
How to access iPhone videos on PC

Depending on the file size and the stage of your project, there are a few ways to get your video files moved from iPad to Mac to be able to play or edit on a big screen.

If you're looking for a stable and efficient way to move your videos and photos (and other files) from your iPad (or iPhone) to your mac. consider Appgeeker iPhone Data Transfer. It excels by providing a more stable, selective, and high-speed way to move massive libraries of media files.
You can get your videos downloaded from iPad to Mac through a wired USB connection or wirelessly.
Moving video from an iPad to a Mac should be a seamless experience, yet for many, it remains a point of friction. With the iPad Pro now packing M-series chips and the ability to shoot in professional formats like ProRes, the mobile studio is a reality. However, the final polish often happens on the Mac. This guide explores how to transfer videos to Mac from iPad, mainly focusing on Apple's native ecosystem tools.
Table of Contents
When it comes to transferring video files from an iPad to a Mac, AirDrop is the most intuitive method to handle the task. It utilizes Bluetooth to find nearby devices and then creates a peer-to-peer Wi-Fi connection to move the data. Because it doesn't rely on your local router, it can achieve speeds that often surprise users.
Here is the step-by-step guide to getting the video from your iPad to your Mac.
1. Before you start, make sure both devices are ready to see each other: On your Mac, go to Control Center (top right icons) > AirDrop and ensure it is set to Contacts Only or Everyone for 10 Minutes. On your iPad, go to Settings > General, tap AirDrop and set it to Contacts Only or Everyone.
2. Open the Photos app where your video is stored.
3. Tap the video you want to send to open it.
4. Tap the Share icon (the square with an arrow pointing up, usually at the bottom left).
5. Tap the AirDrop icon (the blue concentric circles).
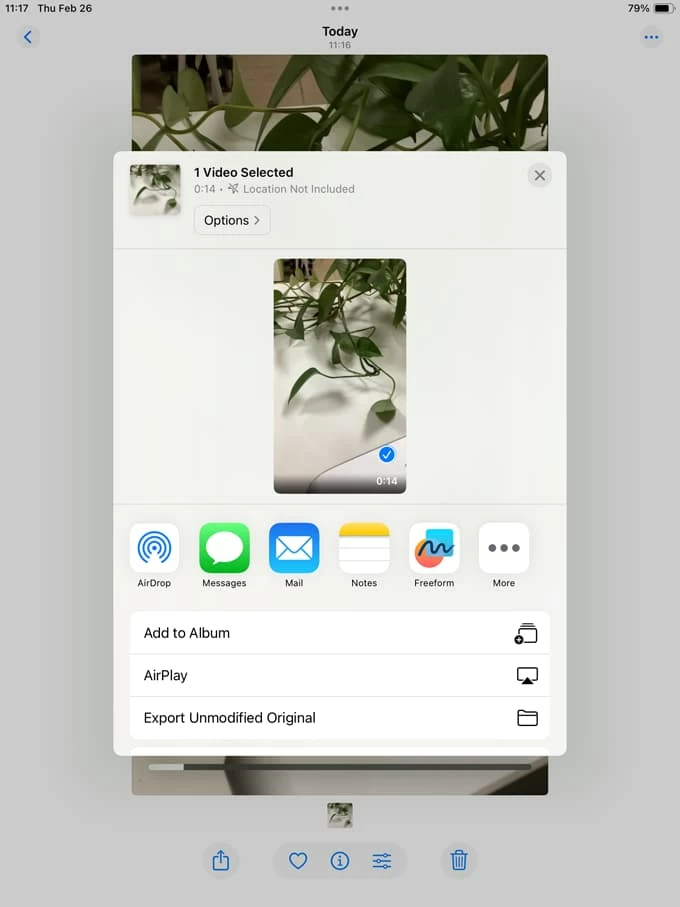
6. Choose your Mac from the list.
7. A notification will pop up in the top right corner of your Mac screen. Click Accept.
8. You can then choose to Open in Photos or Save to Downloads.
By default, AirDrop files on a Mac are sent straight to your Downloads folder. To find it quickly, click on the Finder icon in your Dock, then click Downloads in the sidebar.
If you see the iPad stuck on "Preparing," it's usually because the iPad is trying to transcode the video (e.g., converting HEVC to H.264) to ensure compatibility. To avoid this and keep your quality high, go to Settings > Photos, scroll to the bottom, and select "Keep Originals" under "Transfer to Mac or PC."
Related: Forgot iPad Passcode
When you have 50GB of raw footage, wireless is your enemy. A wired connection is the only way to utilize the full bandwidth of the iPad's Thunderbolt port.
Since macOS Catalina, the Finder has replaced iTunes for device management. Follow these steps to transfer videos and photos from iPad to Mac.
1. Connect your iPad to your Mac via a USB-C or Thunderbolt 4 cable.
2. Open Finder and select your iPad in the sidebar.
3. Click on the Files tab. This shows a list of apps on your iPad that support direct file sharing.
4. Click the small arrow next to an app name (e.g., "VLC" or "Files") to see the videos stored inside it.
5. Simply click and drag the video file from the Finder window onto your Mac's desktop or into a specific folder.
Finder will not show a progress bar for the transfer, but you will see a small syncing icon next to your iPad's name in the sidebar until the move is finished.
If your videos are inside the Photos app, they won't show up in the Finder Files tab. Instead, you may use Photos app to import your videos into Mac.
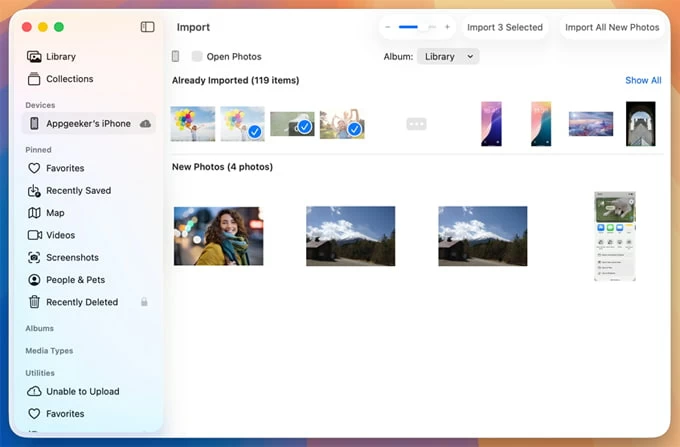
1. Open the Photos app on your Mac.
2. Select your iPad in the sidebar.
3. click Import All New Videos.
4. At the top of the window, you'll see an Import to: dropdown menu. your transferred videos go into your main Library by default. You can change this to a specific Album if you want to keep your project organized from the start.
Popular in file transfer market, Appgeeker iPhone Data Transfer is often faster and more stable than the Finder or Photos app for bulk video moves between iPad and Mac. It allows you to browse and selectively export videos without the risk of overwriting data or being throttled by iCloud storage limits.
Additionally, it offers unique utility by allowing you to transfer photos, music to and from your iPad and iPhone, and back up your personal files, including contacts, messages, notes, call history, making it a far more flexible "two-way street" for regular users.
Steps to transfer iPad videos to Mac using iPhone Data Transfer.
1. Use a lightning or USB-C cable to connect your iPad to your Mac, then launch the software.
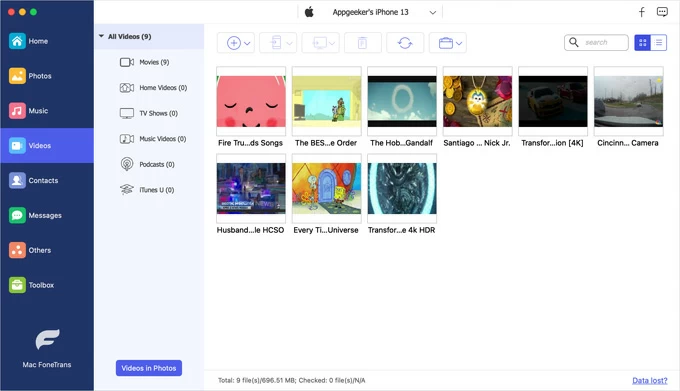
Once launched, you should see your iPad's dashboard.
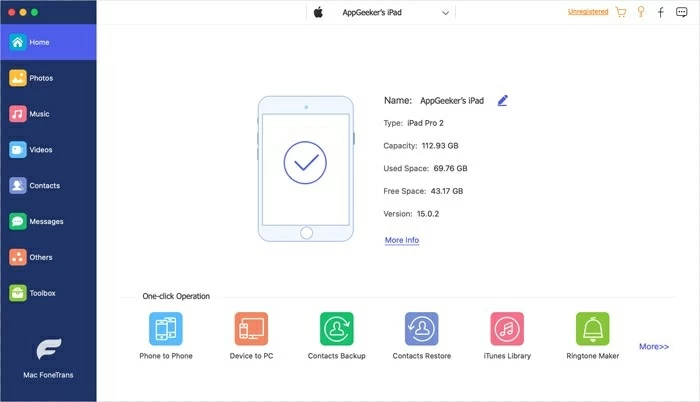
2. On the main dashboard, look for the Videos Icons on the left side, click it. The software will break these down into sub-folders like Movies, Home Video, TV Shows, or Music Videos.
Select the category where your video lives. You will see a list of all videos in that category with thumbnails and file sizes.
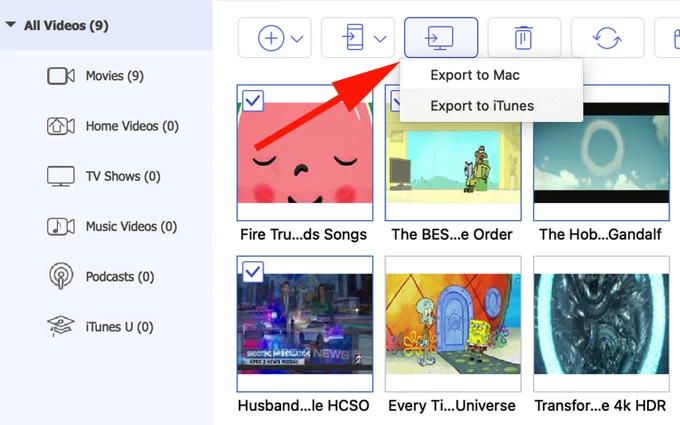
3. Click the checkbox in the top-left corner of the video thumbnails you want to move, then click Export to Mac icon on the top menu. This will initial the video transfer process.
Because this is a wired connection, it will likely be significantly faster than AirDrop for large 4K files.
Once finished, the software will show a Transfer Completed message. Click "View Files" to open the folder on your Mac where the videos were saved.
Related: Text Messages Missing on iPhone
If you have a high-tier iCloud+ plan, the best way to move video is to not move it at all—just let it exist everywhere. You just enable iCloud Photos on your both iPad and Mac, you don't need to actually move the videos from iPad and Mac, any video shot on the iPad automatically uploads to the cloud and appears in the Mac's Photos library.
Enable iCloud Photos on iPad:
1. Open the Settings app on your iPad.
2. Tap your Apple Account at the very top of the left-hand sidebar.
3. Tap iCloud.
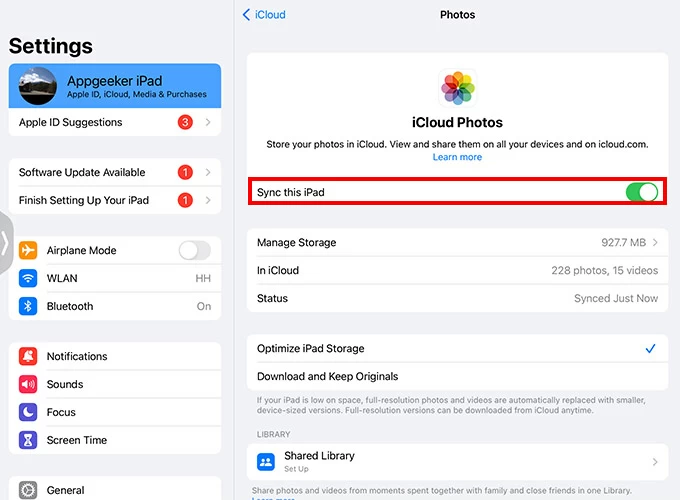
4. Tap Photos.
5. Toggle the switch for Sync this iPad to On.
Enable iCloud Photos on Mac:
1. Click the Apple Menu in the top-left corner of your screen and select System Settings.
2. Click you Apple account at the top of the sidebar
3. Select iCloud on the right side.
4. Click iCloud Photos.
5. Toggle the switch for Sync this Mac to On.

Please note that upload speeds are limited by your home Wi-Fi. If you shoot 10GB of video, it might take hours to appear on your Mac.
To save space on your iPad while keeping full-res files on your Mac:
Related: How to Add Music to iPhone without iTunes
For those who started an edit on the iPad using Final Cut Pro, and want to move the entire project (media included) to your Mac for professional finishing, Apple has streamlined this.
1. In the FCP iPad project screen, tap the Share button.
2. Choose Final Cut Pro for iPad Project.
3. Select AirDrop or iCloud Drive.
4. On the Mac, open the file. FCP for Mac will automatically wrap the iPad project into a Mac-compatible Library, keeping all your cuts, transitions, and layers intact.
Note: This is a one-way street. You can move from iPad to Mac, but you cannot currently move a complex Mac FCP project back to the iPad version due to the difference in feature sets.


