
How to transfer WhatsApp to iPhone 17

Using the Photos app and importing your iPhone 17 pictures still works in Mac, but you have other options that are suitable for transfer of a few shots or large library.

For those who want to a reliable and straightforward way to import your iPhone 17 photos, consider using Appgeeker iPhone Data Transfer, which allows for the seamless transfer of photos, music, and videos from an iPhone to a computer, and vice versa without the risk of erasing existing libraries or relying on iCloud syncing. And it offers granular control to select specific items rather than forcing a bulk import.
There are a few different ways to download photos from iPhone 17 to Mac for backup, or editing later.
Whether you're clearing out storage on your iPhone 17 or backing up your precious kids pictures locally to computer, Apple provides several built-in tools to transfer photos from an iPhone 17 to a Mac. While some methods are wireless and instant, others offer more control over where your pictures are stored. There are also third-party file transfer tools available to transfer your photos more easily.
Here are the best ways to move your iPhone 17 photos library to your Mac. The majority of these methods should work for other models of Apple iPhone and iPad.
Table of Contents
This is the fastest method for moving a handful of photos without plugging in a single cable. It uses a combination of Bluetooth and Wi-Fi to create a peer-to-peer connection between your iPhone 17 and Mac machine.
How to download photos from iPhone 17 to Mac with AirDrop:
1. Open Finder on Mac.
2. In the sidebar, click AirDrop.
3. At the bottom of the window, ensure "Allow me to be discovered by:" is set to Contacts Only or Everyone for 10 Minutes.
4. Open the Photos app (or Files, or any app containing the pictures you wish to move) from your iPhone 17 device.
5. Select the pictures you want to transfer to Mac.
6. Tap the Share button (the square with an upward arrow).
7. Tap the AirDrop icon.
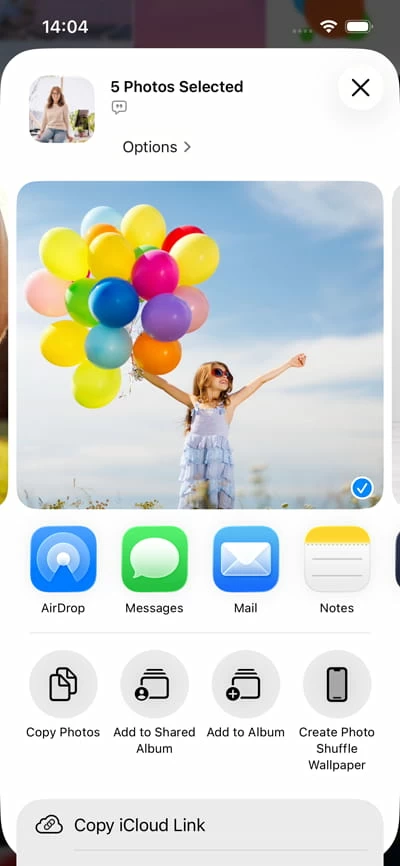
8. A list of nearby Apple devices will appear. Tap your Mac's name.
9. If prompted, click Accept on the notification or within the AirDrop Finder window.
10. Choose whether to Open in Photos or Save to Downloads. By default, files are sent directly to the Downloads folder.
See also: Photos not showing up on iPhone Camera Roll
If you prefer a traditional import experience that organizes your images by date and event, the Photos app that's preinstalled is the most robust option. It copies these pictures on iPhone 17 directly into your Mac library.
Note, In the latest iOS versions, photos in your Hidden album on iPhone 17 are locked behind Face ID or Passcode. By default, these will not appear in the Import screen. If you need to transfer those photos to Mac, you will need to temporarily toggle off "Use Face ID" (or Passcode).
1. Connect your iPhone 17 to your Mac using a USB-C cable.
2. Launch the Photos app on your Mac.
3. Select your iPhone 17 in the sidebar under Devices.
4. Before anything, use the Import to dropdown menu at the top menu to choose whether to add these to your main Library or a specific album.
5. To move all photos to Mac from iPhone 17, choose Import All New Photos in the top-right corner, or select specific images and click Import Selected.
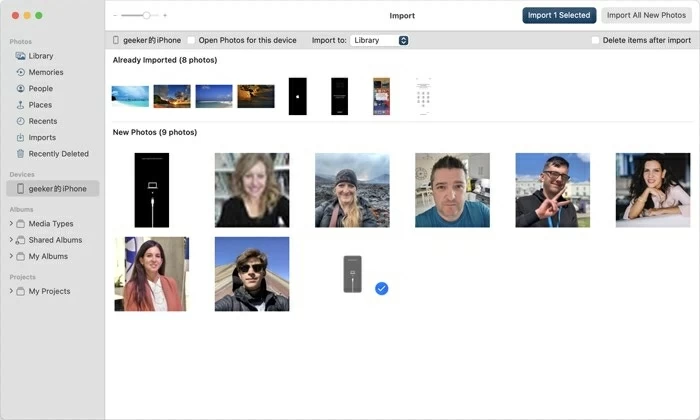
Tip: Once select "Import All New Photos," the app automatically grabs everything that hasn't been transferred yet.
Don't like the way macOS Photos app or AirDrop offers for photo transfers of your iPhone 17 pictures? There are a lot of excellent third-party alternatives offering a more robust, bidirectional management experience that overcomes several Apple's native tools limitations.
Our favorite is Appgeeker iPhone Data Transfer. It allows you to export your iPhone 17 photos directly into a standard folder hierarchy on your Mac, making them immediately available for third-party editors or manual organization. Furthermore, the tool provides a stable, wired connection that handles massive libraries with higher reliability. It's often the fastest way to handle large batches of 4K video and high-res photos.
By the way, the tool can handles your music, photos, messages, notes, contacts, and other files on your iPhone 17, and includes a set of features to manage the device's library.
Here is the detailed step-by-step guide:
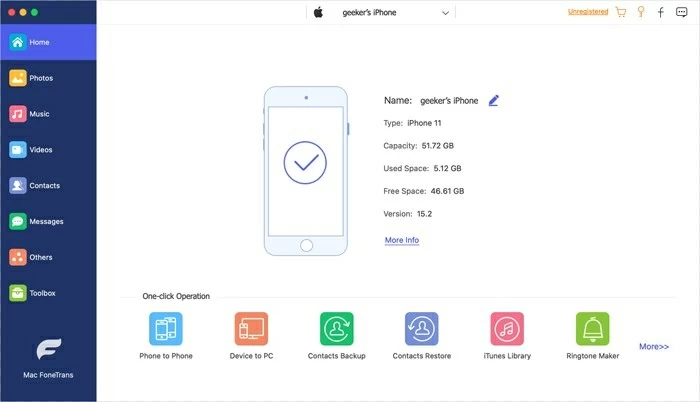
Step 1: Connect the iPhone 17
Plug your iPhone 17 into your Mac using a USB-C to USB-C cable. If prompted, tap Trust and enter your passcode. On your Mac, if a "Allow accessory to connect" pop-up appears, click Allow.
Launch the software. It will take a few moments to analyze your device. Once complete, you will see your iPhone 17 dashboard.
See also: How to transfer videos from iPhone to laptop
Step 2: Load photos library
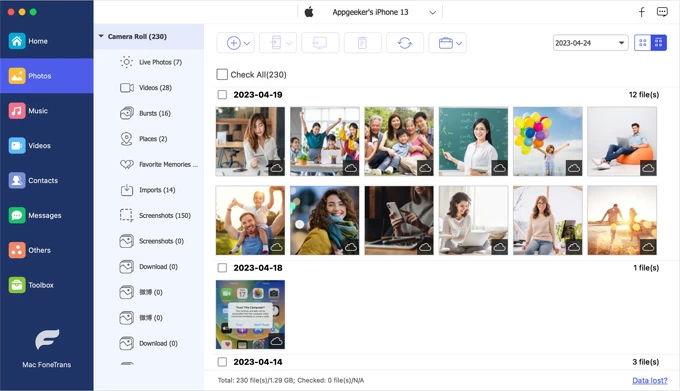
To transfer photos from iPhone 17 to Mac, click the Photos icon in the sidebar. You will then be presented with a window of all your phone's pictures on the right pane, sorted by month and date.
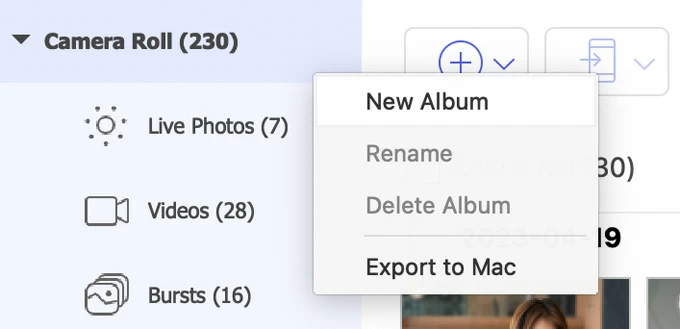
You can browse by Live Photos, Videos, Busts, Places, Download, Screenshots, or app-specific albums on the center pane.
Step 3: Download photos to Mac from iPhone 17
Hover over photos and click the checkbox for the pictures you want. Click the Export to Mac icon in the top-right toolbar.

Once finished, you will see your photos neatly organized in your Mac's Finder.
That's all there is to it!
You can also right-click on the selected items, from the opening context menu, select Export to Mac. As you can see, you can also choose to transfer your iPhone 17 photos to another Apple device (i.e. iPad), add to another album in the device, delete it, check meta info, etc.
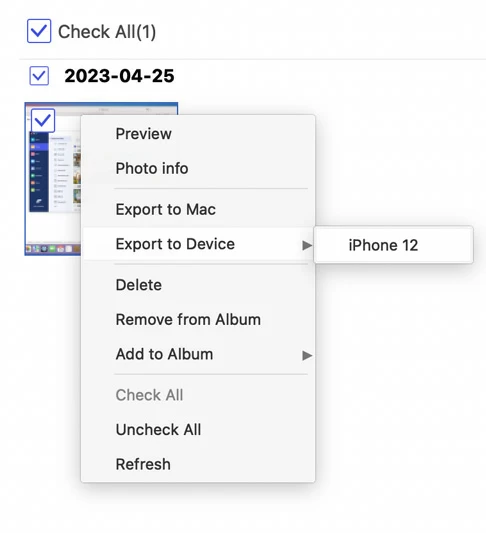
Just want to transfer photos of a specific album on iPhone 17 to Mac? Right-click on that album, then select Export to Mac from the context menu.
Another good things is, on the bottom of home screen, you will want to use the Device to PC shortcut if you're backing up your entire library or moving all photos at once.

See also: How to transfer music from computer to iPhone
For users who don't want to use the Photos library and prefer to save photos directly into specific folders (like Desktop or Documents), Image Capture is a hidden gem.
1. Connect your iPhone 17 and open Image Capture on Mac. (MacBook Air/ Pro, iMac, etc.)
2. Select your iPhone from the Devices section.
3. Use the Import To dropdown menu at the bottom to choose a destination folder.
4. Click Download All if you want to transfer everything, or select individual photos and click Download.
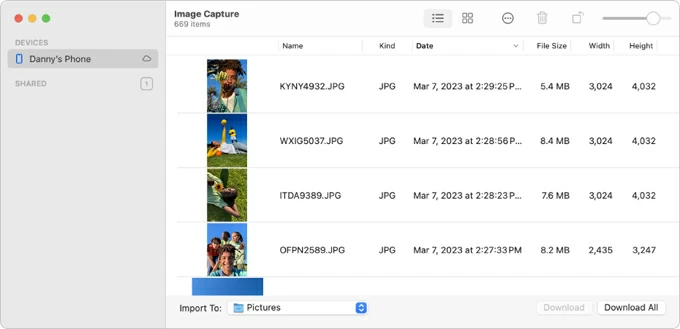
Once the progress bar finishes, a green checkmark or a folder icon will appear next to the imported shots.
This method removes the need for manual transfers entirely. Once enabled, every photo you take on your iPhone 17 is automatically uploaded to the cloud and synced to your Mac.
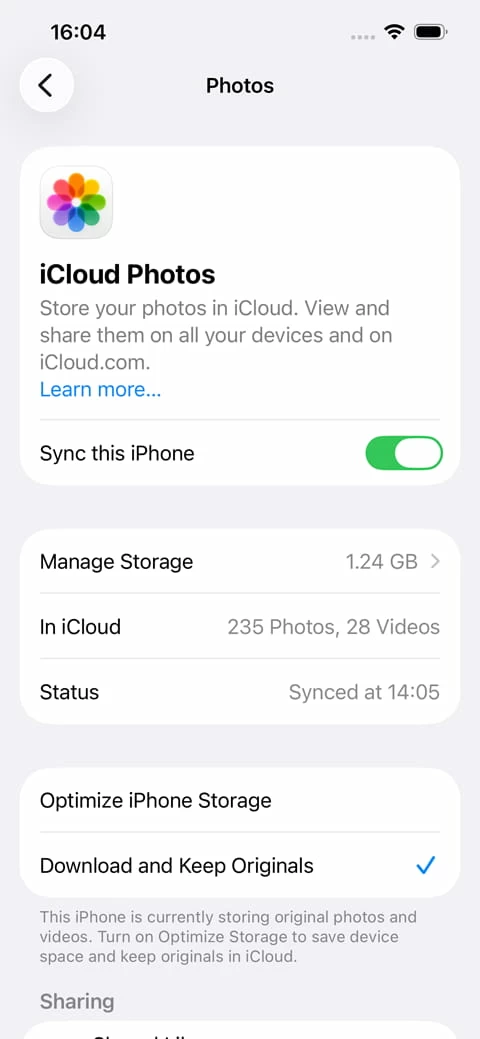
1. On your iPhone 17, go to Settings > [Your name] > iCloud > Photos and toggle on Sync this iPhone.
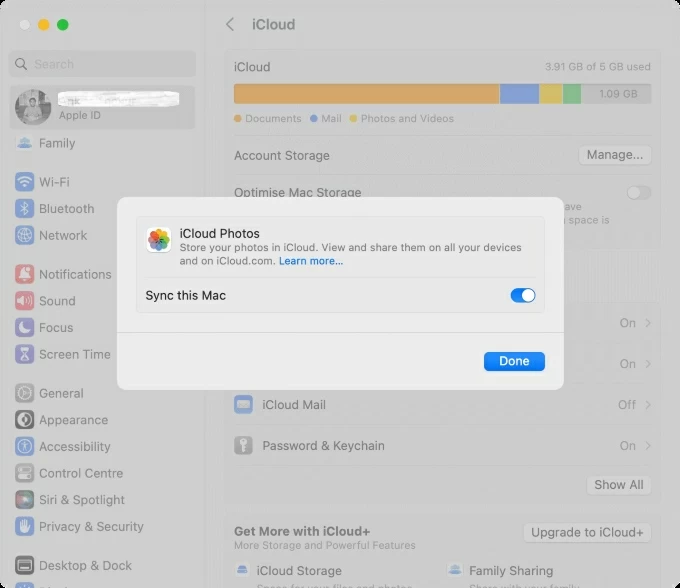
2. On your Mac, open the Photos app, go to Settings > iCloud, enable iCloud Photos, then ensure Sync this Mac is checked.
Keep both devices connected to Wi-Fi and power. Wait for a while, it will sync all photos from iPhone 17 to Mac.
Note, this method shares your iCloud storage quota. If you have a large library to transfer, you may need to upgrade to a paid iCloud+ plan to ensure that all your iPhone 17 photos can be imported into Mac completely.
See also: How to fix iPad Unavailable try again
Since the retirement of iTunes, Finder has taken over device management. This is the go-to method for those who want to sync specific albums from Files app on iPhone 17 rather than importing raw files.
To manage and copy photos from an iPhone 17 to a Mac using Finder, connect your iPhone via USB first, then follow the steps below:
1. Open a Finder window on your MacBook, iMac, or Mac Mini.
2. Locate your device's name in the Finder sidebar.
3. Click the Files tab in the button bar.
4. You will see a list of apps that have folders shared with your Mac.
5. Click the small arrow next to an app (like "Pages") to see the files inside.
6. Simply click a photo and drag it directly from the Finder window to your Mac's Desktop or any folder.

Keep in mind that this method only works for photos you have specifically saved to the Files app on your iPhone 17. The Photos tab in Finder window doesn't help get photos from iPhone 17 to Mac, but sync from your computer to your phone.
See also: How to unlock forgotten Screen Time passcode on iPhone
Using iCloud.com is a great cable-free method to move photos, especially if you don't want to deal with physical connections. This method relies on your photos being synced from your iPhone 17 to the cloud first. It keeps your Mac's local Photos Library clean if you prefer to store your images in specific folders on an external drive.
Here's how to transfer photos from iPhone to MacBook, iMac, or Mac Mini through iCloud.com website:
1. Enable iCloud Photos on the iPhone 17.
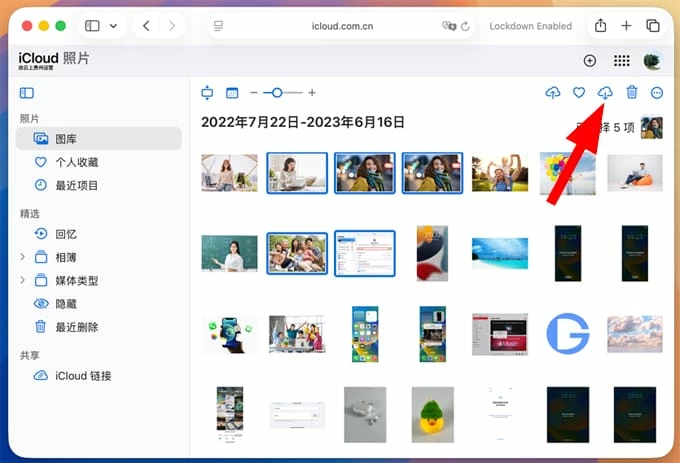
2. On your Mac, open any web browser (Safari, Chrome, etc.) and go to iCloud.com.
3. Sign in with your Apple account and password.
4. Click on the Photos icon from the app grid.
5. Browse and select multiple specific photos you want to back up to Mac.
6. Click the Download icon in the top toolbar.
By default, iCloud often downloads a compatible version of your picture. To get the raw, full-resolution file (including high-res metadata and HEIC formatting), click Download icon, from the drop-down menu, select Unmodified Original.


