
How to Transfer Videos from iPad to PC

It's never been easier to transfer your videos from your iPhone to a Windows 10 PC, since you have various simple approaches to take. Here's how to.

Brief summary: There're multiple options for you to transfer videos from your iPhone to a Win 10 PC. Windows 10 built-in tools like File Explorer and the Photos app helps transfer and manage a limited amount of videos efficiently. You can also use iCloud Photos to wirelessly sync the iPhone videos to your PC in Windows 10.
While for downloading large iPhone videos to Windows 10 or in the opposite direction, Appgeeker iPhone Data Transfer could do that quickly for you and keep your videos in original quality.
![]()
Based on your needs, choose a proper tool to import the videos from your iPhone to a PC running Windows 10.
In today's digital age, we capture countless moments by recording videos on our iPhones. However, the storage capacity on the device is limited, and we often need to transfer the iPhone videos to a computer like a Windows 10 PC, for safekeeping or editing purposes. Additionally, if you're planning to sell or upgrade your iPhone, it's essential to back up your iPhone videos to Windows 10 to ensure you don't lose them.
Luckily, transferring videos from your iPhone to PC in Windows 10 is just a breeze. Here we'll walk you through 4 different ways to transfer your cherished videos from your iPhone to your Windows 10 computer with ease. If you have recorded a YouTube live stream video on the iPhone, you can also take these approaches to transfer to your PC.
Table of Contents
Tip: Looking to record a video on your PC? Make it a walk in the park with the help of the AppGeeker Screen Recorder. Its top-notch features and simple interface ensure that screen recording is not only efficient, but also a pleasurable experience.
File Explorer is a built-in file management tool in Windows PC that allows users to organize and transfer video files from an iPhone to a Windows 10 computer. But it could be kind of difficult to locate specific video files, since they are stored in a folder structure that's not very user-friendly.
1. Connect your iPhone to your PC using a lightning cable.
2. Unlock your iPhone and tap Trust when prompted to trust the computer. You may need to confirm it again by entering the lock-screen passcode.
3. Open File Explorer on your PC and click on This PC.
4. Go to Your iPhone name > Internal Storage > DCIM.
5. Locate the videos you want to transfer, then drag and drop them to a folder on your PC.
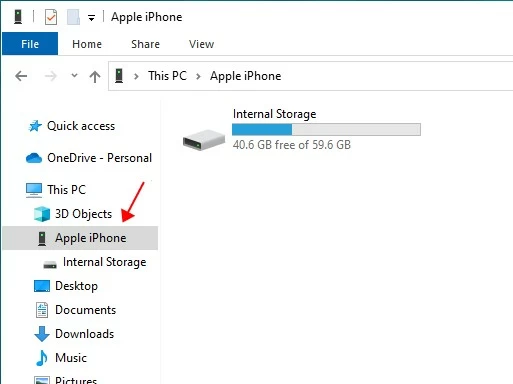
Tip: You can also locate your iPhone under Devices and drives after clicking This PC.
As you can see, the videos are stored in the "DCIM" folder, which stands for "Digital Camera Images." Within this folder, there are subfolders that are numbered and named using a combination of letters and numbers. This can make it challenging to find the specific iPhone videos for transferring to your Win 10 PC, especially if you've taken a lot of videos or don't remember the exact date or time when you recorded them.
You can also use File Explorer to transfer your iPhone videos to a laptop. Click here for full instructions on how to transfer videos from iPhone to laptop.
The Photos app is a default photo viewer and editor app for Windows 10. You can use it to transfer videos from your iPhone to your Windows 10 PC without using any third-party software. And before uploading iPhone videos to Windows 10 in this way, make sure that you have updated iTunes to the latest version on your computer.
Note:
If you're going the opposite way, from PC to iPhone, this is what you need: How to transfer videos from PC to iPhone.
Here's how to import your videos from iPhone to a PC running Windows 10 by the Photos app.
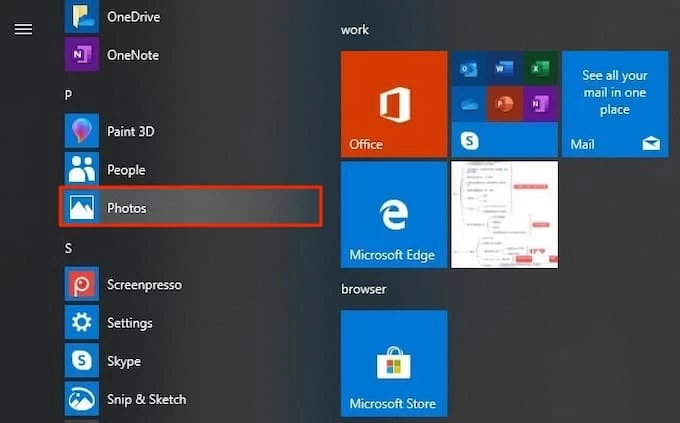
1. Open the Photos app from the Start menu. If not found, it may be not installed on your PC. Just go to the Microsoft Store to download it first.
2. Use a cable to connect your iPhone with your computer. If prompted, unlock the device and trust the PC.
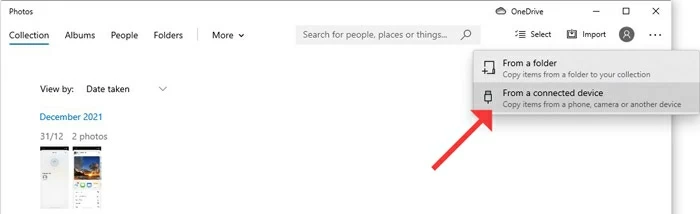
3. In the upper-right cornner of the Photos window, click Import > From a connected device. Then the app will start to detect new photos and videos on your iPhone.
4. After the detection, select the videos for transferring from the preview list.
5. When you finish selecting, click Import at the bottom to transfer the videos. Once the transfer is done, you can find the transferred iPhone videos files in the Pictures folder of your Win 10 PC.
The Photos app and File Explorer are both great if you transfer just several videos from your iPhone to your Windows 10 PC. But they can be time-consuming when dealing with large videos in bulk. For this reason, cloud services such as iCloud or efficient third-party software like iPhone Data Transfer can serve as viable alternatives.
If you are looking to quickly transfer your iPhone videos to a Windows 10 computer or vice versa, Appgeeker iPhone Data Transfer is an unmissable solution.
Regardless of the video's size, this versatile program can transfer batches of videos from your iPhone to PC pretty fast while preserving their original high-quality resolution, which ensures no loss in the process. Moreover, it features on-the-fly format conversion to make sure that any video file not supported by your Win 10 PC can still be transferred seamlessly. And with its clear and intuitive interface, managing your video library is just a breeze.
Main highlights:
Check out how to transfer your iPhone videos to your Windows 10 PC by this means:
Step 1. Unlock your iPhone and plug it into the computer. Select Trust from the pop-up message if you got one on the device.
Step 2. Launch the software on your PC and select Videos on the left menu. You can see your iPhone information like the capacity on the home page.

Step 3. Choose the videos from the iPhone to transfer to the PC. Here all the videos will be categorized into different types, which makes it easier for you to locate your desired videos.
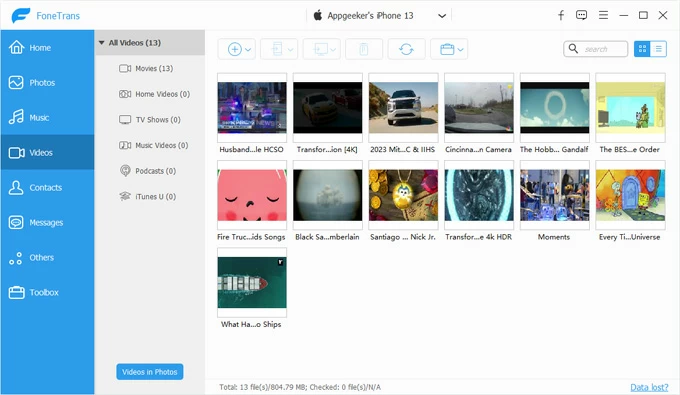
Tip: To transfer the videos recorded by the iPhone camera, simply click on the Videos in Photos button located in the lower left corner.
Step 4: After selecting the videos, hit the computer icon at the top and select the Export to PC option to start the transfer. You'll be then asked to choose a folder to save the transferred videos.

For those seeking a hassle-free wireless way to sync large videos from their iPhone to Windows 10, iCloud Photos presents a compelling option. With this method, your photos and videos are kept in their original quality. Automatic uploading also streamlines the process, though the free storage cap is set at 5 GB, and additional space requires a monthly payment.
Below are the steps to download your videos from iPhone to Windows 10 computer with iCloud Photos. It's worth noting that a stable Wi-Fi connection on both your iPhone and PC is required.
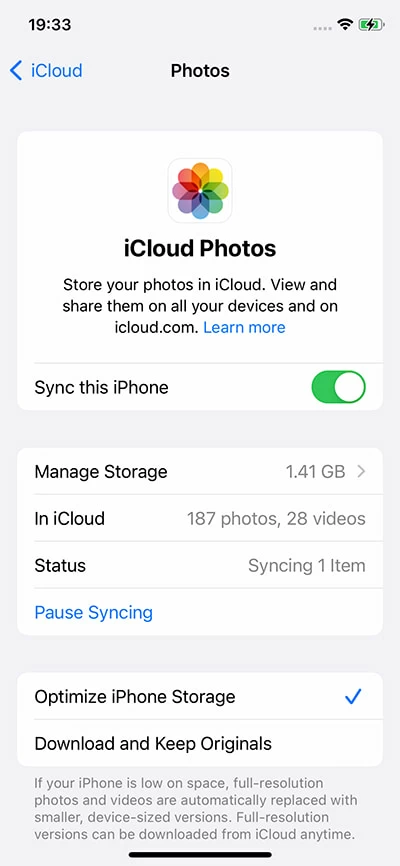
On your iPhone: Open the Settings app and click your account name at the top, then go to iCloud > Photos and turn on Sync this iPhone. Later your iPhone videos and photos will start to be synced to the cloud.
On your Win 10 PC: Go to the iCloud website in a browser and log in with the same Apple account on your iPhone. When you see from the iCloud menu, click Photos and then select the videos you need to transfer. Hit the Download option from the top-right corner to get the iPhone videos to your computer in Windows 10.

To retrieve deleted photos from iCloud, follow our guide on how to restore photos from iCloud backup (iPhone & iPad supported).
1. Can I transfer my videos from iPhone to Windows 10 PC using AirDrop?
Unfortunately, AirDrop is an Apple-exclusive feature, which means it's only available for transferring files between Apple devices like iPhones, iPads, and Macs. It cannot be used to transfer videos or any other type of files from an iPhone to a Windows 10 PC.
2. How to transfer large videos from iPhone to Windows 10 without iTunes?
To import your large videos from your iPhone to a Windows 10 PC without using iTunes, you can try cloud service like iCloud to sync the videos. But it has limits for the cloud storage space.
Also, you can use an efficient third-party tool, iPhone Data Transfer, to upload your clips without iTunes. It can transfer large videos in bulk quickly, and make on-the-fly conversion on your transferred videos format.
3. Can I transfer the videos downloaded in the Apple TV app from iPhone to PC in Win 10?
By using iPhone Data Transfer, you can transfer the videos downloaded in the Apple TV app from iPhone to Windows 10. Notice that the Photos app and File Explorer can't do that for you.


