
How to Record Video on MacBook Pro

Learn how to record audio on your computer system with QuickTime Player. Check out the tutorial guide shared in this post and find the answer.

Summary of the article:

Screen recorders usually capture external and internal audio by default, but QuickTime only records external sound.
Nowadays, various scenarios demand us to record our computer screens. Whether you have an online meeting, an online class, or want to share excellent gameplay, you have to record the computer with audio. QuickTime is not a stranger to your Mac users. It is usually used to play videos on Mac models, but you may don't know that it is also a screen recorder that can catch every moment on your Mac screen.
However, QuickTime Player can record only the microphone voice, screenshots, or video of the user from the webcam. Therefore, you may be struggling with recording system audio on your computer. In this article, we'll find proper ways to record computer audio. Without further ado, let's get started.
Table of Contents
As aforementioned, QuickTime Player is not supported to record computer internal audio. But you don't need to worry, countless QuickTime-substitution you can select from to record both internal and external audio on your Mac computer system. Some of them are given in the paragraphs below:
Screen Recorder is an industry-leading software program with no operating system limitations. It's an all-in-one tool that lets you record all activities on your display screen. Additionally, you can use it to capture system and microphone sounds without hassles.
This software comes with tons of rich features. With desktop Screen Recorder, you can flexibly adjust the recording area of your computer. Whether you want to capture your entire screen or specific portions, this tool is the perfect screen recording solution. Recording your screen and webcam simultaneously is also available with ease.
This software has a sleek interface for quick navigation. Recorded files are stored in several formats, including MP4. Without QuickTime Player, use Appgeeker Screen Recorder to capture the Mac screen with computer audio flawlessly:
Step 1. Download and install
Install Appgeeker Screen Recorder on your computer, then run it.
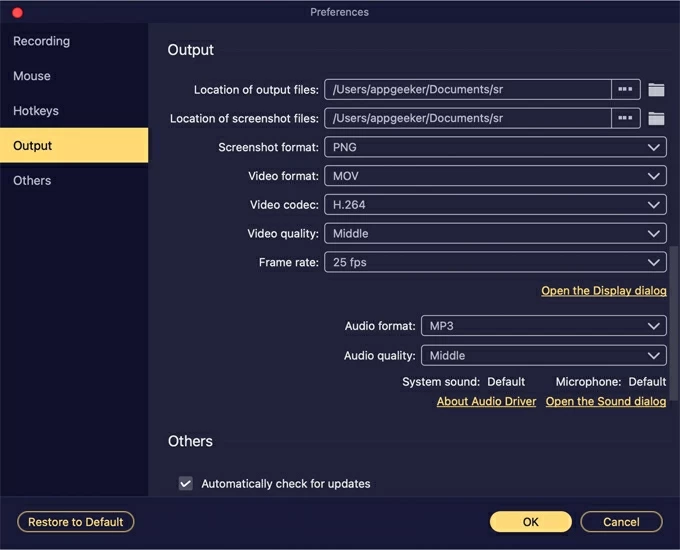
Step 2. Set the preference
Before recording, kindly click on the gear button at the top right corner of the software to make some necessary adjustments. Here you can change the output format of the recorded file and tweak some advanced settings to control the output effect of the file. Once that's set, choose the output folder and proceed to start recording.
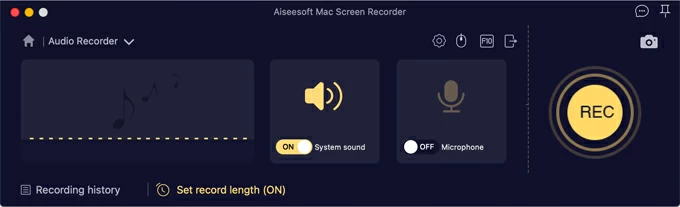
Step 3. Choose the recording module
Next, if you want to record only audio from your computer, select Audio Recorder. If you want to record the entire screen with system sound, then choose Video Recorder.

Here we take Audio Recorder as an example. The page below will pop up immediately. Turn on the System Sound. If you don't need the external voice from the microphone, you can turn the mic off. Later, click on REC.
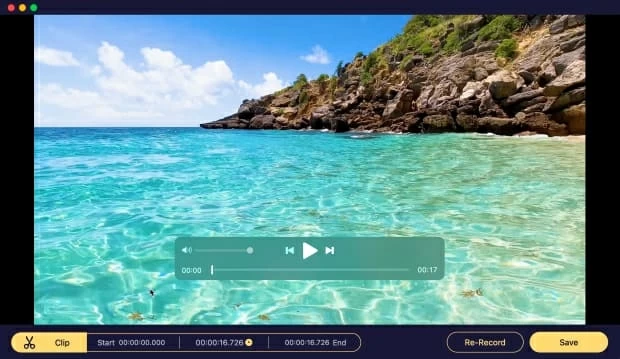
Step 4. Finish recording video with computer audio
Wait until the recording is over, then click on the Stop button to end the process. Hit on Save at the bottom right corner of your screen to save the file. All recorded files will be neatly presented on the screen. You can go to the file you set before to check it.
Another professional third-party tool Audacity enables you to capture audio sounds on Windows and Mac computers. It's a simple audio recorder well-known for its excellent services. This open-source program allows you to record high-quality live audio via a microphone to catch the external voice, or the mixer to get the computer audio.
It also supports audio editing, allowing you to cut, copy, and paste sound recordings freely. Unlike QuickTime Player, Audacity lets you export recorded Mac audio in various formats.
Note:
Step 1: Connect your headphone to your Mac. Locate the Apple menu, and click on it to launch the System Preference page. On the next screen, select Sound > Output to choose your preferred audio source. Scroll down to Audacity Preferences and pick SoundFlower (2ch) as your audio source to proceed.
Step 2: Play audio from any app on your computer, then launch Audacity and click the Record icon. Immediately, Audacity will start capturing the audio sound.
Step 3: Tap on the Stop button to end the process. Once done, click on the appropriate buttons to export the recorded file in your preferred format to your hard drive.
Limitations of Audacity
Though QuickTime Player doesn't support recording internal audio on a computer, it still serves to capture your Mac screen and the audio from the microphone with complete ease. It's one of the most highly efficient tools designed by Apple. Find below the detailed procedure to record external sound with QuickTime Player:
Step 1: Locate and click on the Launchpad icon in your Dock and browse the QuickTime Player app. Open it. Navigate to File > New Audio Recording to open the audio recording window.
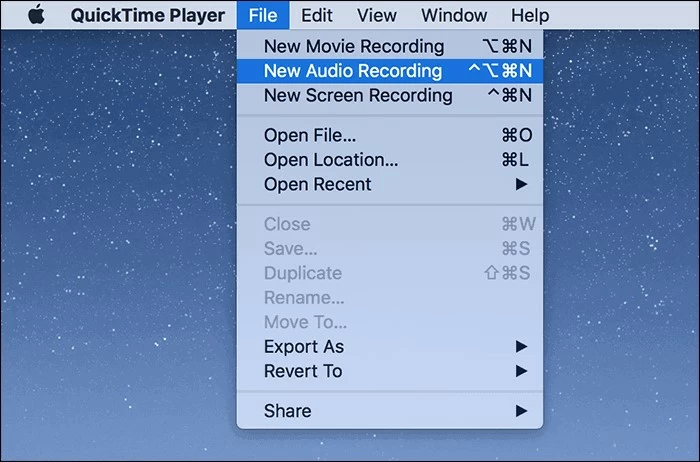
Step 2: Tap on the drop-down menu next to the red circular icon to choose your preferred audio source.
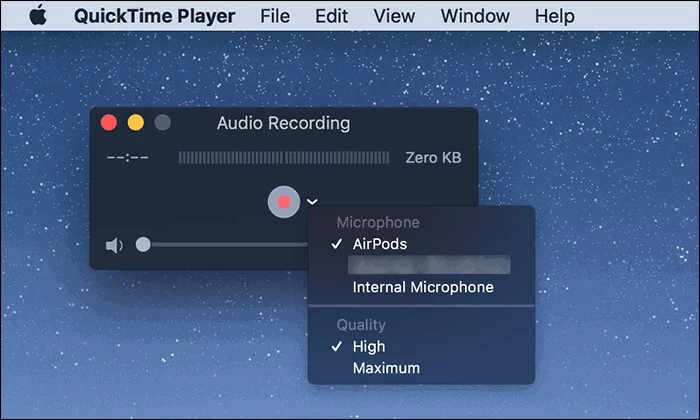
Step 3: Upon completing the step above, tap on the red circular button to start the audio recording. Wait until the recording is over, then click on the grey stop button.
Step 4: Then the recorded external audio will be presented on the screen. You can click to hear it. Once you are satisfied with the audio, click on File and choose Save to Save the recorded file.

With the third-party tools above, you can record audio on your Mac computer system. Of all the tools introduced, Appgeeker Screen Recorder is the best due to the advanced features it holds and its user-friendly recording process. However, sometimes you may want to extract the system audio from the recorded video. Then you can resort to a professional converter to convert the video to MP3.
Appgeeker Video Converter is a reliable video-converting software that works with Windows and macOS. It helps you convert between video formats without distorting the quality. You can also use it to extract the system audio from your recorded computer screen without stress.
Step 1: Install Appgeeker Video Converter on your computer and launch it for usage.
Step 2: When it opens, click on the Add File drop-down menu at the top menu bar. Then select the screen-recorded video to import.
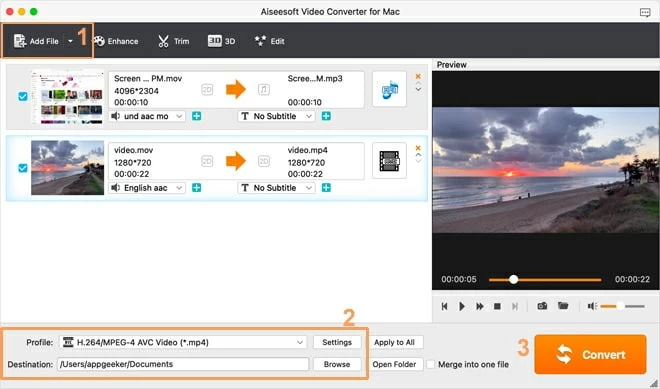
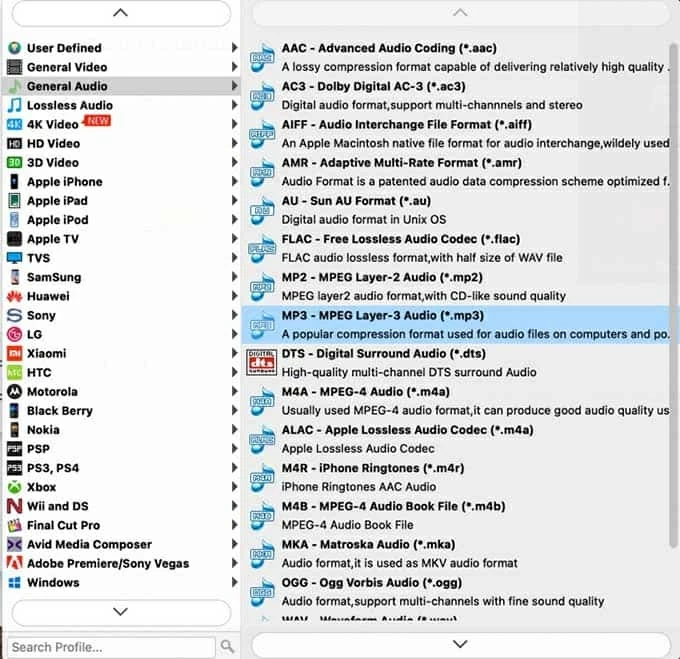
Step 3: Open the Profile drop-down menu and choose MP3 – MPEG Layer-3 Audio (*.mp3) in the General Audio panel.
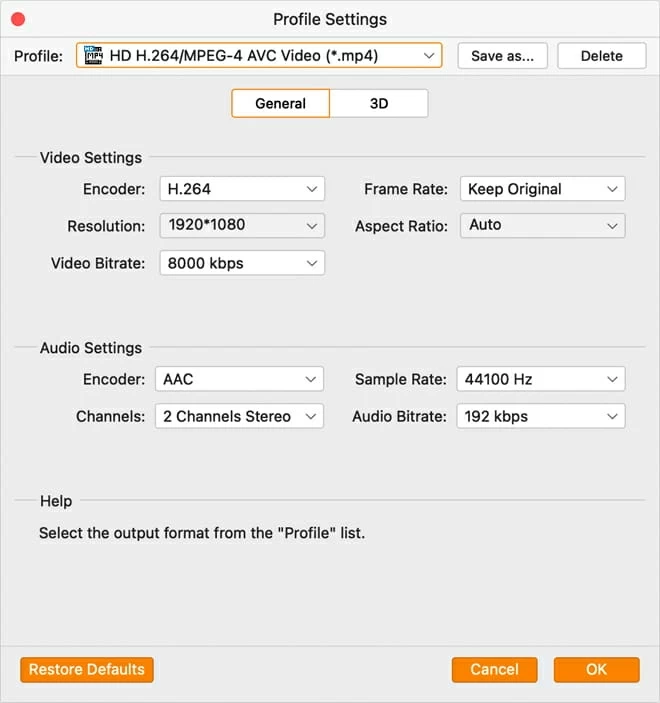
If you are a producer, you can click on the Settings icon beside Profile to change the advanced settings. If you are not tech-savvy, then keep the default settings and back to the home page to proceed.
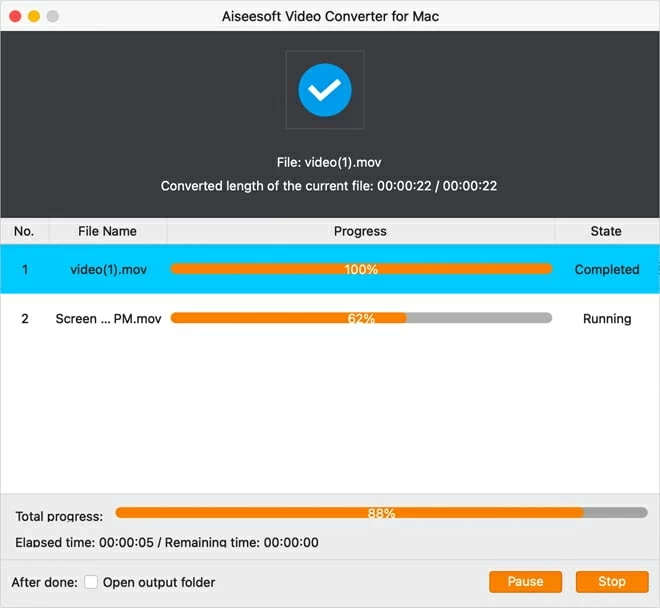
Step 4: Next, tap on the Browse icon next to Destination to choose where you want to save the converted file. Once done, click on Convert. Appgeeker Video Converter will automatically convert the recorded video to audio.
QuickTime has a Windows version, can I use it to record Windows PC audio?
No. Apple once launched QuickTime Pro for Windows computers. It is a professional program that lets Windows users record video/audio on their PCs. However, Apple ended support for QuickTime 7 and QuickTime Pro, which means Windows users cannot record their computer screen with audio anymore. Therefore, desktop Screen Recorder is the most recommended tool to record computer audio when QuickTime is not supported to make it.


