
How to Recover Deleted iMessages on iPhone

Has your iPad become disabled? Here are some proven workaround to take if your iPad Lock Screen fails to unlock after too many wrong passcode attempts.

Face it, remembering a bunch of different passwords and passcodes from social accounts, email, computer logins, iPhone, iPad can be an exhausting and stressful thing.
While a passcode helps secure sensitive data and information in your iPad, if you've completely forgotten the passcode you set a year ago to the Apple's tablet and entered it wrong too many times, your iPad will disable itself and lock you out.

You have to enter the right passcode or restore the iPad to factory settings when it's disabled.
That's a pain, of course, as you're locked out even if you're the device owner. Thankfully, you still have options to get into your iPad: you can connect your disabled iPad to Finder or iTunes on computer to restore it to factory defaults; if you set up Find My iPad, you'll want to reset the disabled iPad through iCloud. In addition, the third-party apps, Appgeeker iPad Unlocker for example, always help you out and get the disabled tablet working again.
Just one note – restoring an iPad that's disabled deletes everything, as well as removing the Lock Screen. But you can restore your settings and data all from a backup and set a passcode. If backup is not available, you won't save the current data.
If your iPad says that it's disabled, it means that you (or someone) type the incorrect passcode too many times to enter the iPad, causing Apple's security mechanism to suspect that someone is trying to access the iPad without authorization and disable the screen.
Once you get the iPad disabled connect to iTunes message, it disables your iPad completely — you're not allowed to type in the passcode anymore.
How to fix a disabled iPad depends on what alert appears on the Lock Screen. If you're presented with "iPad is disabled, try again in X minutes" message, you have chance to remember your passcode and enter it to your iPad once the screen changes back to the usual background after the waiting period is up.
If you're on your last life — the 10th attempt to enter your passcode — but get it wrong again, you'll see a message that asks you to connect the iPad to iTunes. At this point, the only way to unlock the disabled iPad is connect it to iTunes or Finder to boot from Recovery mode using your computer. Alternatively, take advantage of iCloud's Find My feature to revive it.
The instructions outlined in this article apply to iPad Mini, iPad Air, iPad Pro, and all types of iPhone models when the device is disabled.
Also see: iPhone is disabled connect to iTunes.
Firstly, you can try connecting the Apple tablet to your computer with which you synced it recently for restore. If you've got a Mac you'll be using Finder app, and if you've got a Windows computer you'll be using iTunes.
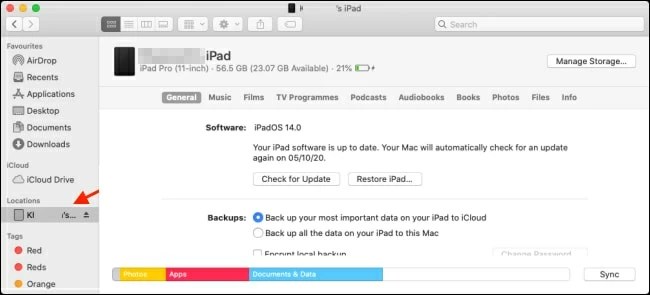
1. Connect the iPad to the computer and run Finder or iTunes.
2. Your device should automatically appear in Locations (Finder) or the upper right corner (iTunes). If the iPad is still disabled and won't be recognized, skip to recovery mode option referred in the next method.
3. Click Restore iPad.
4. When it finishes restoring your iPad, go through the necessary setup steps, and then choose "Restore from iTunes backup."
5. Choose a recent backup from the list.
You can restore an iPad with disabled screen as long as you synced it with your computer before.
If this method doesn't work, your iPad is probably never synced with your computer or is disabled permanently. You next option is boot the device into recovery mode, which includes an option to force the disabled device to reset into its factory settings.
Follow these steps to reset iPad from recovery mode when disabled.
1. Turn the iPad off. The exact way to do this will depend on which model you have:
To turn off an iPad with Face ID, press and hold the Top button and either Volume button for a while. Drag the power off slider that appears to turn it off.
To turn off an iPad with a Home button, press and hold the Top button for a while. When the power off slider appears, drag it to turn your device off.
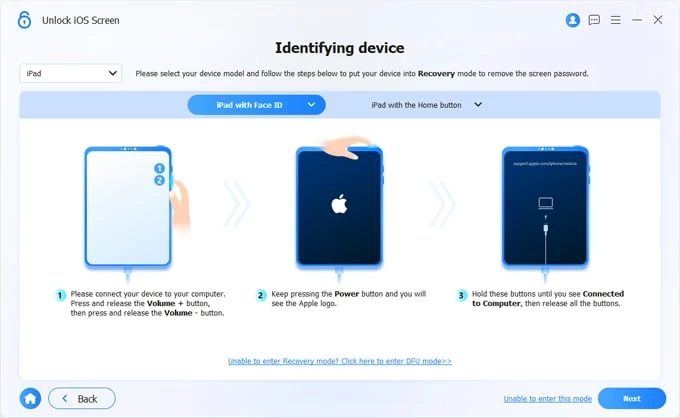
2. Enter recovery mode. You'll need to press a different combination of buttons:
To place an iPad with Face ID into recovery mode, quickly press and release the Volume Up button, press and release the Volume Down button, and then hold the Top button until the Recovery Mode screen appears.
To place an iPad with a Home button into recovery mode, press and hold both the Home and the Top buttons at the same time until the Recovery Mode screen appears.
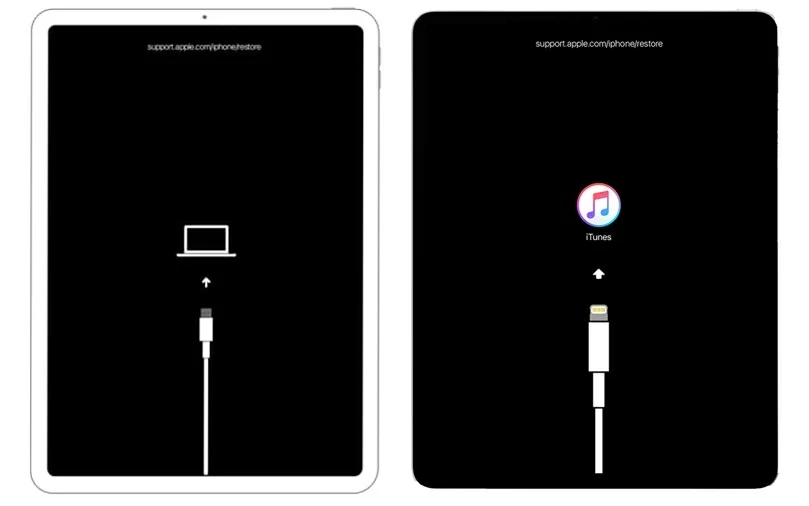
A recovery mode indicates a picture of a charging cable pointing to a laptop or iTunes.
3. Locate your tablet under Locations in Finder if you're on a Mac, or select the device icon in the upper left corner in iTunes if you're on a PC.
4. Select Restore option. You'll get a message prompting that you need to update or restore an iPad that has a "problem." Select Restore.
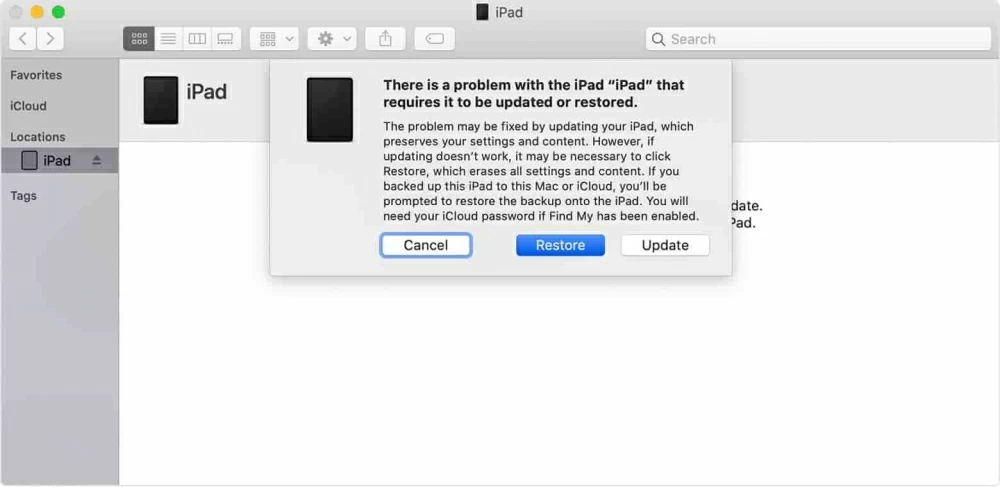
Restore the iPad that says disabled; don't update it.
5. Wait for the computer to connect Apple server to download and reinstall software. This will restore everything on the iPad to factory settings, including Lock Screen removed. If the downloads takes more than 15 minutes, start over.
6. Set up your iPad. After it restores the iPad, the device reboots and walks you through the basic setup process, which is similar to when you first set it up. When you're prompted to get data from a backup, sign into your iCloud account or from iTunes. All your photos, contacts, documents, notes, apps and settings should be in place soon.
If you're struggling to use Finder or iTunes to handle the iPad issue and not getting anywhere, then it is worth checking the third party application. Appgeeker iPad Unlocker has been around for several years with a good reputation. Despite the name, it includes options to unlock your iPhone, iPad and iPod touch, no matter what kind of model you have.
Besides being able to remove the lock screen and reset the passcode, it can also get rid of the Activation Lock, Apple ID and the forgotten ScreenTime passcode.
Here are step-by-step guide to use this application to handle an iPad disabled screen problem.
1. Run it on your either Mac or PC, and connect your iPad with USB cable.
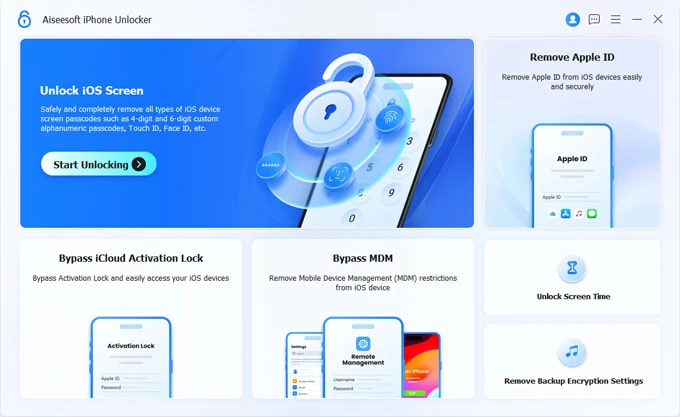
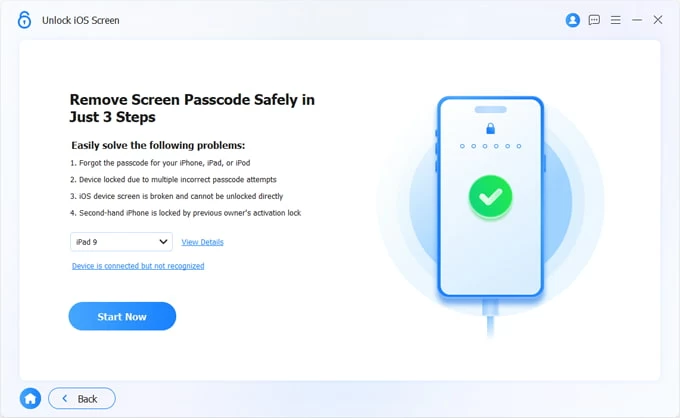
2. Select Unlock iOS Screen on the interface. If it doesn't detect your device, follow the onscreen instructions to place it into recovery mode.
3. Once detected, check your iPad information from the screen and click Start Now button.
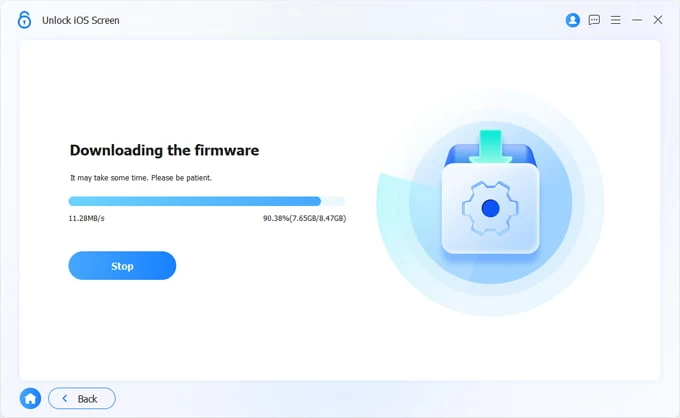
4. It will begin downloading firmware package of your iPad from Apple Server. This could take a few minutes, so be patient.
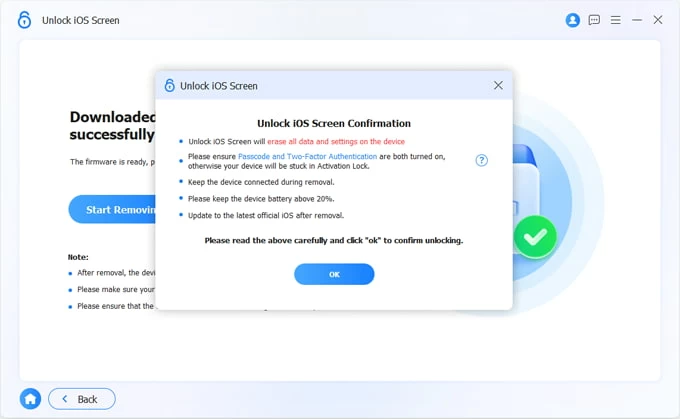
5. After downloading, a dialog pops up, helping you understand the risks involved. Checking the warning messages carefully.
Once you're ready, press the OK button to confirm.
That's it! Once the process finishes, your iPad is no longer disabled.
Apple's Find My iPad service is available as an Find My app and as a standalone webpage; both work the same way. From there, it offers you 3 useful functions: play a sound to ping your iPad, lock it, or remotely erase the device. Obviously, we'll want to wipe it clean when the iPad is disabled. Let's see how it works.
Fire up the Find My website on your browser and sign into your Apple ID and password. Choose your iPad from "All Devices" list. Then click "Erase iPad" option.
In the next notification explaining that your iPad will reset back to factory settings, click "Erase" to confirm. You will want to sign in with your iCloud password to proceed.
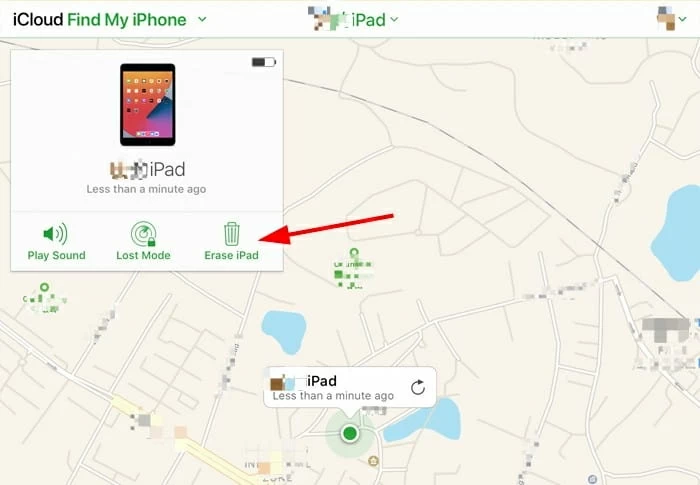
Select your iPad to erase remotely.


