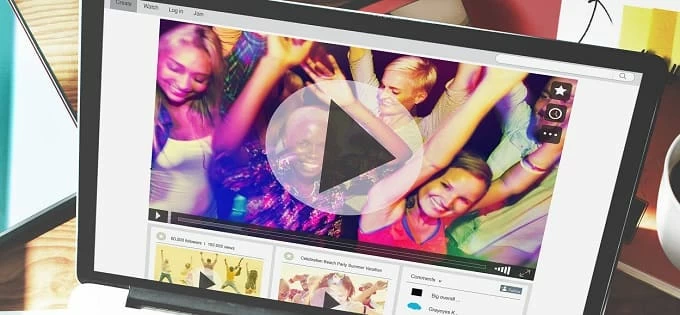
How to Record Streaming Audio on Mac

As long as the camera and microphone are properly configured on your Mac machines, here are several ways on how to record a video of yourself on Mac.

Important Points - Self-Recording Video on a Mac
Before recording yourself on Mac, make sure that your computer's built-in camera and microphone are working properly.
If you want to record yourself doing things like teaching tutorials, singing, making presentations, or recording live video for uploading to YouTube via the webcam, knowing how to record video on Mac can come in handy.
Luckily, most Macs come with a webcam or support connecting a plugged-in camera device, which is convenient for recording a video on Mac by capturing your face or posture. This guide will walk you through the ways to record video on Mac, including Mac built-in recording tool and professional video recording software to record yourself on a Mac.
Table of Contents
The most obvious way to make your Mac record video via the built-in camera is QuickTime Player, a media player that comes pre-installed with your macOS and is known for its convenient screen and audio recording.
Using its New Movie Recording feature, combined with the microphone, you can record video on the Mac for free through the camera with your own voice or background sound. Here's how to record yourself on a Mac with QuickTime Player:
First, open QuickTime Player on your Mac and navigate to File > New Movie Recording. You can press "Option + Command + N" to trigger the New Movie Recording.
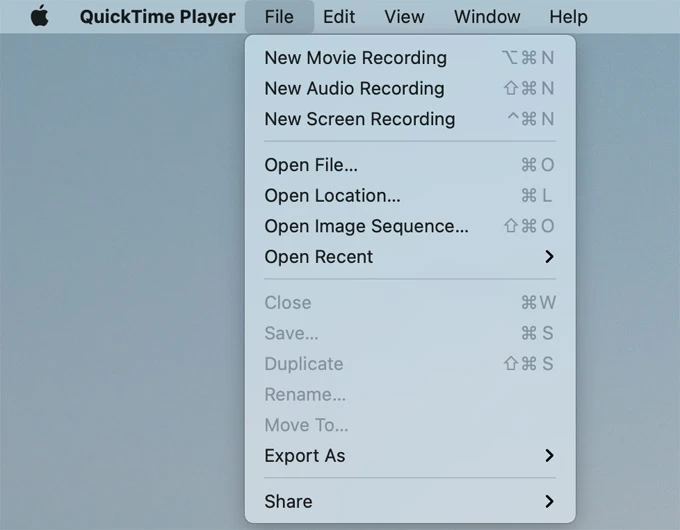
Select your internal camera and microphone by clicking on the "arrow" icon in the recording control panel. If your Mac computer doesn't have a built-in webcam, make sure you've connected an external available camera. Besides, you can also choose the quality of the recorded video.
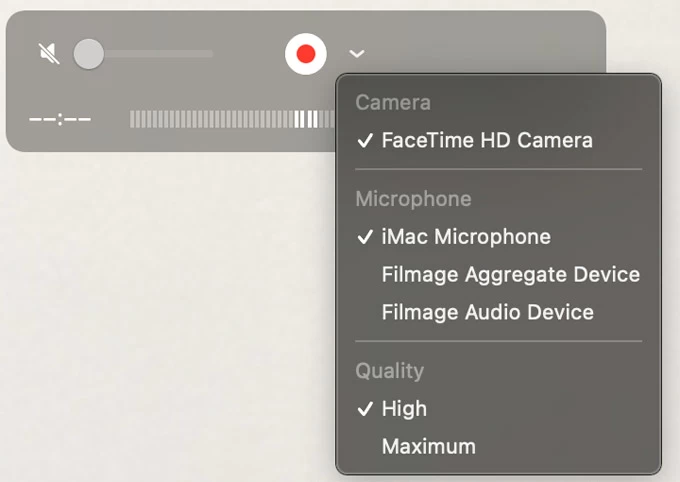
Use the "Volume Control" on the left and drag it to a comfortable volume level.
After setting up your camera and microphone, click the "Record" button to record a video on the Mac.

When you're finished recording, simply click the "Stop" button. To export the video, click File > Save, then name the file and pick a location for it.
Tip: If you want to screen record video on Mac, such as recording YouTube video on Mac, you can start by choosing File > New Screen Recording.
If you want to record high-quality videos on Mac or want to add more footage such as annotations or photos while recording videos for tutorials, presentations, meetings, etc., then you can do it with Appgeeker Screen Recorder, a versatile recording and editing software.
The software not only lets you enable built-in or external camera to record HD portrait videos, but also capture screen footprints and webcams to create picture-in-picture videos. With a simple interface, it gives you great flexibility to record computer screen, webcam and audio.
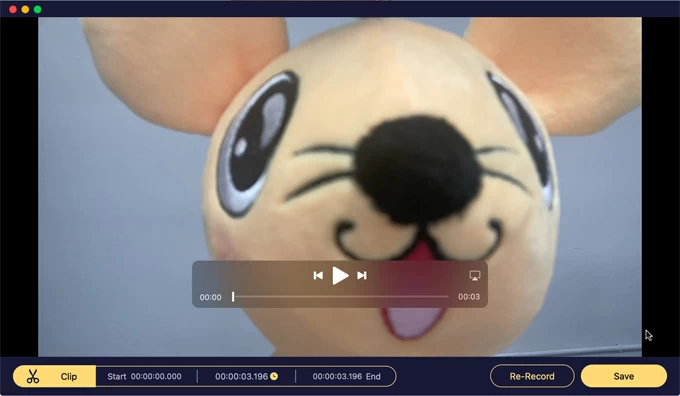
1. Download Appgeeker Screen Recorder and install it onto your macOS system.
2. Launch the software and choose Webcam Recorder tab. In case you want to record your computer's screen and webcam simultaneously, click Screen Recorder tab instead.

3. Select your camera. The software will record a video from internal FaceTime HD Camera by default, but if you have an external camera connected, you can select it from the drop-down menu in the bottom left corner.
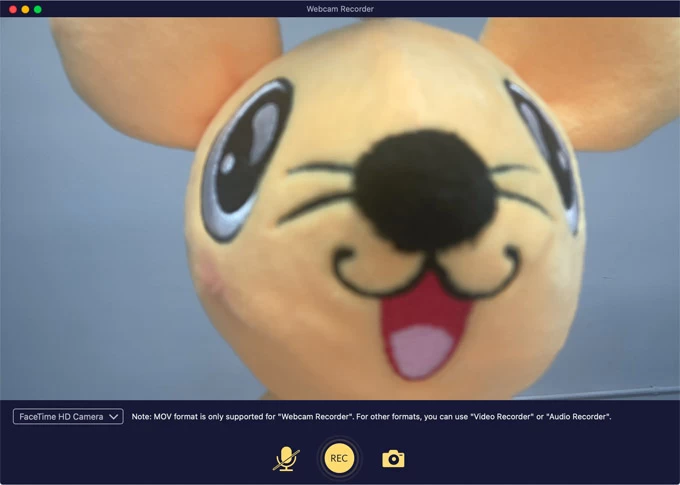
4. Turn on the microphone by clicking the "Microphone" icon at the bottom of the screen.
5. When you are ready, click the "REC" button. The software will begin recording yourself video with camera on Mac.
6. Once you're done filming, click the "Stop" button. And then you can clip the recorded video on Mac, or click Save to export the video.
Apart from recording a video on a Mac with the webcam, the software also fulfills your need to record audio from Mac computer. Its Audio Recorder option is designed to capture sounds coming from Mac.
Another software built into Mac computers, Photo Booth, is able to show camera's view in real time. It is specifically designed to take photos or record videos on a Mac with the built-in camera or an external camera device plugged into the Mac.
The good thing about recording video on Mac with Photo Booth is that you can add filters. In addition to that, you can choose whether or not to use the inversion effect when capturing live preview.
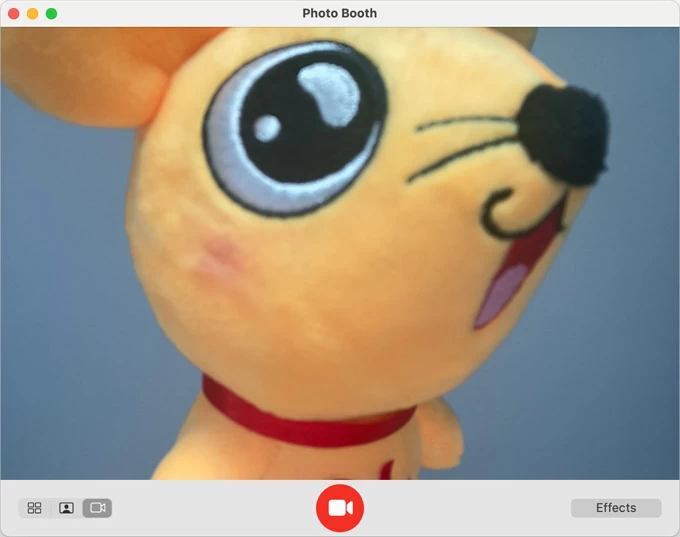
1. Run Photo Booth app on your Mac. If necessary, make sure that the connected camera is turned on.
2. Click the "Record a movie clip" icon at the lower left to get the red Record Video button at the middle.
3. Hit the "Record Video" button to start recording a video of yourself on Mac.
4. Click the "Stop" button when you complete recording.
Read more: How to record a live stream on Mac
Both QuickTime Player and Photo Booth only offer the ability to record video on a Mac but lack editing tools. If you want to record a video for big project and need to edit it later, then using iMovie will give you numerous professional video editing options. Here's how to record yourself on your Mac:
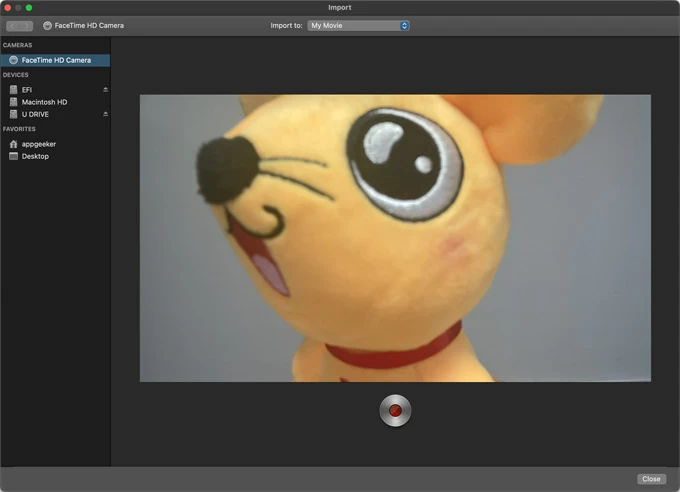
1. Get iMovie from the Mac App Store and run it on your desktop.
2. Head to File > Import Media on the top toolbar.
3. Select the camera for video recording. iMovie will choose FaceTime HD Camera by default, if you have other available camera options, pick your desired camera device.
4. To begin, click the "Record" button. Your live preview will be captured through the camera.
5. Click the same button again to stop recording. Your recorded clip will be automatically saved in iMovie's library, and then you can start editing your video!
Here are some major essentials for better video recording on any Mac computer:
Camera: If you have an external camera, remember to set it at eye level so that you in the video will look more real to others!
Framing & angle: It's better to put yourself in the center of the frame, making sure to leave some space around the frame to allow the camera to focus on your face.
Microphone: Mac's built-in microphone is enough to capture your voice when recording a video. But if you're using an external microphone, keep your mouth close to the microphone so your voice is captured clearly on the video.
Lighting & background: If you are recording video outdoors, avoid sunlight; if you are recording your video indoors, make sure the light is sufficient and even. Only when the video is film in the right light, your characters in video will not have problems with exposure, blurring, black shadows and so on.