
How to Restore Notes from iCloud

There are three ways to fix "iPhone is disabled. Connect to iTunes" error on your iPhone SE. You're not required any technical skill to unlock and access the disabled device.

The "iPhone is disabled. Connect to iTunes" error is a hot issue raised in Apple Discussions Forum. Users claim that they can't get into the passcode entry screen to unlock the phone. If your iPhone SE shows the same message, we're here to help.
Getting this "iPhone is disabled" message means that your iPhone SE has been permanently locked. This is the result of too many failed passcode attempts made in your iPhone SE. Perhaps you forgot the passcode, keep entering the incorrect numeric code, and finally get "iPhone is disabled. Connect to iTunes" on iPhone SE. Maybe your kids or someone else disabled your phone behind your back by testing the wrong the code constantly to get in.
Obviously, to fix the issue, connecting your iPhone SE to iTunes (or Finder) is an option, but it's not the only one. Appgeeker iPhone Unlocker and iCloud can also save your bacon when your iPhone SE is disabled and says connect to iTunes. All the detailed steps have been covered below.
You'll learn how to unlock a disabled iPhone SE using iTunes (or Finder), a 3rd-party tool and iCloud.
Whether your iPhone SE is completely locked down intentionally or unintentionally, bear in mind that all the data and settings will be wiped out completely after using the following tricks to undisable your iPhone SE.
Let's begin with iTunes software to unlock your device. If you're holding a Mac running macOS Catalina 10.15 or above, go with Finder. The procedure of how to fix "iPhone SE is disabled connect to iTunes" problem is almost the same in both applications.
Prepare a computer with latest version of iTunes or Finder installed, your iPhone SE, and a USB cable that came with the device. When you're ready to restore disabled iPhone SE, here's what you need to do.
Step 1: Put your iPhone SE into recovery mode
This step can let your computer quickly detect your iPhone SE when it's complete locked. No passcode is needed.
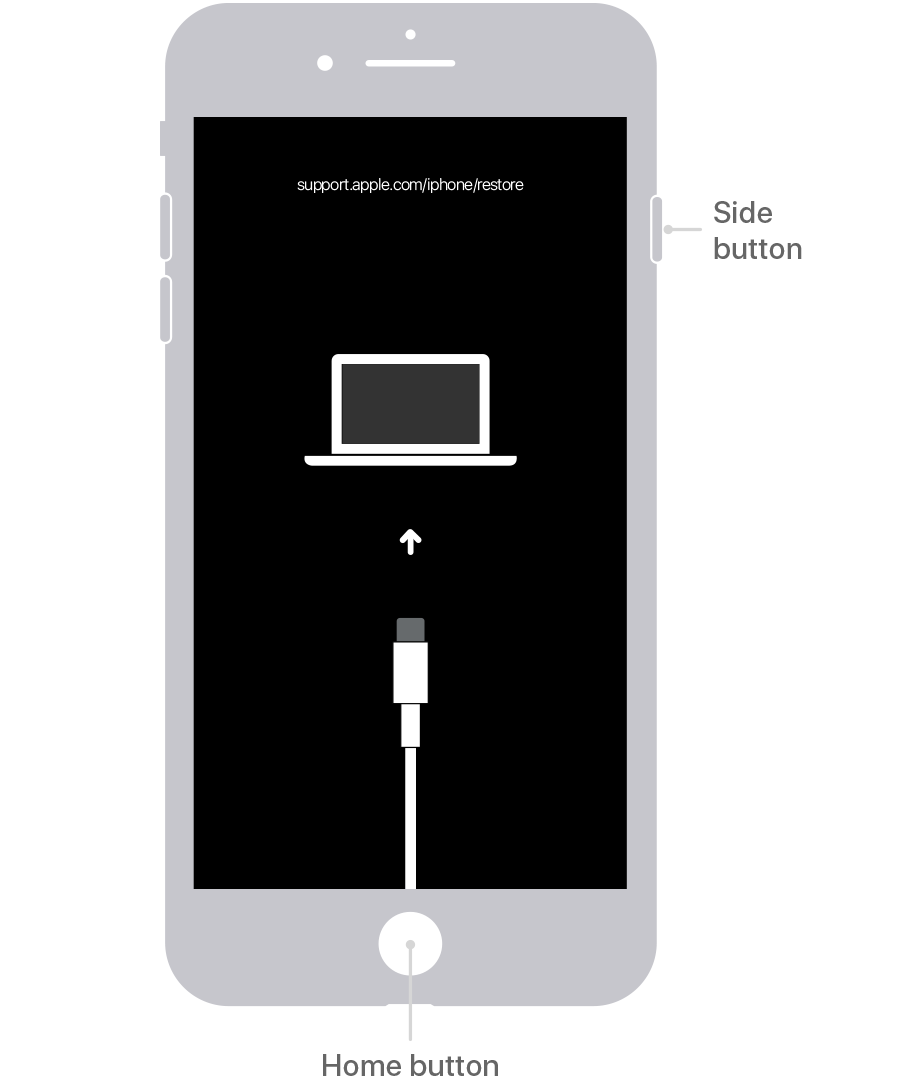
You might need to try a few times to get into recovery mode.
Step 2: Locate your iPhone SE
If a dialog box pops up automatically in your computer as soon as you successfully place your device into recovery mode, move to step 3 to restore the device. If not, do the following:
If your iPhone SE exits recovery mode during the restoration process, enter the mode again.
Tips:
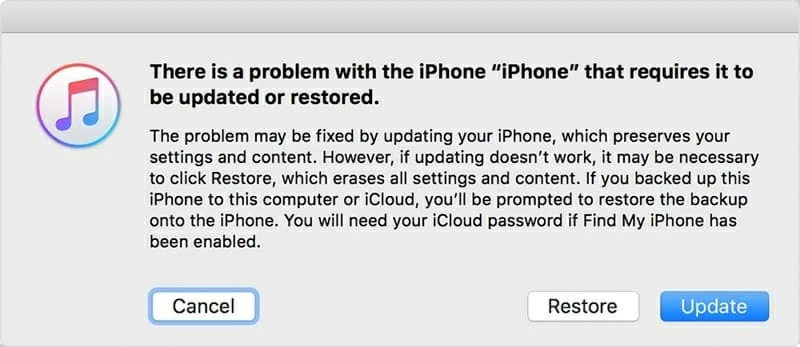
Step 3: Hit the Restore button
In the presented dialog box, hit Restore button. Doing so will delete all the content saved on your iPhone SE and bring it back to a factory-fresh state - the process is irreversible.
Once the restoration process ends, you'll get back to your iPhone SE setup screen. Just navigate through the Setup Assistant pane options to set up your device.
Tips:
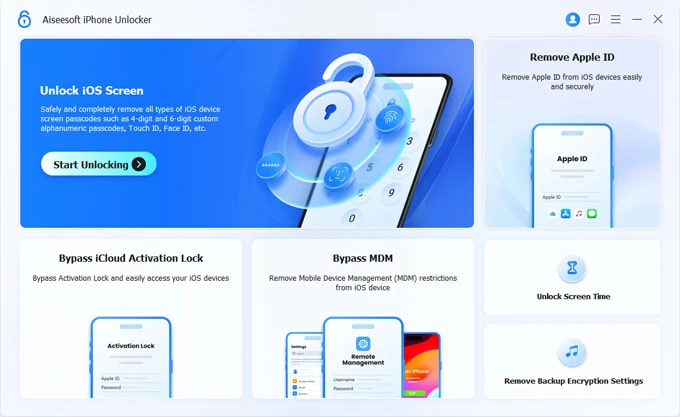
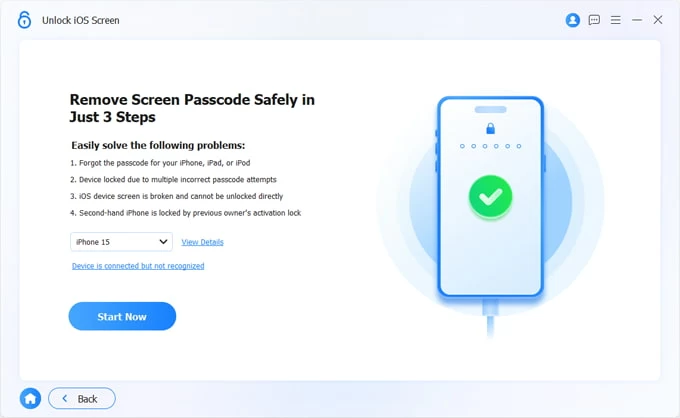
iTunes (or Finder) can help bring your device back to working when it becomes disabled, but if it's not right for your needs, Appgeeker iPhone Unlocker deserves an attempt at unlocking your device without entering any passcode or password.
This software fits well with all iPhone, iPad and iPod models, integrated with multiple lock removal tools to unlock any forgotten passcode, remove Face ID, Touch ID or Apple ID, bypass disabled screen and reset the Screen Time passcode.
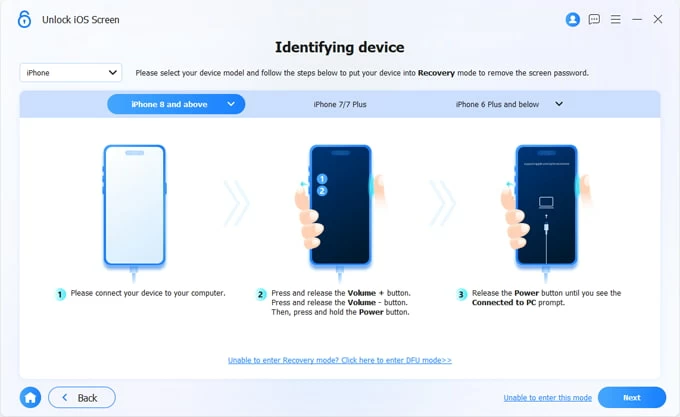
Using iPhone Unlocker to fix "iPhone is disabled connect to iTunes" iPhone SE shows on its screen is very straightforward:
Step 1: Download, install and launch the tool
After the installation, fire up the program on your PC or Mac. Then, choose Start Unlocking.
Step 2: Plug iPhone SE into computer
Use a data cable to plug your iPhone into your computer. You'll be prompted to make your iPhone SE enter the recovery mode. Just do as prompted.
Once connected, view your device information and modify it as needed. Confirm by pressing the Start Now button.
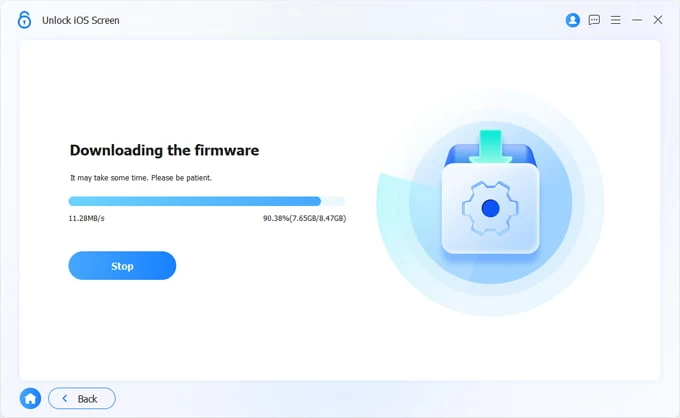
Step 3: Download the latest iOS software for your iPhone SE
Wait until the iOS firmware package downloading completes.
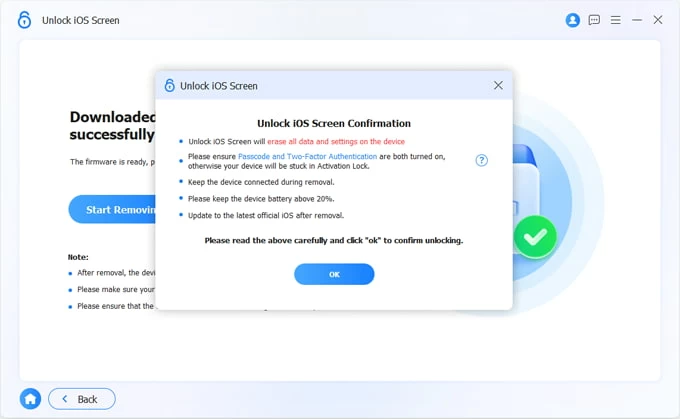
Step 4: Unlock an iPhone SE that is disabled and says connect to iTunes
A new dialog box will show up after the download process finishes. Click OK in the prompt, then press the Confirm Again button to bypass the disabled error message.
You might be interested in: How to undisable an iPad after repeatedly entering wrong passcode
Seeking a way to reset disabled iPhone SE without iTunes or computer? That's no problem at all with iCloud built-in Find My iPhone feature - as long as it's been activated before your device gets disabled. The process can be broken down into three steps: Log in to Find My in iCloud with Apple ID and password, locate your device, and click Erase iPhone.
Step 1: Go to Find My iPhone in iCloud.com
Visit https://www.icloud.com/find/ using any browser on a smartphone or tablet. Sign in with your Apple ID account that's used in your iPhone SE and wait a few seconds for it to process.
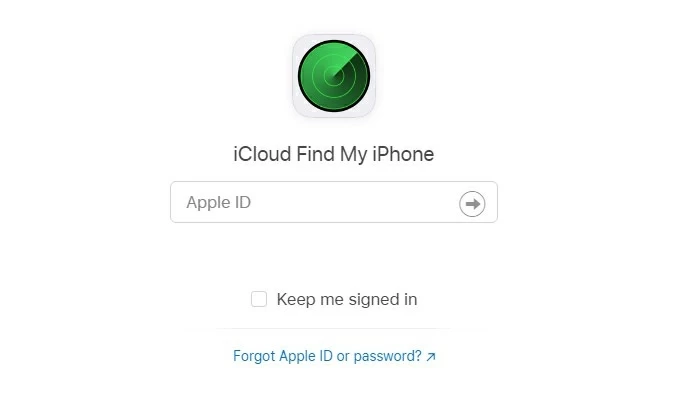
Type your current Apple ID and password in iPhone SE.
Step 2: Locate your disabled iPhone SE
From the top middle position of the opening page, click on All Devices. In its drop-down menu, choose the device that becomes disabled.

Select the device you've locked after multiple wrong passcode attempts.
Step 3: Click Erase iPhone
From the given options under your device icon, choose Erase iPhone.
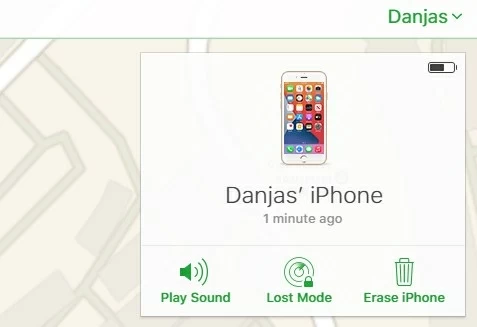
It'll start wiping the iPhone SE as long as it's connected to Internet.
Read also: How to fix when your iPhone stuck on white Apple logo screen.
How to Stop iPhone SE from being disabled
Here're a few bonus tips:
That's it!