How to Get Blu-ray Sound Tracks into AC3 Format on Mac


Blu-ray Movies, featured with high-definition video quality, remain gaining a large popularity among the public and film makers. And there are reasons that Blu-ray lovers are looking for the way to edit their favorite Blu-ray movies through video editing tool like Adobe Premiere Pro CC on desktop to create stunning masterpiece. However, they may finally find that they can not directly pull movies out of Blu-ray disc to copy onto Adobe Premiere Pro CC. And this article will discuss the topic about how to rip the Blu-ray and load movies in it onto Adobe Premiere Pro for your further editing.
It should be noteworthy that Adobe Premiere Pro supports a wide range of digital video formats as input but the encrypted Blu-ray or DVD disc is not in the queue. So you need to circumvent the built-in copy protection in Blu-ray and convert the content to a common editable format before importing to Adobe Premiere (Pro CC, Element 16, CS6, etc.) software.
To make the process smoothly, the tool we're going to use in this article is Blu-ray Converter, a relatively simple to use Blu-ray /DVD ripping tool on the market. Fitted with advanced technology, it can decrypt and remove copy protection system contained in the Blu-ray or DVD disc and then convert the movie to something that's suitable for adobe Premiere such as MP4, WMV, AVI, M4V, ASF, H.264 AVC, etc. It can also acts a video converter that gives you ability to convert videos from one format to another.
The process is very straightforward. Pop in your disc, choose an Adobe Premiere supported output profile, and a click of "Convert" button. Then go and get a cup of coffee (conversion takes time). Below are the detailed steps.
Note, if you are a Mac user, then you can go with Blu-ray Ripper for Mac to rip and convert your both Blu-ray and DVD collection. Also, a Mac compatible external Blu-ray drive is required.
Step 1: Load Blu-ray movies
Insert Blu-ray disc you want to rip and fire up the software.
Click Load Disc button to import the Blu-ray movies from its location. The program will recognize the whole disc and display the titles on the main screen to let you select your desired one.
You then can select the subtitle tracks and audio streams for the movies. To do so, click the Subtitle and Audio box right behind the title and choose the language you want to keep or leave them by default.
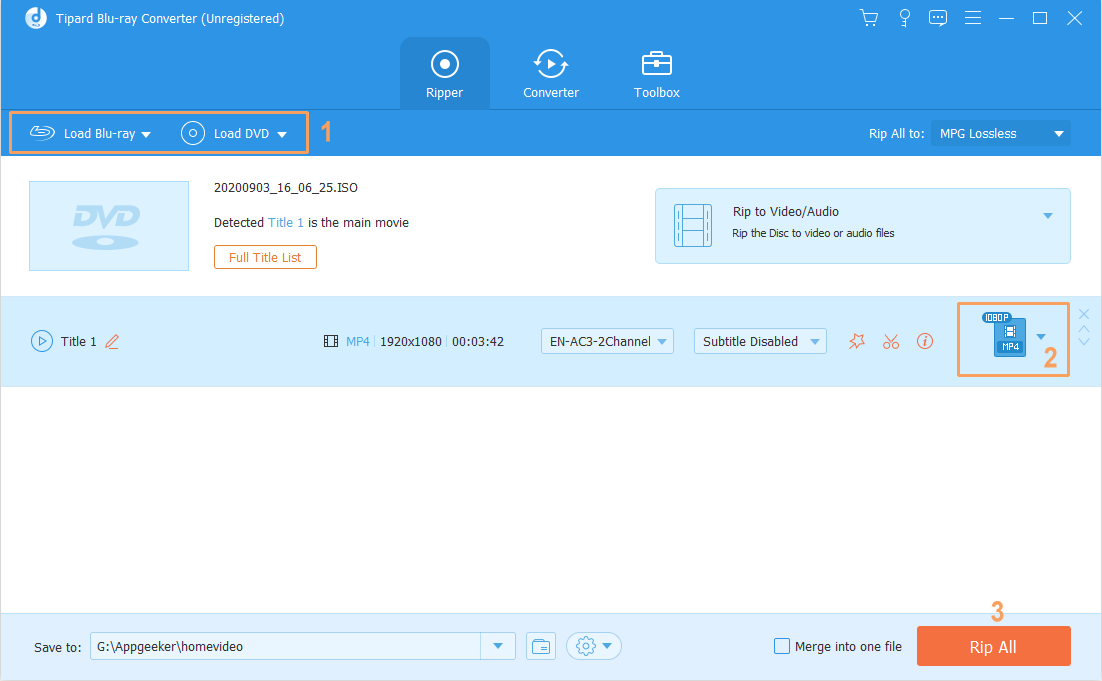
For added convenient, you can join and combine several added titles together using Merge into one file option on the lower right corner of the main interface. An "Edit" icon on the top menu bar is available for you to make some basic editing on the file. This is self-exploration.
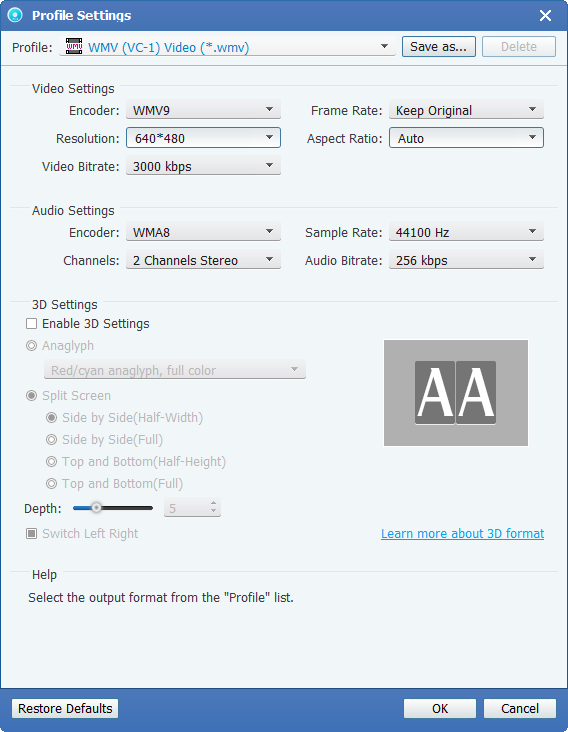
Step 2: Choose your conversion settings
Head to the Profile drop-down menu at the bottom left-hand side of the window, click the default field labeled *.MP4, this will open a pull-down box as follows, where you can select any of one format profile that Adobe Premiere application accepts.
For added convenience, this Blu-ray converter software comes with Adobe Premiere presets. Simply head to Adobe Premiere/Sony Vegas category on the left side, in its opening list, select one of available profiles you want: *.wmv, *.mpg, *.mov.

Tip: A Apply to All function located in the lower center of the main interface is available for you to set the same profile for all the chosen files, so you don't need to repeat to do it individually.
For the advanced users, you may click Settings next to Profile drop-down menu to tweak the video and audio encoders based at your disposal to produce the video you need.
In general, the default configurations will bring you the optimized resulting files as possible.
For those who want to play Blu-ray movies on certain gadgets, you can check the device-oriented categories where contains a wealth of pre-configured presets, including Apple devices, Android phones/ tablets, game consoles and others. Once you select the preset, this program will automatically optimize the settings to the correct size for your device.

See Also: How to Use iPhone to Play Blu-ray Movies
Step 3: Start Converting Blu-ray to Adobe Premiere compatible format
Before conversion, it's good to pick an desired output location on your computer for storing your resulting videos. You can do this by clicking the Browse button in Destination field.
Now, hit the green Convert button on the lower right corner of the windows to commence the conversion process. The whole process might take some time, depending upon your computer's processing power as well as the duration of the Blu-ray titles.
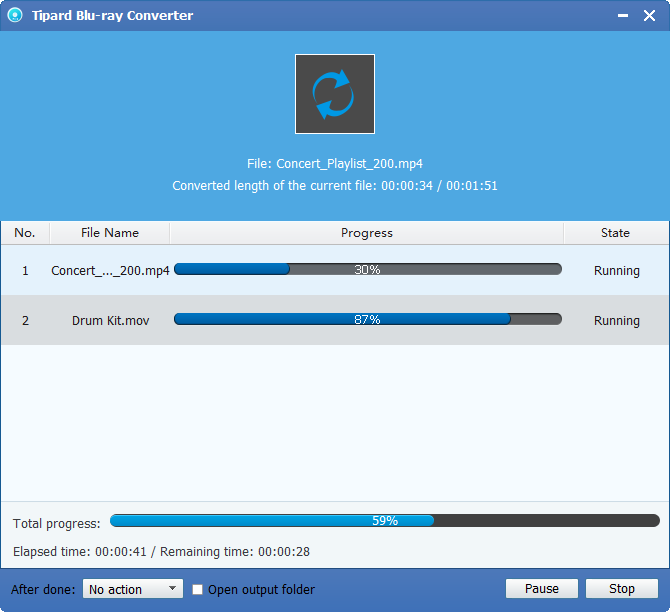
Congrats! You have had your Blu-ray converted to Adobe Premiere video files successfully. You're now ready to put the new minted files onto Adobe Premiere for editing.
That's it. Good luck!