How to Stream a MKV Video File on Apple TV


The growth of online video and increasing quality and size of the videos make WebM format popular in web-video delivery. It's capable of delivering highly compressed HD videos but still in high quality for webpage videos using HTML5 video element. In Comparison to patented h.264 and MPEG4 standards, WebM is an open standard suitable for commercial and non-commercial applications.
While most major Web browsers will support WebM as part of HTML5 video, it's still rather difficult to play a .webm file on Apple products, whether it is QuickTime player, iTunes, iPhone, ATV or Final Cut Pro X, iMovie. So is there any way to get the WebM video to work on Mac ecosystem? The answer is positive, converting the video from WebM to MOV format.
What is MOV
Let's step back for a second and try to answer what a MOV format actually is – the answer, in short, is that MOV is a common container format developed by Apple using proprietary compression algorithm. On Mac environment, MOV is probably the most efficient and safest file type for use on Apple applications and devices.
Get the Best Result with the Right Tool
There are more WebM to MOV converters online than you can shake a stick at. In terms of simplicity, conversion speed and stability, Video Converter for Mac wins a lot of praise from Mac users. As one of the best video conversion tools currently, it takes the .webm file and convert it to .mov file easily and quickly, and converts almost all conceivable audio and video format types as well as offers many of customization options to get control over the output. The inbuilt editing features even allow frame cropping, segment cutting, file merging or watermark embedding.
For Windows users, there is a sleek desktop version called Video Converter for Windows.
Step 1: Add WebM Videos
Click "Add File" on the toolbar of the window and load the WebM video files to the application. It is possible to drag-n-drop the files directly to the window.

Editing (optional)
The software has a built-in simple video editor for editing videos, allowing you to clip any portion of the movie, join together two video files into one seamless video, crop the picture to focus on a specific area, add a text/image logo, adjust saturation, brightness and contrast, and even remove noise in a video. It lacks the editing power of a professional editor, but is streamlined and can make basic edits over video for you.
To do this, simply click the "Edit" button on the toolbar.
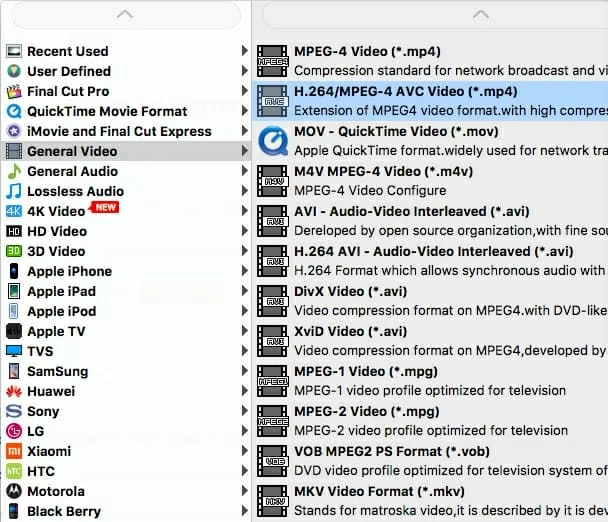
Step 2: Select MOV Format from "Profile" Drop-down menu as Output
Click "Profile" drop-down menu at the bottom left side, in the opening window as shown in the picture below, select "MOV – QuickTime Video (*.mov)" under the "General Video" category.
It is up to you whether to create your own customized settings from scratch or stick to the status quo. You can set the right Video Bitrate to strike a balance between file size and output quality, change the Resolution to cater to a device or correct Aspect Ratio which leads to stretched or compressed video image. All these can be done by clicking "Settings" button to the right of "Profile" menu.
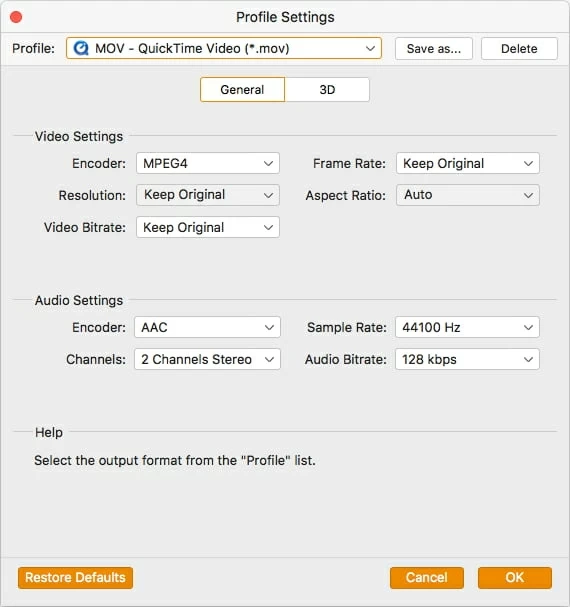
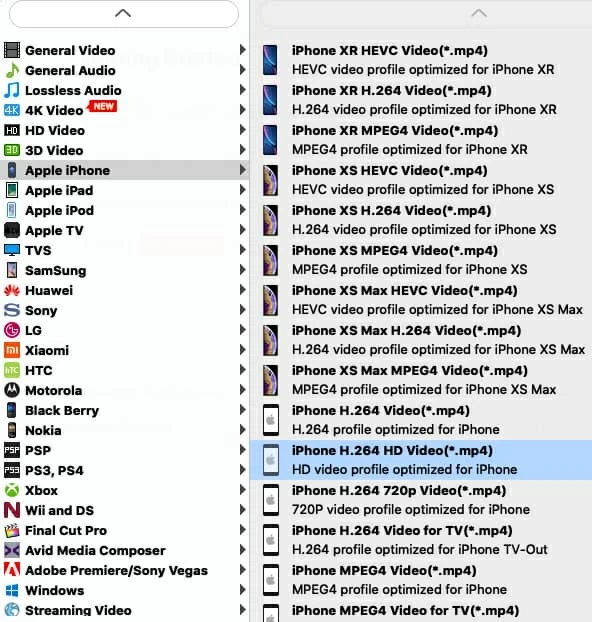
As an Apple user, you may plan to view your movie collection on iPad, edit them in Final Cut Pro X or just sync to the HDTV using Apple TV. Whatever the case, the program has loads of presets ready for you.
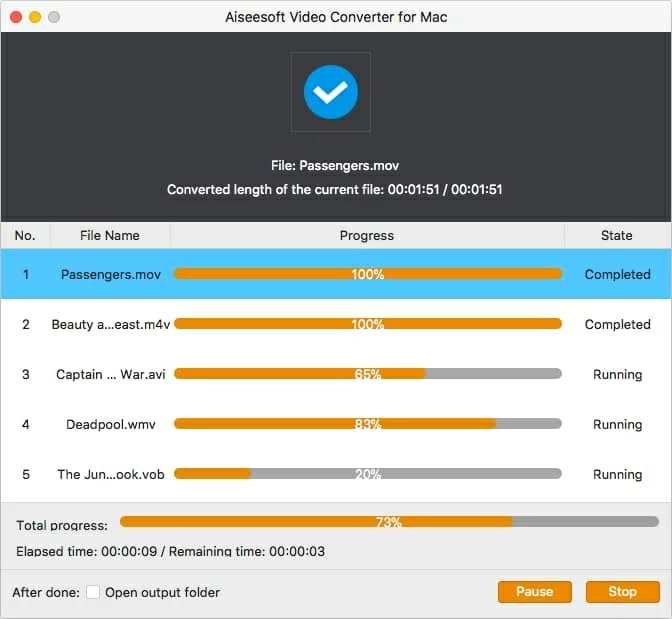
Step 3: Press "Convert" Button to Initialize WebM to QT MOV File Conversion
Once set, pick a local folder that is easily accessible for the exported QuickTime MOV files. To do this, simply hit the "Browse" button under "Settings". The program will remember the selected folder so next time you can skip this step and press "Convert" directly.
If everything goes okay, press the large orange button labeled "Convert" and wait until the converter finish its job. In this manner, WebM files end up in MOV wrapper.
Hope you enjoy using Video Converter as a very simple yet efficient video conversion tool!