
How to Convert from MP4 Video to WebM Format for Mac


4K (Ultra HD or UHD), the latest TV technology buzzword, is now being employed in home theatre system, commercial digital cinema projection and digital camcorders. Technically, a video shot in 4K (3840*2160) is fitted with sophisicated features like higher image definition quality, more detailed picture, better fast-action and larger projection surface visibility that gives consumers the unusually exciting visual experience that they have never had.
However, despite its advantages, 4K is far from being a mainstream resolution as 1080p (1920*1080), the most popular configuration used over the market today. The fact is that 4K is only deployed if you have sufficient graphics power, and streaming 4K video online can be too bandwidth-intensive. In most cases, the majority of playback, editing work is still being finished in 1080p.
To get things easier, you'd better downscale the 4K to 1080p resolution. Thankfully, Video Converter for Mac will do you a favor among a myriad of tools. It is surely in the support of converting UHD 4K video down to 1080p or 720p quickly. Plus, it is capable to convert your 4K footage to virtually any format you want including MKV,MP4, MOV, WMV, FLV, etc. It also comes with a handy built-in editor, giving you ability to edit your file and make full control over the quality of the exported video.
If you are running on Windows OS, please turn to its counterpart Video Converter for Windows.
Step 1: Add 4K Source Video File(s)
After the installation of the program, open it and you will be presented with a clear-cut user wizard.
To get started, a click of Add File button on the toolbar to load the original 4K video clip(s) to the middle processing pane. Alternatively, you can drag the 4K file(s) directly from your Mac local drive.
Note: you're allowed to load 4K videos in bulk and this utility will convert in batches at one time. Better still, you can tick Merge into one file option and then your several highlighted files will be joined together.

Step 2: Tweak Output Settings
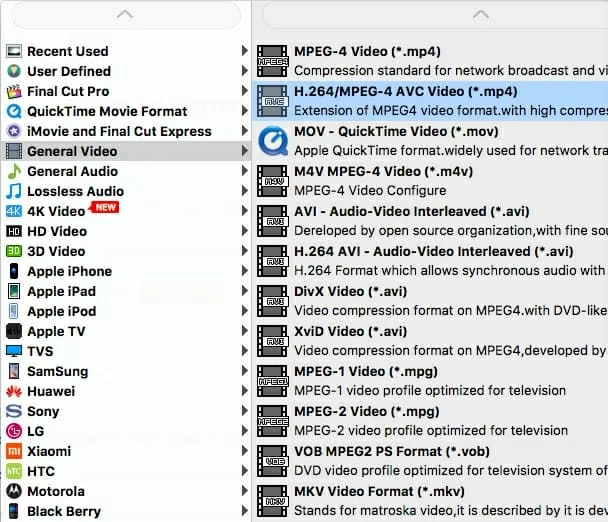
Press Profile drop-down menu on the lower left side of the interface to call up the format selection panel, from which you can quickly choose a proper target format that best meets your need.
In this tutorial, we just want to change the resolution from Ultral HD 4K to 1080p on Mac, so leave and let this field alone.
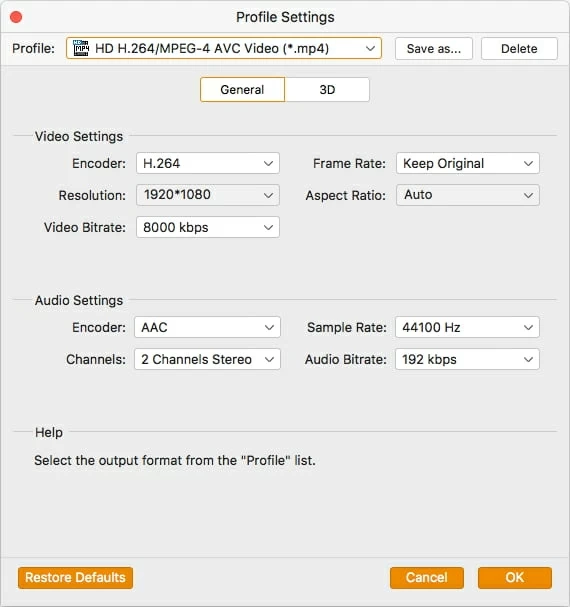
Next, you have to hit Settings icon right beside the Profile menu, which will bring up the Profile Settings window with a slew of conversion options including resolution to be configured according to your preferences. And the screenshot you will see is displayed as below.
For the purpose of this guide, simply click Resolution box and select 1920*1080 (1080p) from the list. Meanwhile, the other audio and video encoding parameters like encoder, frame rate, aspect ratio, video/ audio bitrate, can also be adjusted if you need.
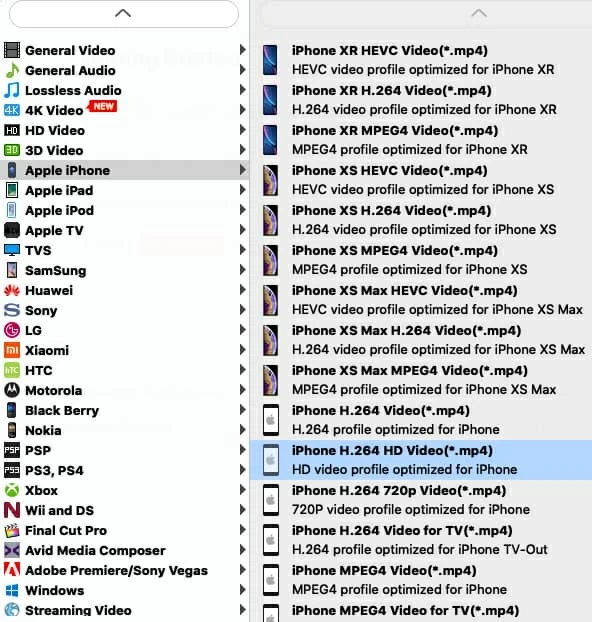
If you have a need to convert 4K video or other media files for playback on iPhone, Samsung smartphone or any other handy gadgets, this utility will satisfy your requirement, providing you a vast library of out-of-the-box pre-configured profiles to tailor your conversion for portable devices, TVs, video-sharing sites, game consoles and more.
After selecting the output format, turn back to the main interface of the program and press Browse button beneath Settings icon to choose an output path as the destination folder to save the converted 1080p movie.
Step 3: Start the Conversion from 4K to 1080p for Mac
Now, all you need to do is hit Convert button located at the bottom right corner of the window to let the 4K HD to 1080p conversion begin on your Mac.
This 4K converter is very efficient in conversion and the progress bars will show the remaining time.
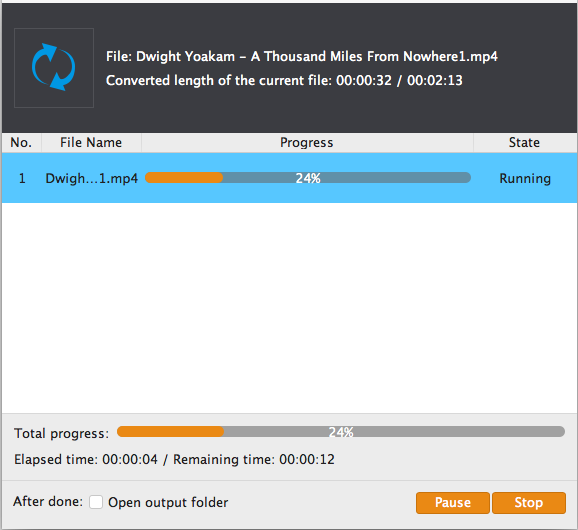
When the 4K to 1080p converting process completes, check the new generated 1080p video from the folder you just specified on your Mac machine.
Now, you can move the converted 1080p video where you need it for playback or edit. That's it!