
How to Retrieve Deleted Phone Numbers on iPhone

iPhone stores all your memorial photos you shot, but what happens when you're locked out of your device? Here's how to get photos when your iPhone is locked.


It is still possible to recover photos from your locked or disabled iPhone.
It stands to reason that your iPhone will hold a lot of meaningful photos, and you will also create a passcode to protect the data on your iPhone, including those photos. But there're occasions that you forget iPhone passcode and your iPhone gets locked, or your iPhone becomes disabled for other reasons. So, is there any chance you recover photos from locked iPhone?
Don't worry, you can still unlock iPhone without passcode and access those precious photos again. By following the guidance in this post, you can effortlessly get photos off locked iPhone, even though you have no backup.
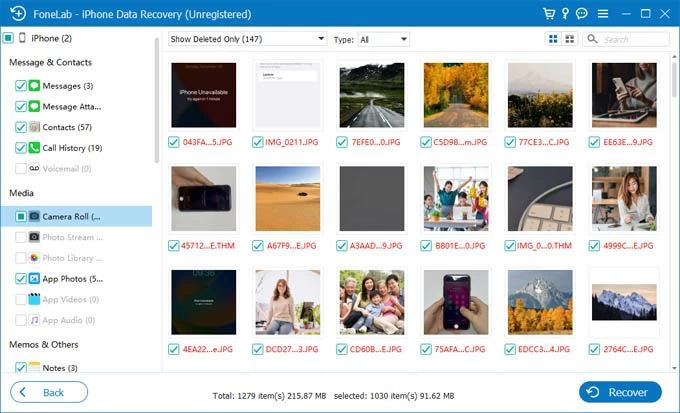
If you cannot get into your locked iPhone and you haven't backed up your iPhone photos, then with the help of a professional tool - Appgeeker iPhone Data Recovery, you can get back photos from your locked iPhone without losing data.
The tool has a built-in deep scan mode that can search for photos in your iPhone's storage space, and then restore existing and deleted photos to a user-specified location. Besides, it can detect your available iTunes backup archives and extract photo items from them for recovery.
Therefore, to restore photos from a disabled iPhone, iOS Data Recovery has two modes to satisfy you.
If you haven't created a backup in iTunes or iCloud, as long as your locked iPhone can be detected by the computer, you can use iOS Data Recovery to retrieve photos from the iPhone that is locked without a backup according to the following steps:
This mode lets you access iPhone photos without erasing all content on your device, and is especially suitable for users who remember iPhone passcode but their iPhone becomes unavailable.
If the locked iPhone can't be detected, but you have backed up your iPhone in iTunes in advance, you can use this tool to extract the desired photo items from the iTunes backup without losing other existing data.
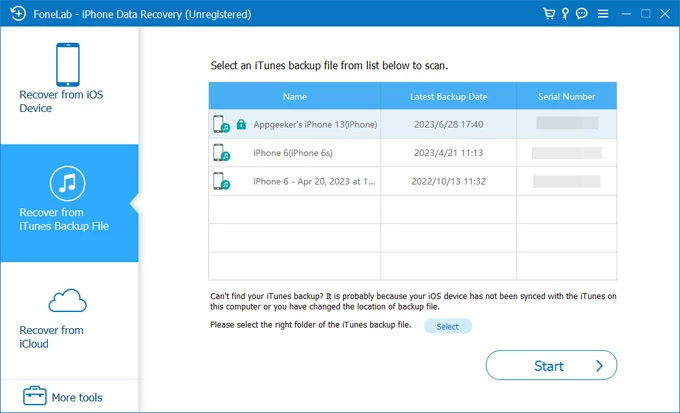
As we all know, unlocking your iPhone without a passcode requires resetting your device, which will erase all the data and settings in your iPhone. However, in case you have a backup, with this software, you can directly get photos off a locked iPhone without causing data deletion. This method also works for getting back photos from stolen or lost iPhone.
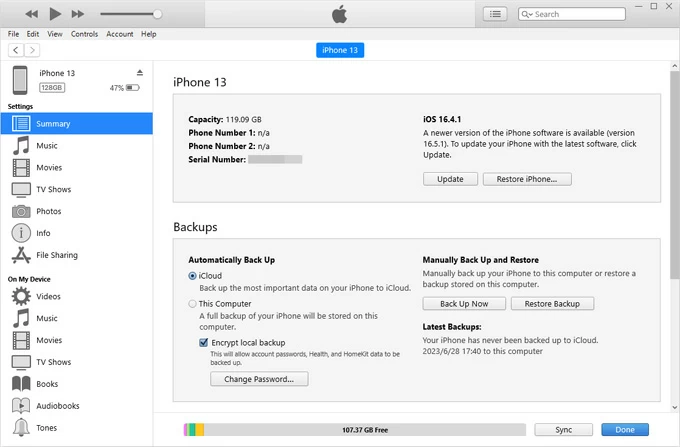
In addition to using third-party software, you can also try some common official ways, that is to recover photos from a locked or disabled iPhone via iTunes backup or iCloud backup. But they all require you to restore your iPhone to default settings, which removes the locked screen on your iPhone, and then you can restore photos from backup during the setup process.
Tip: If your iTunes is set to auto-sync, it will automatically create an up-to-date backup for you when it detects your connected iPhone, which ensures that you have a latest archive of all the photos from your locked iPhone.
Now, you can get into iPhone without passcode but you can set a new one as normal. The images in iTunes backup are restored to Photos app in iPhone as well.
If photos in the locked iPhone are synced to iCloud space, you can sign in to iCloud.com and use "Find My" to remove the forgotten iPhone password, and then select "Restore from iCloud Backup" when setting up the iPhone.
Alternatively, there is a lucky way to recover your photos from a locked iPhone but avoid erasure of current data. With the iCloud Photos enabled in the iPhone that is locked, you can select the "Photos" option on the iCloud official website to view the photos from the locked device and download them to the computer for saving.
If you've never sync iPhone with iTunes and iCloud, the only way to erase a disabled iPhone with a forgotten passcode is to use recovery mode. This is often a trade-off you have to make between an unusable iPhone and important photos.
Here is how to get photos off locked iPhone with recovery mode:
Doing this you can unlock the disabled iPhone and access it, then you'll need to set up your iPhone from scratch and recover your photos from your iCloud or iTunes backups.


