How to Recover Data from a LG Android Phone


I had my iPad Mini 4 stolen on the way home and I have backups available in iTunes & iCloud with countless photos and other key data I want. Anyway to access the backups without the iPad Mini 4?"
Mobile devices like iPads are always the seductive gadgets for being lost or stolen because of the features of being small and portable. There are times when the theft happened accidently on the road or on vacation, leaving absolutely little chance of the iPad being found in spite of the help of locator services like Apple's Find My iPhone service built into iCloud.
If that's the case, you may prepare for the unthinkable: your iPad is gone for good with all the stuff missing, especially the valuable pictures. But you are not completely out of luck since there's associated iPad backup file synced in iCloud account and a computer using iTunes. Well, you should be all set to retrieve photos on the lost iPad using these copies. If you don't want to do an all-or-nothing restoration process via iTunes or iCloud, there's also a third-party tool out there to assist you to get just the images from the stolen iPad and the process could be insanely easy.
iOS Data Recovery – A Safe and Reliable iPad Photos Extractor
Whether the photos or any other types of important files are stored on the iPad that was stolen or lost, Appgeeker iOS Data Recovery software could be the great magic to get all the data back. It allows you to directly access to the iPad backups you made with iTunes or iCloud, granting the ability to retrieve the any kinds of data you need.
The interface of the software is well managed without seemingly complex structures and recovering photos via iTunes & iCloud backup is a simple matter of scanning the backup files with the software, choosing the certain pictures you want to bring back and then clicking the Recover button.
Now, follow the tutorial below to get the photos from iTunes and iCloud backup after you lost the iPad.
Step 1: Launch the program and select the iTunes recovery mode
Download the program through the Download link above and mount it on your computer.
Since we're going to retrieve iPad pictures from backup, we firstly choose "Recover from iTunes Backup File" mode from the left sidebar, the program will automatically search for all the iTunes backups you've made beforehand on your computer and list them on the right pane of the interface.
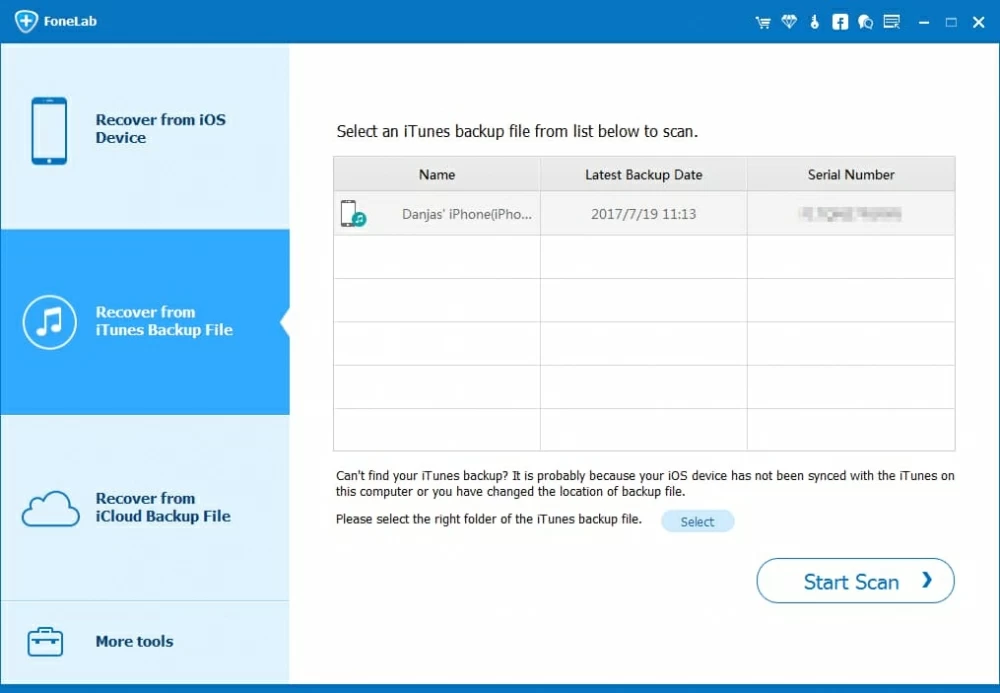
Step 2: Scan iTunes backup files
From the list, look at the data of each backup choose the most relevant one that is associated with your lost or stolen iPad and then click the Start Scan button.
The program will begin scanning the files embeded in this backup, and once it is done, you'll get a list of found files, which are sorted by different of file types. You can see the number of items for each file type in the parenthesis.
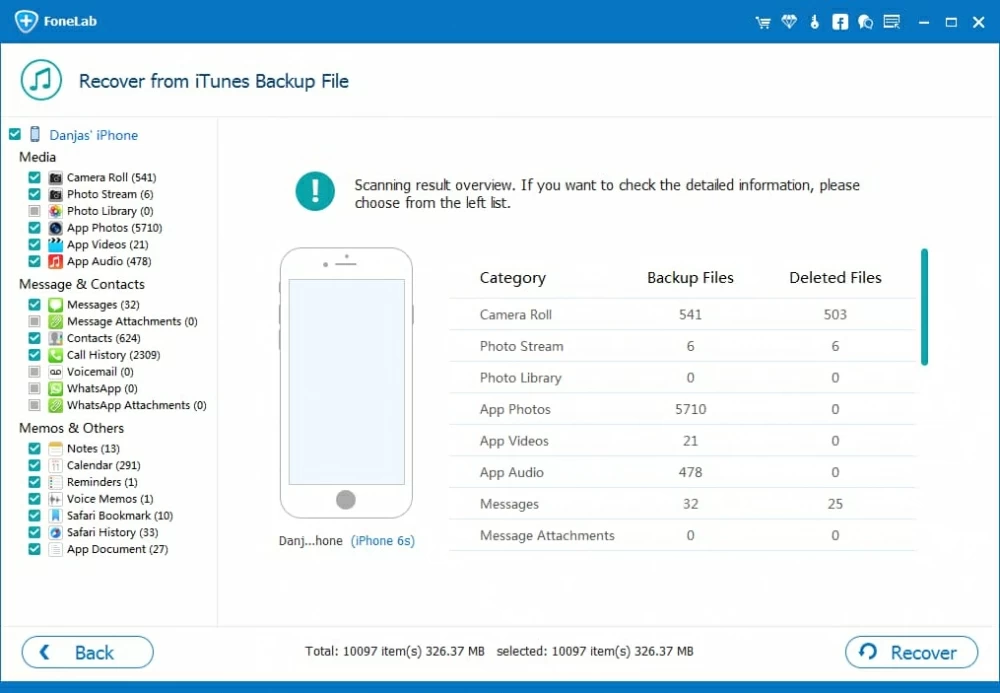
Step 3: Select the photos to be extracted from iTunes backup
On the left side of the interface are the options where you can locate the lost files easily to identify what exact files you would like to recover.
To get the photos back, choose "Camera Roll" category (or "Photo Library", "Photo Stream") under "Media" section and all the included photos will be marked by default on the right pane. This is of convenience when you want to restore all the photos from the lost iPad. You can also remove the checkmarks from the checkboxes to deselect the items you don't need.
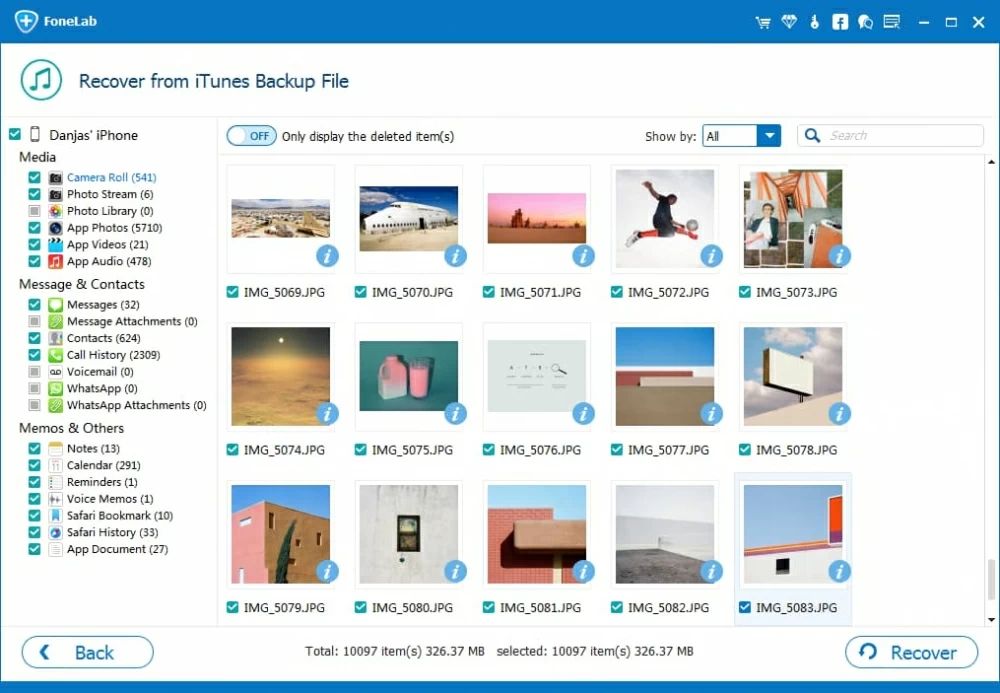
The "Search" box on the top right corner is incredibly useful for finding the specific files to be restored by entering the keywords.
Once you've marked everything you're going to restore, press the Recover button at the lower right corner of the interface. You'll be asked to select a location for the extracted iPad photos in the pop-up window. Or you can ignore this as there is a default folder provided.

Finally, hit the Recover button in the pop-up to confirm and the software will kick off the retrieving process for extracting photos of lost iPad from iTunes backup.
[Useful Article: How to Retrieve a Deleted Message on iPhone]
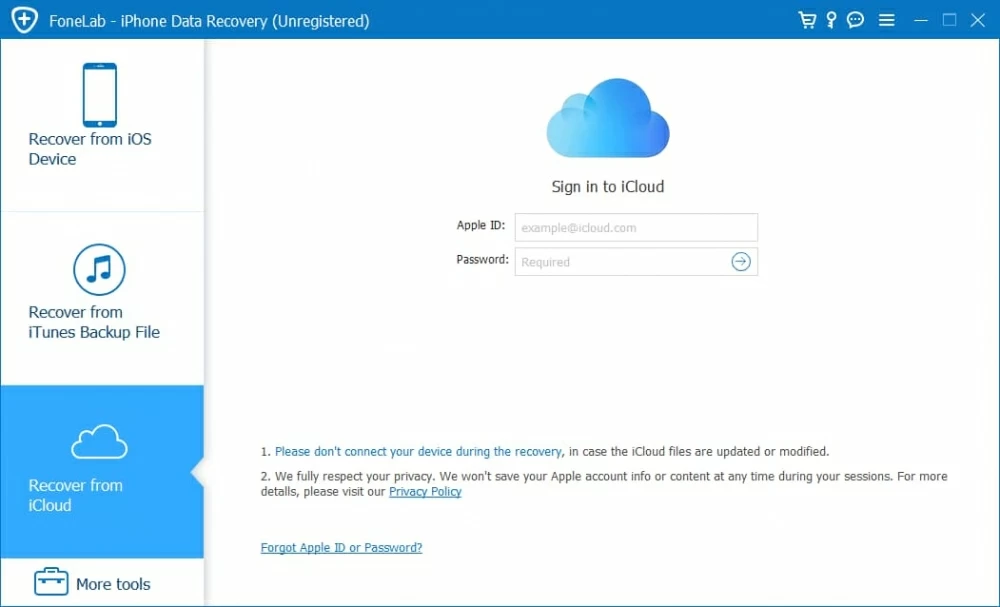
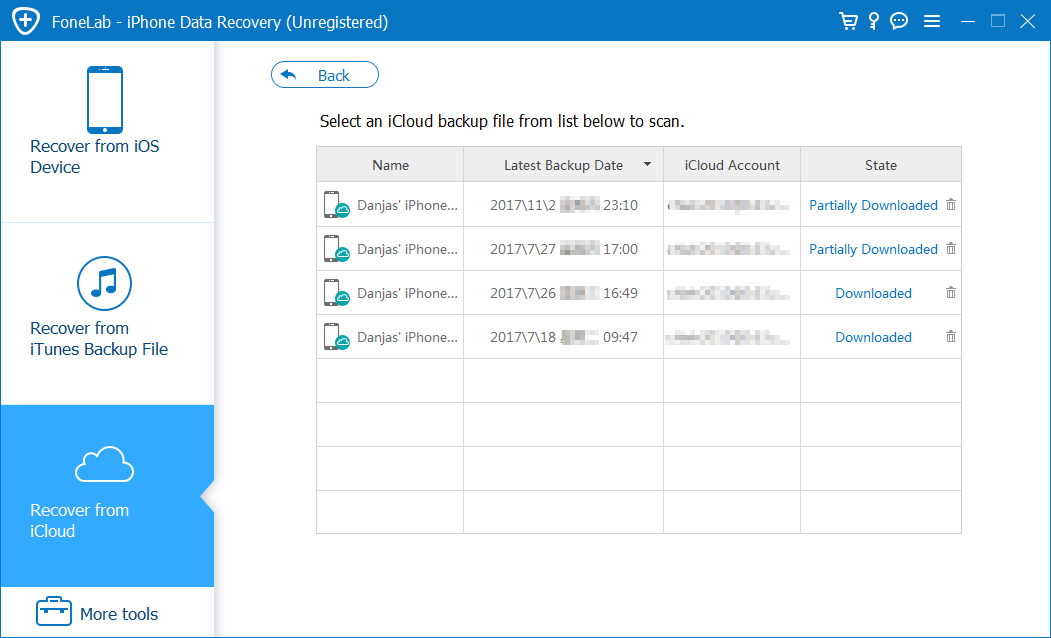
Step 1: Sign into iCloud account
Move to the lower left of the startup interface, click on "Recover from iCloud Backup File" mode and you're ready to retrieve lost photos from stolen iPad instantly.
Then, input your Apple ID and Password to sign up for your iCloud account when prompted.
Step 2: Download a backup
Once login, the program will automatically present all the backups housed within your iCloud account, listing the information of the backup: device's name, latest backup date and iCloud account.
Choose the iPad backup and press the Download button to its far right.
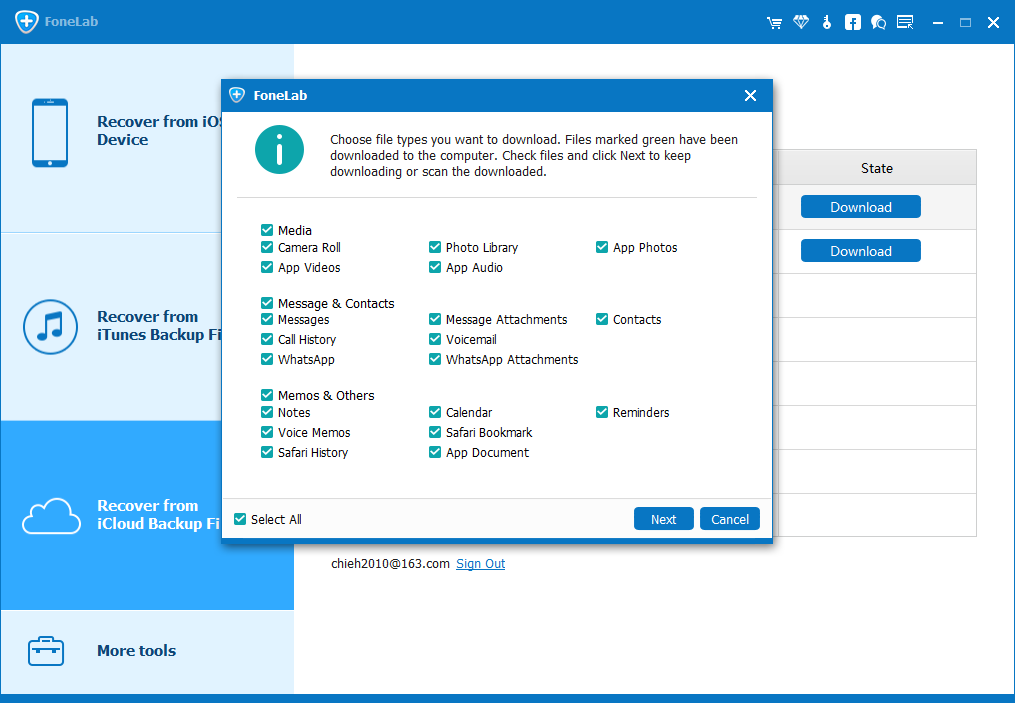
Then, a dialog box with different file types appears. According to its on-screen instruction, you're required to choose the types of files you would like to download. By default, all the items are selected.
To get only the photos back, you need to check the "Camera Roll", "Photo Library" and "App Photos" items instead. Then click the Next button to download the files.
Step 3: Pick the Photos and initiate retrieving process
After downloaded, you'll get into a next window like the screenshot below.
For the purpose of extracting photos from backup (when iPad is lost), simply click "App Photos" category on the left pane (or "Photo Library", or "Camera Roll"), all the pictures under it will be presented as thumbnails on the right pane. You can then select them one after one by ticking the checkboxes.
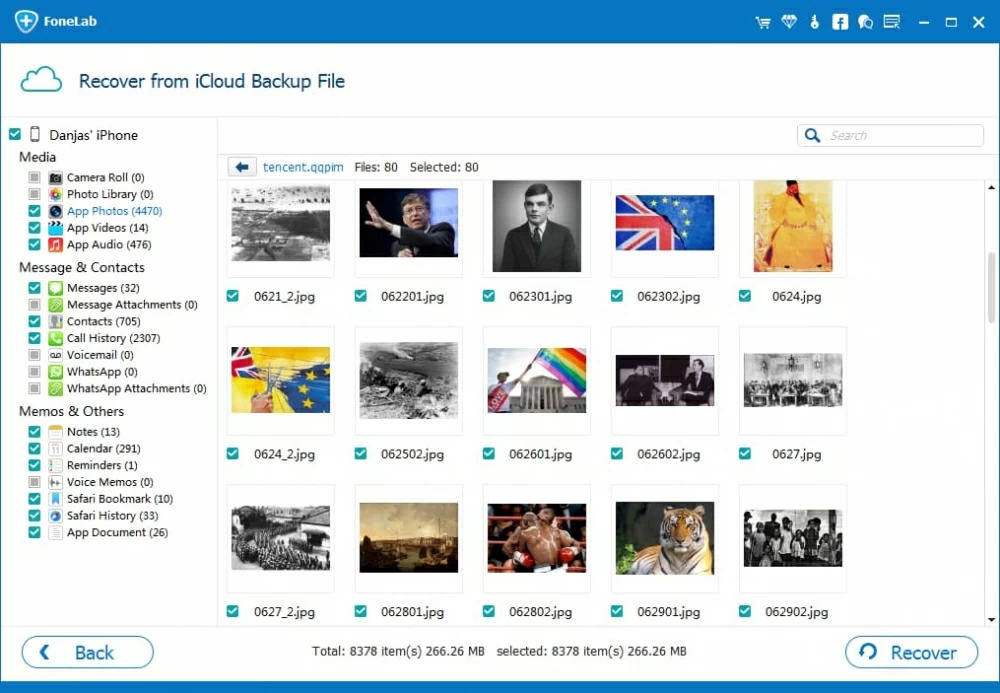
Now that you've selected the photos, all you need to do is press the Recover button to get the items retrieved and saved to your computer.
That's it! With this software, you can retrieve the valuable pictures quickly and easily even after your iPad is stolen or lost.