Retrieving iMessages on iPhone from iCloud Backup


Although it may seem impossible, copying your music from iPad and saving them in iTunes library or a separate folder on your computer, whether it's an iPad Mini, iPad Air or iPad Pro, is fairly easy and simple that requires little more than your iPad, USB cable and a 3rd utility.
If you've had your iPad for years, you might have music on your iPad library that you want to copy onto your computer hard drive to free previous storage space or just for backup purpose. It's easy to transfer your music from your computer to your iPad through iTunes, however, the transfer of music is an one-way process. Going in reverse and getting songs off iPad and move onto computer is not that easy. Apple hasn't endowed iTunes with that feature on purpose to stop music sharing illegally with other people.
Fortunately for you, there are a variety of ways available to move your songs between iPad and computer, whether you're on a Mac or a Windows machine. In this tutorial we show you an easy way to transfer music from iPad to your working computer, which is essential if you need to back up the tracks locally or recreate your iTunes library. It can also be effective if your computer has crashed and want to get your music back.
Use iPad Music Transfer Software
You'll now need to choose the iPad to computer music transfer software you want to use. While a lot of utilities on the web claim to do such kind of tasks, iPhone Data Transfer is our pick.
iTransfer is a simple, cross-platform management application that makes it easy to copy songs from iPad to computer and back. It can transfer much more than just music—with it, you're able to transfer many of other types of data like video clips, movies, podcasts, photos, messages, contacts. In addition to the transfer function you will find some extra features like the ability to fix ID3 tag, delete, edit, rename, organize your media files, turn your photos and video into GIF files. It's also compatible with iPhone, iPad, Android phone and tablets.
Scroll down for our quick guide on how to back up your iPad tracks on computer, so you can free up space on your device. Related article: How to recover iPad notes.
Step 1: Connect iPad to computer
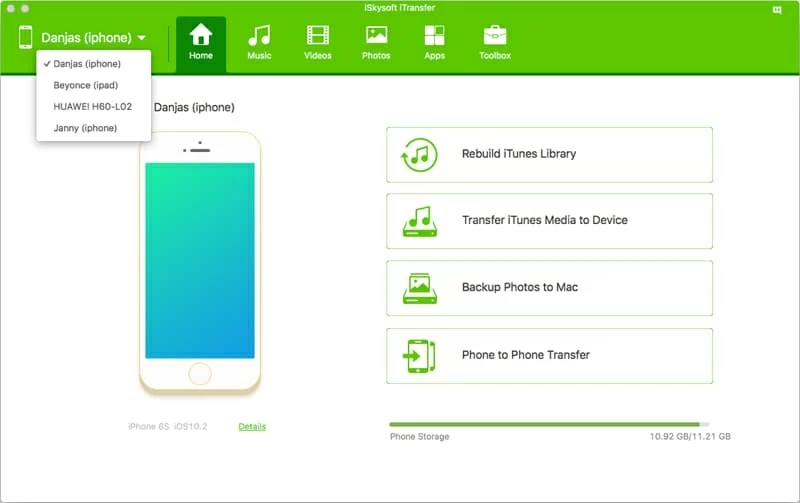
Connect your iPad to your computer via the device's USB cable. Open up iTransfer, and you will see its main interface as shown below.
Go ahead and move your mouse cursor to the upper left corner and select iPad (if you have more than one device connected).
Step 2: Select music tracks from the iPad library
Click the Music button on the top navigation bar, and this should display all tracks your iPad has on the window. This application breaks down the tracks by type, showing music, podcasts, iTunes U, and audio books in the sidebar.
Click the Music category on the sidebar, you all music files will show up on the right pane.
Next, check the boxes next to each song you want to copy to your computer from the list. If you want to move all your songs, just check the box next to Name on the top of the list.
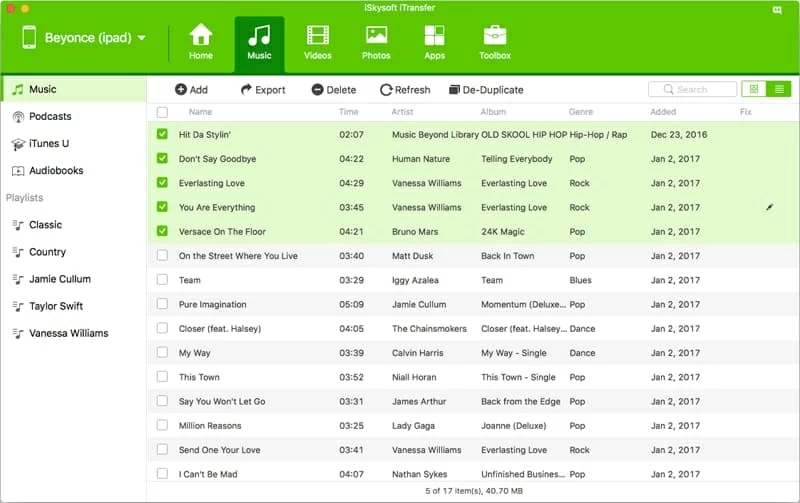
One benefit you can get from this software is you're able to fix the music ID3 tags such as name, artist, album, year, genre, track numbers. To do so, select the tune you need to fix ID3 tags, right click on it, and then select "Fix music info" option from the right-click menu.

Step 3: Start getting songs off from iPad and moving to computer
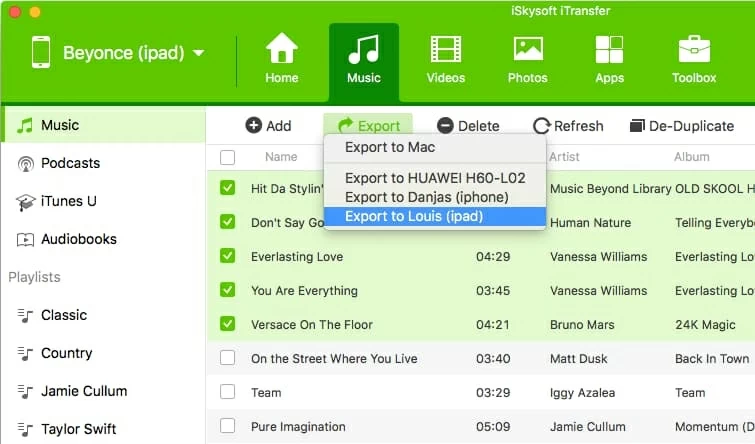
When you're ready, go ahead and click the Export button under Menu button. In its drop-down menu select the Export to Mac (it will be Export to PC if you're running a Windows machine) option.
In the dialog that opens, specify a location where you want the copied songs to be saved on your machine. After that, click the Save button in the dialog and then iPad songs to computer transfer begins.
Depending on the amount of music you have on the iPad, the transfer time may take anything from a few minutes to hours.
Once the process is finished, you can navigate to the destination folder on your computer and access all your transferred music!
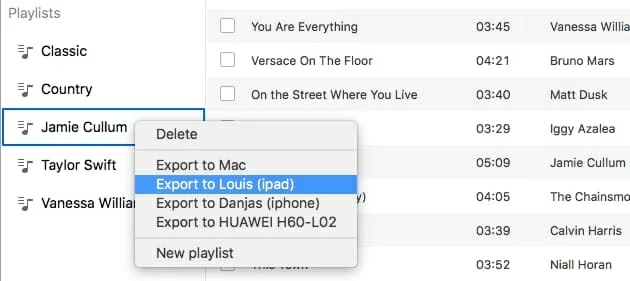
Tip: You also have options to make a full copy of music in a playlist of your choice to move onto your computer. All you have to do is select a specific playlist on the left sidebar of the screen, then export the songs via right-click menu.
Supported models: iPad 2, iPad 3, iPad 4, iPad Air, iPad Air 2, iPad (2017), iPad Mini 1, iPad Mini 2, iPad Mini 3, iPad Mini 4, iPad Pro, etc.
How to Copy All My iPhone Music to An External Drive