
How to Transfer WhatsApp Chats from Android to iPhone

iPhone does a great job of shooting nice photos. But if you want to view and edit pictures on a larger screen, then importing iPhone photos to iPad will be a good option.

What to know when transferring photos from iPhone to iPad:

Transfer iPhone photos to iPad so that you can see more details and add edition easily.
iPhone shoots some of the best photos and videos than any other smartphone out there. But, sometimes, iPhone users will want to see more details about the pictures on a larger screen. That's where iPad comes in, allowing maximum photo clarity and facilitating users to view the tiniest details of photos by zooming in and enlarging on the bigger iPad screen. So, here, we've gathered 4 quickest ways for you to get photos from iPhone to iPad without hassle:
Being the official method to sync your photos on iOS devices, iCloud keeps your videos and images secured in cloud storage. Not only does it store your iPhone photos but also constantly updates them, giving you access to your pictures anytime and from any device you want.
Besides, iCloud categorizes your photos and videos by days, months, and years, and any change you make to your collections is also synced to the iCloud and updated on every device that is connected to your Apple account.
iCloud syncs your photos over Wi-Fi. Make sure you've connected both devices to the network before you start. Here's how iCloud transfers photos from iPhone to iPad automatically:
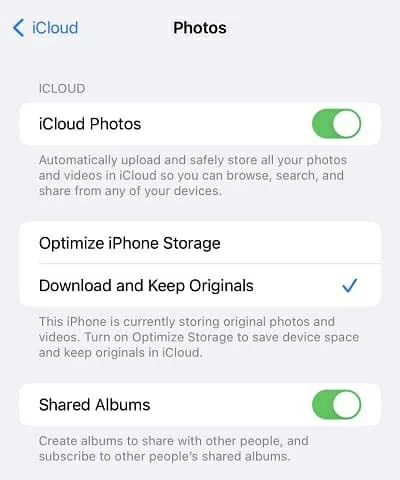
iCloud Photos sync photos automatically on both iPhone and iPad.
Note: iCloud will delete the pictures which you accidentally delete from any connected device. So be careful when you want to remove some files from iCloud storage.
By turning on the iCloud on both iPhone and iPad, your photos are automatically transferred from iPhone to iPad and shared across all the connected devices. But, be aware that you cannot store unlimited photos and videos because the standard iCloud storage that you can use for free is only 5 GB in total, which forces users to upgrade to the iCloud + service - the Apple's premium cloud subscription. Otherwise, you can try the other helpful methods below.
iCloud shares photos from iPhone to iPad in a wireless way. But if you do not want to get into the mess of not having enough cloud storage, then Phone Transfer is all you need.
Standing out as a one-stop solution for transfer, Phone Transfer offers a straightforward and quick way to make data transfer between various devices. Whether you want to move pictures from iPhone to iPad, or transfer files across platforms, you'll always find what you're looking for.
Phone Transfer does a lot more than moving data files from one device to another. Aside from transferring photos from iPhone to iPad, it can also be used to back up photos from your device on a computer or a laptop in original size for later use. Furthermore, you can retrieve your files from iCloud or iTunes anytime you want and feed your iOS devices with it.
Step 1: Choose Phone to Phone transfer mode.
Open Phone Transfer on Mac or PC. At the tool bar, click Phone Transfer > Phone to Phone.
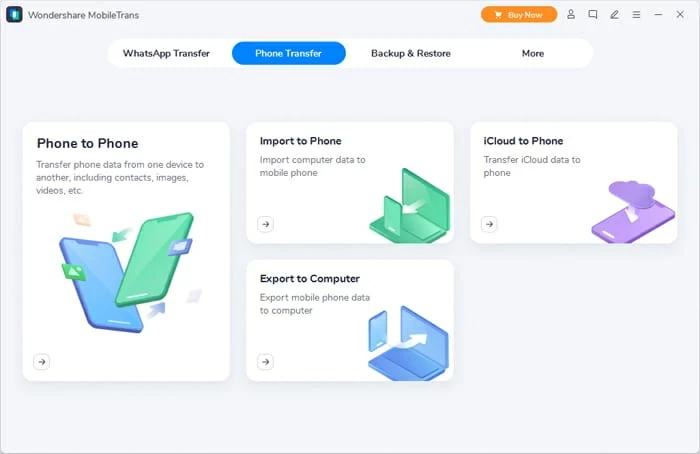
To transfer pictures from iPhone to iPad, select Phone to Phone mode.
Step 2: Connect both iPhone and iPad to your computer.
Notice that both iPhone and iPad appear on the software's interface. You can click the Flip button so that iPhone shifts to the source device and the iPad positions on the target device. And don't do anything if they are placed in the correct positions already.
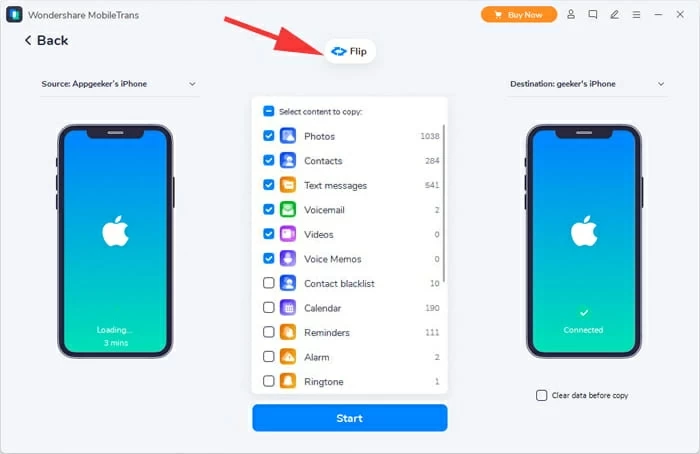
Place the source iPhone on the left, and the target iPad on the right side.
Step 3: How to get photos from iPhone to iPad in one click.
Now Phone Transfer will scan the source device and then display all the available data you can transfer. Check the Photos box and hit Start button to initiate the transferring process.
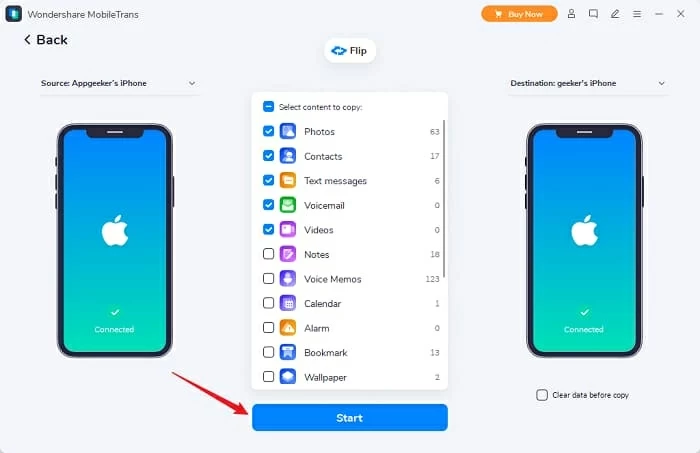
Simply select Photos and start transferring pictures from iPhone to iPad instantly.
So now you know how to move photos from iPhone to iPad with a wired connection using your computer. Once transferred, disconnect both your iOS devices, and you will find all the photos are imported from your iPhone to iPad now.
To transfer photos from iPhone to iPad, Phone Transfer is far much more efficient and versatile within a few clicks. You can get the job done without worrying to face limited storage issues. Even if you want to put your iPhone photos or videos onto other devices, Phone Transfer would also be your top pick for you since it supports 6,000+ devices and 18 different data formats.
Video Guide: How to Transfer Photos from iPhone to iPad | All iPhone and iPad
It is difficult to mention iCloud without bringing in iTunes. As an official way to transfer files and to back up and restore iDevices, iTunes can also be used to move pictures from iPhone to iPad with no doubts. Unlike iCloud requiring both cloud storage and the network, iTunes only needs a computer running Windows system or macOS 10.14 and the earlier. If you're using a Mac based on macOS 10.15 and above, then try the Finder.
Import your iPhone photos to computer first:
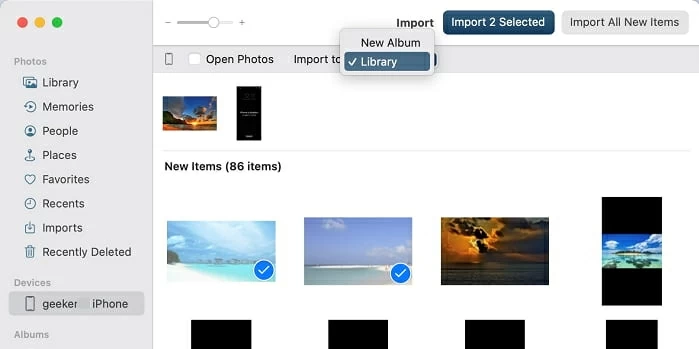
Import selected or all new items from iPhone to computer.
Move photos to your iPad from computer:

Use iTunes or Finder to move pictures from a PC or Mac computer to your iPhone or iPad.
Being fast and highly secured, the built-in feature AirDrop is also another good option that wirelessly transfers photos and files from iPhone to iPad within the Wi-Fi and Bluetooth range.
AirDrop takes the hassle out of sharing files between iDevices. It's pretty easy to build wireless connection between iPhone and iPad using AirDrop. Enabling AirDrop, you pick photos of whatever you want to transfer. Then it shows you all the available users nearby and sends the images to the exact receiver you like to share with.
1. On your iPhone and iPad, swipe up from the home screen. In the Control Center box, enable AirDrop. If asked, also activate Wi-Fi & Bluetooth.
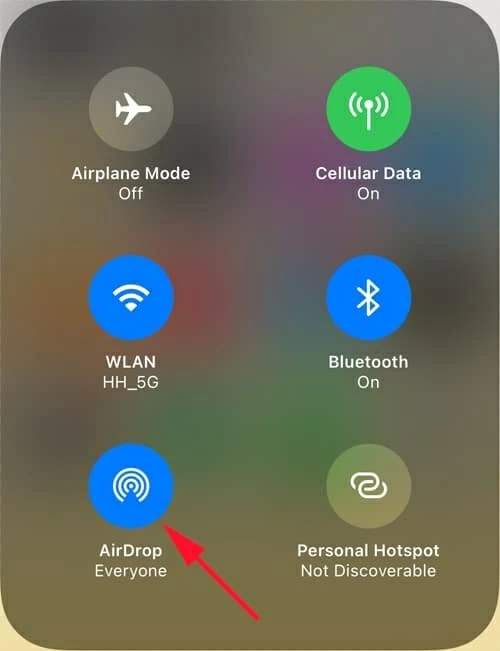
Enable AirDrop on both iPhone and iPad.
2. Launch the Photos app on iPhone and select images you want to transfer to iPad.
3. Now simply tap the Share button and select AirDrop to start the transfer process. The iPhone will display the available iDevices as options to transfer. Choose your iPad.
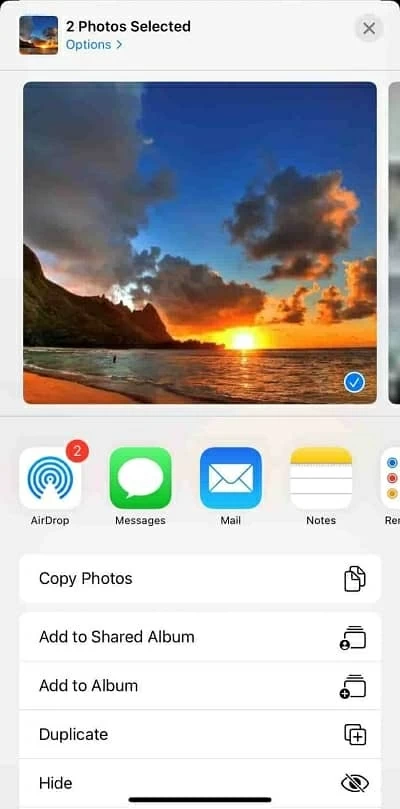
AirDrop photos from iPhone to iPad.
4. Finally, on the iPad, tap Accept button to receive the pictures.

Accept photos from iPhone on your iPad.
It is as simple and easy as it gets, you can move photos, documents, or any important files from your iPhone to your iPad, and also other Apple devices.
So that's the 4 different methods you can use to make photo transfer from iPhone to iPad with or without computer. Each way has its offerings. Try the one that suits you best. If you'd also like to keep your iPhone or iPad photos on your computer for a backup, or want to transfer pictures between devices or across platforms painlessly, then Phone Transfer would be an excellent option that you may like to consider first.