
How to Transfer Music from iPad to iPhone

Want to transfer some ringtones from iPhone to iTunes library? Read this guide to see how to transfer ringtones from iPhone to iTunes with or without wire.


There are various ways to help you transfer iPhone ringtones from iPhone to iTunes on either Windows or Mac.
Transferring ringtones from an iPhone to the iTunes library offers users a convenient way to manage and personalize their iPhone ringtones. iPhone users may transfer ringtones to the iTunes library as a means of backing up their preferred tones, ensuring they can be easily restored or transferred to a new device.
Below, we'll show you step-by-step how to move ringtones from iPhone to iTunes. Aside from just introducing the traditional method - iTunes, we'll also introduce you to Appgeeker iPhone Data Transfer, a trust-worthy ringtones transfer tool, supporting transfers across iPhone and PC.
Table of Contents
iTunes is a versatile media management software that allows users to organize and play music, movies, and transfer ringtones from iPhone devices to the iTunes library.
While this feature enables seamless ringtone transfer from iPhone to iTunes library, it supports only those ringtones that have been purchased from iTunes Store. Before getting started, make sure you have downloaded the latest version of iTunes.
Note:
Here's how you can use iTunes to transfer ringtones from iPhone to iTunes library:
Step 1. Connect your iPhone to your computer using a USB cable. Plug one end of the cable to your iPhone, and the other end to your computer's USB port.
Step 2. Launch iTunes on your Windows or Mac computer.
Step 3. Click on File from the top menu > Devices > Transfer Purchases from [your iPhone's name]. This action will transfer the purchased ringtones from your iPhone to the iTunes library.
![]()
After completing these steps, the purchased music from your iPhone should be transferred to your iTunes library, including ringtones. If you want to play purchased ringtones in the iTunes library, follow the below steps to authorize your computer.
1. Click on the Account tab located at the top of the screen > Select Authorizations from the drop-down menu > Choose Authorize This Computer.
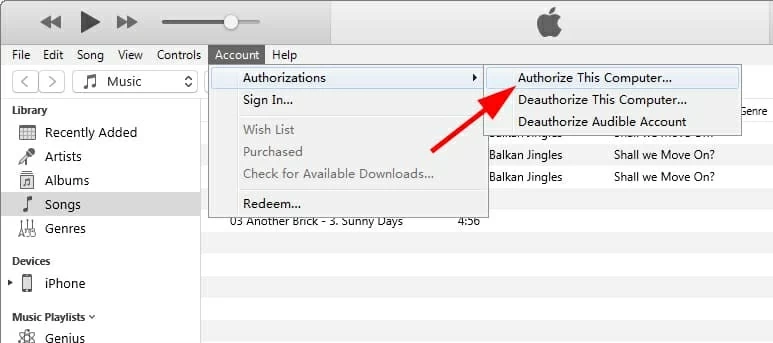
2. Enter your Apple ID and password associated with your iTunes account.
3. Click on the Authorize button to confirm the authorization.
Also read: How to fix when iPhone is unavailable
iTunes only supports transferring purchased ringtones from iPhone to iTunes library. If you want to transfer free ringtones downloaded from other sources on iPhone to iTunes, you will need iTunes alternative software, like Appgeeker iPhone Data Transfer.
For most iOS device users, the reason they transfer ringtones from their iPhone to iTunes goes beyond just backing up their iPhone, but to prepare for the subsequent ringtones transfer to computer or another new iPhone. With iPhone Data Transfer, you can easily carry out all data transfers from iPhone to iTunes, iPhone to PC, iPhone to iPhone, or more.
iPhone Data Transfer - Transfer ringtones from iPhone to iTunes
Let's see how to transfer ringtones from iPhone to iTunes library with iPhone Data Transfer:
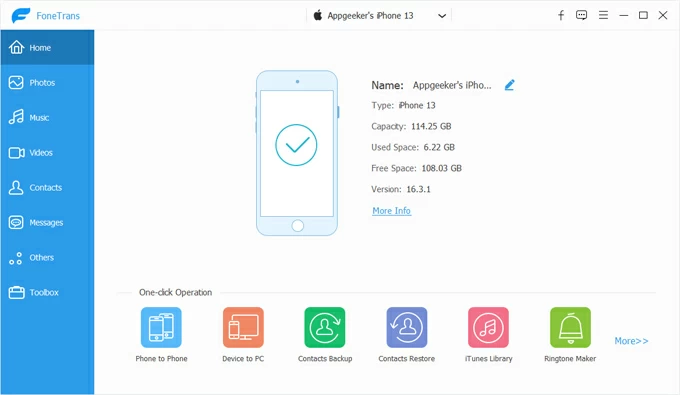
Step 1. Download and install iPhone Data Transfer to your PC.
Step 2. Connect your iPhone to your computer using a USB cable. It's the same cable you use to charge iPhone. Then, launch the app.
Step 3. Navigate to the Music tab in the left sidebar to access your iPhone's music library. Then click on Ringtones, all ringtones on your iPhone will be loaded here in the list.
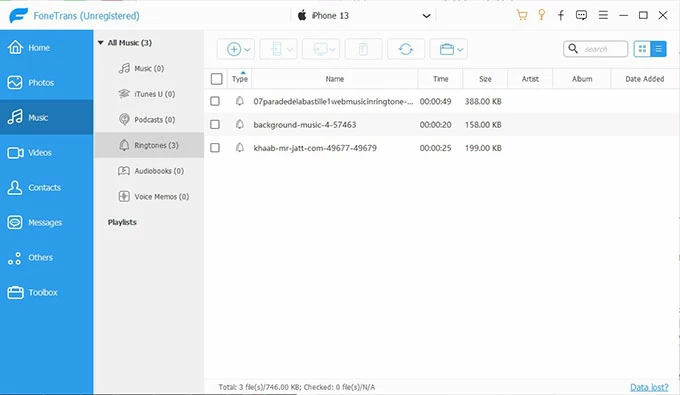
Step 4. Check the box next to the ringtones you want to transfer from iPhone to iTunes. To select all ringtones, simply tick the check box next to Type in the upper left corner of the right pane.

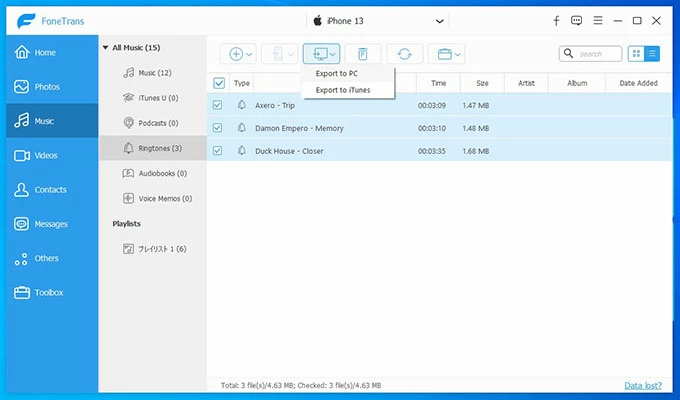
Step 5. Click on the computer icon in the toolbar at the top of the music list > Choose Export to iTunes from the drop-down menu. If you'd like to transfer ringtones from iPhone to PC, then click on Export to PC option.
Note:
Surprisingly, email can also be used to transfer ringtones from an iPhone to the iTunes library. To do so, you need to first send the ringtones to your own email address. Then, log in to your email account on your computer and download the received ringtones files. Finally, add the files to the iTunes library on your PC.
Here's how to transfer ringtones from iPhone to iTunes library via Mail:
Attach Ringtone Files to an Email and Send to Yourself
1. Launch Files app on your iPhone, Select the ringtone you'd like to transfer from iPhone to iTunes > Tap Share button at the bottom left of the screen> Choose Mail.
2. Enter your own email address as the recipient.
3. Tap the Send button to send yourself the email.
Download the Ringtone on Your PC and Add to iTunes Library
1. Log in to your email account through a web browser, or any email client on your PC.
2. Locate the email you sent to yourself containing the attached ringtone file, and then download the ringtone.
3. Open the iTunes app, Click on File at the top menu bar > Select Add File to Library option.
4. Select the ringtone file from your computer's file system, and then click on Open.
Now you have transferred the ringtone file from iPhone to the iTunes library.
Note:
Tip: If you want to record the audio playing online for offline use, such as sound from live streaming, or game videos, you may need AppGeeker Screen Recorder to capture and save them to your computer. See our article on how to record MP3 audio files in Windows 10.
1. Can I transfer iPhone ringtones from iPhone to iTunes via AirDrop?
It is not possible to transfer ringtones directly from an iPhone to iTunes using AirDrop. AirDrop is primarily designed for sharing files between Apple devices wirelessly, but it doesn't have built-in functionality to transfer tones specifically to iTunes.
2. How do I transfer ringtones from iPhone to computer?
3. How to set new iPhone ringtones?
To set a new ringtone on your iPhone, follow these steps. First, open the Settings app on your iPhone. Scroll down and tap on Sounds & Haptics or Sounds. In the Sounds and Vibration Patterns section, tap on Ringtone. Then, select the ringtone you'd like to use.


