
Why is my Apple ID password not working


You don't need a fancy cloud subscription or a degree in tech support to free up space on your iPhone 18. Transfer photos to your computer with these simple methods and tools.

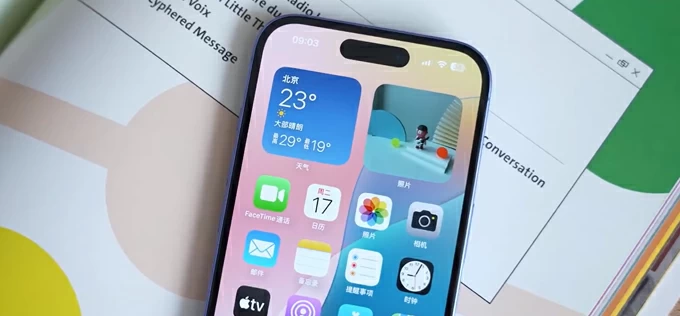
Depending on your specific scenario and needs, there are multiple ways to transfer photos from an iPhone 18 to a PC.
Let's be real—if you own an iPhone 18, your camera roll has probably taken on a life of its own. Between snapping quick pictures of your morning coffee, screenshotting memes, and capturing those spontaneous sunset shots, your storage bar has been flashing warnings for weeks. You love having everything at your fingertips, but the constant "Storage Almost Full" notification is getting old. It's that familiar moment where you realize your phone isn't just a phone anymore; it's a digital scrapbook that's bursting at the seams.
That's where your PC steps in. Transferring photos from your iPhone 18 to your computer isn't just a chore; it's a digital deep clean. Plug in, breathe, and finally sort the keepers from the duplicates. A quick offload gives your phone the fresh start it deserves—no more storage anxiety, no more deleted-memory regrets.
In this article, we'll show you how to transfer your iPhone 18 photos to your PC using different methods. If you're looking for a quick, batch-transfer solution that takes minimal effort, give Appgeeker iPhone Data Transfer a try.
Like the Android ecosystem, Apple also lets you manually copy photos directly out of the iPhone 18's internal gallery to your PC—all you need is a USB cable. The only downside is that it sorts all your photos into multiple folders, so you have to open them one by one to find the images you want to transfer. It's not the most straightforward way to get the job done.
Get your computer ready, connect your iPhone 18, and follow these steps to transfer the photos:
1. Unlock the phone with screen lock passcode.
2. Open File Explorer, find your iPhone under This PC and double-click it.
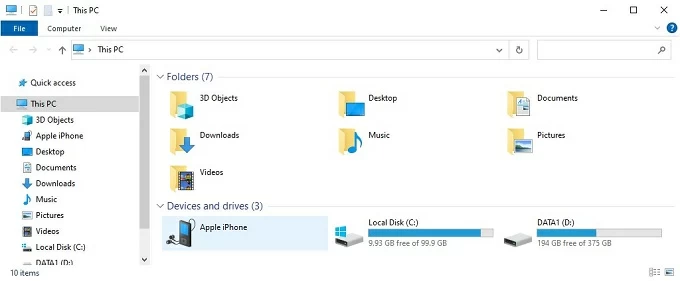
3. Locate the DCIM folder. All your pictures are stored inside multiple subfolders within it.
4. Open each subfolder one by one, select the photos you want, then copy and paste them to a folder on your computer.
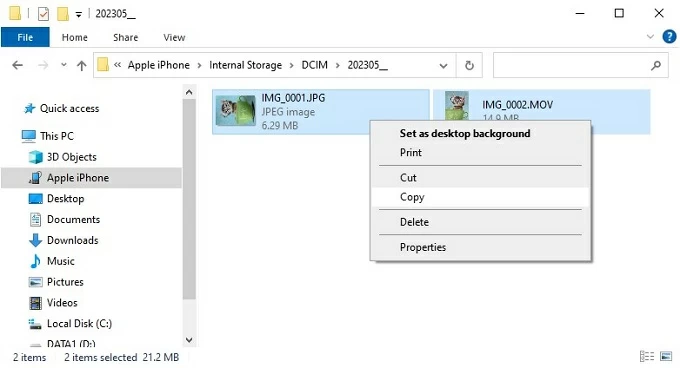
If you have a large number of photos to export, this process can be quite time-consuming.
See also: Forgot iPad passcode
Unlike simply browsing the DCIM folder where photos are scattered across multiple dated subfolders, the Windows Photos app aggregates everything into a single, timeline-based view. This allows you to easily browse, select, and import your iPhone 18 pictures into Windows PC without having to dig through confusing file directories.
It provides a more intuitive, gallery-like experience for transferring your images, though it may take some time to process if you are dealing with a large volume of high-resolution photos.
1. Unlock your iPhone 18 and plug it into the computer with a USB cable.
2. If a prompt appears on your phone, tap Trust to grant the computer access to your device.
3. Open the Photos app on your Windows PC.
4. Click the Import button at the top-right corner, then select From a connected device.

5. The app will scan your iPhone 18. You can choose to import all new photos, or click Select to pick specific pictures manually.
6. Set your preferred destination folder on the computer, then click Import to start transferring selected photos to PC.
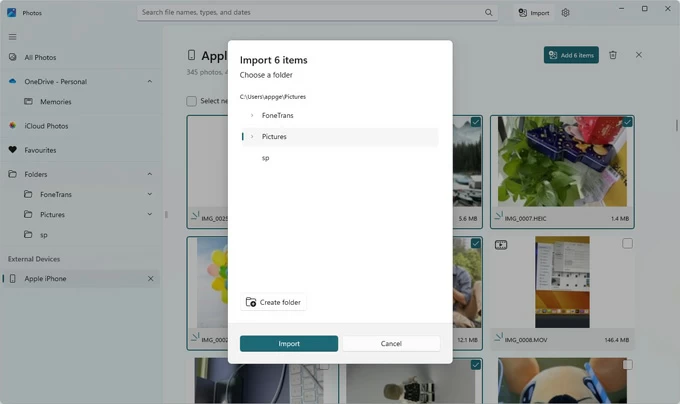
Wait until the process finishes. You can view all imported photos inside the Windows Photos app afterward.
Make sure your iPhone 18 is unlocked throughout the whole transfer process; if the device locks mid-transfer, the import may fail or disconnect. Once the import finishes, safely eject your device before unplugging the cable. Also, transferring a large number of high-resolution photos will take longer, and you need sufficient free storage space on your computer.
Don't like the way Windows offers? For those who are looking for a more efficient and organized workflow, Appgeeker iPhone Data Transfer provides a professional-grade solution that outperforms standard Windows tools. Unlike the native Photos app, which can struggle with large volumes of data, Appgeeker iPhone Data Transfer is optimized for high-speed transfers without compromising image quality. It presents your entire photo library in a clear, timeline-based layout—similar to what you see on your iPhone—eliminating the need to hunt through confusing folders.
Furthermore, it offers flexible options to transfer your iPhone 18 photos to your PC, external drives, or even directly between devices, making it the ultimate tool for managing your visual memories
The software offers a clean, intuitive interface that lets you preview and select exactly what you want to transfer in seconds, no matter it's an image, song, or video.
Follow these steps on how to transfer photos from an iPhone 18 to a PC.
Step 1. Download and install the software on your Windows PC, then launch the program.
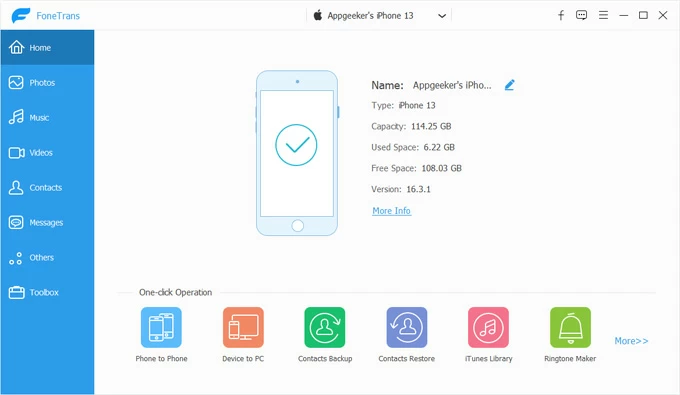
Unlock the iPhone 18 and connect it to the computer via a USB cable.
Step 2. From the left sidebar of the software's main interface, click the Photos module to load your iPhone photo library.
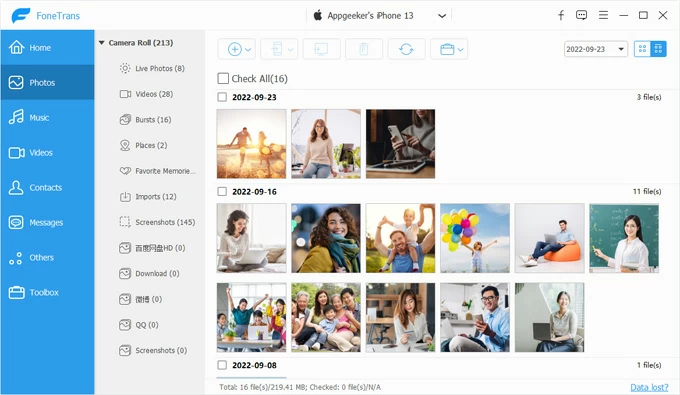
Step 3. Browse photos by album, date, or category. Select the specific pictures you want to transfer, or use Check All to choose the entire library.
Step 4. Click the Export to PC button and choose your target folder on the computer.
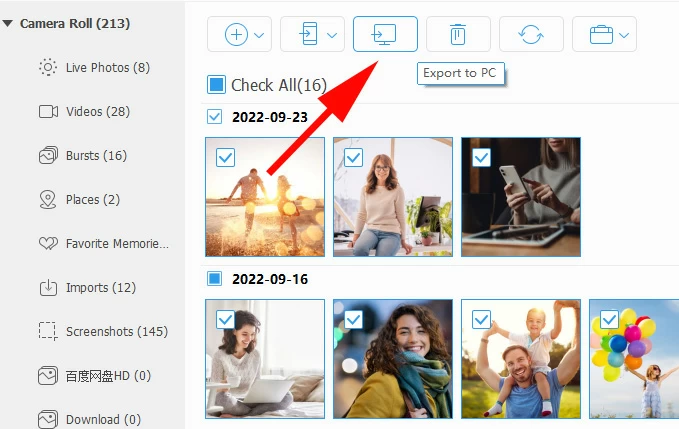
Wait for the transfer to complete. All selected photos will be saved to your specified location on your computer with original quality preserved.
You can also use its right-click context menu to export selected pictures.
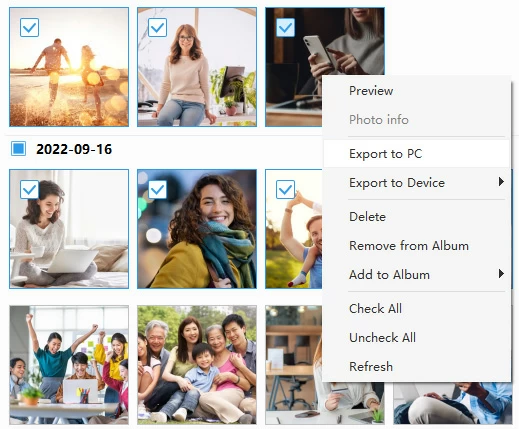
Alternatively, right-click on a specific album to transfer an entire folder of pictures.

See also: iMessages disappeared from iPhone
For users who want to eliminate the hassle of USB cables entirely, iCloud offers a seamless, wireless solution. As Apple's native cloud service, it keeps your photo library synchronized across all your Apple devices automatically.
Instead of manually connecting your iPhone 18 to a computer for photo transfer, you can simply install iCloud for Windows on your computer and enable iCloud Photos. Whenever you have an internet connection, you can easily browse and download your pictures on iPhone 18 to any computer.
1. On your iPhone, go to Settings > tap your Apple Account > iCloud > Photos, then turn on Sync this iPhone. Your photos will start uploading to iCloud automatically.
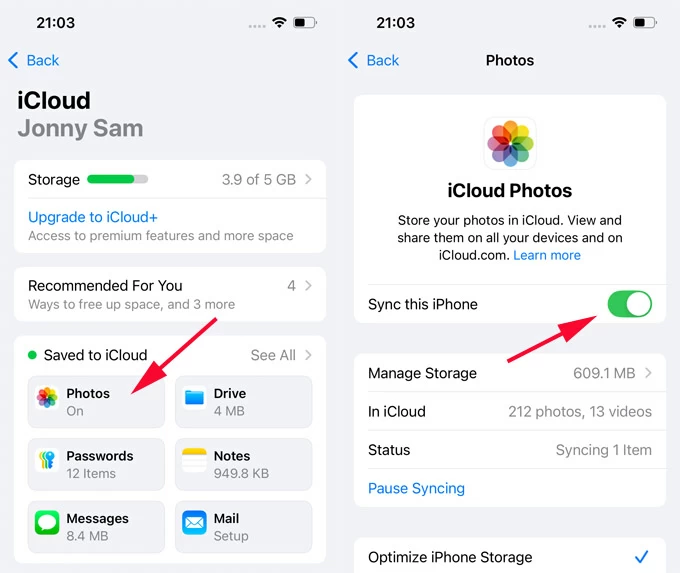
2. Make sure your iPhone is connected to stable Wi-Fi. Uploading a large photo library may take hours or longer depending on your network speed.
3. On your computer, download and install iCloud for Windows from Microsoft Store, then sign in with your Apple ID.

4. Tick Photos and click Apply. iCloud will sync your photo library to the PC.
5. Open File Explorer, find iCloud Photos folder, then copy the pictures to other folders on your computer.
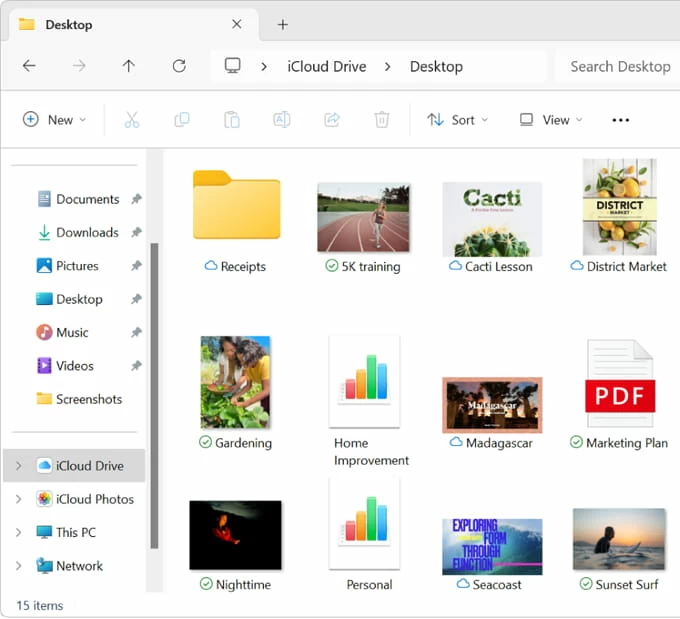
Optional: download photos from iCloud
You can also open a browser on your Windows PC, visit iCloud.com, then sign in with the same Apple ID used on your iPhone to download photos stored on the iPhone 18.
1. Click the Photos icon to open your iCloud photo library.
2. Browse albums or the full library, select the pictures you need. You can hold Ctrl and click to pick multiple photos, or select an entire folder of pictures.
3. Click the Download button and choose a destination folder on your computer.
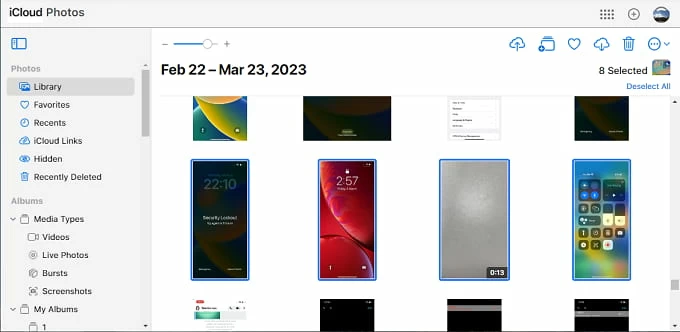
4. Wait for the download to finish. All photos will be saved to your PC in original quality.