
How to reset iPhone in Security Lockout mode

Want to get a real simple way to download your pictures and videos from your iPhone SE to your Mac? Here are the best ways to move your images over to macOS.

For those who need a simple and quick way to move your photos from an iPhone SE to a Mac, you can't miss Appgeeker iPhone Data Transfer, which gives you granular, bidirectional control to transfer specific photos or entire albums directly between your iPhone and Mac without forcing a full, rigid iCloud or system library sync.
You can import your iPhone SE photos to Mac to free up space or back up your memories for safekeeping,
Imagine this: Your iPhone SE storage is full but you don't want to store the photos and videos in iCloud. You then try sending them to your MacBook via AirDrop, but it is unreliable, especially when you're transferring more than 100 photos at once. It just transfers some but not all selected items. Opps...
When your iPhone starts running low on space, or if you simply want to back up your precious memories you take in vocation, moving those photos on the iPhone SE to your Mac is the logical next step. Fortunately, the deep integration within Apple's ecosystem makes this relatively painless. Depending on whether you prefer a quick wireless transfer, a bulk wired import, a complete backup solution, or a cloud-based sync, there are several ways to get the job done.
In this guide, we will walk you through the five best methods to transfer photos from your iPhone SE to your Mac, utilizing built-in macOS utilities, wireless protocols, Apple's iCloud, and powerful third-party alternatives.
Related: How to fix iPad Unavailable screen
If you have a USB cable nearby and don't want to install extra software to import your iPhone SE photos on a MacBook or iMac, the native macOS Photos app is your best option.
To get your pictures onto your Mac, just plug your iPhone SE in with a USB cable and open up the Photos app. Pick your phone as the source—it'll load you all the new photos you haven't previously been imported yet. Then, just choose your favorites (or grab them all) and save them to your library!
This will handle as many photos as you have on the phone and have room for on the Mac, making it ideal for transferring large batches of photos and video files without relying on internet speeds.
Here're detailed steps to transfer photos from iPhone SE to a MacBook, iMac, or Mac Mini.
1. Plug your iPhone SE into your Mac using a lightning-to-USB (or USB-C) cable. If this is your first time connecting the two devices, unlock your iPhone and tap "Trust" when the "Trust This Computer" prompt appears on your screen, then enter your passcode.
2. Open the Photos app from your Mac dock if it doesn't launch automatically.
3. Look at the sidebar on the left side of the Photos window. Under the Devices section, click on your phone name.

4. Select whether you want to import the photos to your main library or a specific album under "Add To" drop-down menu in the top of the window.
5. To transfer all new photos that're not imported yet, click the "Import All New Items" button in the top-right corner. Alternatively, click on individual images to highlight them, then click "Import Selected."
Once the transfer completes, a dialogue box may ask if you want to delete the imported photos from your iPhone SE or keep them. If your device is almost full, you will want to click "Delete Items" to instantly free up storage.
While Apple's native utilities cover standard workflows, power users often find them restrictive. If you want full granular control over your device media, manage your phone library, or the ability to export photos and other personal information (contacts, texts, notes, calls, etc.) without syncing issues, a premium third-party tool like Appgeeker iPhone Data Transfer is the gold standard.
With it, you don't have to store your iPhone SE photos as a library in your Mac, but more like a folder in Finder that you can back up and move as required. It even supports bidirectional transfer, allowing to add photos, videos, and music back to your iPhone through drag-n-drop and click-to-add. It works well on both PCs and Mac.
To move iPhone SE photos to Mac with Appgeeker iPhone Data Transfer, do the following:
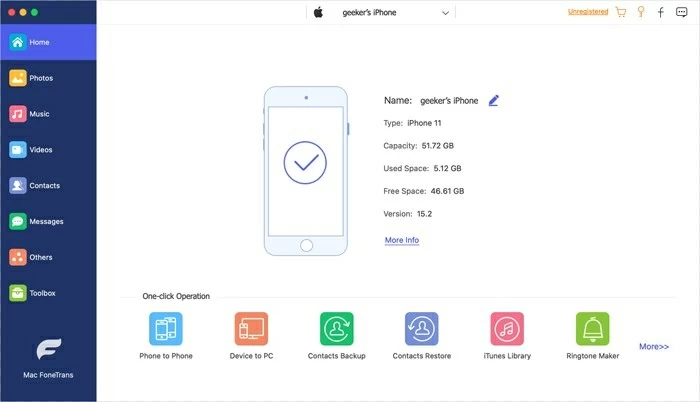
Step 1: Download, install, and open the tool on your Mac
Launch the tool on your computer, then plug your iPhone SE in via USB.
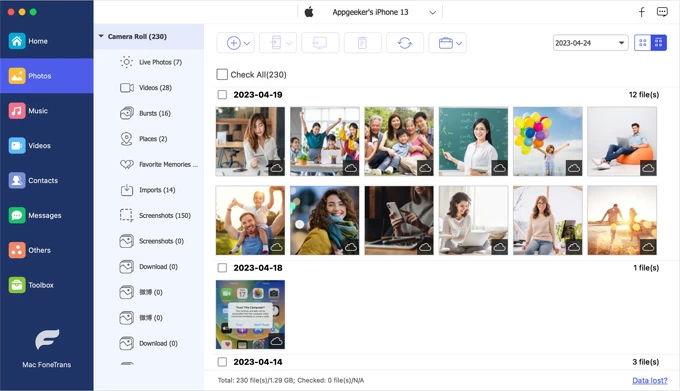
Step 2: Load picture library
Click on the "Photos" entity from sidebar menu. Wait a few seconds for the tool to load your photo library.
Unlike native apps, Appgeeker iPhone Data Transfer categorizes your media library by specific parameters—including Albums, Media Types (like Live Photos, Places, Burst shots, Screenshots, or Download), and even a specialized timeline view.
Step 3: Export photos from iPhone SE to Mac
Check the small boxes located in the upper left corner of the images to select items you wish to download, then click the "Export to PC" icon in the top taskbar.
Alternatively, tick "Check All" to select all mages in this album.
A dialog will slide out, letting you choose your target folder on macOS and confirm.

The application will execute a highly stable, high-speed transfer complete with progress tracking.
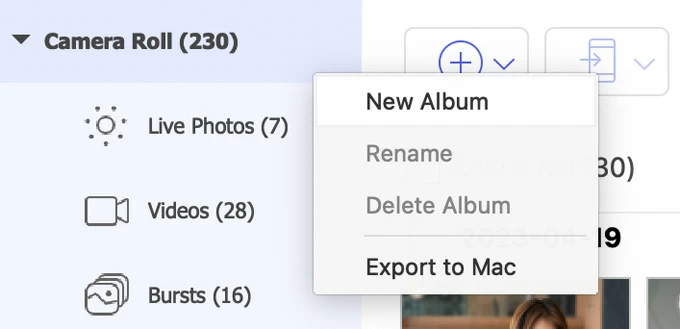
Bonus: Right-click on any photos or albums, you have more options to handle different tasks, including the ability to export to another iPhone or iPad, preview, move to another album, delete, or check metadata.
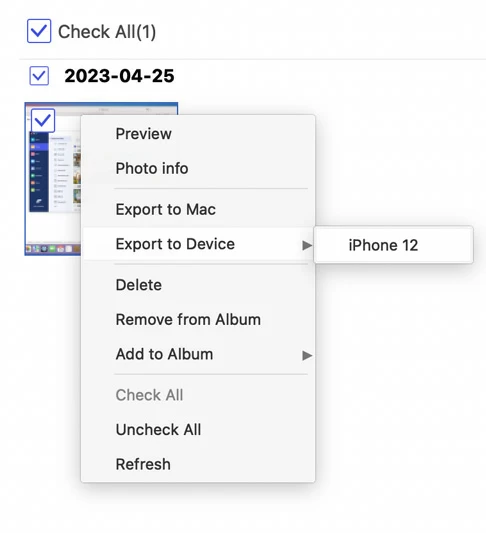
For those who want to import everything in a specific album at once, you can also right-click on that album, from its context menu, select "Export to Mac."
Related: How to transfer videos from laptop to iPhone
When you only need to move a handful of recent snapshots, a single screenshot, or a quick video clip, plugging in a cable can feel like overkill. AirDrop, instead, always performs better in speed and convenience. It transfers photos between your iPhone SE and Mac without any compression or quality loss.
However, AirDrop can be super finicky when transferring in batches exceeding 1000 images.
1. Set "Allow me to be discovered by" to Contacts Only or Everyone on your Mac.
2. Open the native Photos app on your iPhone SE.
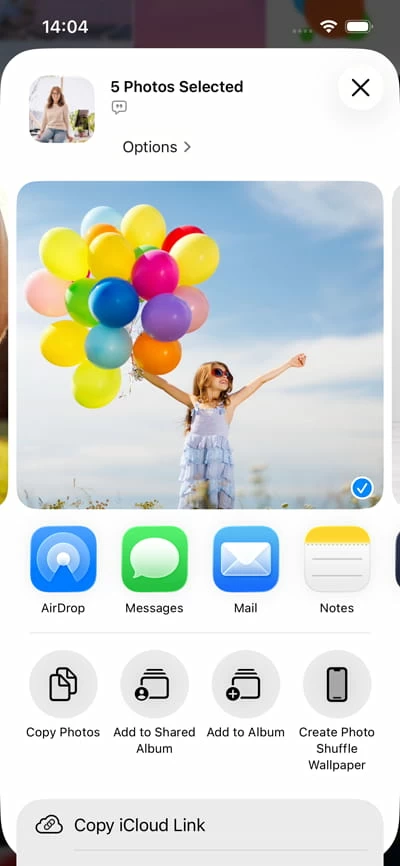
3. Browse through your photo library and highlight the specific images you want to send.
4. Tap the "Share" icon located in the bottom-left corner of the interface.
5. Select "AirDrop" from the row of sharing options. You will see a list of nearby compatible Apple devices.
6. Tap your Mac's icon or name from the list.
7. A notification will pop up on your Mac, and the transferred images will automatically save directly into your Mac's Downloads folder. If both devices are not registered with the same Apple ID, you may need to click "Accept" before transferring.
While the native macOS Photos app forces you to move your iPhone SE pictures into your Mac's locked, structured database library, another macOS hidden gem - Image Capture lets you organize videos and photos directly into standard Finder folders, external hard drives, or custom desktop directories.
Now, here's how you can transfer pictures from iPhone SE to mac with Image Capture.
1. Link your iPhone SE to your Mac and unlock your mobile device.
2. Simply search for Image Capture using Spotlight to open it.
3. Click on your iPhone SE under the Devices section on the left sidebar.
4. After a brief loading period, a clean, spreadsheet-style list of every photo and video file on your device will populate the window.
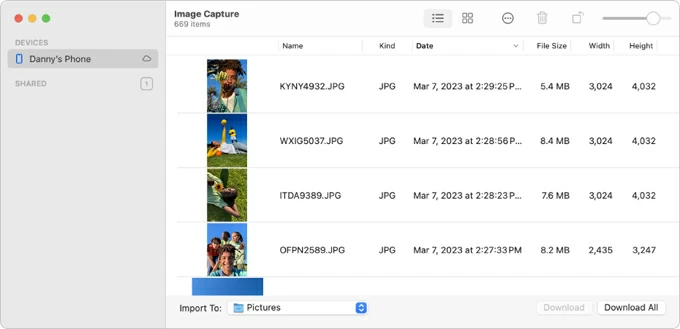
5. Highlight individual photos you need, then click "Download" button in the bottom right corner. If you want to grab the entire library where includes all your favorite photos and video clips, simply click "Download All" button.
By default, your iPhone SE images will saved into a Pictures folder on your Mac. But you can head to "Import To" drop-down menu in the bottom left side and select Other... to map the transfer to any folder or an attached external drive.
Related: iMessages missing on iPhone
Given that you have enabled iCloud Photos feature on your iPhone SE, any photos you take on the phone will automatically sync with iCloud and can be accessible across all your Apple devices sharing the same iCloud credentials.
To download individual images onto your Mac, accessing iCloud through a web browser is incredibly straightforward.
1. On your Mac, open Safari, or any preferred web browser and go to iCloud.com.
2. Sign in with the same Apple ID and password. If you have two-factor authentication enabled, enter the verification code sent to your iPhone SE.
3. Click on the "Photos" icon from the grid of web applications.
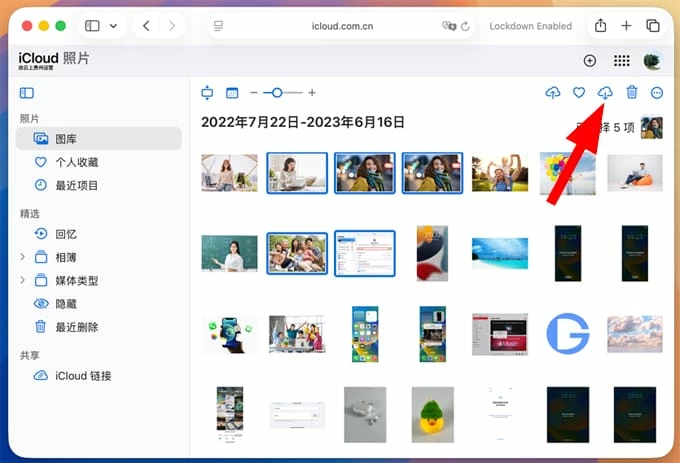
4. Browse through and click on the photos you want to copy into Mac, click the "Download" icon (a cloud with a down arrow) on the top toolbar.
Generally, it will pull the images directly into your Mac's local Downloads folder instantly.


