
How to find old text messages on iPhone


There're many reasons to copy your iPhone SE photos to laptop: to free up storage, back up memories, or edit on a bigger screen. It's simpler than you think. Here's how.

Whether you are clinging to the classic home button on a 2nd or 3rd generation model or still rocking the original pocket-sized compact classic, the iPhone SE remains one of Apple's most practical devices. However, with limited base storage—often starting at just 64GB—high-resolution photos and 4K video clips can rapidly fill up your device's memory.
You can use USB cable, cloud sync, and reputable third-party tool to download pictures on iPhone SE to laptop.
Moving your photo library from an iPhone SE to a laptop is the best way to free up valuable internal storage, back up priceless memories against accidental loss, and prepare photos for detailed editing on a larger display.
While Apple makes moving photos from iPhone SE to laptop that's running macOS straightforward, transferring photos to a PC or customizing how those photos are organized can occasionally throw up roadblocks.
In this guide, we break down every reliable method to transfer photos from your iPhone SE to your laptop—both Windows and macOS, including native USB transfers, cloud syncing, and deep management using powerful third-party tools like Appgeeker iPhone Data Transfer.
If you are using a laptop running Windows 10 or Windows 11, you can transfer photos from iPhone SE directly without installing extra subscription software. Windows offers two native ways to do this: the Windows Photos app and File Explorer.
Step 1. Connect your iPhone SE and trust the laptop
Plug your iPhone SE into a spare USB port on your laptop using a reliable Lightning cable. Unlock your phone screen. A pop-up prompt will appear on your phone asking: "Trust This Computer?" Tap Trust and enter your passcode. Without this step, your PC will not be granted access to the iPhone's storage media.
Step 2: Import using the Windows Photos app
1. Launch the Photos app from your Windows Start menu.
2. Click the Import button located in the top-right corner of the window.
3. Select From a USB device and choose your iPhone SE from the list.
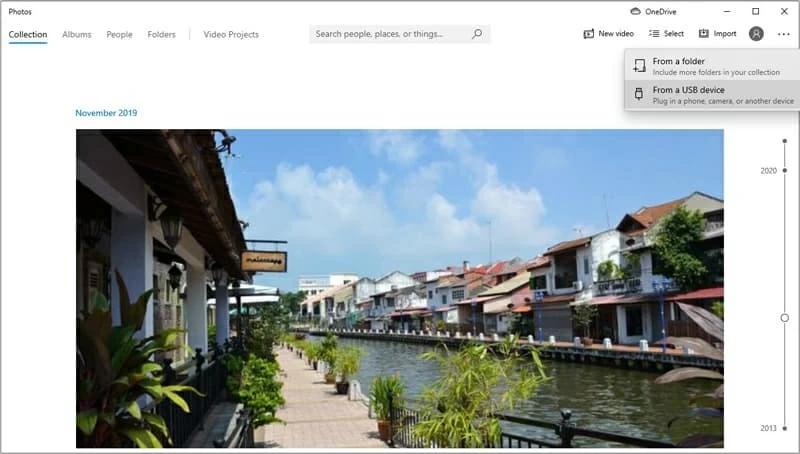
4. Windows will scan your device for media files. Once loaded, you can select specific photos or click Select All.
5. Choose your target destination folder and click Import Selected.
Step 3: Alternative manual export via File Explorer
1. Open File Explorer.
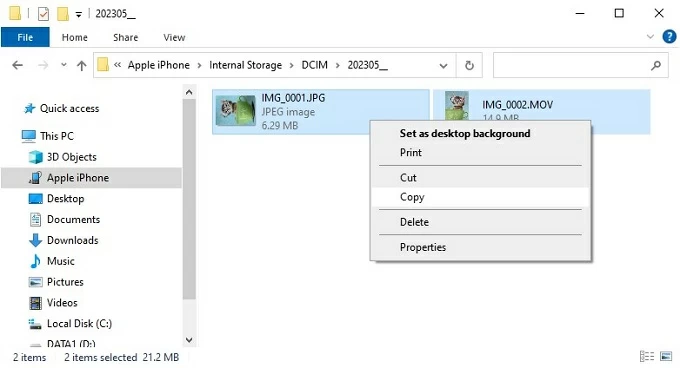
2. Navigate to This PC in the left sidebar and double-click Apple iPhone.
3. Open Internal Storage, then navigate into the DCIM folder.
4. Inside, you will see subfolders labeled like 100APPLE, 101APPLE, or date-based structures.
5. Highlight the desired photos, copy them (Ctrl + C), and paste them (Ctrl + V) into your preferred local laptop folder.
Related: Photos not showing up on iPhone camera roll
For users running a MacBook, Apple provides built-in utilities designed for high-speed local transfers without relying on iCloud. In macOS environment, we will use Photos app and Image Capture.
Step 1: Transfer via Photos app
1. Connect your iPhone SE to your MacBook using the appropriate cable.
2. Open the Photos app on your Mac.
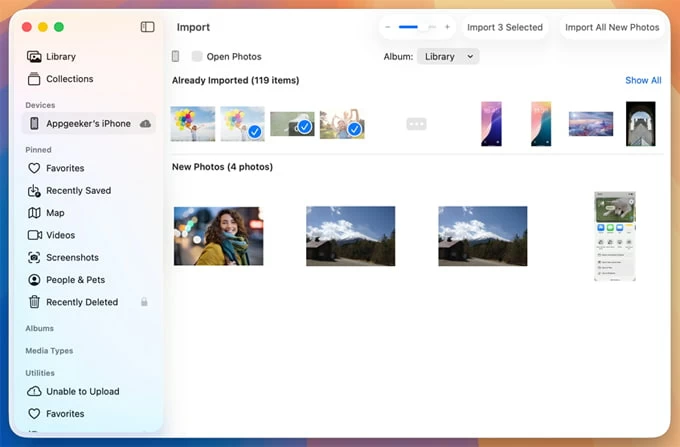
3. Your iPhone SE should appear under the Devices heading in the left sidebar.
4. Select the device. The main window will display all photos and videos currently stored on your phone that have not yet been imported to the Mac.
5. Choose an existing album or create a new one, then click Import Selected or Import All New Photos.
Step 2: Alternative import via Image Capture
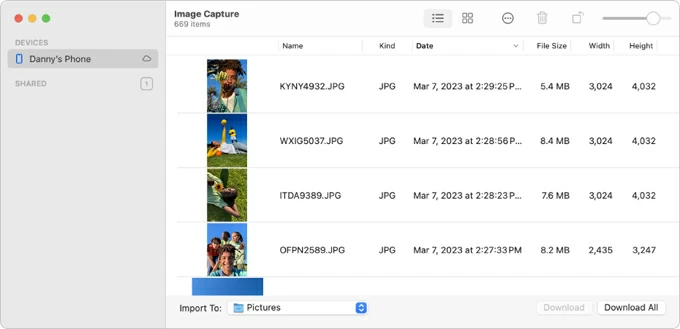
If you want to bypass the Mac Photos library database and export raw image files directly into specific Finder folders, follow these steps:
1. Open Image Capture app from Application folder.
2. Select your iPhone SE from the left panel.
3. At the bottom of the window, choose your desired destination folder via the Import To dropdown menu.
4. Select individual photos or click Import All.
Related: How to transfer music from Mac to iPhone
While native tools work well for basic needs of transferring your iPhone SE pictures, they can be rigid. Windows File Explorer often crashes when importing thousands of photos simultaneously, and the Windows Photos app sometimes fails to convert Apple's HEIC image format into standard JPEGs.
This is where Appgeeker iPhone Data Transfer comes in. As a comprehensive iOS device management software for both Windows and Mac, it offers granular control over media exports, preserves original folder structures, converts formats on the fly, and exposes hidden metadata.
One of great thing is that it supports two-way transfer, which means you can import media files (photos, videos, music) to and from your iPhone.
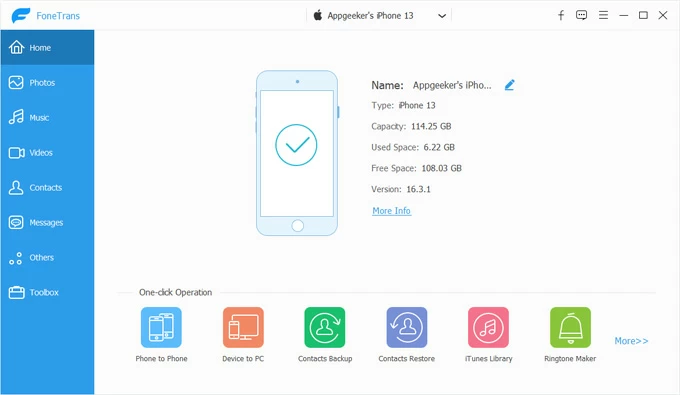
1. Connect Your Device and Establish Pairing
To transfer photos from iPhone SE to laptop, first of all, connect your iPhone SE to your laptop via USB, and then launch the software.
2. Navigate to the phone's photos library
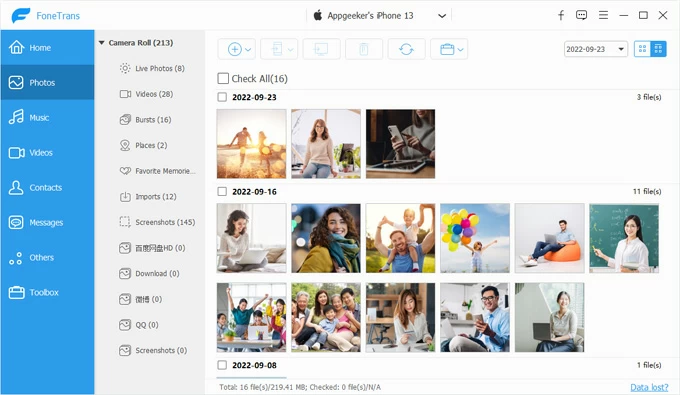
In the software's main sidebar, click on the Photos icon. It will load your entire photo library, including screenshots, burst shots, live photos, and custom albums.
3. Export photos
Select the photos or albums you wish to transfer. Click the Export to PC (Windows version) or Export to Mac (macOS version) button in the top action bar.
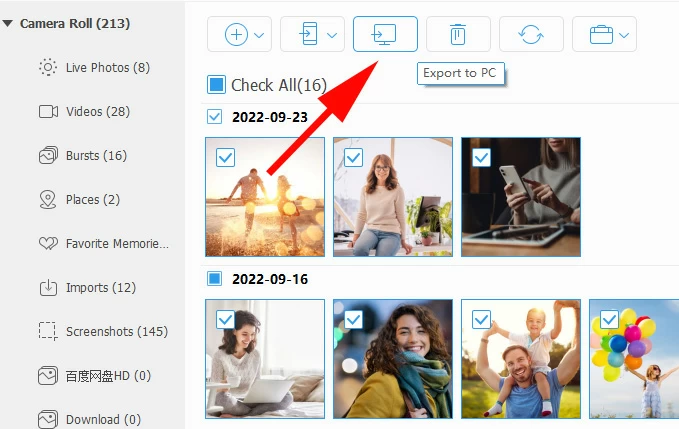
When prompted, choose your target destination folder on your laptop's hard drive.
Appgeeker iPhone Data Transfer will process the transfer, displaying a live progress bar. Unlike native Windows tools, if a single file is corrupt, it skips it gracefully without freezing the entire transfer queue.
Related: iPad unavailable no timer
If you prefer to skip cables entirely, cloud services allow you to sync your iPhone SE photos with laptop automatically in the background whenever your phone is connected to Wi-Fi.
Use Apple iCloud for Windows / macOS
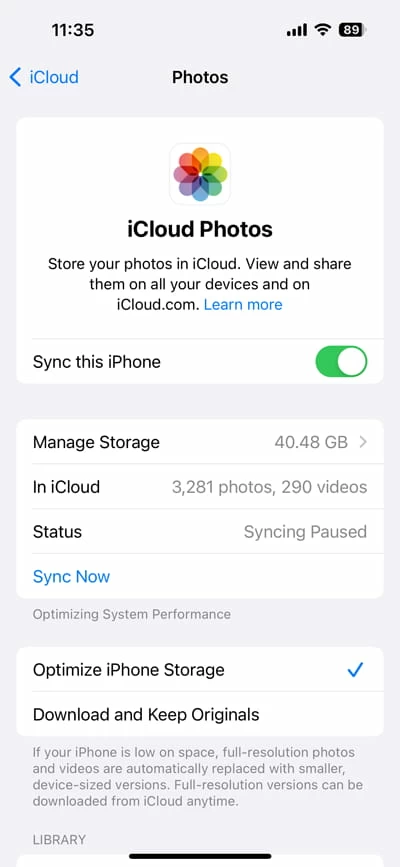
1. On your iPhone SE, go to Settings > [Your Name] > iCloud > Photos and toggle on Sync this iPhone.
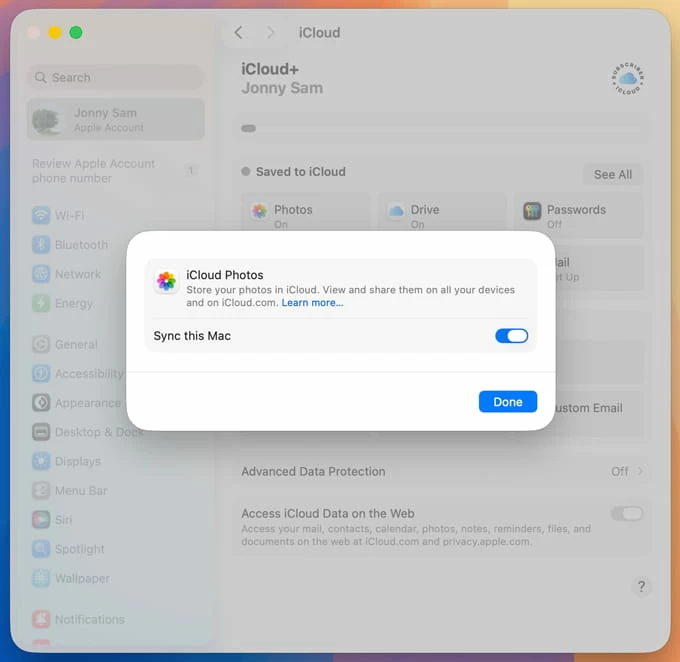
2. On a Mac: Open System Settings > Apple ID > iCloud > Photos and enable syncing. Photos on iPhone SE will download automatically to your laptop's Photos library.
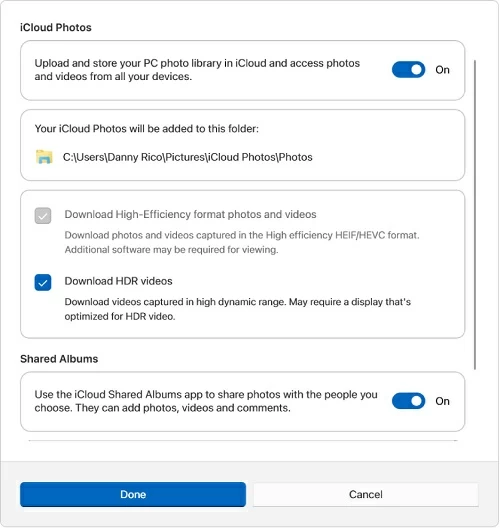
3. On a Windows Laptop: Download iCloud for Windows from the Microsoft Store. Sign in with your Apple ID, check the box for Photos, and click Apply. Your images on iPhone SE will sync to a dedicated folder in File Explorer on laptop.
Use third-Party cloud apps (Google Photos / OneDrive / Dropbox)
If you already use cross-platform cloud storage like Google Photos, follow these tips to send your pictures form iPhone SE:
1. Download the Google Drive, Google Photos, or OneDrive app on your iPhone SE from the App Store.
2. Enable Camera Upload or Auto-Backup within the app settings.
3. Install the corresponding desktop client on your laptop
4. Alternatively, open the web interface of the cloud service in your browser to download your photos locally.