
How to Add Ringtone to iPhone without iTunes

Transferring music from your Mac to iPhone can be a bit of pain, but don't fear, read this guide and you'll find transferring music from Mac to iPhone is a breeze!

Key Points about transferring music from Mac to iPhone:

In this post, we help you move music from Mac to your iPhone in 4 simple yet useful ways.
Getting a new iPhone is always exciting, but transferring some important data - including photos, your favorite music, tons of files, and more - from Mac to your new iPhone may seem daunting. If you're a music lover who is looking for ways to transfer music from Mac to iPhone, you'll definitely be interested in this article.
Besides introducing the officially recommended method to sync music from Mac to iPhone, this guide also covers other effective methods to provide you with more flexibility and convenience to transfer music from your Mac to an iPhone.
Let's look at the different ways on how to transfer music from Mac to iPhone:
When it comes to transferring music from your Mac to iPhone, Finder has always been your first out-of-the-box choice, letting you sync music or other data from an Apple device to another over a USB cable.
Note:
Here's how to sync music from Mac to iPhone via Finder:
1. Run Finder on your Mac.
2. Connect your iPhone to the Mac via a USB cord. If you haven't previously done so, type in the passcode to let your two devices to trust each other.
3. Click on ''your iPhone's name'' from the Locations section. The details about your iPhone should be displayed on the screen.
4. Go on ''Music" tab and check ''Sync music onto your iPhone's name''.
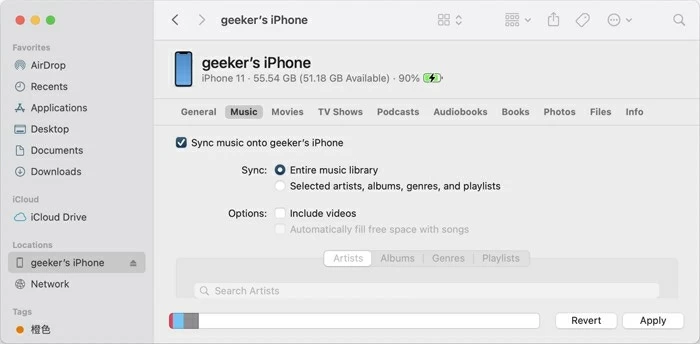
5. Select the music you want to sync from Mac to iPhone.
6. When everything is ready, hit Apply in the bottom right corner to start the music transfer. After the transfer is finished, open the Music app on your iPhone and start enjoying these songs!
See also: iMessages disappeared from iPhone
Don't want iTunes or Finder to overwrite existing songs on your iPhone with transferred songs from Mac? There are still some neat little tricks you can use to quickly and easily copy music from Mac to iPhone.
To get rid of this trouble, we prefer to move music from Mac to your iPhone with the help of Appgeeker iPhone Data Transfer without worrying about the original music library being deleted. This software can sync music, photos, videos, ringtones, etc. from Mac to iPhone, from PC to iPhone, and even from iPhone to iPhone via USB cable.
Since it focuses on data transfer, you'll find it effortless to transfer your complete music library or desired songs from Mac to iPhone without compressing the sound quality. In addition to the usual data management features, you can transfer any incompatible music file to your iPhone and play it.
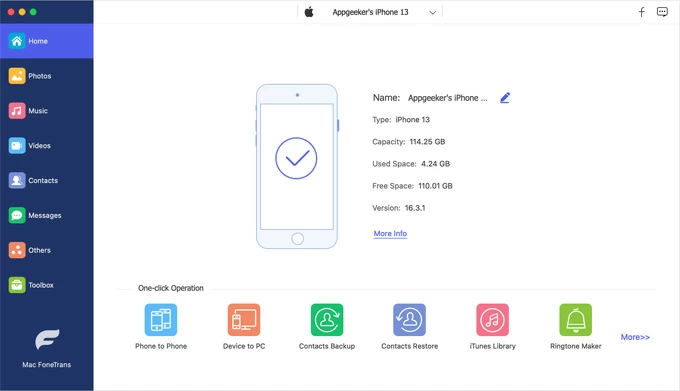
First of all, connect your iPhone to the Mac with lightening-to-USB cable. Then launch iPhone Data Transfer on Mac. Once the software has detected your iPhone, you should the details of your iPhone showing on the software.
Next, click on the "Music" button from the left sidebar. All types of audio files from your iPhone will be loaded here. Click on any file type to preview it on the right side of the software.
Now it's time to add music from Mac to iPhone. Hit on the "+" icon at the top from the options. Then a box appears giving you two options. Select "Add Files" (or "Add folder" to transfer all songs in that folder).
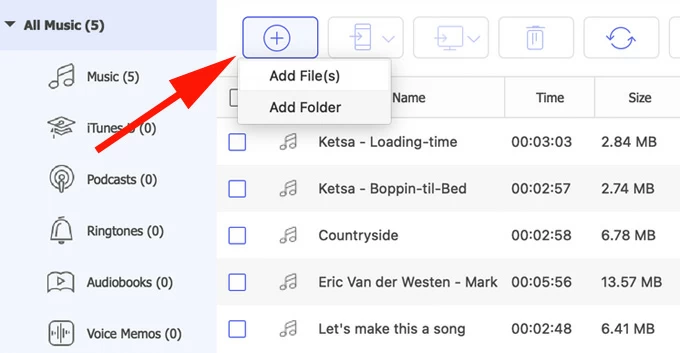
It usually takes a few seconds to get music from Mac to iPhone. Once done, you can play the newly added songs on your iPhone's Music app.
Again, compatibility is no longer an issue. It doesn't matter which format the music file is, iPhone Data Transfer can convert it to a format playable by your device automatically. And it supports various audio tracks, inclusding MP3, FLAC, WAV, APE, M4A, WMA, OGG, AIFF, AAC.
Video Guide: How to Transfer Music from Mac to iPhone
Because iPhone and Mac are important parts of the Apple ecosystem, you can also share music from Mac to iPhone wirelessly using apple-developed AirDrop feature. You just need to make sure that both your Mac and iPhone have airdrop enabled and can receive items shared by anyone. Also, your iPhone and Mac should be closer together to establish a stable Wi-Fi connection to transfer music from Mac to iPhone.
This is guide on how to transfer music from Mac to iPhone using AirDrop:
1. Navigate to Finder > AirDrop on your Mac computer.
2. Select "Everyone" at the bottom of the AirDrop window to let other devices discover and receive your files.
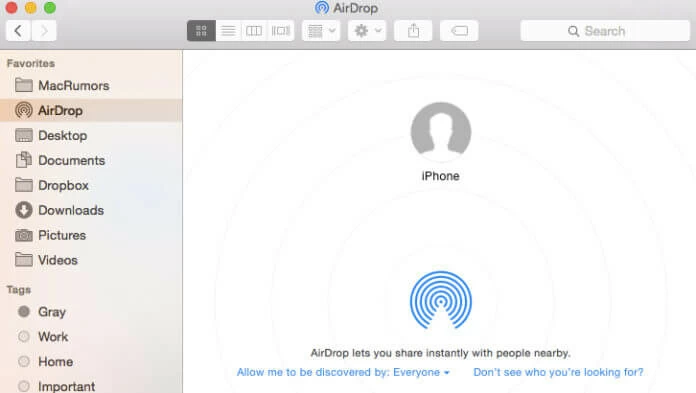
3. Access your iPhone's Control Center panel, turn on AirDrop and select "Everyone", while making sure Wi-Fi and Bluetooth are also enabled.
4. Open the music files you want to transfer on your Mac, then drag them to the AirDrop window and select your target device.
5. Your iPhone will receive a share prompt, tap Accept to get the transferred music from your Mac to your iPhone.
See also: How to recover files from USB drive on Mac
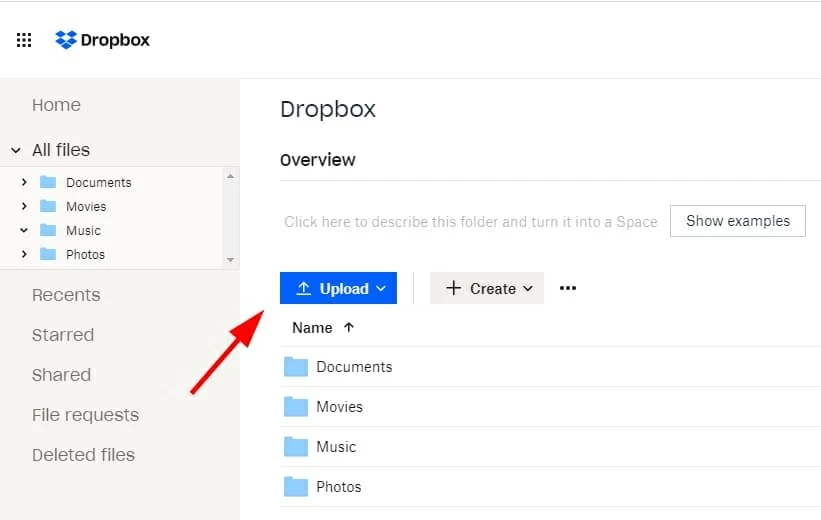
Anyone who knows anything about cloud storage will be familiar with Dropbox, which is regularly used to store music, images, and other files. With a concise and excellent user interface, it is friendly to novices and can also perform a multitude of transfer tasks quickly. Follow these steps to learn how to sync music from a Mac to an iPhone with Dropbox:
Note that songs transferred from Dropbox cannot play on Apple Music, you'll need to resort to other audio player app.
In addition to the Dropbox, there are many other cloud services to help you transfer songs from Mac to an iPhone without using iTunes/Finder. One thing you need to be aware of, however, is that there is a limit to the amount of free usable space offered by cloud services in general.