
Transfer Data Files from Huawei to iPhone

Since macOS X Yosemite, Apple's digital photos management—iPhoto has been retired. We tell you how to transfer iPhone photos to Mac without iPhoto.

What to know
![]()
Read on to get the ideas about transferring photos from iPhone to Mac for backups.
Every once in a while, you may want to transfer the precious photos from iPhone to Mac to free up some of your iPhone storage. (As a music lover, you may also want to transfer music from iPhone to Mac to free up storage.)
If you've been an Apple fan since the very early days, you probably know about iPhoto, which can be used to transfer and manage photos among Apple devices. But the problem is that iPhoto has been retired since macOS X Yosemite. Don't despair: your question on how to transfer photos from iPhone to Mac without iPhoto can be answered in this post.
As discussed previously, Apple has jettisoned iPhoto. Unsuspectingly, Apple's new application — simply called Photos — replaces iPhoto and Aperture for transferring photos from iPhone to Mac.
A USB cord is required to connect your iPhone to Mac. Once connected, the Photos app will pop up automatically and recommend importing your photos.
Follow the instructions to get iPhone photos transferred to Mac without iPhoto:
Prepare a USB cord to connect the iPhone to your Mac. A pop-up window will appear on your iPhone asking you to trust the device or not. Tap on the "Trust" option. Once connected, the Photos app will run automatically. If not, go head to launch it manually by yourself.
On the left side of the main screen, click on your iPhone's name in the Device category. All photos on the connected iPhone should appear on the screen. Click the photos you want to transfer to the Mac to tick them. Then, in the upper menu of the Photos app, click "Import X Selected" to move selected pictures or "Import All New Photos" to transfer the full Camera Roll.
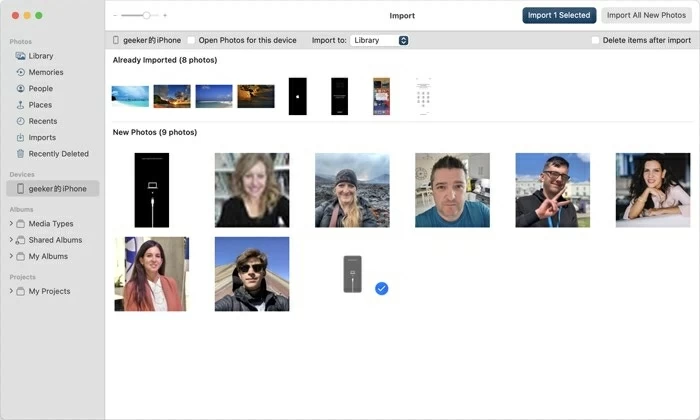
After the transferring, you can view the newly photos by clicking on the Imports from the sidebar.
You can sync photos to your Mac from the iPhone without iPhoto wirelessly by using iCloud. Although both are wireless methods, iCloud has completely different characteristics from airdrop: all of your pictures will automatically transfer back and forth between iPhone and Mac by setting two devices up to sign in to the same Apple ID. Keep in mind that Apple offers each user 5 GB of free iCloud storage to start. To get more storage, simply Pay Apple to upgrade your storage plan.
Enable iCloud Photos on both your devices:
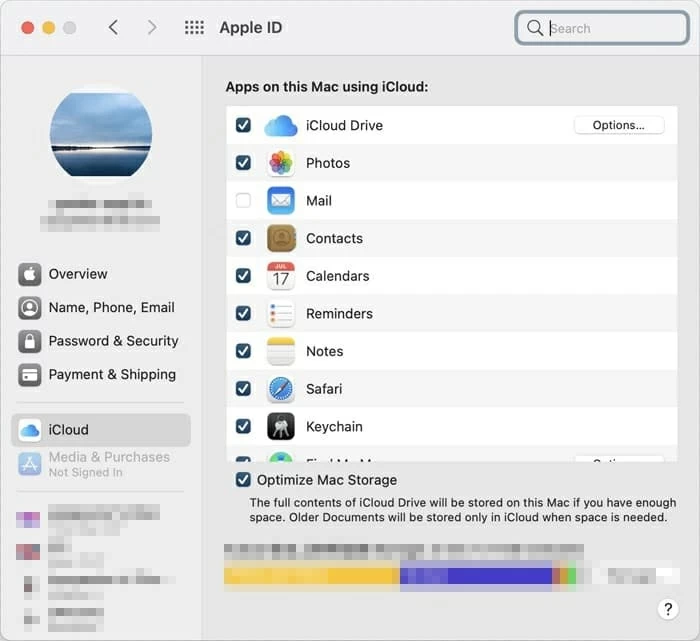
With the same iCloud account, all the photos will be synced from your iPhone to your Mac. The only downside is that you can't select which photo to transfer.
Even though Airdrop is convenient, it can be time-consuming. If you want to transfer photos from iPhone to Mac without iPhoto quickly and efficiently, Appgeeker iPhone Data Transfer might be your best bet. This is an offline method that allows you to import photos from iPhone to Mac over a USB cable.
With a user-friendly interface, iPhone Data Transfer is a one-stop data transfer solution that offers excellent data migration features. Aside from photos, music, videos, messages and any other data are also supported to be transferred from iPhone to Mac, iPhone to Windows and vice versa. Additionally, the best part is that iPhone Data Transfer has unlimited data transfer amount.
All you need to do is to use a USB cord to plug your iPhone into your Mac. Then iPhone Data Transfer will do all the rest.
To download this powerful data transfer tool on your Mac, click the green button below.
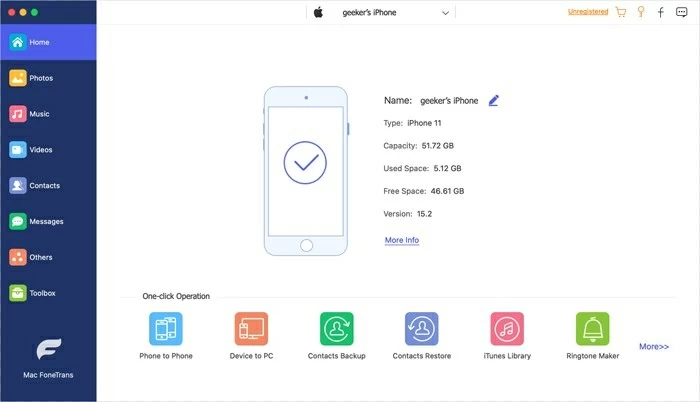
Step 1: Connect your iPhone to the Mac
Launch iPhone Data Transfer on your Mac. Follow the on-screen prompts to connect your device to manage data via a USB cable. Enter the passcode on your iPhone to ensure the connection if needed. The details of your iPhone will appear on the main screen once iPhone Data Transfer has recognized your device.
Step 2: Choose photos to move
As you can see, there are some tabs on the left side of the main screen. Click the "Photos" tab to load up all the photos from your iPhone. You can swipe down the screen to navigate through these photos. To select the photos you want to add to your Mac, tick the little box on the photo.

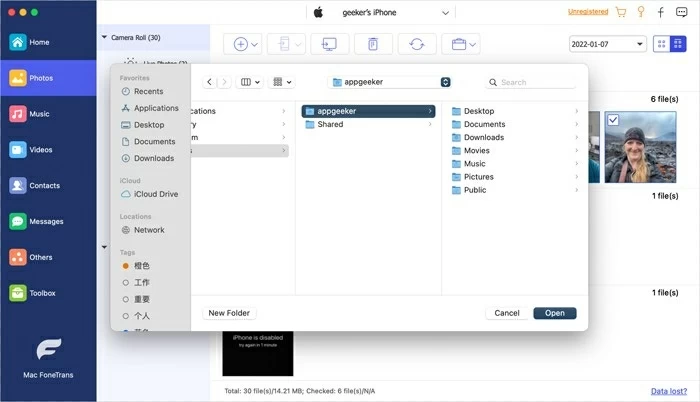
Step 3: Add photos from iPhone to Mac
It's time to add these selected photos from iPhone to your Mac: click the icon that looks like a computer. Here pops up a window asking you to choose the destination folder for these selected photos. Choose a folder as you like and then hit the "Open" button to confirm.
Again, iPhone Data Transfer performs a direct and efficient data transfer. In fact, it's more than just a data transfer tool. It offers other powerful features like iPhone backup, ringtone creation, media files conversion, etc. Such versatility and practicality is really worth a try.
Apple has been granted multiple patents, one of which is Airdrop — a close-range wireless transfer feature. It is not just for photo transfer between iPhone and Mac. You can use it to transfer almost everything. Before moving to the exact steps, enable Wi-Fi and Bluetooth on both the iPhone and the Mac, and make sure both the devices are within range (about 30 feet).
Open the Photos app on your iPhone. Select the ones that you want. Tap the "Share" icon from the bottom left corner. You will be led to a screen like the following picture:
![]()
Select the Airdrop icon from the options. In the coming screen, select the name of the mac to which you want to import the photos.
Move to your Mac, a pop-up window appears asking you to decline or accept the photos from ''the name of your iPhone." Click the "accept" button.

You can download the pictures and then move them to the folder of your preference. You can also open them directly in the Photos app on the Mac.
macOS has a large number of great pre-installed applications, but not all of them are well-known. Image Capture is a case in point. If you are a person who has ignored this application for a long time, it might be time to see how useful Image Capture is for copying photos from iPhone to Mac. With your iPhone connected to the Mac, photos can be easily transferred to your Mac.
1. Connect your device to the Mac. You may be prompted to unlock your iPhone to trust the Mac.
2. On your Mac, launch Image Capture. From the sidebar, click on your iPhone's name under the "DEVICES" button. You should see all the photos from your iPhone appearing on the screen.
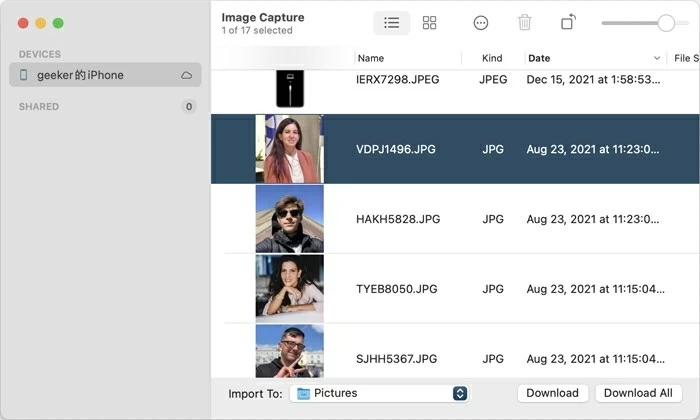
3. Select the ones that you want to save to your Mac. At the bottom of the window, select a folder to store these photos by clicking on the button next to "Import TO."
4. Hit "Download" to begin the process of transferring. (You can also click on the "Download All" button to save all the photos from your iPhone to your Mac.)
If you just need to transfer several pictures from iPhone to Mac, Mail app might be a good option for you. Let us check out Mail app to see how you can share photos from iPhone to Mac.
Select the photos you want in the Photos app on your iPhone. Then tap the share icon below the photo. Next, tap on Mail. Enter the email address you are logged into on your Mac and complete the entire email. Tap the send icon.

Receive the email that you just sent in the Mail app on your Mac. Also, downloading these photos on your Mac is supported.
This guide covered six ways to transfer photos from iPhone to Mac without iPhoto. You can pick any of these methods and follow the given steps to make the move. If you're seeking a tool to free your hands and help you to do all the tasks, then iPhone Data Transfer would be the top pick.


