How to Copy iPhone Songs to Windows PC


Remember when you're forced to delete some cherished photos or videos to free up storage in your iPhone? Or the inconvenience of editing or resizing the images that's taken on a space-limited device screen? Fortunately, moving a step further to transfer iPhone photos and videos to your Windows 10 PC can save you out of the pain.
It doesn't matter if you're attempting to move over pictures as .JPG files, screenshots as .PNG files, or videos as .MOV files. Importing iPhone photos to Windows 10 is just a simple few step procedure that you can learn within minutes, even though you're not a technical expert.
Ways to Transfer Photos from iPhone to Windows 10 computer
There're mainly four useful tricks for mobile-to-PC photo transfer without suffering any dos and don'ts, all of which can apply to all iPhone models. You can choose the method that suits you best.
Note: If you need to fix the "Device is unreachable" error message that shows up out of the blue when trying to copy photos from iPhone to a Windows 10 PC, get help from here.
Solution 1: Windows Photos App
The Windows Photos App is a free and standard application from Microsoft to help for keeping all your device photos secured in a PC. It comes handy whether you prefer getting all photos off an iPhone onto Windows 10 at once, or migrating over pictures in bulk. HEADS UP: This tool can only detect the photos stored locally on your device. If you have "iCloud Photos" toggled on, please jump to the method 4 to do the transfer.
Run the latest version of iTunes, keep your device on the Home screen, and then the photo transfer process via Windows Photos app is simpler than you might think. See also: How to Import Photos and Videos from Phone to PC

The migration process through Microsoft Photos could get stuck if there're an impressive number of pictures to move over. If this is the case for you, create a ZIP file for the photos and then try again. Should the error still exist, go ahead to the next approach to transfer photos from iPhone to Windows 10 desktop & laptop without using iTunes.
Solution 2: File Explorer
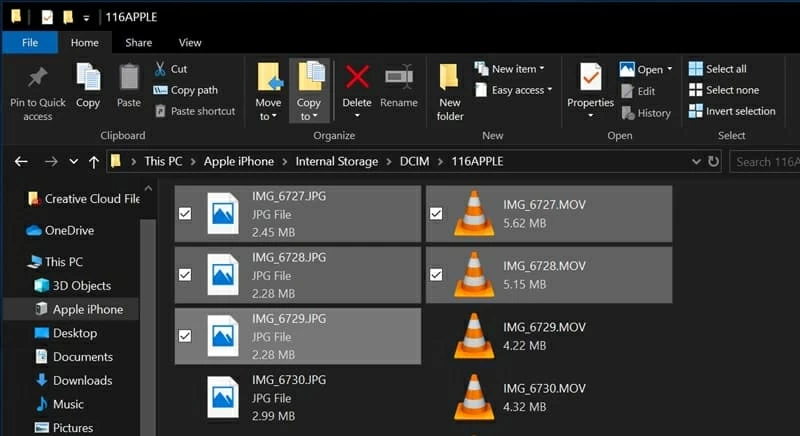
File Explorer is another way to move pictures from an iPhone to a Windows 10 using the USB cable. It is a free and official application for easy data transfer purpose on an PC, and the entire process is quick and secure. When you're ready, follow the step-by-step procedure mentioned below to get iPhone photos transferred to Windows 10 laptop & desktop:
Tips: You can also copy-and-paste the DCIM folder to send the entire photo library to the computer's hard drive.
If you end up with failing to import all photos from iPhone to Windows 10 after iOS 13 update, the solution is here.
Solution 3: iTransfer - Efficient and Convenient
iPhone Data Transfer is an indispensable tool for iOS-to-computer data transfer, supporting multiple files like photos, video, contacts, music, and any other files. After a quick scan on the photo-storing device, it'll deliver an interface for hassle-free preview and selection on image(s). Whether you wish to only migrate photos housed in a single folder like Live Photos, Selfies, Panoramas, etc., or just all of them seated in the device, this tool will send the pictures directly from iPhone and save onto the Windows 10 without any data loss. You're also allowed to manage the transferred photos with ease.
Here's how to do the transfer of iPhone pictures to a computer running Windows 10 OS.
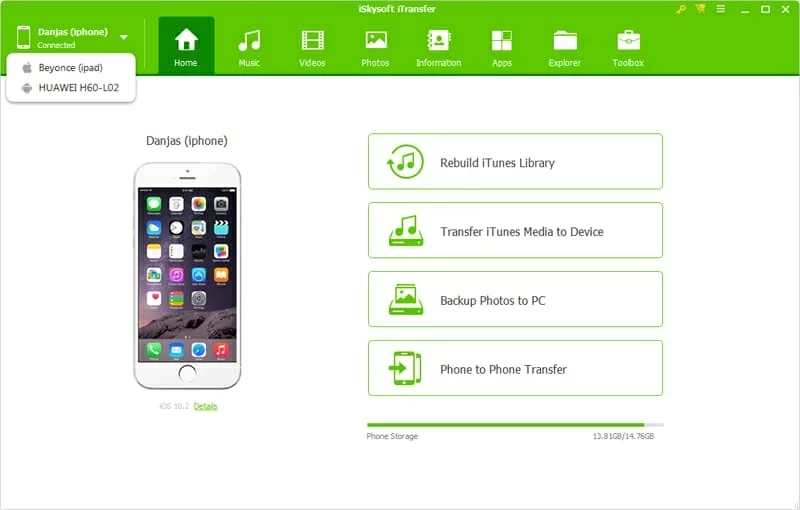
Step 1: Plug your device to the Windows PC
Initiate the software, and establish a connection between your iPhone and PC through a USB cable.
Step 2: Select photo(s) you need to transfer
Once your device is detected, click Photos tab from the navigation bar. You will see all your photos within the relevant categories like Camera Roll, Photo Library, etc.
To transfer photos from an Apple iPhone to Windows 10's hard drive, select the photo(s) by ticking the box(es) on the top left corner of each image.

Step 3: Save iPhone photos onto Windows 10 PC
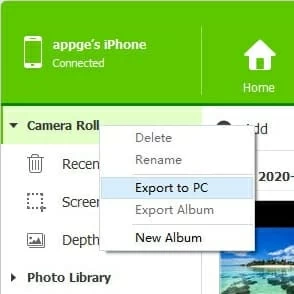
Now, hit the Export button in the upper line and choose Export to PC from its drop-down menu. Keep your device attached until the transfer is complete.

Should you need to transfer the specific photo folder(s) onto the computer, right-click the heading(s) and choose the Export to PC from the resulting menu list.
All your images are transferred. Enjoy!
Solution 4: iCloud Desktop App
If you're looking for a way to transfer iPhone images over to a Windows 10 wirelessly, then iCloud Photos is going to work the best for you. It's shipped right into your iPhone device, aiming to store all your pictures in Apple's secure online iCloud storage and make it easy to access from other devices as long as you log in to the same Apple ID account.
First, you'll need to sync the images to the iCloud. Simply go to Settings > [your name] > iCloud > Photos, then turn on iCloud Photos. After a while, step through the following wizard to download the iPhone photos to Windows 10 PC using iCloud for Windows.
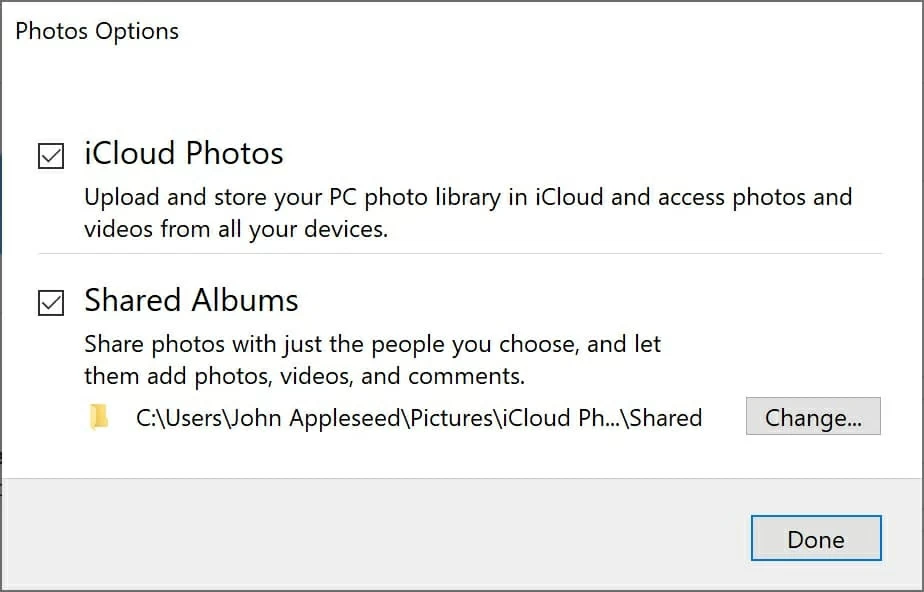
Now, it will sync all iPhone photos to Windows 10 PC automatically. You can also adopt the Shared Albums function and customize the location of your Shared Albums folders. Click here to learn more.