How to Record Music on Computer

You can record Minecraft gameplay on your Windows PC in multiple ways, including using a built-in tool Xbox Game Bar and some third-party screen recorders. Here's how.

There are various screen recorders for you to record Minecraft videos on PC.

Record Minecraft gameplay on your PC using an appropriate tool according to your preference.
Minecraft is a popular sandbox game enjoyed by millions of people worldwide for its allowing you to unleash your creativity to the fullest. Chances are that you may need to record Minecraft if you are a YouTuber making gaming tutorials, or just a gamer looking to capture memorable Minecraft gameplay moments to share with friends. It's not difficult at all to complete the task, and you've got different options to do it easily on your PC.
When it comes to Minecraft videos recording, you can use the native screen recorder on Windows PC, Xbox Game Bar, or other software like OBS or the AppGeeker Screen Recorder. Here's a step-by-step guide on how to use each of them to record Minecraft gameplay on a PC.
Other than recording Minecraft on Windows PC, you will also learn how to do it on Mac at the end of the article. You may jump to the corresponding part directly.
Don't miss: How to record gameplay on Mac
The Xbox Game Bar comes pre-installed on Windows PC, making it convenient to gain instant access to widgets for recording gameplay like Minecraft without installing another software. However, it only offers basic recording feature except from editing and merging videos.
If you just want to capture simple Minecraft gameplay moments to share with your friends, then Xbox Game Bar could be an ideal choice. In the following, let's see how to do it on your PC.
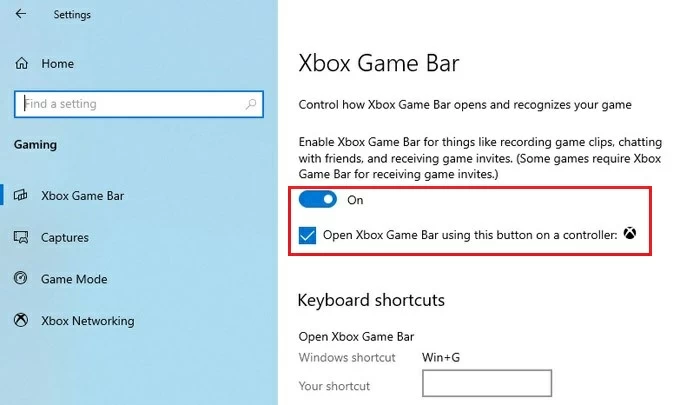
Step 1. Check if you have enabled Xbox Game Bar. Go to Start menu > Settings > Gaming > Xbox Game Bar to make sure that the switch is on and the checkbox is ticked for Open Xbox Game Bar using this button as a controller.
Step 2. Open Minecraft on the desktop.
Step 3. Press Windows Key + G to activate Xbox Game Bar. You can see the widgets toolbar at the top of the screen.

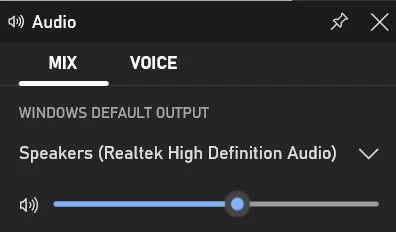
Before recording Minecraft, you can adjust the system audio in MIX, or sound from microphone in VOICE.
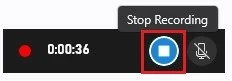
Step 4. Press the Windows key + Alt + R or hit the Record button to start the recording.
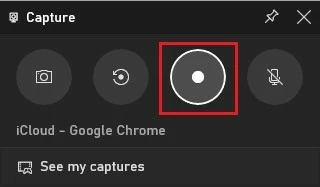
Step 5. After recording your wanted moments on Minecraft, you can hit the Stop button to stop the gameplay capturing.
A notice of Game clip recorded will pop up from the right on the screen, telling you the recorded video has been saved. Click on it and you can review the clip in the Gallery window.

Note:
As we have already mentioned above, even though Xbox Game Bar is easily accessible, it still has some limitations like it cannot record your game and the webcam simultaneously. For specialized recording needs, an advanced tool is often more appropriate. Here we've got the dedicated ones for you.
If you want the best recording tool possible of your Minecraft gameplay moments, you may opt for the dedicated AppGeeker Screen Recorder. It is ideal for streamers, YouTubers, and gamers, as it can record literally everything on the PC, from your Minecraft gameplay to other windows or even your webcam. Moreover, you can edit the recorded video and convert it into different formats directly in the tool, which is superior to Xbox Game Bar. Check how simple it is to record Minecraft on your PC with this incredible screen recorder.
Step 1: Launch Screen Recorder
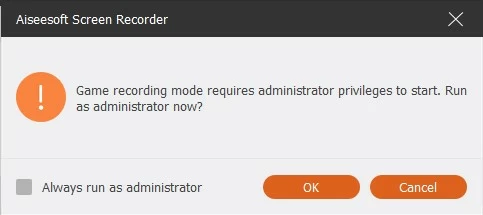
Download and install the application on your PC. Open it and select Gamer Recorder.

You will be then prompted to allow the tool to run as administrator by hitting OK.
Step 2: Select Minecraft gameplay
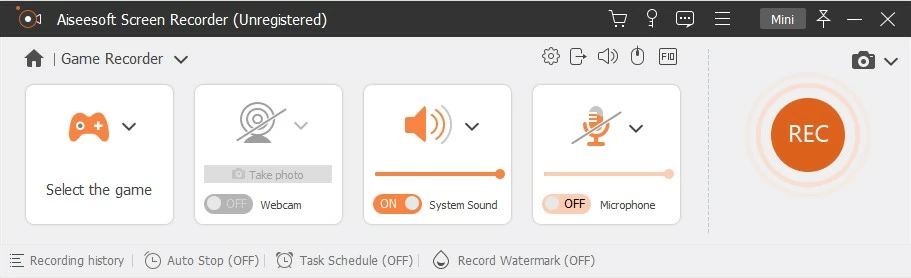
In the box of Select the game, choose Minecraft to record.
Step 3: Adjust the audio settings
Before recording Minecraft gameplay, you can decide which audio needs capturing by hitting the corresponding button, System Sound or audio from Microphone. You can even enable webcam to record yourself at the same time.
If you want to adjust the output settings, hit the gear icon.
Step 4: Start the recording
You can hit the REC button to start recording. Now open Minecraft and start playing.
Step 5: Stop the recording
If you have recorded the gameplay moments you want, you can hit the Stop button on the floating bar or press Ctrl + Alt + R to end the recording. Later you will be allowed to preview and edit the video as needed. When done, you can export it in a required format.
Note: If you hide or exit Minecraft gameplay during the recording, the screen recorder will stop capturing automatically.
OBS is yet another third-party tool that you can use to record your Minecraft gameplay moments on your Windows computer. It is so professional that it delivers multiple advanced features that satisfy different recording needs. However, different from the AppGeeker Screen Recorder, it may be a bit challenging for a beginner to master properly due to its complicated interface.
With the specific steps below, you can try recording Minecraft gameplay by use of OBS.
1. Launch OBS on your PC.
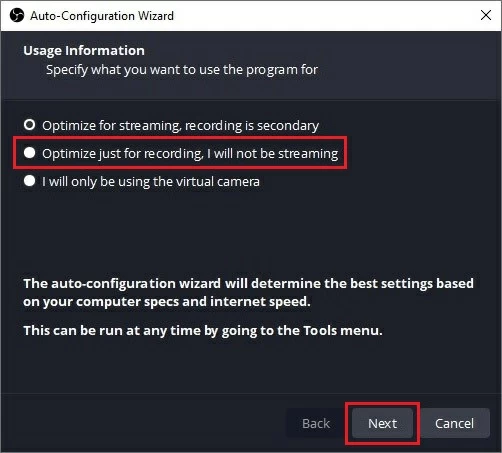
If it's your first time to open the tool, you need to select "Optimize just for recording, I will not be streaming" in the pop-up window called Auto-Configuration Wizard. Then hit "Next" to go on.
2. In the Scenes box, hit the + icon to add a new scene. Name it and click "OK."
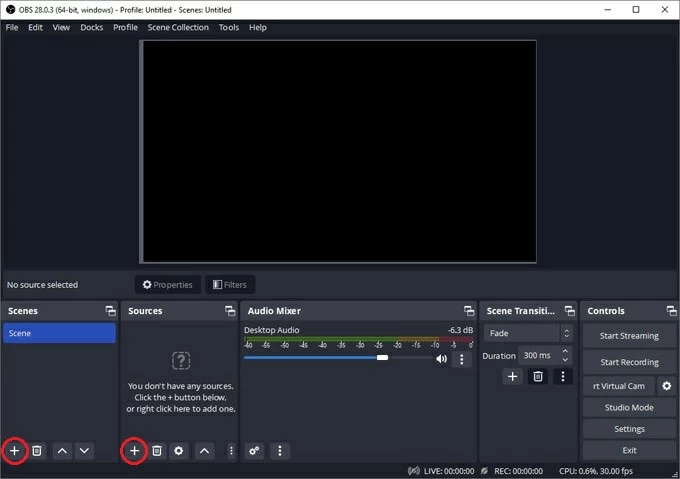
3. In the Sources box, also hit the + icon and select Game Capture from the list.
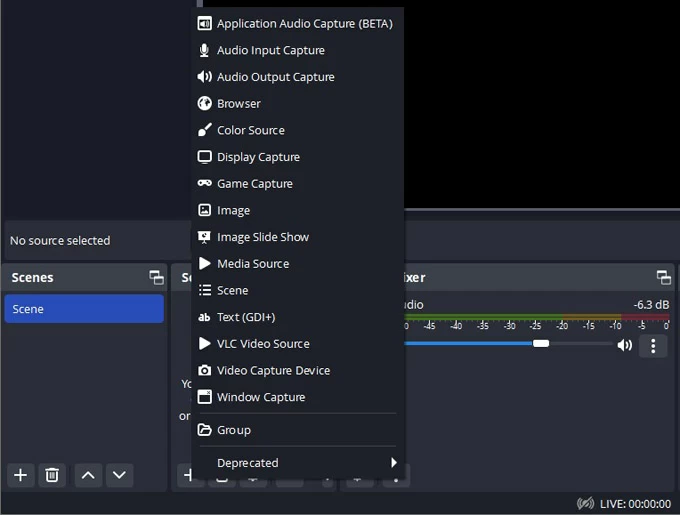
Tip: Selecting Game Capture here lets you capture the Minecraft gameplay window only; if you want to record the entire PC screen other than the gameplay window, you need to select Display Capture instead.
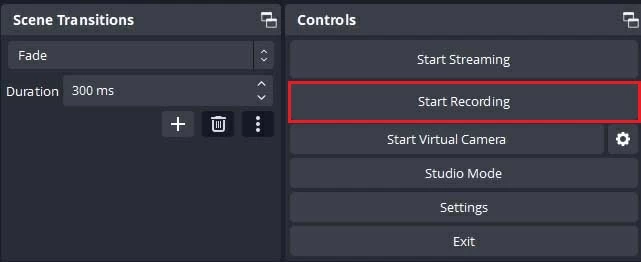
4. You can selectively adjust the audio volume.
5. After that, you can click Start Recording. Then open the Minecraft game to start playing and recording.
6. Once you are done with the recording, just click Stop Recording and your video will be saved automatically to your PC. You can check it in File > Show Recording.
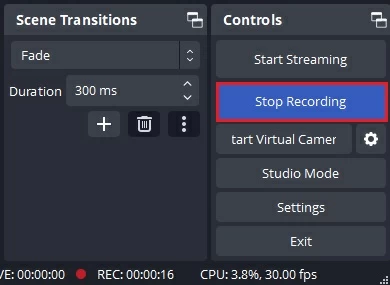
If you have other questions, you may check this article to know more details: Fixes for OBS Game Capture not Working on Windows 10.
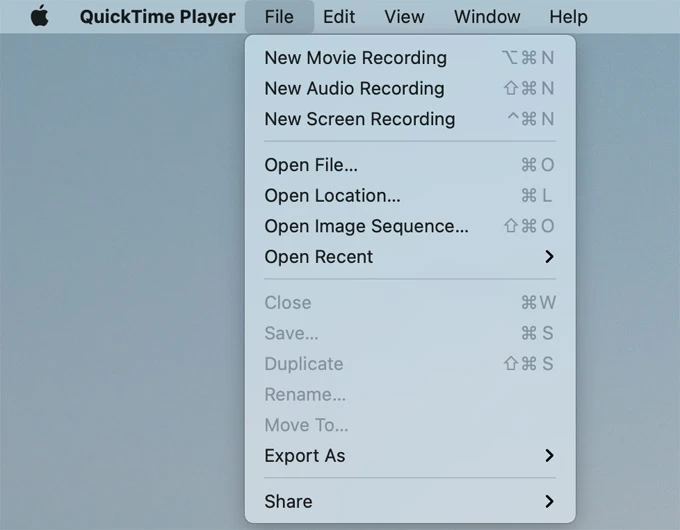
If you feel like recording Minecraft gameplay on a Mac, there is also a handy built-in tool for you to finish the capturing, which is QuickTime Player. It comes pre-installed on all the macOS devices, serving as a functional media player as well as a fantastic screen recorder. With this application, you can easily record screen on your Mac.
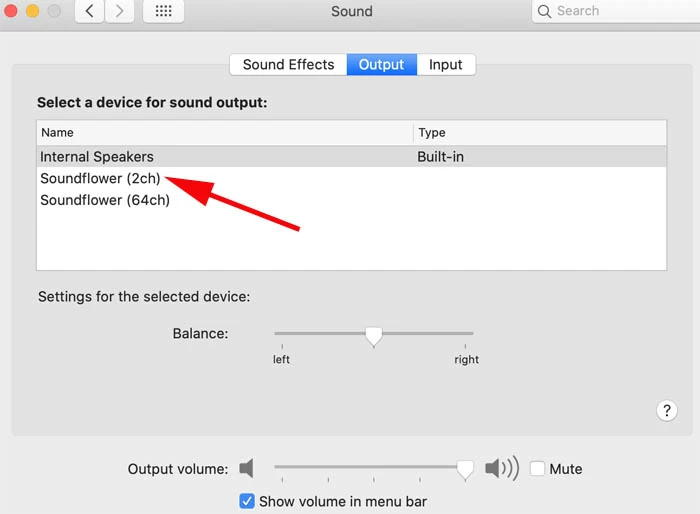
To record internal game audio, you need to first download and install a plug-in called Soundflower, and make a bit set-up: go to System Preferences > Sound > Output and select Soundflower (2ch) as the sound source.
Below are the steps to use it for recording Minecraft on your Mac.