
How to Screen Record Desktop on Windows 10 Computer

If you want to record audio on your laptop, either internal audio or external audio, here will give you a complete guide on how to make a laptop audio recording.


You can use the default Windows recorder or professional recording software to record your laptop's audio.
Given the growing digitization, many activities, such as conferences, discussions, presentations, and online lessons, are now carried out via the Internet. You'll need to record audio on laptop at some point. This could be for a crucial conference, an essential interview, a special song, or many other sound events.
Today, most of us work with laptops because they are portable. You may occasionally need to record a key online session, lecture, speech, or other audio data while working on a laptop, but how can you make an audio recording on a laptop?
Also read: How to screen record on any laptop
If you want to record audio on your laptop, you can use the built-in tool and third-party recorders that are readily accessible on the market. And fortunately, we've compiled some of the most practical tools in this comprehensive guide to assist you in recording audio on laptop. So, let's explore all the choices available on your laptop!
Table of Contents
The Voice Recorder (Win 10)/Sound Recorder (Win 11) tool comes pre-installed on all Windows devices, and the simple instructions below will show you how to capture sounds through a microphone on laptop. We'll begin by opening the Voice Recorder application on your laptop and employing it to record audio using either the built-in microphone or an auxiliary microphone attached to your laptop, such as a webcam or Bluetooth mic.
Microsoft Voice Recorder is a built-in feature of Windows by configuration, and you can activate it from the Start menu. Otherwise, you must manually install the software using the Microsoft Store application or online. Downloading it is free. Note that it goes by the name Sound Recorder on Windows 11.
Read more: How to record audio on Windows 10 computer
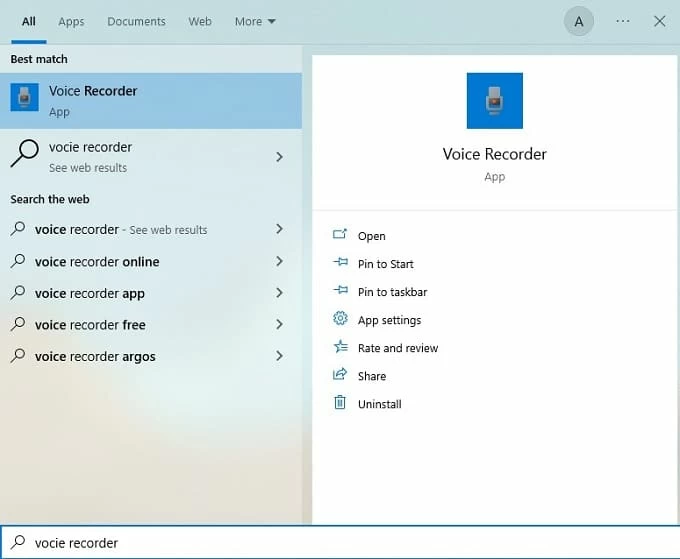
Step 1. Start the Voice Recorder. Activate the search bar by tapping the Windows button (or by clicking the Start button), typing voice recorder, and then clicking the best-matched option, Voice Recorder, to open it.
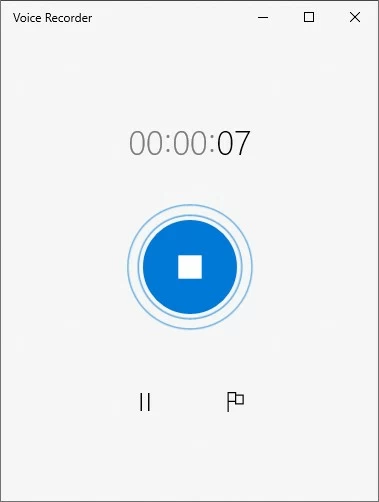
Step 2. Click the big blue mic symbol on the display to begin an audio recording.
As you start, you will notice a timer that allows you to accurately measure the length of the recording. There are also several keys on the recording interface that allow you to pause or resume recording, stop it at any time, or place a marker at a critical moment.
Step 3. Speak more clearly into the microphone so the Voice Recorder can capture your voice.
Step 4. When you're finished, hit the blue Stop button in the middle to end the audio recording.
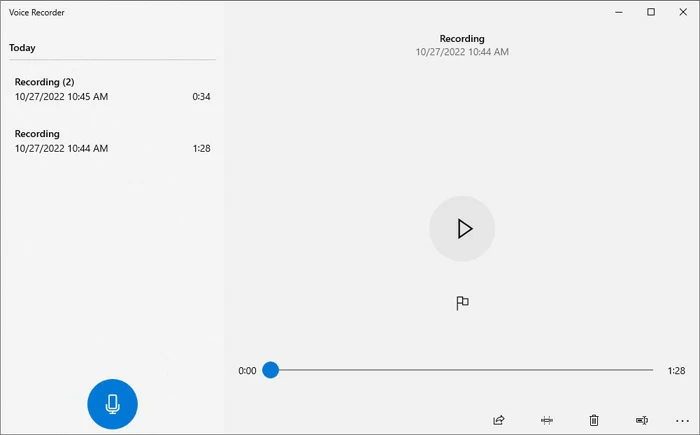
The newest recorded audio recording will be automatically saved and appears on the Voice Recorder app screen's left side. The audio file you captured on the laptop can be played back, shared, edited, renamed, or flagged.
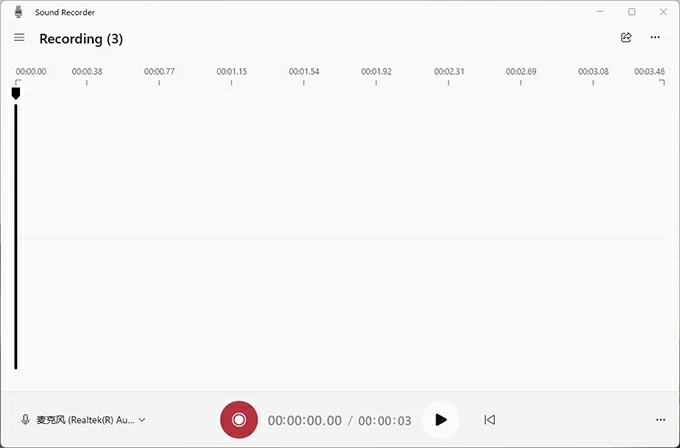
1. Run Sound Recorder on your laptop.
2. Select your microphone device by clicking on the microphone icon in the bottom left corner.
3. Click on the red circle icon to start recording.
4. Hit on the Stop Recording (black square) button to finish audio recording.
Note:
Related read: How to record video on Windows 11
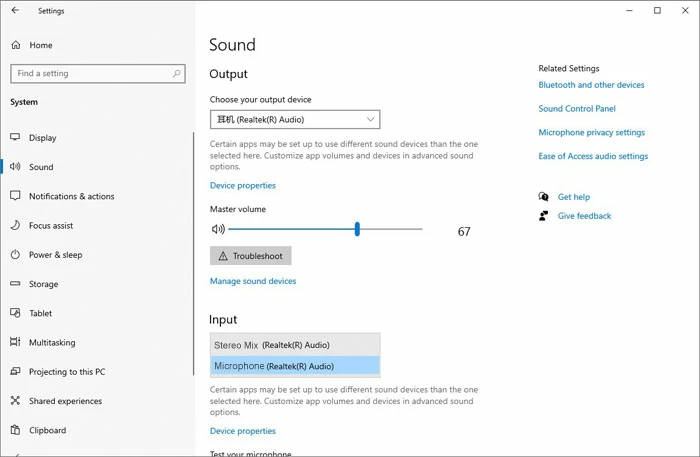
If you are having issues with the audio input while recording on a laptop, it's possible that you're not using the right microphone, or that it's not connected properly. In that case, follow these instructions to configure your microphone as the recording system in Windows' Sound Settings section.
Select Settings > System > Sound from the Windows Start menu. Make the installed mic or any additional microphone connected to your laptop the primary audio recording input device by selecting Microphone underneath the Input tab.
Once completed, you might utilize the Voice Recorder software to record an audio file on your laptop and listen to the result.
You cannot simply record internal sound on your laptop because Microsoft Voice Recorder restrains the use of the microphone from recording audio or sound. Neither music streaming online nor video playing on an internet browser will be captured; only your voice or ambient noise will be recorded using the microphone audio input.
Hence, if you're worried about audio recordings from your laptop and microphone, think about employing a feature-rich yet simple-to-use application. AppGeeker Audio Recorder is recognized as a comprehensive recording software that simplifies and expedites the recording of mic audio and system audio.
AppGeeker Audio Recorder meets all your recording needs with interactive options for capturing audio from microphones and laptops, as well as outputting in various audio formats. In addition to recording system sound and microphone audio from any laptop simultaneously or separately, it can also reduce microphone noise to improve the quality of audio recording.
1. After downloading and installing, launch the application on your laptop.
2. On the home screen, select Audio Recorder.

3. Decide whether you wish to record the system sound, microphone, or both concurrently.
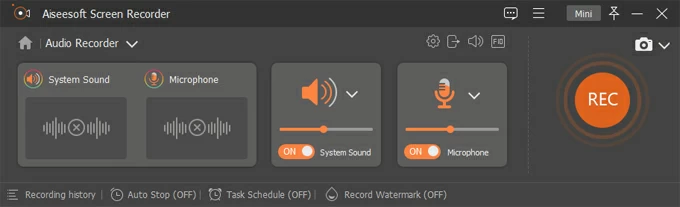
Toggle System Sound and Microphone on/off to record the audio you want on your laptop and adjust the volume level. You can also choose to eliminate noise or enhance the microphone by clicking on the inverted triangle icon next to the Microphone.
4. Hit the red REC icon to begin capturing audio.
Tip: Before you start recording, click on the gear icon above the Microphone and go to Output > Audio Settings to select the audio format and quality.
5. Click the Stop button on the floating bar to end capturing the sound file. Then you can preview or edit the recorded audio file on laptop.

Read later: How to record your computer screen and audio at the same time
Audacity is a free sound recording tool that supports many tracks and various input devices if you don't want to use the default Windows Voice Recorder application. As an open-source and cross-platform audio recorder, you can change, capture and save sounds on your laptop using Audacity. Windows, Mac and other operating systems are compatible with the software.
Note:
To perform laptop audio recording with Audacity, follow these steps:
1. Install Audacity and launch it on your laptop.
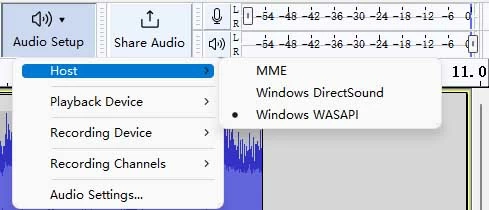
2. Configure recording options. In order to record the audio coming out of your laptop, you need to navigate to Audio Setup > Host and select the Windows WASAPI option. Then select an appropriate recording device.
3. Click the red Record icon to start recording audio.
4. Hit the Stop icon at the top of the display after you are finished recording.
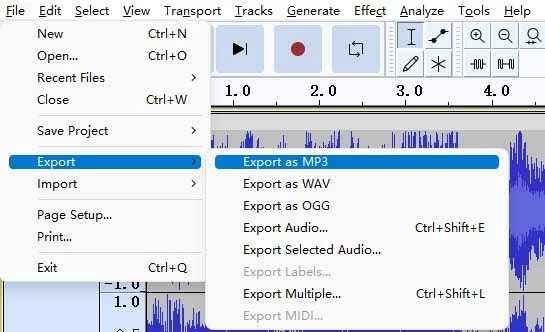
5. To save the recording, locate File > Export in the upper left corner and select a file format to download the audio recording to your laptop.
Windows has a function called Stereo Mix, which may be used to playback audio from two distinct devices, one connected through USB and the other via AUX. But above all, you can also use Stereo Mix to record audio from laptop, although it's deactivated by default. You have to enable it in the Sound settings and combine it with the default recorder or recording software like audacity to record your laptop's internal audio.
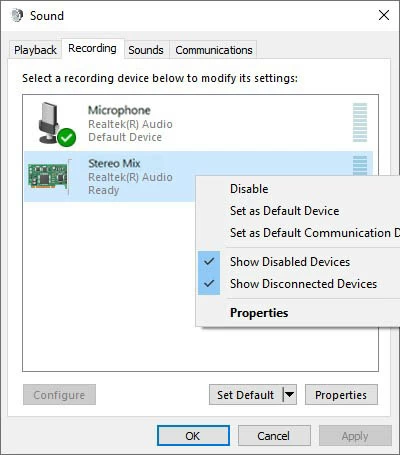
Tip: If you don't see the Stereo Mix option, right-click in any blank space and check the "Show Disabled Devices" option; on Windows 11, head to Settings > System > Sound > More Sound Settings and enable Stereo Mix there.
Note:
Conclusion
There are many excellent audio recording solutions on a laptop, including Windows Voice Recorder, AppGeeker Audio Recorder, Audacity, and Stereo Mix. But it's up to you to decide which audio recorder best suits your requirements, since all these tools are equally good and are fitted to serve different purposes!


