
Audio Record on PC: How to Record Computer Audio and Microphone

Wondering How to Record Internal Audio on a PC? You'll find the right tool to record your PC's internal audio here!

Unlike Mac models, Windows PC allows users to pick up system audio in simple ways.
There are several situations where you may want or need to capture the internal audio of your PC. It may be necessary sometimes to record a lesson, gameplay, an online meeting, etc., which can't be done through a microphone only. That's where an audio recorder comes in. However, searching online for a reliable PC-based audio recording application will always be difficult and time-consuming.
Worries not. If you're unaware of the way to record internal audio on your pc, we've got your back. In this article, you'll discover the finest tools and the steps to record internal audio on a PC. Let's get started!
Table of Contents
Want the best tool to record PC internal audio? Appgeeker Screen Recorder is your answer! It allows you to record internal audio and external voice together. Using Appgeeker Screen Recorder, you can also record the screen of your PC. It lets you capture all the activities on the screen with simple clicks. This easy-to-use software is available for both Windows and Mac users to record computer screens with audio a little easier.
To improve the quality of your recordings, Appgeeker Screen Recorder employs powerful algorithms that filter out background noise from the microphone. Also, it facilitates a complete soundcheck before a recording session to guarantee optimal audio quality.
Additionally, the desktop Screen Recorder's interface is so well put out that even a novice can easily use it. As for advanced Windows pc users, it offers some advanced features such as basic editing, color adjustments, and mouse tracing.
To record system audio on PC using Appgeeker Screen Recorder, follow the steps below:
Step 1: First and foremost, download and install Appgeeker Screen Recorder on your PC, and launch the tool.
Step 2: Now, from the main interface, select Audio Recorder to record PC system audio.

Step 3: After that, you need to turn on the toggle under the System Sound tab for internal audio recording.
Note:
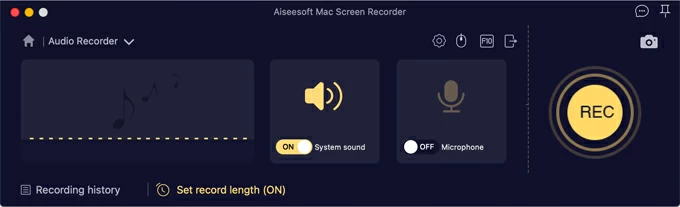
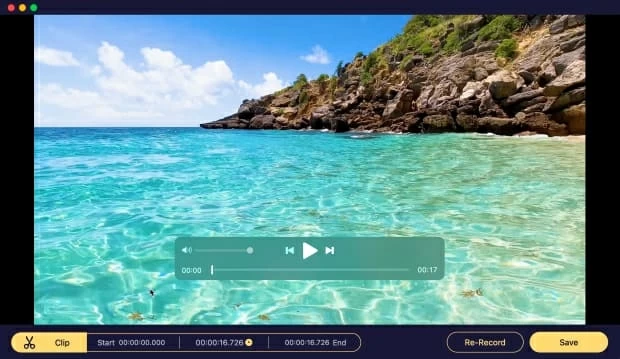
Step 4: Click the REC button to start recording your PC's internal audio. Once you're done, select the red stop button to stop the recording. The preview of the recorded file will be presented on the screen, you can check it and set the start and end. Then Save it.
We've got you covered if you wish to discover a free tool to record your PC's system audio. This section lists three of the finest means to capture internal sound on a PC.
The Xbox game bar, a built-in screen recording app, is available on Windows 10 and 11 pc for capturing gameplay. It also takes little effort to record system audio in a non-gaming app.
The program's functionality and compatibility make it an excellent choice for recording Windows 10 and 11 PCs. In contrast to Appgeeker Screen Recorder, which can capture the whole screen simultaneously, Game Bar can only record one screen simultaneously. Furthermore, you'll need to record the video to capture system sound on a PC.
To capture PC internal sound via Xbox Game Bar, follow the steps below:
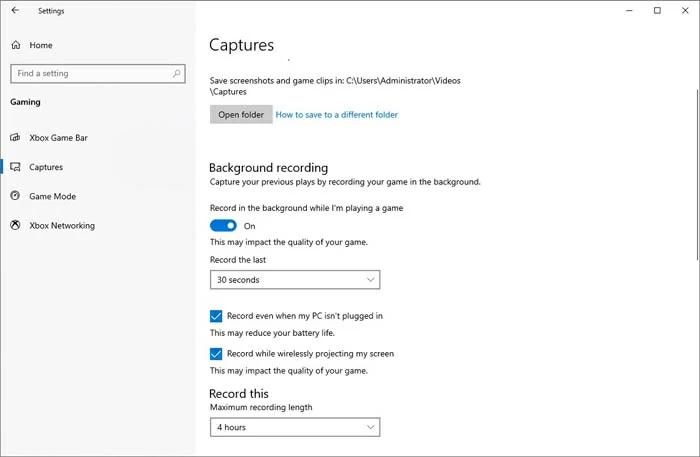
Step 1: Open the Windows settings and select the Gaming option. Go to the Captures and move the slider next to the Microphone recording volume to the minimum, and the System volume to the maximum.
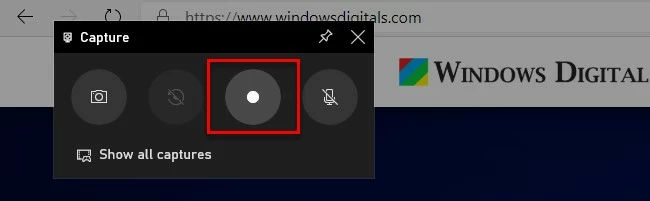
Step 2: Now, press Windows + R keys on your keyboard to open the Xbox Game bar.

Step 3: After that, click on the White dot option to start the recording. Once you're done recording, click on the Stop button.
OBS(Open Broadcaster Software) Studio is a cross-platform recording program that is free and effective. Its most common use is to record one's screen or a video clip. By default, it captures both system and microphone sound on a PC, you can manually set the recording audio as well. All playing sound on the PC, whether it is music, sound effects, or song, can be picked using OBS Studio.
Using OBS Studio for recording the sound from your desktop is a breeze. However, there is a major shortcoming compared to Appgeeker Screen Recorder. OBS Studio will provide a video recording with a blank screen as an output format for audio recording. You'll need to utilize a separate video converter to get the audio from the recording. Furthermore, the interface and recording process is complex, which means it's not user-friendly. If you are skillful at this or you are interested in using OBS Studio, follow the steps below to record PC internal audio.
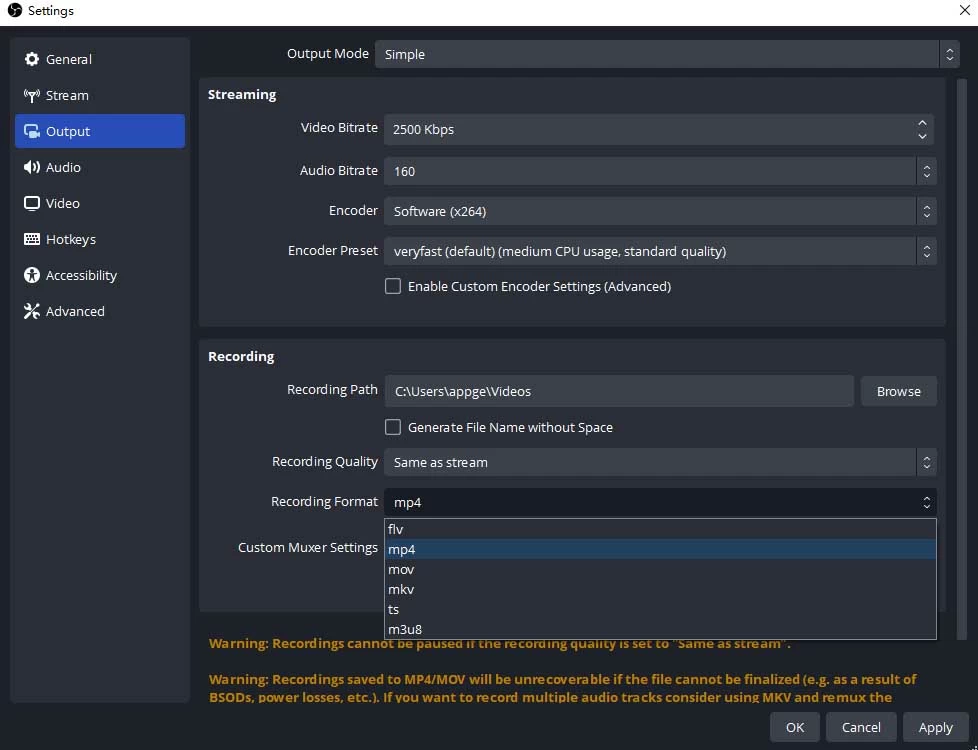
Before recording, go to File > Settings > Output to set the Recording Path for saving the recording file. OBS Studio set .mkv as the default video format. You can change the output format in Recording Format drop-down menu.
Step 1: Get OBS Studio on your PC. Create a new scene by clicking the + icon next to Scenes.
Step 2: Verify that you're capturing the Desktop Audio by clicking on Settings and going to Audio. Now, click the + icon next to Sources and choose Audio Output Capture.
Note:
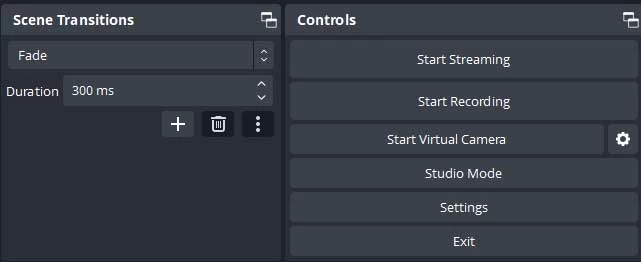
Step 3: After that, click Start Recording on the main interface to record the audio. If you're finished, just click the Start Recording button again. The recorded file with system audio on your computer will be automatically saved in the folder you set before. You can go to the folder and play the recorded video. If you just want an mp3 audio file, you may need a video converter to extract the audio.
Similar to OBS Studio, Audacity is a free multi-track audio editor and recorder that is both user-friendly and powerful. It may digitize recordings from other media or record live audio, computer system audio, or microphone audio. It serves standard editing tools like cut, copy, paste, and delete rips, and your recorded audio can be modified in a snap.
Audacity provides an audio file as an output format, making it more convenient than OBS Studio. Its audio mixer is amongst the best in the market. However, the recording process is also complicated for those newbies.
To record PC internal voice using Audacity, follow the steps below:
Step 1: Before you begin, download and install Audacity on your Windows PC or Mac. After that, launch the tool.
Step 2: Choose Audio Setup > Host > Window WASAPI.
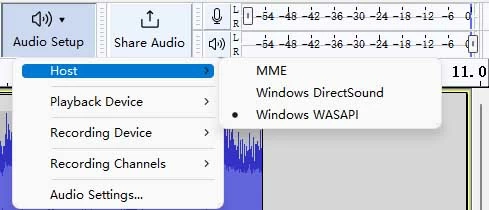
Step 3: Select your computer's speakers from the corresponding drop-down menu in the Recording Device panel. If there's no speaker on your PC, select Headphone.
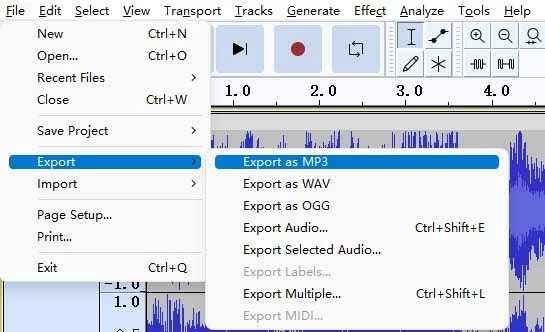
Step 4: Click the red Dot button to start recording PC internal audio. You can hit on the triangle button to pause and continue the recording process. Once you're done, select the Stop button or press Space on the keyboard to stop. After that, you can play the recorded sound to check if you need to reset it or change the start and the end. When you are satisfied with it, export the file by clicking on File > Export as MP3.
Can I record system audio on PC by Windows Voice Recorder?
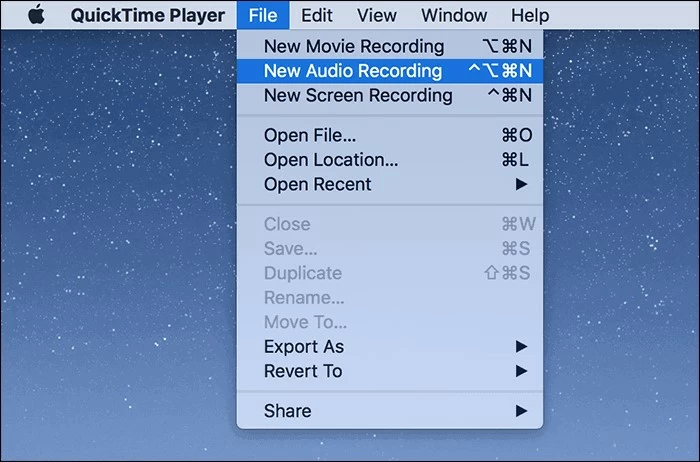
No, you cannot record system audio on a PC by Windows Voice Recorder. Voice Recorder is a built-in tool available for Windows PCs that allows you to record audio. Similar to QuickTime Player on Mac models, you can only record eternal sound from the microphone, and there's no option for choosing a microphone device. Therefore, we suggest you choose a more reliable tool above like Appgeeker Screen Recorder to record PC internal audio straightforwardly.
How to record internal sound on Windows 8 PC?
Since Xbox Game Bar only supports Windows 10 and 11, there's no built-in way to record internal sound on Windows 8 PC. However, you can use Appgeeker Screen Recorder and follow the similar steps above to record the system audio on your Windows 8 PC.
How to record internal voice on Windows 11 computers?
To record internal voice on Windows 11 computers, users can utilize all the methods above. When recording system audio on Windows 11 PC via Xbox Game Bar, avoid using TAB + ALT or minimizing the window, as doing so will cause the recording to pause. However, this doesn't happen in Windows 10 when you record the internal audio via Xbox Game Bar.
Conclusion
People, more importantly, content creators, often need to record PC internal audio for various purposes. To help them get audio from a PC in lossless quality, we came up with the finest tools and ways to record internal audio on a PC. If you wish to record internal audio in lossless quality along with the activities on the screen, Screen Recorder is your best bet!


