How Can You Back Up an Android Phone Safely


Summary:
Perhaps you will update your Samsung device in a rush if there's a new system update ready because updating phones provide additional new feature and better performance, and even patch security holes.
However, if you're too careless when doing the update or something goes wrong, the data and photos may lose from your Android Samsung.
The good news is that there're some methods that can be used to easily retrieve your lost pictures, and you can check them out below.
Before you try photo recovery methods on an updated Samsung
1. Restart your Samsung Phone
When you encounter the photo deletion issue, the first you try is force your Samsung to restart manually - hold the Volume down and the Power buttons simultaneously for about 7 seconds and then choose "Restart" option. This is the quickest and easiest solution to solve the issue.
2. Look on SD card
Alternatively, you can check the SD card on your Samsung device in a situation where you lose photos after Samsung update. To do that, you should unmount the card, remove it and insert it into your computer to see if it can be recognized by the computer. If not, the SD card may be corrupted or defective. A corrupted SD card won't allow you to view the files on the phone, or worse still all data including crucial pictures on your Samsung may get lost thoroughly.
Don't fret, you can use Android Data Recovery that can scan your SD card completely to recover missing images.
Once you find your photos disappear from your Samsung Galaxy (S, Note, A, and Z) after a new update, you should stop using the Samsung device to avoid the disappeared photos are overwritten by the new data.
Method #1: Recover lost photos on Samsung Android after update from backup
Nowadays almost all people like to take pictures using their mobile devices and more and more and more memorable photos on their phones. They've realized the importance of periodically backing up phone to a safe place and they did so.
Therefore, having a full backup for Samsung phone will save you a world of hurt. Should you've also backed up your Samsung phone, it's just a piece of cake for you to restore deleted photos.
Get photos back from Samsung Cloud
Samsung Cloud provides 5GB free cloud storage space for every Samsung users, provided that it's your first time you log into Samsung Cloud. And only if you turn on Gallery sync feature in the Samsung Cloud, the photos you've taken will be synced and backed up to this native cloud storage service.
Note: Samsung announced that they will discontinue the Gallery sync support in 2021. You should move your photos synced on Samsung Cloud to other backup solutions as soon as possible.
Steps to retrieve disappeared pictures:
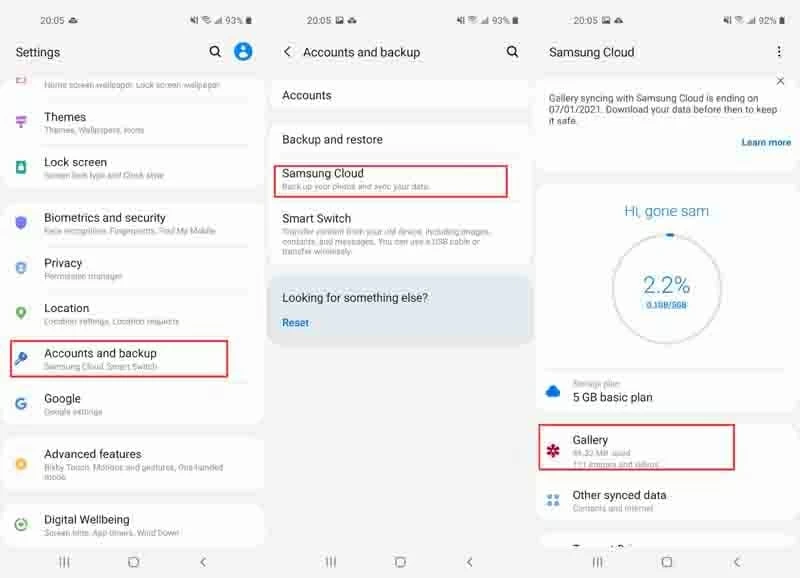
1. Open your Samsung Galaxy's Settings app and tap Accounts and backup > Samsung Cloud.
2. Swipe down the screen from the top until you see "Gallery", and then tap "Gallery" > "Recently added".
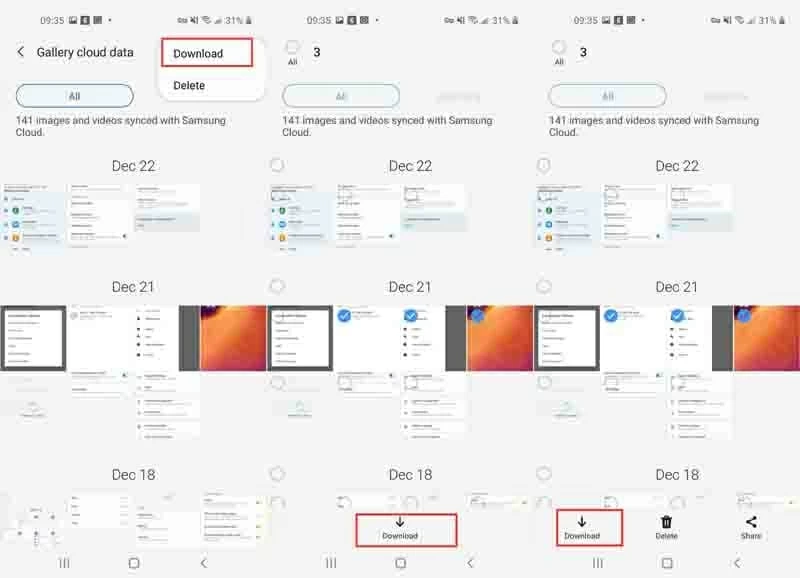
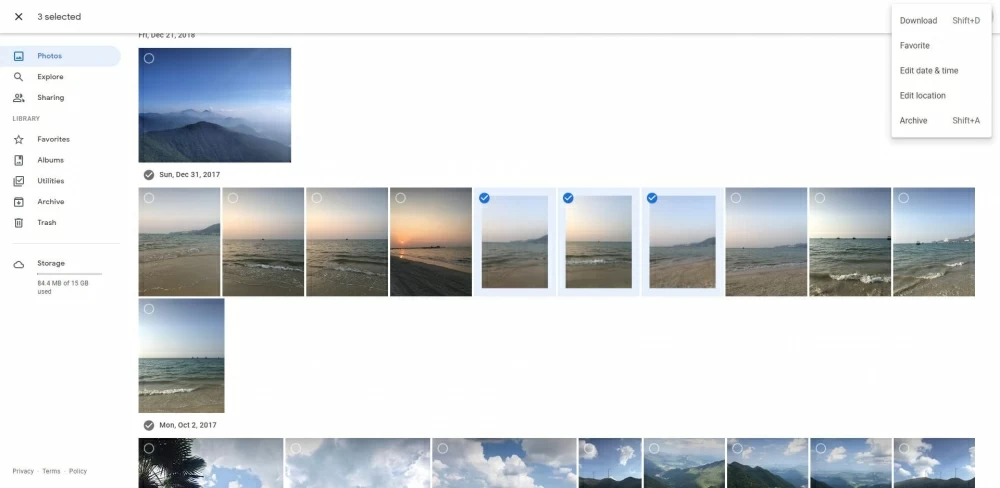
3. In the "Gallery cloud data", it shows you all images synced with Samsung Cloud. You can click More option (three dots) in the top-right corner, tick the checkmark in the top left of pictures you want to restore, and tap "Download" like the screenshot.
Or you can hold the photos you would like to restore, and click "Download" in the lower left corner of the screen.
You can also retrieve missing pictures from the web version of Samsung Cloud:
1. Open your desire browser, and navigate to support.samsungcloud.com.
2. Click on Sign in, enter your Samsung account and password, and then hit SIGN IN.
3. Click "Gallery" in the left panel. After that, you can enable "All" option, or check any image you want to recover.
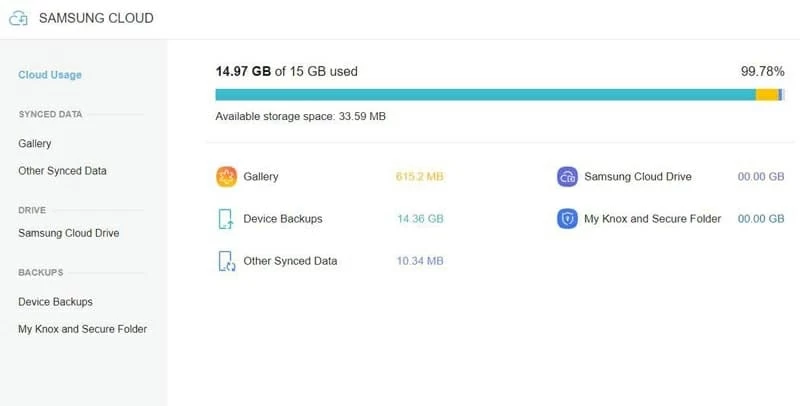
4. At last, click "Download" option at the upper right corner of the window.
Retrieve pictures from Google backup
Actually, the photos taken on your Samsung smartphone not only can be saved on the Gallery app or synced to Samsung Cloud, they can also be backed up to your Google account. It means that you're able to use Google Photos and Google Drive to protect the photos being lost.
To get your phone backed up to Google account, you should open Settings app, and tap Accounts and backup > Backup and restore > Google Account > Account (log into your Google account). Then, toggle on Back up to Google Drive, or tap Google Photos > toggle on Back up & sync. Please keep in mind that Google Drive to manually upload gallery photos if you want it as a photo repository.
Well, Google backup will save your bacon if the latest Samsung update delete your irreplaceable photos. Let's learn how to restore them from Google backup.
Steps to restore disappeared images from Google Photos:
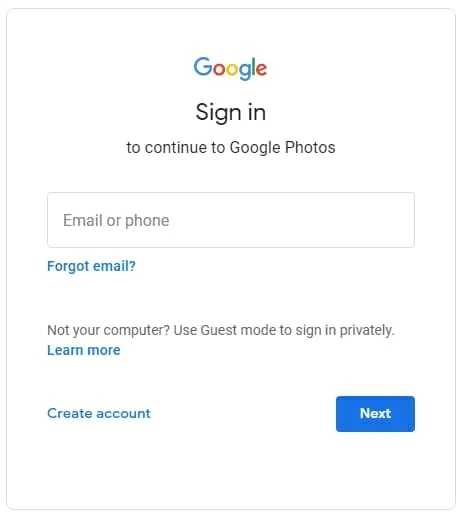
1. Launch your favorite web browser for personal use on your computer, and navigate to photos.google.com.
2. Click Go to Google Photos, type your Email/phone and password, and click on Next.
3. Once you enter Google Photos, click "Photos" in the left, then all backed-up images will be displayed.
4. Select the images you would like to restore, and click on "Download" at the right corner of the window.
Steps to restore deleted pictures from Google Drive:
1. Opening the web browser on your computer, go to drive.google.com.
2. Click on Go to Google Drive, and enter your Google account.
3. Ensure "My Drive" is selected, click the folder containing your photos.
4. Right-click the photo you would like to restore.
5. Click "Download" in the pull-down menu.

Method #2: Recover missing photos after Samsung Galaxy update without backup
Are you upset because you didn't make a backup for your images on Samsung phone before the new update and now want to recover lost photos? There is a dedicated program to recover the photos and other data and save them onto your PC or Mac, without a backup ready.
Android Data Recovery is the dedicated & powerful solution that runs on PC hard drive and macOS. It can (selectively) recover pictures, text messages, music, documents, call history, contacts and more lost from your Android phones.
There's an easy-to-understand graphical interface on the Android Data Recovery, so you will feel ease to use it with a text & image screen. Learn how to recover missing photos after Samsung update and save them locally when no backup.
Pro tip: We suggest doing the photo recovery on your computer so as to prevent overwriting lost data. Thus, Android Data Recovery can be a godsend.
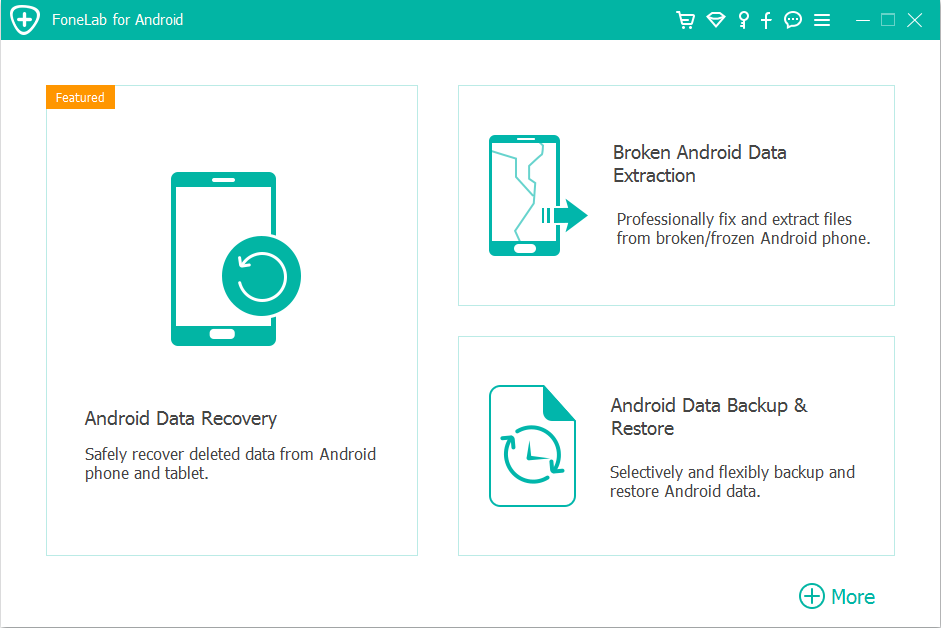
1. Connect your Samsung Galaxy to computer. Once you've installed the software for your computer, now you can fire up it. Use the USB cable that come with your Samsung phone to hook up the phone to your work PC or Mac.
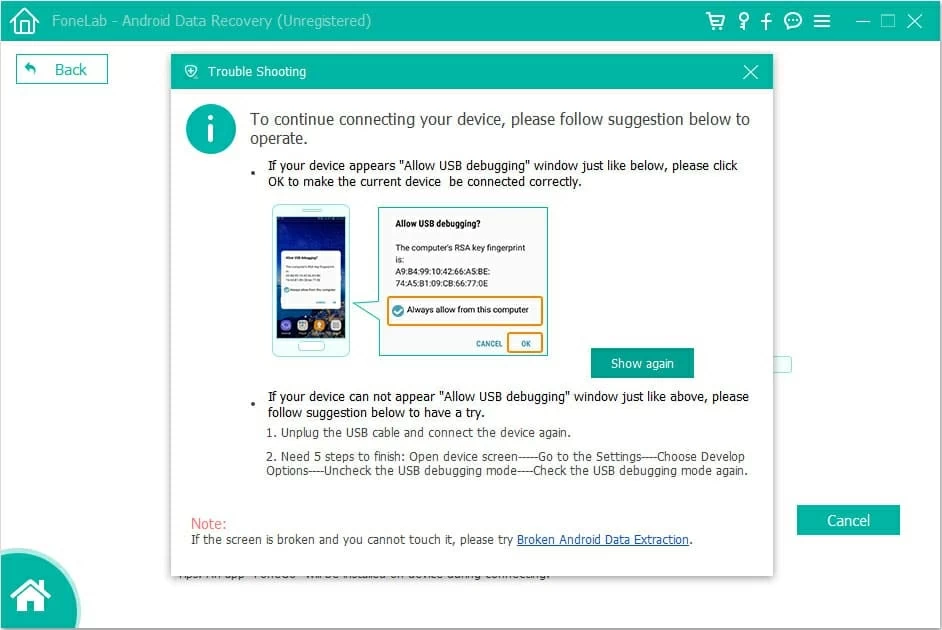
2. Allow USB debugging on your Samsung device. After you plug your phone into computer, a message says "Allow USB debugging?" will pop up, and you need to enable "Always allow from this computer" and then tap Allow.
If there's no message, you can go to Settings app to enable the USB debugging mode. Here's a specific guide.
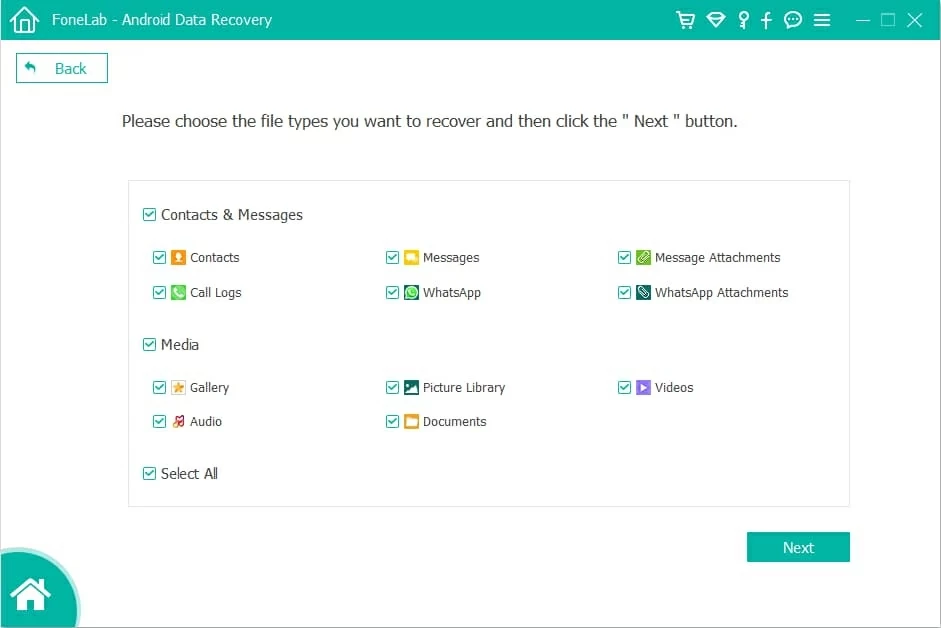
3. Choose photo data to recover. Next you can click Android Data Recovery tab, then respectively check the box next to "Gallery" and "Picture Library".
Then, click on the green Next button. The software will instantly scan the pictures stored on your Samsung smartphone.
4. Preview and select the image. From here, you will view all pictures after scanning. Check the box under the pictures you want to restore. You can select some pictures or select all pictures to recover as your will.
But if this window doesn't show the lost pictures, you need to hit Deep Scan. In this mode, the program will perform a deep scan on the phone's internal memory to discover more losing data. Deep scan will take a long time to complete.
It's to be noted that you have to root your Samsung device before choosing the deep scan mode.
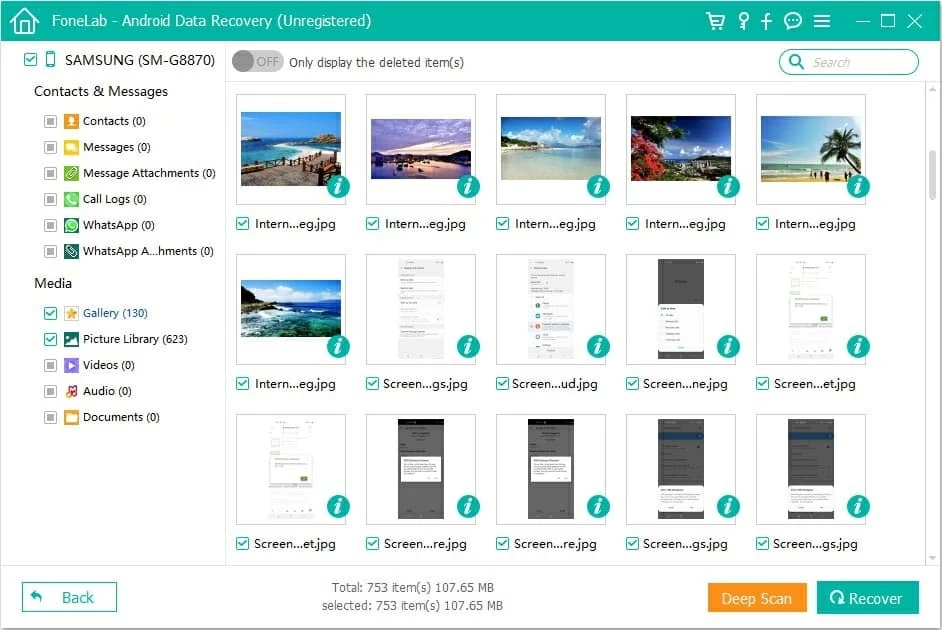
5. Recover lost photos. Finally, click Recover button. Wait a few minutes, the missing photos will be successfully recovered.
Method #3: Recover disappeared pictures after update on Samsung phones from the Trash
Have you considered the missing photos are still in the trash? We do recommend that you check the trash of the Gallery app or Google Photos, and maybe there's a chance to retrieve all your lost pictures. The steps are straightforward and here's how.
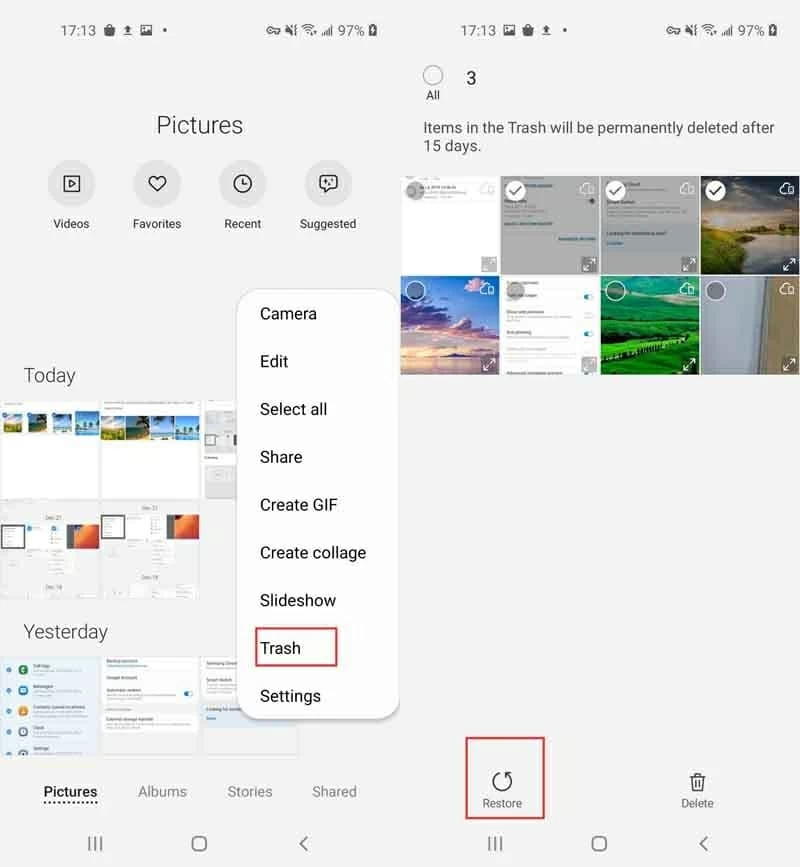
Retrieve photo from Gallery trash
Note that Gallery trash only save the deleted pictures for 15 days.
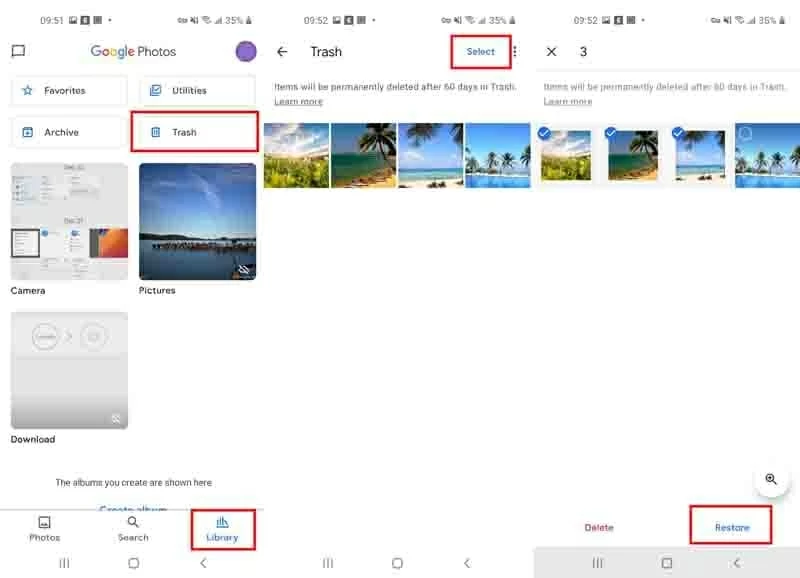
Retrieve photo from Google Photos Trash
Tip: The trash of Google Photos will save the deleted images for 60 days.
Will I lose photos if I update my Samsung phone
Commonly won't. For extra security, you should learn something what you should do before update your Samsung Galaxy device so that you won't get flustered in a case that pictures disappear mysteriously as something went wrong during an update.
Remember to back up your Samsung
Backing up your Samsung photos to a safe place is always a good idea. A solid backup strategy will help you prevent the photo and other important information from being lost.
1) To Cloud
There're numerous of cloud backup solutions (also called online backup services), such as Microsoft OneDrive, Dropbox, Google Drive, etc. Therefore, except for native Samsung Cloud, you can also get your Samsung Galaxy backed up to these services before the latest update to avoid photo loss.
2) To Computer
You can also back up your Samsung phones on the local PC or Mac computer before update. Speaking of that, the Android Data Recovery software includes a backup feature that enables backing up photos, contacts, audio, videos, etc. to the desktop & laptop.
Use the right way to update your Samsung Galaxy
If there's a new update available, your phone will prompt you to install them. After the update, you would find that the interface is different from before, or it adds additional features. However, we also would like to caution you in advance that during the update, you can't use your phone normally and don't press the power button or sudden power off your device.
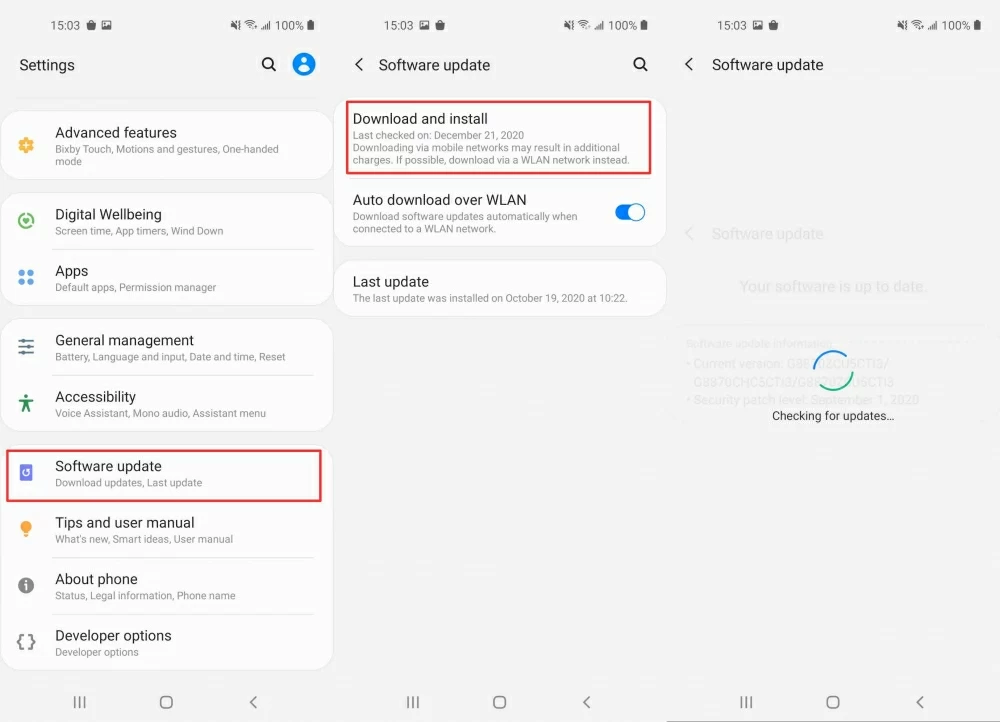
To update your Samsung smartphone manually in a right way, you should go to Settings app, scroll down and tap Software update > Download and install.
You can also enable your Samsung to automatically download the new operating system over Wi-Fi. Just toggle on "Auto download over WLAN" under "Software update".
Remove the SD card before updating Samsung devices
SD card is a type of removable storage device that can store large chunks of data, like videos, photos, files. If you don't want it to be corrupted during the update you should pop out the SD card before you run the Samsung update: Turn off your phone and unmount the SD card.
Conclusion
The problem latest update deleted your pictures possibly result from accidental deletion of photos, physical damage on SD card, or malware attack on your Samsung phone.
While there're ways to retrieve the deleted or lost photos with ease, begin with restoring them from the backup. If you didn't back up your phone, retrieve the pictures without backup using Android Data Recovery. Additionally, remember to check the Trash.
This hopefully helps you solve the photo loss issue.