How to Rip a Blu-ray and Convert into MOV Format in Mac


I've just shown you how to copy Blu-ray movies straight to another Blu-ray disc in the previous article. If you want a DVD duplication from an original Blu-ray, you could do that as well, especially if you have no Blu-ray player in hand this moment. While it might seem like a daunting task to make a copy of one Blu-ray to a DVD on your Mac or Windows machine because of strict disk encryption schemes, it is actually a quick and painless task.
Rather than copying all the files from your source Blu-ray to a new folder on your desktop, and then burn to a blank DVD, here what you need to do is pick up the tool—Blu-ray Copy program we have used to make a copy from BD to BD.
This tool is easy in operation but powerful in function that enables you to create backups from Blu-ray to DVD disc, Blu-ray, BD folder or ISO image, with just a few clicks. What's more, it provides three copy modes for multiple needs and the subtitles and audio tracks could be freely selected and retained so as to enjoy your movies in familiar language.
Now, let's walk through the step-by-step guide to have a look at how this Blu-ray Copy software works in shrinking your Blu-ray to fit on DVD on Mac (or PC) smoothly. Please do note that since you're compressing larger Blu-ray disc onto smaller-capacity DVD disc, the process will cause quality loss.
See Also: How to Copy Blu-ray Movies onto Hard Drive on Computer
Step 1: Load Source Blu-ray
Insert the original Blu-ray disc to the drive, and launch this Blu-ray Copy software application. When its main interface opens, hit Add Blu-ray/DVD button to import source BD titles to the program.
Tip: You are allowed to hit the inverted triangle arrow next to Add Blu-ray/DVD button to select your disc folder or ISO files as input.
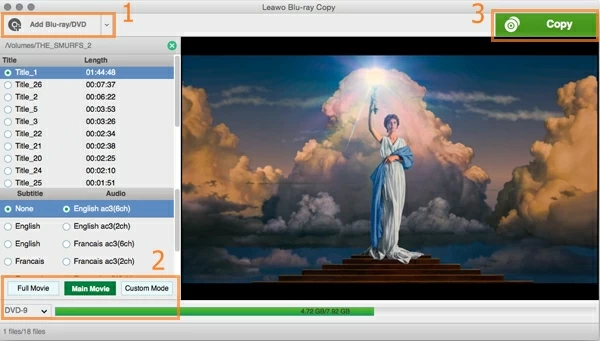
Once the disc is navigated, the titles and other detailed information will be shown up on the main interface of the program.
Step 2: Configure settings
As a general rule, you'll only need to select your DVD type (see lower left side) and tweak the settings for output. Here you are allowed to select a copy mode among Full Movie, Main Movie and Custom Mode located on the lower left corner of the screen. In general, if you don't want all of the extra special features, select Main Movie and then the title with the longest playing time displayed.
In addition, subtitle tracks, audio streams are available for you to choose in your own way.
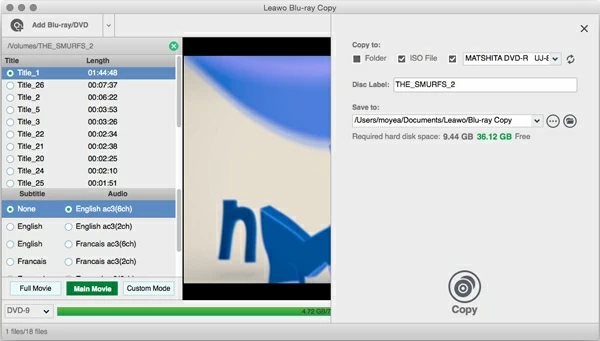
Then move to the upper-right corner of the interface and hit the Copy button. This will open the backup setting dialog, in which you could set the details under the option of "Copy to", "Disc label", "Save to".
Next, take the Blu-ray disc out and insert a blank DVD into the drive. At this point, in "Copy to" area you should tick the third option where shows the DVD name in order to copy movies from Blu-ray to DVD. Also, you here are able to tick ISO option to rip a Blu-ray into ISO image file for backup.
Step 3: Start Copying Blu-ray to a blank DVD on your Mac
Now hit Copy button again at the bottom of the dialog to commence the process of compressing movies from a Blu-ray onto a DVD disc. A window comes up showing you the copy status. You could cancel the process anytime if you want by clicking Cancel button.
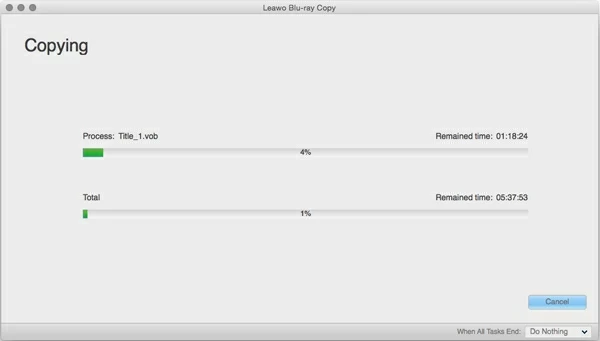
Done! You've made a backup of your Blu-ray over to another blank DVD disc on your machine.
Happy copying!