How Can I Rip a Blu-ray to a MKV File Format in Mac


In an era of streaming, Blu-ray sales are under attack. There's really no need to purchase new Blu-ray movies to watch at home using Blu-ray player, other than you're a BD freaks. If you have a large Blu-ray collection that takes up a large amount of room space, you might want to consider ripping your Blu-ray files on MacBook Pro & Air to create a digital copy that can be played on computer or loaded into your iTunes library.
Ripping a Blu-ray disc on MacBook Pro & Air is simple; all it takes is a Blu-ray drive, a Blu-ray ripper tool and a bit of time. Now, I'll share with you instructions on how to rip a Blu-ray and save movies onto MacBook Pro & Air.
1. Preparatory Work
Blu-ray Converter makes things as easy and stress-free as possible, allowing you to cut through the copy protection on the DVDs and Blu-ray discs, and then convert the movie content into digital files. It also acts as a solid video converter which can convert pretty much any media formats.
When you're ready, it's time to rip movies from Blu-ray to MacBook Air & Pro.
2. Rip Blu-rays on MacBook
Step 1: Load Blu-ray files
Before you launch the software, open your MacBook's BD drive and insert your Blu-ray disc. Close the tray and open the software.
Click the "Load Disc" option in the upper left side corner of the window and browse your Blu-ray disc and choose it. The Mac Blu-ray converter will take a few moments to scan the content.
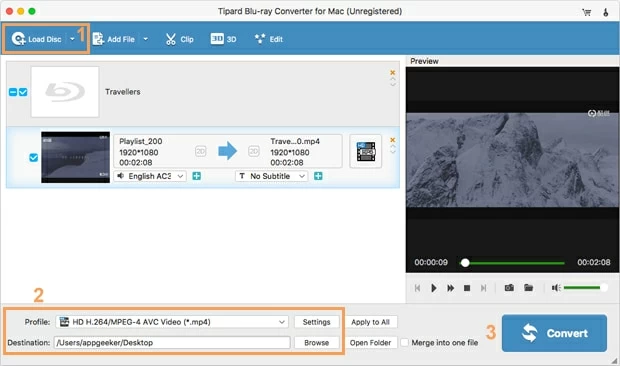
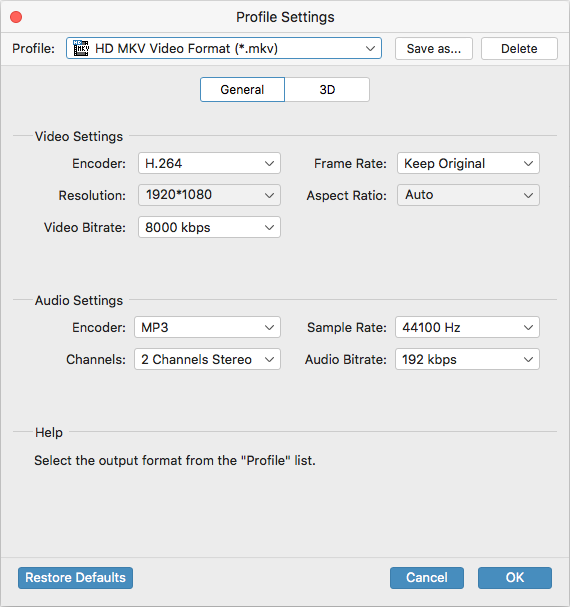
Step 2: Set the output formats and saving destination
Now you need to decide which format you want the output files to be. If you're looking for a common and compatible file type, it makes sense to rip Blu-ray disc to MP4 format on MacBook, but you can save it in any other format (i.e. MKV, MOV, M4V) you want.
To do so, click the "Profile" drop-down menu on the bottom left side of the window, in the opening panel, select HD H.264/mpeg-4 AVC Video (*.mp4) under HD Video category.
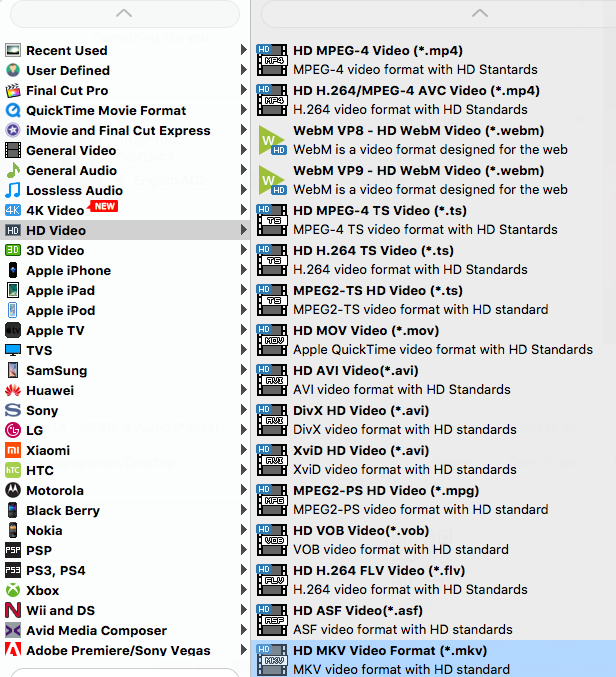
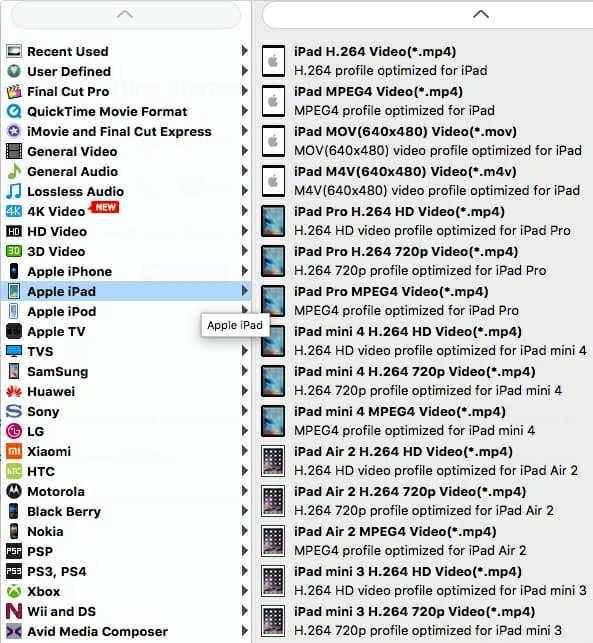
On the panel, you will also see several device-specific presets. They correspond to the devices you wish the files to be played on. Choosing preset rather than a specific format will save your time.
You can also fine tune the conversion settings to get control over the quality of output file. The program sports such a feature dubbed as "Settings" next to "Profile" menu. Entering this Settings window you can adjust the values given in the corresponding boxes.
These can be left as the default.
Go ahead and choose where you want to save your output file through "Destination" field on the bottom of the window.
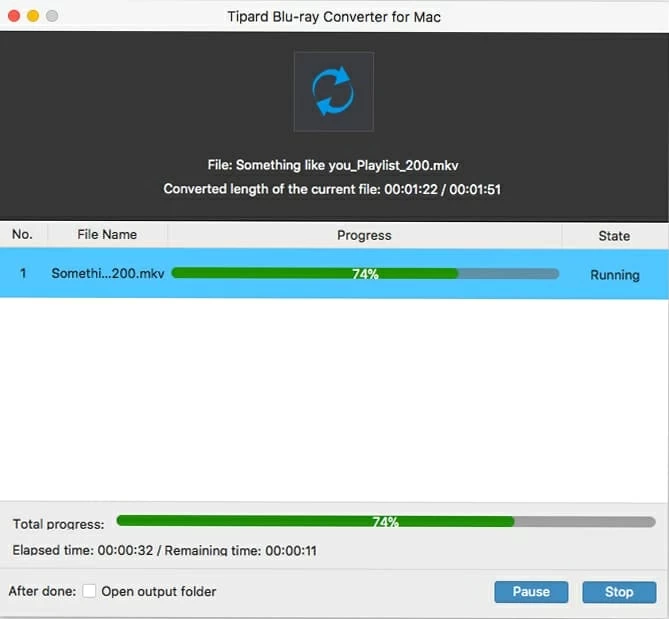
Step 3: Rip and save Blu-ray to MacBook Air & Pro
Once you're happy with all your settings, click the "Convert" button at the bottom right side of the program's window to begin ripping and putting Blu-ray movies on MacBook hard drive.
The whole process could take quite a while, depending on the length of the Blu-ray movie and your computer power. Progress monitoring is available.
That is it!
It seems like a little bit difficult at first when it comes to backing up Blu-ray to MacBook, but it really is very easy to handle. It's just a matter of picking a right Blu-ray ripper tool and rip the disc to digital format on MacBook. We also popular Blu-ray tutorial on how to play Blu-ray on Mac.