
How to Get Back Lost Pictures on LG Phone


Have you accidentally deleted all or a bunch of memorable vacation photos from your phone? Don't lose any hope. Whether you're running Android or iOS, you could actually retrieve lost phone pictures with the right utility.
The built-in camera in smartphone has made it so convenient to get carried away to take a lot of photos. This is great, but not every picture you shot is the one you tend to keep for a long term; then you decide to delete it to get it off your phone. It's easy to do the photo deletion and unfortunately, it's just easy to make a accidental deletion as well, especially when using the select option to delete a bunch of photos at a time.
We've all dealt with photo loss on a daily-used phone, whether it was from software bugs, mistaken deletion, or after a picture transferring from and to another handset or computer, OS upgrade, device syncing process. If you lose an irreplaceable picture on your mobile phone, you definitely want it back. Now what? To raise the chance of retrieving lost photos on the phone, you should stop using the device immediately, since the deleted photos linger in the file system and doing anything on phone will result in the files being overwritten and render them unrecoverable.
Whether you're using an Android-based phone or an iPhone, this guide will help you get phone photos back effectively after you've erased them on the phone.
If you use Google Photos (or similar cloud storage services like Dropbox, OneDrive), and had the Backup & Sync option enabled, then all photos you've added in Android's memory should be included in the application as well. Even after you delete a phone picture from Gallery, it'll stay in the Trash folder in Google Photos for 60 days for instant restoration.
If this doesn't work for you, there's no way to restore the phone pictures disappeared from Android, except for employing a dedicated phone photo recovery tool. Android Data Recover is one such application that you can use to handle recovery tasks, and it is both Windows and Mac compatible.
The program will automatically scan through the entire storage of Android's internal storage to find any file that have been deleted but no yet overwritten, including photos in the cell phone. From the scanning result window it returns, you could selectively choose a particular or a whole slew of pictures to bring back — it's simply a point-and-click process. As a comprehensive program, it's equipped with the backup option to guard you against a mass of data loss. [Also Read: How to Back up an Android phone or Tablet Safely]
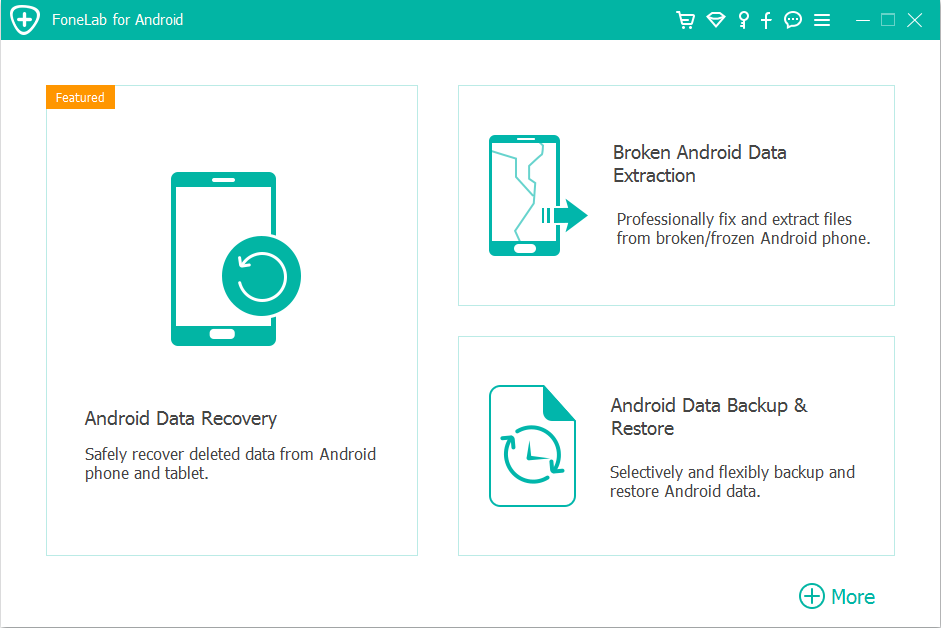
Step 1: Plug Android to computer
On running the software, click Android Data Recover option on the window. Then, attach your smartphone, via the USB cable, to your computer.
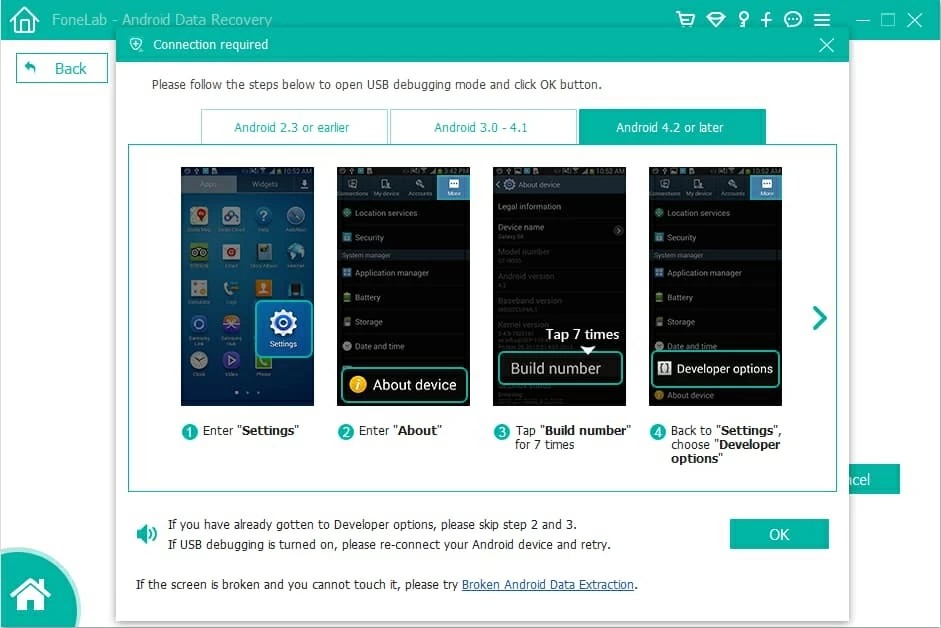
Step 2: Authorize USB Debugging
At this point, you'll be prompted to allow USB debugging on the phone to allow the software access to the device. Depending on the what OS version your phone is running, choose a particular version (e.g. Android 4.2 or later) then follow the instructions on the pop-up to proceed with the process.
When you've done this, click the OK button and move to next step.
For more in-depth instructions visit this page: How to Enable USB Debugging on Android
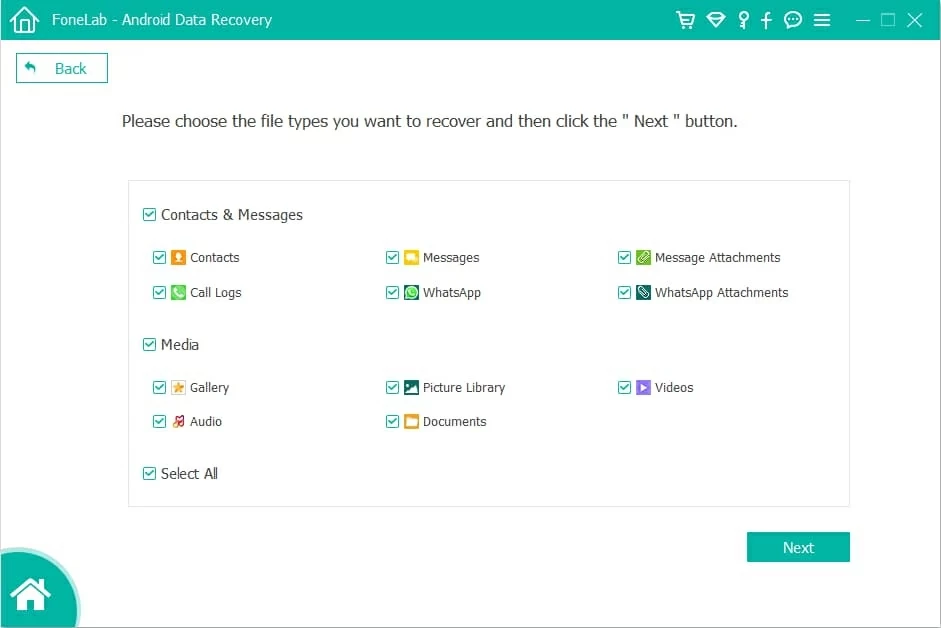
Step 3: Select Android file types to retrieve
In the new window, you'll be given the options of file types to choose from for recovery: Contacts, Messages & Attachments, Gallery, Pictures Library, Videos, etc. In our case, select Gallery and Picture Library option and click the Next button.
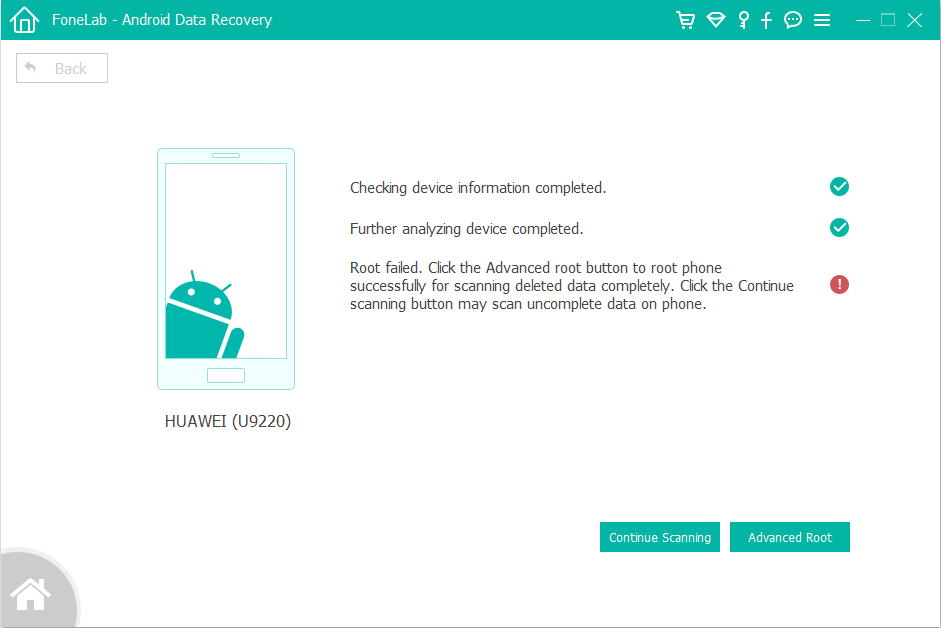
The utility will check your Android information and further analyze it in a quick manner. You may get a notice messages on the screen asking to root your Android for scanning the deleted phone photos deeply and completely.
To do this, press Advanced Root button on the bottom, then get the free KingoRoot tool downloaded from the newly-opened site. For more information about rooting process jump to our article on how to root and unroot an Android device.
Step 4: Choose phone photos and trigger recovery
Once you're rooted, the software will do a whole search on your Android for the phone pictures and this would take a little while to complete.
When it's done, you will get a scanning result window, shown as the screenshot below. To retrieve lost phone photos, click on the Gallery option (or Picture Library option) on the left, which will bring up a slew of picture thumbnails on the right pane, then click each checkbox next to each item name you would like to restore.
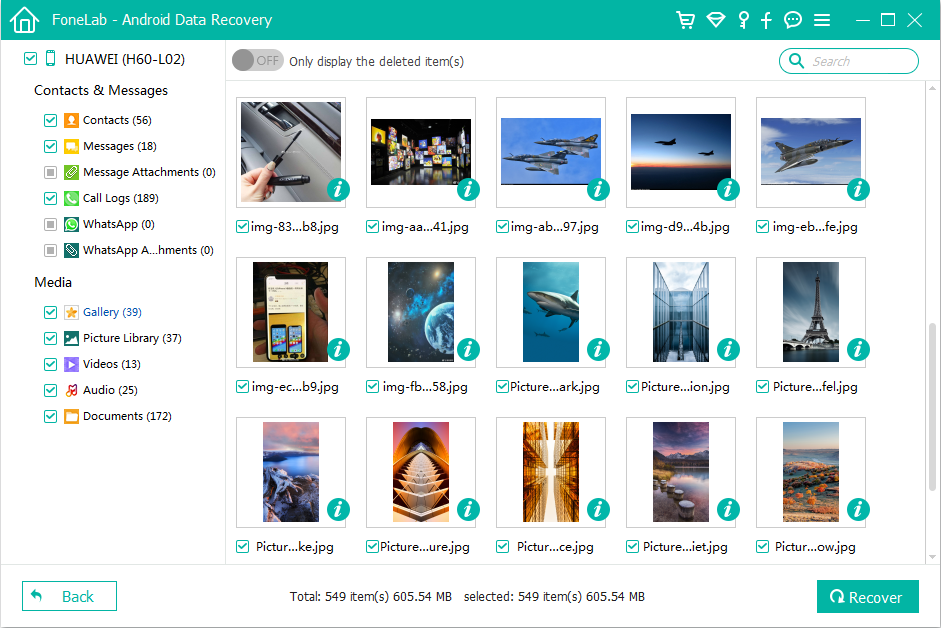
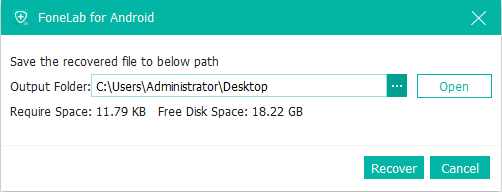
After that, click the Recover button at the lower right, then on the pop-up dialog window, set a destination that is accessible to your machine for saving the recovered phone photos.
At last, click the Recover button in the dialog and let the software do its things.
Also see: Transferring all messages from Android to iPhone.
This is how simple it is to recover phone photos on Android mobile. For iPhone users, things get easier and more straightforward as you don't do extra settings before a deep scan.
The fact is that a safety net for saving the accidentally deleted phone pictures — Recently Deleted album, has been built in iPhone Photos app since iOS 8, which makes it a very pleasant process for anyone who needs to undo the mistake.
If you can't find the phone pictures you need in that album, and you don't have a up-to-date backup, then you need to apply Appgeeker iOS Data Recovery to restore. It's equipped with the direct recovery solution that enables you to retrieve deleted or lost photos back in place.
Step 1: Connect iPhone to computer
Hook up iPhone with your machine using the USB syncing cable and open the software after installing.
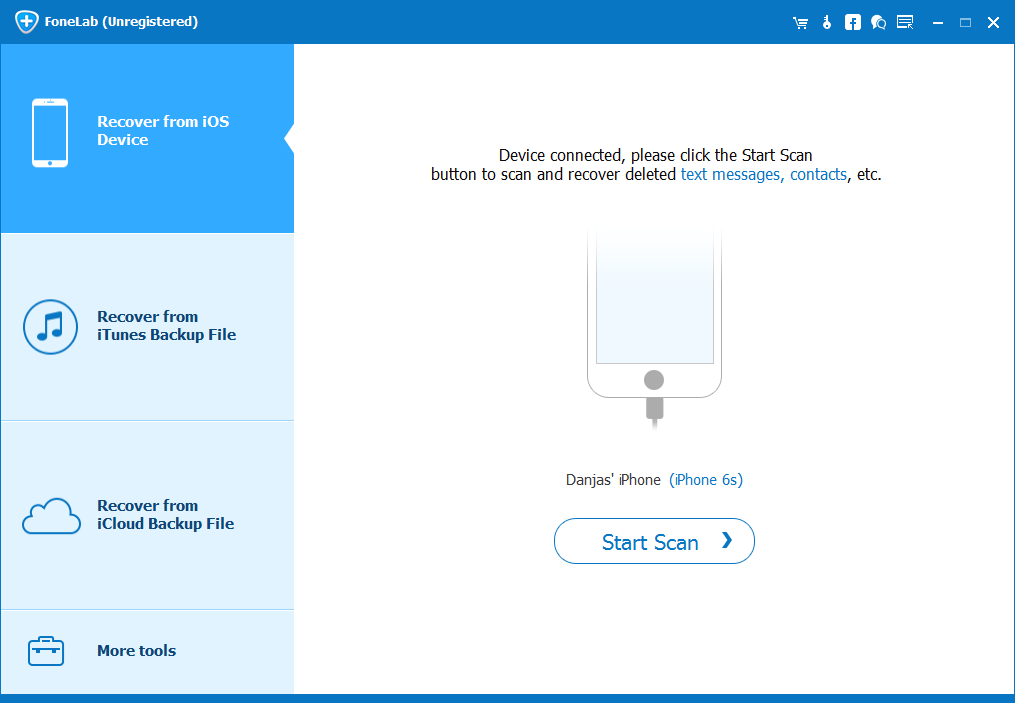
On the startup window, click on Recover from iOS Device mode from the left side for getting back the phone pictures you've erased, and the software will recognize the device.
Step 2: Analyze iPhone's memory to find the lost phone photos
Once your iPhone is detected, click the Start Scan button when it appears on the screen. This will start the process of scanning files on iPhone — This may last a few minutes depending on how many data files store on the phone.
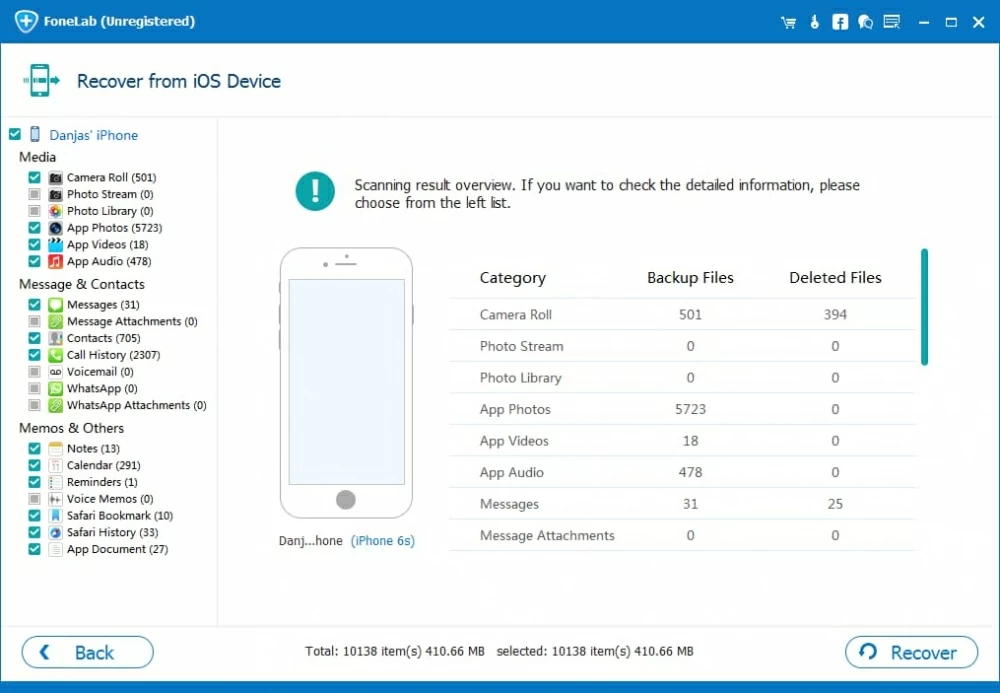
After the deep scan, a new window opens. On the right is the overview of all found files and on the left are the navigable categories, such as Camera Roll, Photo Library, App Video, Contacts, Notes, etc.
Step 3: Select phone pictures to restore
In this step, all you need to do is choose what to recover. To get the deleted phone photos restored, click on Camera Roll category (or Photo Library, Photo Stream, App Photos) on the left, under which you can see the recoverable pictures on the right pane. You can then check the boxes for the items that you want to bring back.
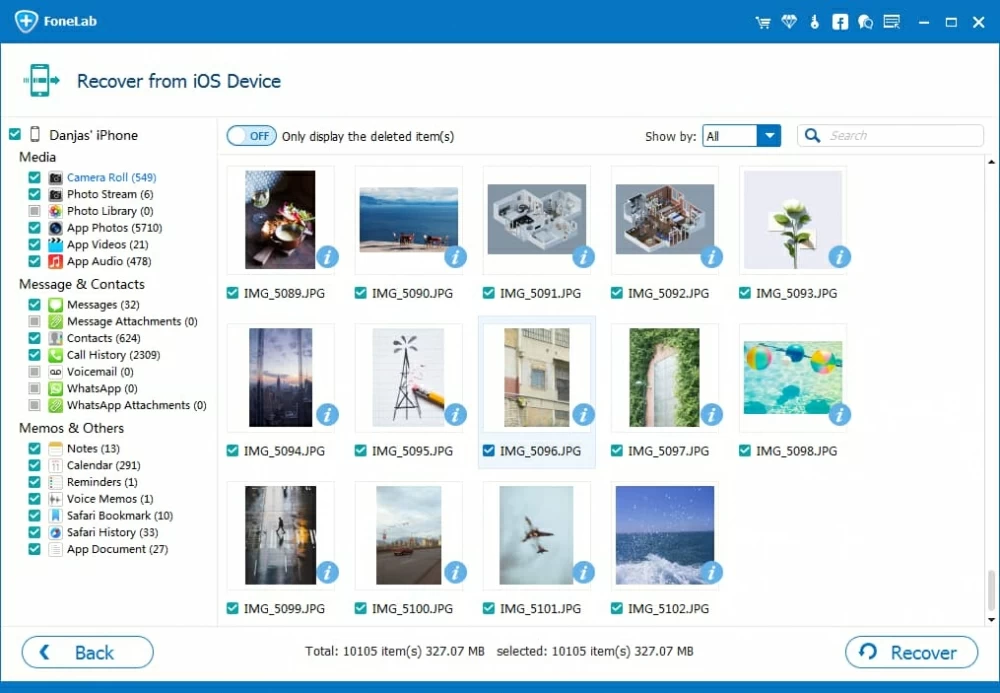
Tip: If you have a ton of pictures on iPhone, you can enable Only display the deleted item(s) on the top, which is easier for sifting through the results.
Step 4: Begin phone photos recovery
After making the selection of the photos, click the Recovery button and indicate where you would like the restored files stored in the pop-up window so you can find the folder easily after the recovery.
Finally, hit the Recovery button again to commence the phone picture recovery for iPhone. Wait until the application finished its tasks.

After the completion of restore, go to the folder you designated previously on your machine and check the recovered pictures.
Conclusion
With the help of these two powerful batch photo recovering utilities, your disappeared, lost and deleted pictures in the phone should be recovered and accessible again. One tip is to try the free trial of the program to see whether it can locate the missing photos on your phone before you buy it.
Most importantly, making timely backup of a phone will prevent yourself from accidental loss.