Photos disappeared from iPhone - Causes & fixes

This ultimate guide covers all possible ways for wired and wireless access to your iPhone photos from your Mac. Explore these efficient methods step by step!

Your iPhone captures life's best moments — but to edit, organize, or preserve them, you'll want to transfer those iPhone photos to your Mac for local access. Thankfully, there are quite a few ways to access your iPhone photos on Mac easily.

Accessing iPhone photos on Mac is a simple task, whether with a cable or wirelessly.
Whether you prefer to view your pictures on a larger screen or free up device space, this guide covers every method for how to access iPhone photos on Mac.
From wired transfer to automatic cloud sync, these efficient options ensure seamless access to your iPhone photos from your Mac without losing any quality.
The reliable Appgeeker iPhone Data Transfer enables you to selectively transfer full-quality photos from iPhone to Mac or vice versa, ideal for offline photo access and avoiding iCloud storage limits.
Table of Contents
This comprehensive guide works for all Mac models, including MacBook Air, MacBook Pro, iMac, Mac mini, Mac Pro, and more.
To get your iPhone photos accessible on Mac, the built-in Photos app on macOS can be one of the easiest ways — simply connect your iPhone with your Mac with a USB or Lightning cable, then the Photos app will open automatically, allowing you to import specific pictures and videos from your iPhone directly. Here's how to access iPhone photos from Mac Photos app:
1. Connect your iPhone to Mac with a USB cable. If a prompt appears asking for Trust This Computer, tap Trust to allow photo access.
2. Open the Photos app on your Mac if it doesn't launch automatically.
3. Click your iPhone under Devices in the left sidebar.
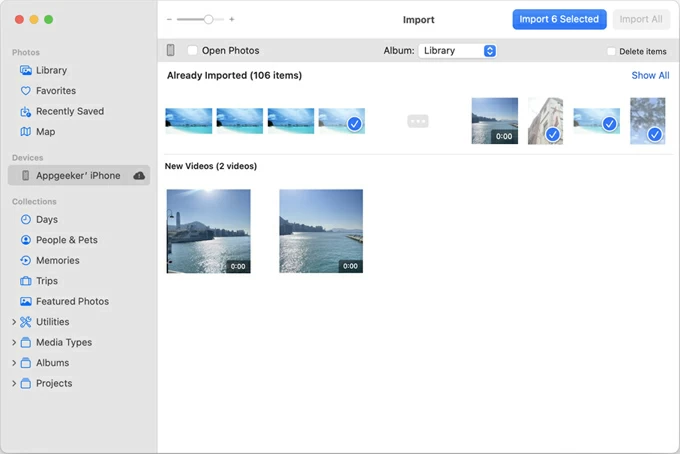
4. When the Import screen shows up, all photos and videos on your iPhone are accessible here.
Note: On macOS Sequoia 15.4 or later, the photos and videos in iPhone's Hidden album won't be imported to your Mac if the album is locked.
5. At the top toolbar, select where you prefer to import your iPhone photos for future access. You may choose a current album or create a new picture folder in Album box.
6. Click to select the iPhone photos you want to access on your Mac.
7. Click Import Selected button in the upper-right corner. Or, check Import All New Photos to transfer only the new items.
Wait for the process to complete. Once done, you're able to access the imported iPhone photos on your Mac at any time, whether for viewing, editing, or sharing.
For Apple users, iCloud Photos safely stores your photos and videos and keeps them up to date and accessible on all your Apple devices and iCloud.com automatically. That is, with multi-device accessibility, you're able to wirelessly access your entire iPhone Photos Library from Mac and vice versa through iCloud Photos syncing.
For seamless iPhone photo access on Mac:
Simply connect both devices to an active Wi-Fi network. Then follow these steps to enable iCloud Photos on iPhone and Mac for wireless photo access:
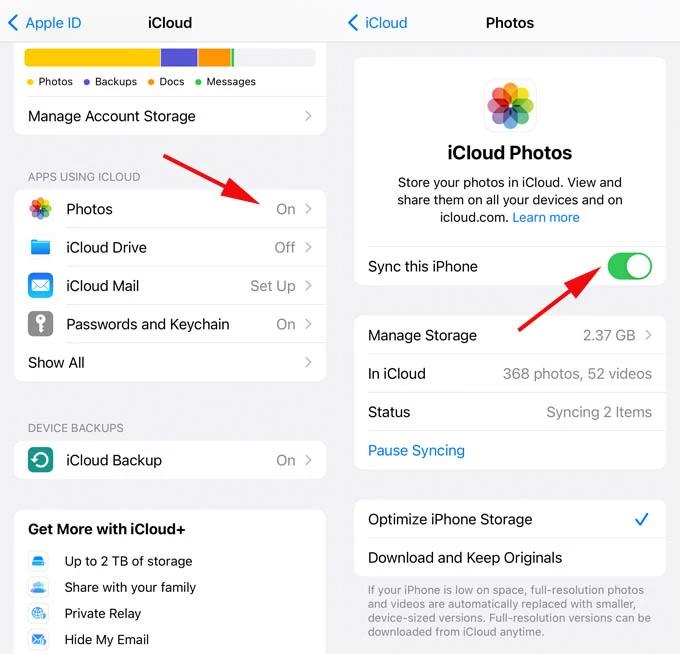
Step 1. Enable iCloud Photos on iPhone.
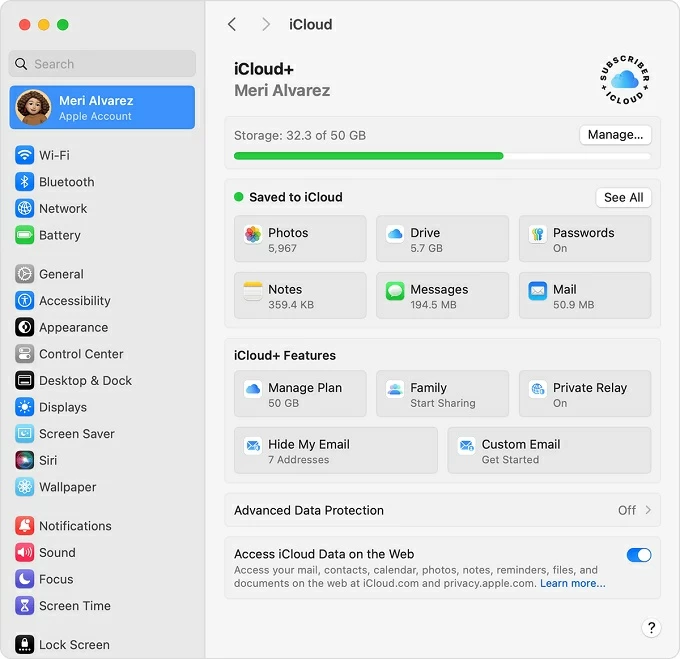
Step 2. Turn on iCloud Photos on Mac.
Step 3. Access iPhone photos from Mac.
Note: With iCloud Photos enabled, any photos deleted from your iPhone will disappear from your Mac as well. If that happens, seek help for recovering deleted photos on iPhone.
Alternatively, visiting iCloud.com on Mac also lets you access the photos and videos on your iPhone wirelessly. Here's what to do:
When it completes, the downloaded iPhone photos are accessible on your Mac at any time.
While iCloud Photos syncs iPhone photos with Mac for wireless access, the maximum iCloud free storage you can use is 5 GB only. If your photos and videos are over 5 GB, you may upgrade to iCloud + for more paid cloud space.
When your iCloud storage reaches its limit, you may want an alternative way to access iPhone photos on Mac. Luckily, Appgeeker iPhone Data Transfer provides the perfect solution, letting you transfer your entire Photos Library or just selected pictures from iPhone to Mac without using iCloud.
This offline method offers full access to your iPhone photos at their original quality, giving you the flexibility to transfer your pictures, videos, Live Photos, and Cameral Roll while keeping the album structures. Additionally, it even includes a built-in HEIC converter, letting you easily convert iOS photos into more widely compatible JPEG or PNG formats when needed.
Whether to free up device storage or create a backup of your precious images, this tool lets you easily get iPhone photos to Mac in simple clicks. Compatible with all iOS and macOS versions, here's how to access iPhone photos on Mac and transfer them without iCloud or iTunes:
Step 1. Run Appgeeker iPhone Data Transfer on Mac and connect your iPhone via a USB cable. If you see a prompt, unlock your iPhone and tap Trust to allow for photo accessory.
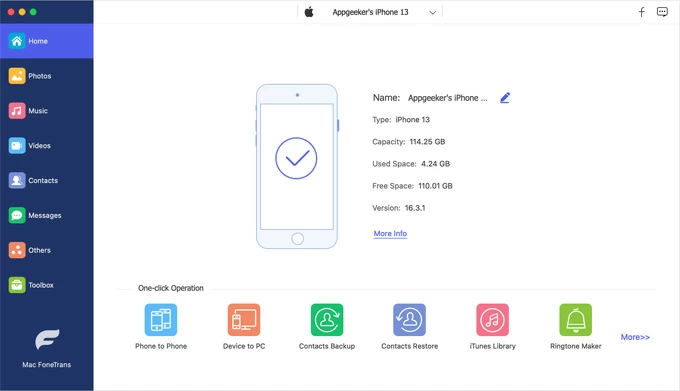
Step 2. Move to Photos tab on the left sidebar, where you'll get full access to the entire Photos Library on your iPhone, including Camera Roll, Live Photos, and all other albums.
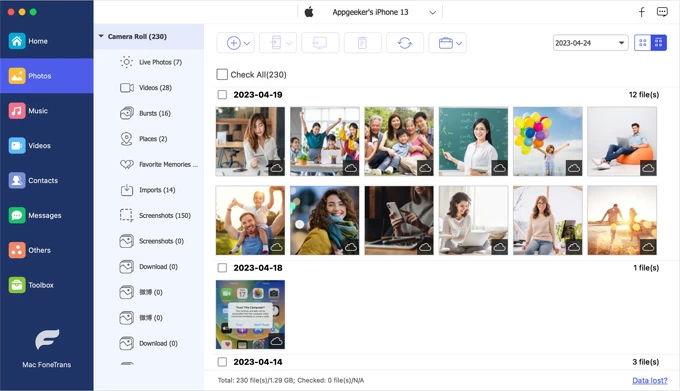
Step 3. Transfer iPhone photos to Mac for local access. Preview and select the iPhone photos you desire, then click the computer icon at the top to import them to your Mac.
Alternatively, you may click Check All to select and transfer all photos from iPhone to Mac.

To free up storage, you may choose to delete those photos on iPhone after the transfer. Then, open the local folder on your Mac to access the iPhone photos you just transferred.
It also works the other way around if you're looking to add photos from Mac to iPhone.
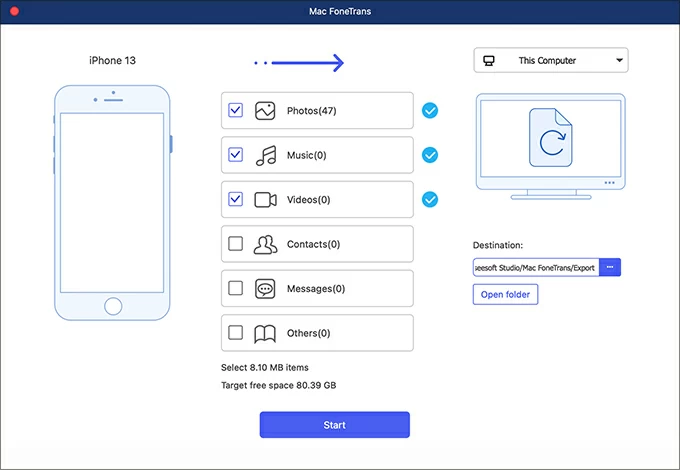
Not limited to the selective transfer, Appgeeker iPhone Data Transfer also offers you the ability to transfer all photos from your iPhone to Mac with a single click. To make it, here are the steps to follow:
This ensures future access and recovery of your iPhone photos if any accidental deletion happens. It can also help if you'd like to transfer music from iPhone to Mac for offline listening.
Another way for accessing iPhone photos on Mac is to transfer the pictures from your iOS device with Image Capture. It's a default app that comes with macOS, enabling you to import photos from an iPhone via a wired connection and save the images anywhere on your Mac.
1. Attach your iPhone to Mac using a USB cable. When asked, enter your iPhone passcode and tap Trust to allow access to your photos.
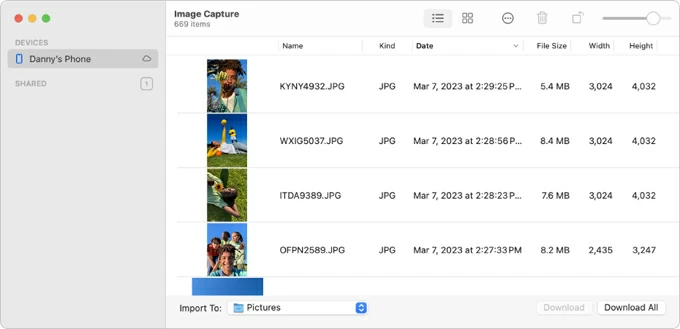
2. Open the Image Capture app from Mac's Launch Pad. If you don't see the Image Capture icon, use the search bar to find it.
3. Pick your iPhone from the Device list on the left.
4. View your iPhone photos and videos when they are accessible on the screen.
5. At the bottom of the screen, click Import To menu and select a Mac folder where you want to keep your images.
6. Select every iPhone photo you want to access locally on your Mac.
7. Hit the Download button at the bottom. Or, check Download All to import all photos from your iPhone to a local folder on Mac.
As a preset feature in Apple devices, AirDrop lets you wirelessly share iPhone photos with Mac in a straightforward way — particularly if there're just a few images you wish to access on your computer locally. Place your Mac and iPhone near each other to start photo transfer steps:
Step 1. Enable AirDrop on your Mac and iPhone before photo transfer.
On your Mac: open the Finder app and select AirDrop from the left menu; when AirDrop screen appears, click Allow me to be discovered by link and set it to Everyone.
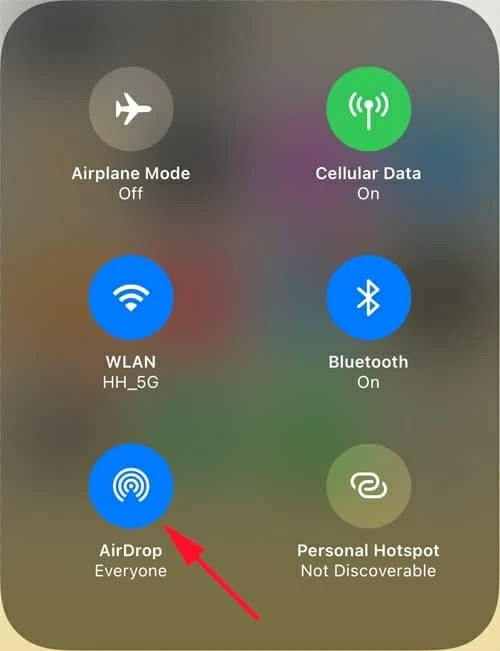
On your iPhone: swipe down from the top-right edge of your iPhone screen, long-press the AirDrop icon and tap Everyone from the expanded options.
Step 2. AirDrop photos from iPhone to Mac wirelessly.
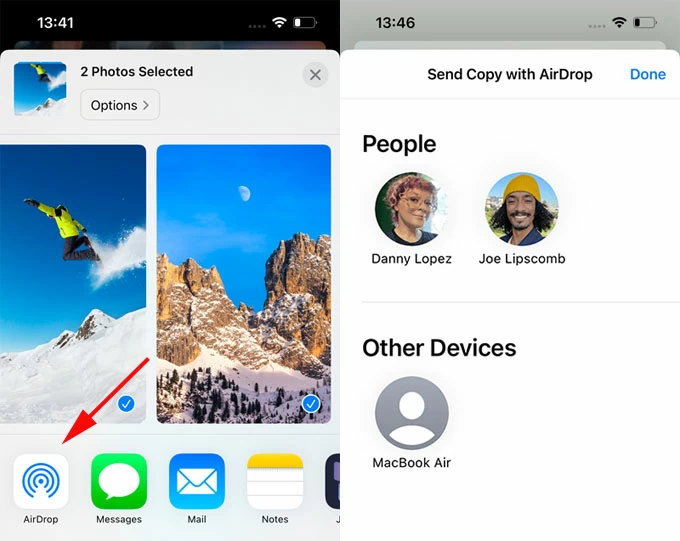
Open the Photos app on your iPhone and tap the Select button from the upper-right corner; then tap on each picture you prefer to send to your Mac.
Tap Share icon at the bottom and pick AirDrop from the sharing list. Your iPhone will detect other nearby AirDrop devices automatically; tap on your Mac when it appears on the screen.
Step 3. Accept iPhone photos on Mac for seamless access.
An AirDrop notification should pop up on your Mac screen, click Accept to save the iPhone photos on your Mac for any access in the future.

The last method that ensures local access to iPhone photos is by transferring them to your Mac via email. This process is simple and quick, requiring no USB cable or iCloud to access your iOS photos on Mac. Here's how:
Q1 - Why can't I access my iPhone photos on my Mac?
If you're using iCloud Photos to get real-time access to your iPhone photos, check whether you have enough iCloud storage, and ensure that your iPhone and Mac are signed in with the same Apple ID and both connected to active Wi-Fi network.
When using other cable-based solutions, check whether your iPhone is connected successfully or try another different USB cable. If the Trust This Computer prompt appears, tap Trust and enter your iPhone passcode to allow for photo access.
Q2 - Can I transfer iPhone photos to Mac without using iCloud?
Yes, here are several options available for transferring photos from iPhone to Mac without iCloud, whether using a cable or wirelessly:
For wired photo import:
For wireless photo transfer:
Q3 - Is it possible to access my iPhone photos from my Mac without a USB cable?
Yes, Apple's iCloud Photos service and AirDrop feature offer wireless access to iPhone photos from Mac without using a cable. Alternatively, other cloud-based services like Google Photos and Dropbox enable photo access across devices wirelessly.