
How to Restore Photos from iCloud Backup

In this comprehensive guide, you'll be able to find the right way to transfer photos from an iPhone to an external hard drive on Windows or Mac, or even without using computer.


There are various available methods for you to move images from iPhone to a portable hard disk.
Transferring photos from iPhone to an external hard drive has become a common requirement for users seeking to free up storage space or create backups. External hard drives have large storage capacities, and well-known brands such as Western Digital, Seagate and Toshiba even can directly transfer iPhone photos to an external storage device without computer.
By backing up photos from iPhone to external drive, individuals can safely and permanently store their precious memories and important documents, and reserve more space on their iOS devices. Therefore, learning how to transfer photos from your iPhone to an external hard drive is a valuable skill. Let's get started.
Table of Contents
If you are a PC user, whether using Windows 11, Windows 10 or Windows 8, here are four ways to transfer your photos to an external hard drive from an iPhone / iPad on PC.
Microsoft Photos is an image management and editing software developed by Microsoft, which is a built-in app for Windows 10 and Windows 11 to share and transfer pictures. You can move iPhone photos to your external hard drive on Windows using Microsoft Photos app.
1. Connect iPhone and external hard drive to Windows PC.
Insert the external hard drive into the USB port of your Windows. Unlock your iPhone and connect it to your PC using the Lightning or USB-C cable. When prompted to trust the computer, tap "Trust" and enter your passcode to authorize.
2. Open Microsoft Photos app.
If the Photos app doesn't open automatically, search for Photos in the Start menu and run it.
3. Locate your iPhone and select the photos.
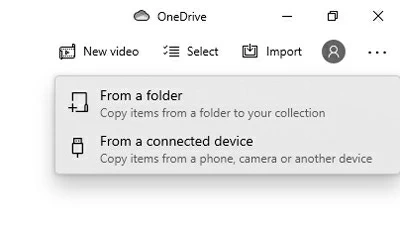
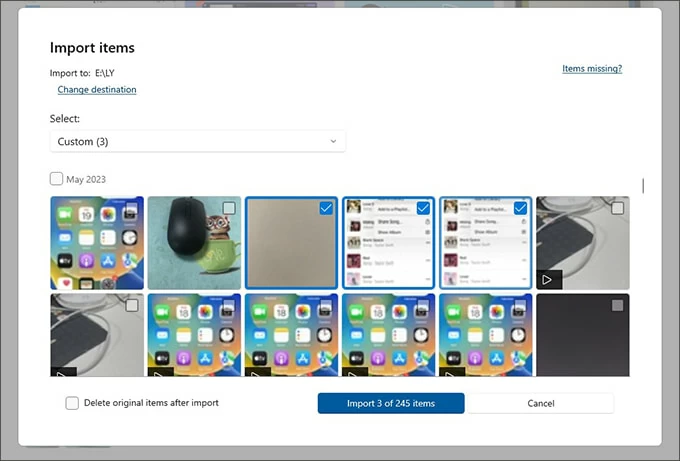
Click the "Import" button in the upper right corner and select "From a connected device." Then choose your iPhone device in the pop-up window. Your PC will start loading your iPhone's photos and videos, which will take a while. When it's done, select the pictures you want to transfer from the Import items window that appears.
On Windows 11, you may need to select Import > From a USB device instead.
Note:
4. Select external hard drive as the storage destination.
Navigate to "Change destination" in the upper left corner of the Import items window and select any folder in the external hard drive as the destination to save your iPhone photos.
5. Import photos from iPhone to external hard drive.
Once you have selected the photos and the destination, click "Import [number] items" in the bottom right to start moving photos from iPhone to the external hard drive.
As the default photo management tool for Windows, Microsoft Photos app is also a good helper to transfer iPhone photos to PC without iTunes.
If you are looking for a straightforward way to transfer a large number of photos at once, then Appgeeker iPhone Data Transfer will provide you with a simple way to transfer your iPhone's photo library to an external hard drive at high-speed.
iPhone Data Transfer can transfer pictures from your Camera Roll, including screenshots, live photos, downloaded pictures, to external hard drive in their original quality. Moreover, when reading HEIC photos, it can convert the incompatible format to viewable format on your device.
Key features:
Here's how to transfer photos from your iPhone to the external hard drive on computer.
1. Run iPhone Data Transfer and connect the devices.
Plug your external hard drive and iPhone into the USB port of your computer separately. Keep iPhone unlocked to facilitate computer access to iPhone. Then download and launch iPhone Data Transfer on your desktop.

2. Choose the photos category to transfer.
Click the "Photos" tab on the left sidebar, and select the photos from the displayed categories. Instead of picking pictures one by one, you can check the box next to "Check All" in the upper left to select all photos in the specific catalog.

3. Add photos to external hard drive.
Click the "computer" icon on the top taskbar, change the save target to any folder in the external drive in the pop-up window, then click "Select Folder" in the bottom right to get photos from iPhone to the external hard drive.

Tip: When HEIC photos are detected, there will be a pop-up window prompting whether to convert them, you can choose to automatically convert HEIC to JPG and PNG format to make the photos compatible with your device.
Besides external hard drives, it can also transfer photos and videos from iPhone to other external storage devices, such as transferring photos from iPhone to USB flash drive.
Another important tool equipped with Windows 10 / 11, File Explorer, which is called Windows Explorer in Windows 8 / 7, provides a resource navigation pane that allows users to switch between different folders by simple clicks. Navigating to your iPhone's DCIM folder in File Explorer enables you to transfer your images from iPhone to your external hard drive.
1. Connect your unlocked iPhone and the external hard drive to your PC. Make sure your iPhone and external hard drive are recognized by the computer.
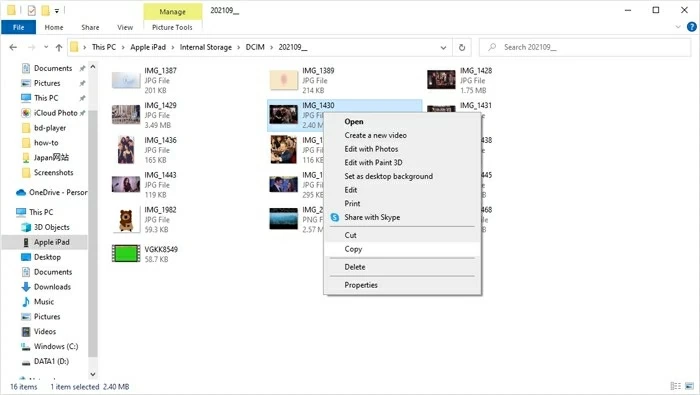
2. Open File Explorer / Windows Explorer and find the connected iPhone device. Press and hold "Win + E" to open File Explorer / Windows Explorer, go to This PC / Computer > Apple iPhone > Internal Storage > DCIM, you will see the photos and videos from your iPhone sorted by date in different subfolders.

Tip: In older versions of Windows, your photos and videos are categorized in 100 APPLE subfolders.
3. Copy the iPhone photos. Pick your pictures in the subfolder or choose the whole folder, use "Ctrl" to choose multiple items. When you are done selecting, right click on the selected pictures and hit "Copy."
4. Paste photos to the external hard drive. Head to the external hard drive, right click and select "Paste" to transfer the copied images from iPhone to the external hard drive on your PC.
In fact, using iCloud Photos that comes with iOS devices lets you back up your iPhone photos to an external hard disk. Once the iCloud Photos is enabled, photos on your iPhone are automatically uploaded to the cloud for backup. After you download photos on your computer by signing in to the iCloud app or visiting the iCloud web page, you can import photos from your iPhone to your external hard drive.
Follow the instructions to move images from iPhone to an external hard drive using iCloud:
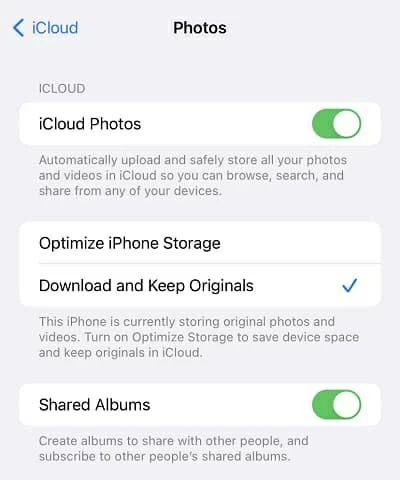
1. Enable iCloud Photos on your iPhone. Tap Settings > [your name] > iCloud > Photos, and turn on "iCloud Photos" or "Sync this iPhone."
2. Visit iCloud.com on your computer and sign in with the same Apple ID.
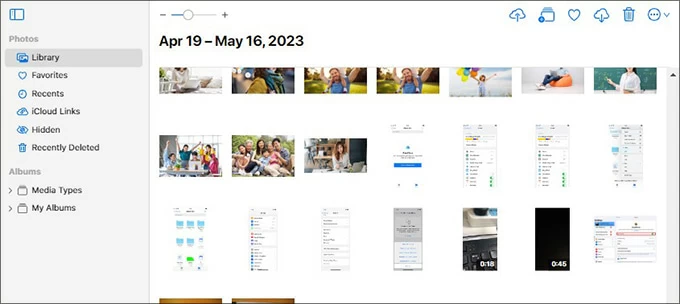
3. Select "Photos" to access the images saved in the cloud.
4. Locate the "Library" tab and select the photos.
5. Click the "Download" button in the upper right to download the photos to your computer. All photos will be compressed in one folder.
6. Establish a connection between the PC and the external hard drive.
7. Copy and paste the downloaded folder to your external hard drive.
Likewise, you can also take the help of other cloud-based services, such as One Drive, Dropbox, Google Drive, etc. The steps of these cloud services to download your iPhone photos to external hard drive are similar to iCloud.
There are two ways to help you transfer photos from iPhone to external hard drive on Mac. By the way, these two methods also work for transferring photos from your iPhone to MacBook Air.
Image Capture is a native macOS program designed to interact with externally connected devices and facilitate the management and processing of photo and video files. With Image Capture, you can easily import photos from your iPhone to external hard drive on your Mac.
1. Use the Lightning or USB-C cable to connect your iOS device to your Mac.
2. Connect the external hard drive to the Mac.
3. Open Image Capture in Finder or Launchpad.
4. Select your iPhone in the "DEVICES" section.
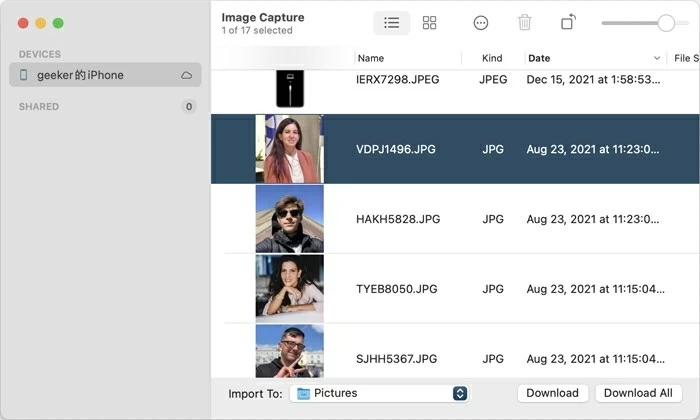
5. Pick the photos to be transferred to the external hard drive. Press the "Command" key to select multiple items.
6. In the "Import To" part, select the external hard drive as your destination folder.
7. Click "Download" in the bottom right corner to start transferring. Or hit "Download All" to move all your iPhone photos and videos to the external hard drive.
Like Windows, Mac also has its own Photos app. Not only can you use the Photos app to transfer videos from iPhone to Mac, but you can also use it to import photos and videos from iPhone to external hard drive on a Mac. The following is how to transfer photos from iPhone to external hard drive using Mac.
1. Plug your unlocked iPhone into Mac with a data cable and run the Photos app.
Tip: If your iPhone has previously made connection with Mac and Open Photos was set, the Photos app will open automatically when the device is successfully connected.
2. Locate your connected iPhone under the Devices tab on the left sidebar.
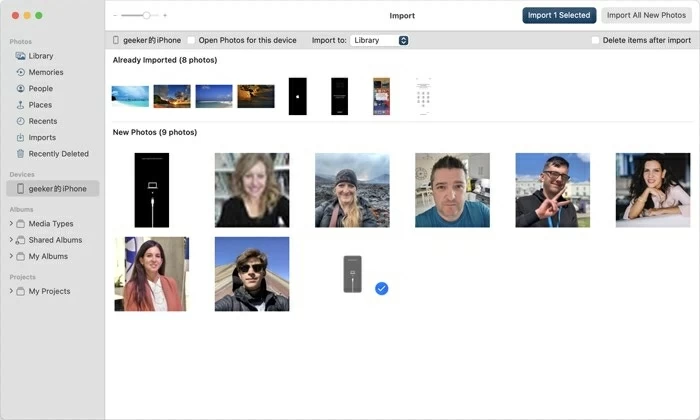
3. Select the photos you want to transfer in the Import window.
4. Click "Import [number] Selected" or "Import All New Items" in the upper right corner. You can check your transferred photos in the Imports section on the left sidebar.
5. Connect an external hard drive to your Mac and open it.
6. Drag and drop the imported photos from the "Import" tab of the Photos app to your external drive's folder.
Actually, don't worry even if you don't have a computer, as there is an option available that allows you to back up photos from your iPhone / iPad to an external hard drive without using a computer. iPhone running iOS 8 and later versions support direct connection and data transfer with external devices.
If you have a Lightning flash drive, such as the SanDisk iXpand Flash Drive, or as long as you have a Lightning or USB-C connector, you can directly transfer photos from your iPhone to external hard drive without computer.
1. Use a Lightning or USB-C connector to connect your iPhone to external hard drive.
Note:
2. Check the location of the external hard drive. Launch the Files app on your iPhone, then tap Browse > Locations at the bottom of the screen to view the external hard drive.
3. Move your iPhone photos to the external hard drive. Navigate to the Photos app and select photos, tap the Share icon > Save to Files > On My iPhone and choose your external hard drive to save photos.
1. Can I move iPhone photos to external hard drive without compute?
You can directly connect the iPhone to external devices, but your external storage device needs an adapter that is compatible with the iPhone. If your iPhone can successfully connect to your derive, you can add photos to the external hard drive through the Share option in Photos app.
2. How to transfer photo library from iPhone to external hard drive on Mac?
Mac has two built-in apps that can help you transfer photos from iPhone to external hard drive-Photos app and Image Capture. If you have iCloud Photos enabled on iPhone and your Mac also turns on the Photos sync function in iCloud, then Your iPhone photos can be automatically synced to the Mac Photos app.
Plug your external drive into your Mac, then open the Mac Photos app and select the iPhone photos you want in the Library tab, and then copy and paste them to your external hard drive.
3. Will transferring iPhone photos to external device affect picture quality?
Generally, using Microsoft Photos app, iCloud Photos, Image Capture, and third-party software iOS Data Transfer to transfer photos maintains the original resolution and quality of the photos.