How to get into an iPad that says iPad Unavailable

Your iPhone 16 remains the premier choice for audiophiles who prefer a local, high-fidelity music library. Here's how to copy your music collection from a computer to an iPhone 16.

If you need a solid way to move music to iPhone 16 from a Windows computer or Mac without involving tedious steps, always go with Appgeeker iPhone Data Transfer. It supports drag-n-drop and traditional click-to-add, and handles large bulk music transfers.
The task of transferring songs from a computer to an iPhone 16 can be done by Apple's own paths and third-party solutions.
Let's say you have a massive, curated music collection on your computer, and you need to move it to your new iPhone 16 without losing metadata, album art, or audio quality. If you simply drag the tracks to the phone's folder after connecting it with your PC or Mac, nothing happens — it won't import your music that you can easily do for Android devices.
How can you transfer music from your computer to iPhone 16 efficiently while maintaining the integrity of your library? The answer lies in a multi-method approach tailored to your specific hardware setup. Keep on reading, and how to transfer your music seamlessly.
Table of Contents
If you have thousands of songs, custom playlists, and high-resolution FLAC or ALAC files, the manual sync that Apple offers often feels restrictive and prone to errors. This is where a dedicated media transfer tool becomes essential. Unlike native utilities, these tools are built for bi-directional freedom.
Our favorite is Appgeeker iPhone Data Transfer. Transferring music from a computer to an iPhone 16 using it provides a high level of control over the items selection and management. You can use it all the time to drag files (including photos, music, and videos) straight into your iPhone without thinking twice. Once they are on your phone's media library, you can then edit ID3 tags, move between albums, create playlists, de-duplicate items, and delete any of them if necessary.
Why use Appgeeker iPhone Data Transfer:
Follow these steps to complete the music transfer from computer to iPhone 16. It works well on both your Mac or PC.
Step 1: Connect your iPhone 16 to computer
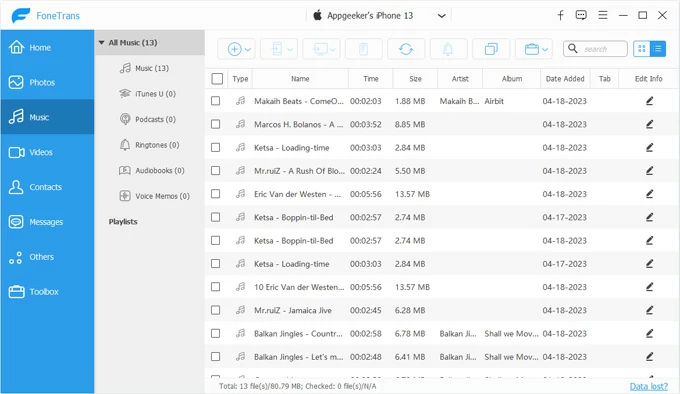
Connect your iPhone 16 to your PC or Mac using a USB-C to USB-C cable. Then launch the software. You then should see an interface like the screenshot shown below.

Step 2: navigate to the Music tab
Once connected, click the Music tab on the sidebar. It will take a few seconds to load your media library. As you can see in the image below, all track files are sorted by different categories.
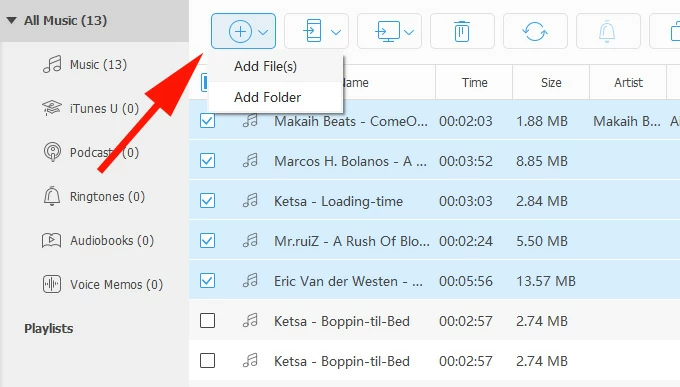
Step 3: Add music to iPhone 16 from computer
You have two primary ways to import music from a computer.
Open the folder on your computer where your music is stored. Simply select the files or folders and drag them directly into the software's window.
Alternatively, Click the Add Folder or Add File(s) button located in the top toolbar. A dialog box opens, letting you choose what music file you want to import from computer.
Important! The software supports various formats, including WAV, FLAC, MP3, MKA, and M4A. If you transfer a format that isn't natively supported by iPhone, it will automatically convert it for you during the import process.
A progress bar will appear in a new-opened small window. Ensure the connection remains stable until the transfer is finished.
Once done, open the Music app on your iPhone 16, go to Library > Songs (or Recently Added). Your new songs should be available for immediate playback.
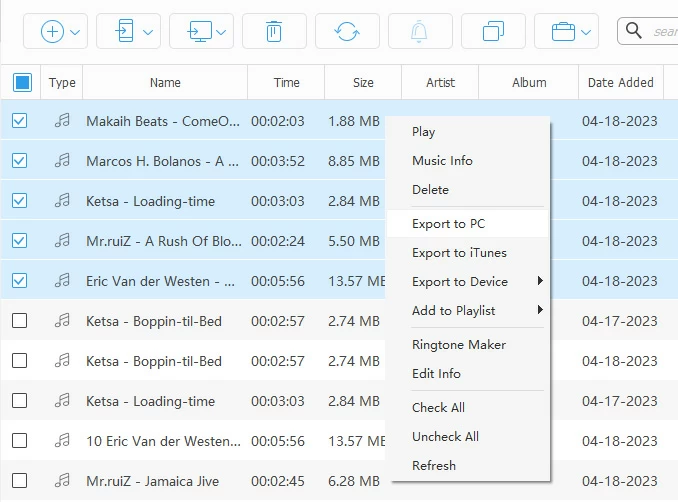
More feature: Manage your music library on iPhone
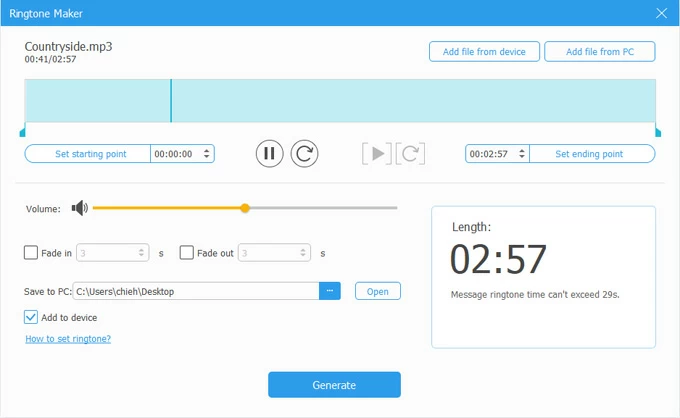
Ringtone Maker: Allow for importing source audio from iPhone or computer
Transferring music from a PC to an iPhone using Appgeeker iPhone Data Transfer is a straightforward alternative to the standard syncing process. This method allows you to manage your library without the risk of overwriting existing data.
For years, when it comes to put music from Windows computer to iPhone, users relied on a bloated version of iTunes. With the iPhone 16, Apple has officially transitioned Windows users to the Apple Devices app, a streamlined utility available in the Microsoft Store.
If you need an Apple's way to transfer your music, download the Apple Devices app from the Microsoft Store. This replaces the syncing functionality of iTunes.
Here's how to use Apple Devices app to sync music from computer to iPhone 16.
1. Connect your iPhone 16 to your PC using a USB-C cable.
2. Launch the Apple Devices app. If prompted, tap Trust and enter your device passcode.
3. Locate your device in the sidebar on the left-hand side of the app window, select it.
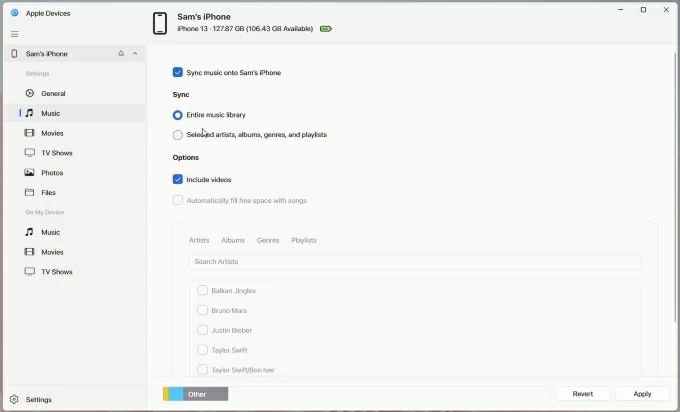
4. Click on the Music tab in the sidebar.
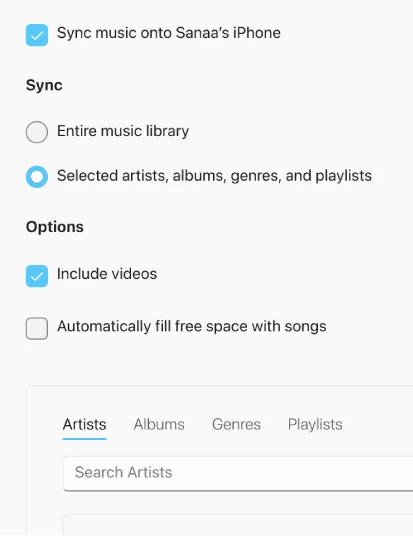
5. Check the box labeled Sync music onto [Your Device Name].
6. Select from either Entire music library if you want to move every song found in your Windows Apple Music library, or Selected artists, albums, genres, and playlists for specific sets of song.
7. Click the Apply button in the bottom right corner.
The sync process will begin. You can monitor the progress via the status bar at the top of the window. When you see "iPhone sync is complete" message, all your music have been transferred to your iPhone 16.
Please note that if a song is deleted from your computer library, it will be removed from your iPhone 16 upon the next sync—unlike the drag-and-drop freedom of 3rd party tools like Appgeeker iPhone Data Transfer.
If you're running a Mac computer and prefer to stay within the Apple ecosystem and your library is already managed within the Apple Music app, Finder is your primary tool. It works similar to Apple Devices app mentioned above.
Here're steps to transfer music from Mac to iPhone 16:
1. Plug your iPhone 16 into your Mac. Since the iPhone 16 uses USB-C, ensure you are using a high-speed cable for faster data rates.
2. Open a Finder window from dock. Under the Locations sidebar, you will see your iPhone listed. Click on it.
3. Navigate to the Music tab in the main Finder window.
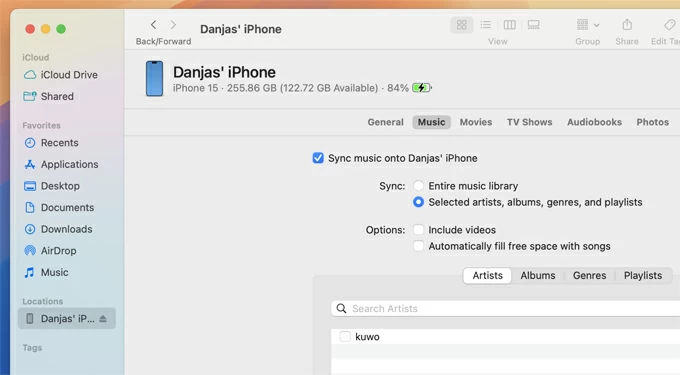
4. To transfer your songs, check the box Sync music onto [Your iPhone Name].
5. Choose whether to sync the Entire music library or Selected artists, albums, genres, and playlists.
6. Click the Apply button to begin syncing your selected songs from computer to iPhone 16.
One thing to be noted, you must disable Sync Library option in Apple Music, otherwise, you cannot manually sync your items via Finder.
Sometimes, you only need to move a single album or a few new songs from your computer to your iPhone 16. In these cases, cables are an unnecessary hurdle. Instead, you will want to use cloud storage and, for Mac users, you can even Apple's own nice wireless alternative - Airdrop to handle the transfer tasks. This method treats your music files like documents, giving you more control over individual tracks.
Since iCloud is integrated into the iOS file system, this is the most seamless method for wireless transfer of your music. Of course, you can use other popular cloud services like Google Drive, OneDrive, Dropbox.
Use iCloud to transfer your music:
1. On your PC, open a browser and go to iCloud.com. Sign in with your Apple ID.
2. Select the Drive icon. Create a new folder named My Music. Drag and drop your music files into this folder.
3. On your iPhone, open the Files app.
4. Tap Browse > iCloud Drive > My Music.
5. To play music without using data, long-press a song or the entire folder and select Download.
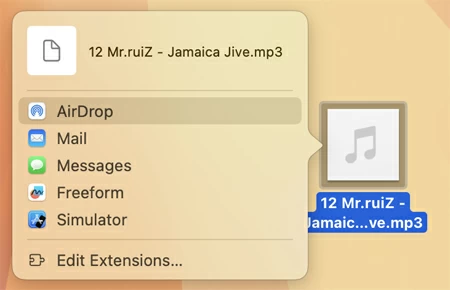
Use AirDrop to transfer your music from Mac:
For Mac users, AirDrop remains the fastest way to move individual songs. Before doing anything, on your iPhone, open Settings > General > AirDrop and set it to Everyone for 10 Minutes.
1. On your Mac computer, right-click the music file.
2. Select Share > AirDrop.
3. Select your iPhone 16 when a window will appear showing nearby devices. (Make sure your phone is close to your Mac)
4. Tap Accept on the iPhone 16 pop-up. If you are signed into the same Apple Account on both, the transfer happens automatically.
5. When asked where to save the files, select Files.
Note, the track goes to the Files app (usually in the Downloads folder), not the Music app. To play them, you must use the Files app or a third-party player like VLC.
The iPhone 16 is a powerhouse for music lovers. Whether you choose the new Apple Devices app on Windows, the native simplicity of Finder, or the total control offered by Appgeeker iPhone Data Transfer software, the key is to understand your library's needs. By following the steps above, you can transfer your music files from a computer to an iPhone 16 effectively.