
How to Factory Reset iPad without Password

Transferring photos from your iPhone 16 to a Windows PC shouldn't be complicated. Use these simple steps to get your photos move quickly - via a cable or wireless sync.

If you want speed, flexibility, and reliability for importing your iPhone 16 photos, a dedicated tool like Appgeeker iPhone Data Transfer is an excellent choice. It enables smooth file transfer of photos, videos, music, etc. from an iPhone to a computer, and vice versa with no risk of overwriting existing data. Bulk transfer and selective transfer are supported.
Moving your photo library from an iPhone 16 to a PC is the best way to back up your memories and free up space.
The iPhone 16 has evolved over the years, but one thing that's remained constant is how to transfer photos from the iPhone 16 to PC. Whether you're on Windows 11, Windows 10 or whatever, the way for photo transfer from iPhone 16 to computer can be as simple as plugging in a cable or as convenient as using a wireless method.
If you have Apple Devices app installed, you can easily import photos from iPhone 16 using the native Windows Photos app. File Explorer is another USB-based importing utility to copy your photos from iPhone to PC. For wireless routes, iCloud Photos and Email let you download iPhone 16 photos to the Windows PC without a cable.
Each method is practical. Pick the one that meets your needs in case you're transferring a large batch of photos or a small number of pictures from iPhone 16's Camera Roll to your PC.
Table of Contents
Applies for iPhone 16 lineup: iPhone 16, iPhone 16 Pro, iPhone 16 Pro Max, iPhone 16 Plus, iPhone 16e.
The iPhone 16 captures photos in HEIF format to save space while maintaining high quality. However, some Windows applications may not open these files without a specific extension.
To ensure your photos are readable as soon as they are sent your PC, it's often helpful to handle the conversion from Apple's HEIF (High Efficiency Image Format) to the more universal JPEG format during the transfer process. You can complete this on your iPhone 16:
Tip: Only choose "Keep Original" option to transfer the raw .heic photos if you have the "HEIF Image Extensions" installed from the Microsoft Store or if you want to save storage space on your computer.
If you want a straightforward cable-based transfer, connect the iPhone 16 to your PC with a USB cable, open the Windows Photos app that can transfer your photos, and choose Import button. Be aware that the computer cannot find the device if your phone is locked, and Photos app won't be able to see and transfer your iPhone 16 photos if iCloud Photos is enabled — you should download the original full-resolution versions to the iPhone first for the photo imports across iPhone 16 to the PC.
When you need to move your entire photo library in your iPhone 16 and store all camera-capture pictures, Live Photos and screenshots locally on the PC right away, use Microsoft Photos app to trigger the transfer on Windows through a wired connection. Here's how.
1. Make sure Apple Devices app or iTunes is installed on your PC.
2. Plug your iPhone 16 to the computer through a USB-C to USB-C cable. Unlock the lock screen and tap "Trust" if prompted.
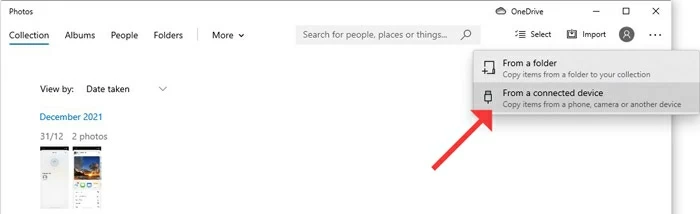
3. Open Photos app from Start menu.
4. On the top-right corner, click Import > From a connected device.
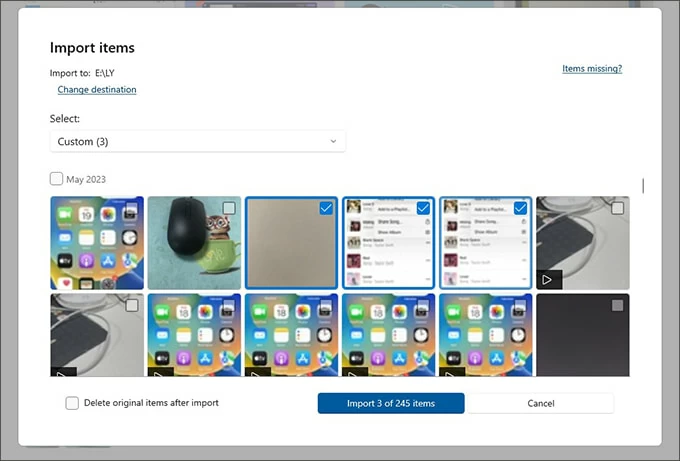
5. If your photo library is large, it will take a few minutes to load all of your iPhone photos and videos.
6. Select the photos you wish to move, and click Import [Number] items at the bottom.
The photos will immediately begin to transfer from your iPhone 16 Camera Roll to your PC. Once the computer finishes importing the photos, you can find them in the Pictures folder by default — which can be changed to anywhere in the hard drive under "Import to" section before the transfers.
Another simple wired method for copying iPhone 16 photos over to the Windows computer is to access your library through the DCIM folder using File Explorer. After Windows system identifies and communicates with iOS device, you will see folders that store your photos and videos. Simply copy and paste the images you want to your PC's desktop directly from your iPhone.
This method works well if you prefer a manual, drag-and-drop approach without using additional apps. However, keep in mind that photos may be stored in multiple folders, and file names can appear less organized compared to using the Windows Photos app.
Steps for iPhone 16 photo transfer to PC using File Explorer:

Your PC will take some time if you move a large number of photos from your iPhone 16 (Plus, Pro, Pro Max.)

A third-party tool like Appgeeker iPhone Data Transfer is useful if you want more control than the built-in Windows import tools provide. It's considered as an all-in-one iOS data manager that transfers photos over USB, exports files to computer and vice versa, and supports multiple data types beyond photos, including videos, music, playlists, messages, contacts, WhatsApp chats, notes, audiobooks, voice memos, and more.
The software's powerful Preview function allows you to access and manage every picture you've ever taken and stored in iCloud on the computer while retaining the original structure, so you can quickly locate and transfer specific pictures or albums instead of importing everything at once. There's also a built-in converter to automatically process the conversion from HEIC to JPG without compromising the resolution during the export.
Whether you want to bypass the technical glitches sometimes found in the Windows Photos app or File Explorer, or are looking for a much faster speed for transferring your iPhone 16 photos (JPG, PNG, HEIF, ProRAW, etc.) over to the PC, let's see how Appgeeker iPhone Data Transfer tool works. It keeps the process simple: Connect iPhone, pick the photos, and export to the computer.
Step 1: Run the software on your Windows PC.
Step 2: Hook up your iPhone 16 to your computer using a USB cable. The software will instantly display your device info.
Keep the iOS device unlocked during the wired transfer of images from iPhone to PC.

Step 3: From the left sidebar, click Photos. The software will quickly load your library so you can access your iPhone photos on your PC.

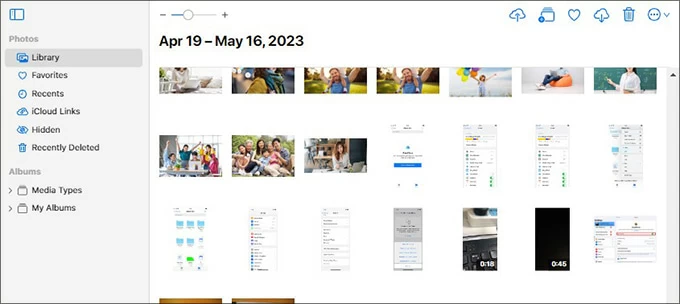
Step 4: Preview your images in Camera Roll and select certain shots individually or albums. You can also view your photos even they were synced with iCloud, which is what Windows Photos cannot do.
Step 5: Click Export to PC icon from the toolbar at the top, then choose a location to kick off the process.
Wait for the tool to move the photos from your iPhone 16 over a wired connection and add them locally on the PC right away without losing quality.
It also automatically handles format conversions (like HEIC to JPEG) to ensure compatibility with Windows.

Also: Photos disappeared from iPhone. How to get them back
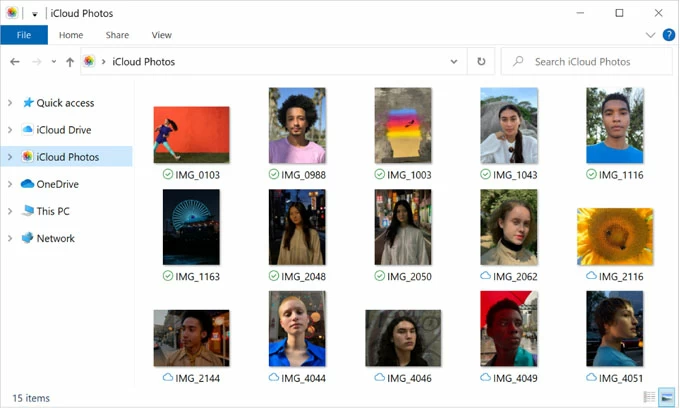
In case you want the most hands-off iOS to Windows photo transfer without messing with cable, simple turn on iCloud Photos on the iPhone 16 and install iCloud for Windows on the PC. Once iCloud Photos is enabled, iCloud keeps your computer and iPhone 16 in constant sync over time instead of one-time imports, through which you're able to access and download iPhone photos to your Windows PC using File Explorer or icloud.com.
Make sure that your iCloud account has enough storage for wirelessly syncing entire library of photos and videos; Otherwise, you will risk at failing to import your photos from your iPhone to the PC.
1- On your iPhone 16, go to Settings > [your name] > iCloud > Photos, then toggle on Sync this iPhone. Keep your device connected to an active Wi-Fi network.
2- Download iPhone 16 pictures to PC directly without a cable. You can either visit icloud.com to download the photos as you want or configure iCloud for Windows for wireless syncing of entire library.
Get photos from iPhone 16 to PC by downloading from iCloud website
Tip: If you need to go on a journey of copying photos or videos from your Windows computer to your iPhone, iCloud Photos website offers an Upload button to complete the transfer.
Download photos using iCloud for Windows
Similar to iCloud Photos, Google Photos is another wireless option for iPhone 16 to PC photo transfer without plugging in a cable by uploading photos from iDevice to Google and downloading them to a computer.
Email is the simplest option when you only need to send a single photo or a small number of photos to yourself or someone else's Windows PC from an iPhone 16. This also means that wirelessly moving iPhone 16 images to a PC via Email is not ideal for large photo libraries.
Using Email for sharing photos from an iPhone 16 to PC is easy. Simply open Photos app on your phone, select your desired pictures, tap Share, and then choose Email. Enter your own email address and tap Send.
On your PC, log into your email account and download the attachment to extract the photos came from your iPhone 16 library. Done!
When deciding how to import photos from iPhone 16 to PC, the choice between wired (USB-C) and wireless usually comes down to two factors: volume and convenience.
Wired transfers
With a high-speed USB-C 3.0 cable to connect the iPhone to the computer, Windows Photos App, File Explorer, and Appgeeker iPhone Data Transfer software are the best choices to transfer a large library while keeping the photos and videos in full resolution. They keep the process simple: plug in, and import — it's significantly faster and stable.
Wireless transfers
Wireless transfer often relies on cloud and network. The popular iCloud Photos works by a seamless synchronization of entire media library instead of specific photos. And for just a few images, email remains the fastest no-setup option.


