iPad Security Lockout? How to Fix


Learn how to transfer videos from iPhone 13 to a computer seamless using various native tools and iPhone data transfer software. Works for Windows PC and Mac.

Appgeeker iPhone Data Transfer offers a stable and efficient USB-based solution to transfer videos between an iPhone and a computer in batch or individually. You can access the video library and pick what you'd like to copy across the devices without losing quality.
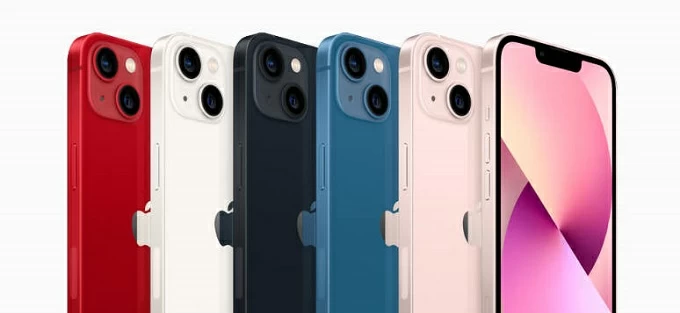
It's easy to offload videos from an iPhone 13 to the computer with or without a cable.
The iPhone 13 can record high-quality videos in 4K resolution, HDR, and HEVC formats, making it an excellent camera for capturing memories. However, moving those large video files from your iPhone 13 to a computer is not always straightforward - especially you don't know which tools you can use for the transfer of thousands of gigabytes of video files.
No worries, this guide breaks down top tested, reliable methods to transfer videos from your iPhone 13 to your computer. The best method depends on whether you're transferring the videos to a Windows PC or a macOS desktop, whether you prefer a wired or wireless video import, as well as how large your video library is.
Before we begin the iPhone 13 video transfer to computer, make sure there's enough space on the hard drive. Let's dive in.
Table of Contents
The direct USB cable connection is the most straightforward way to transfer large video files to a Windows computer from iPhone 13 (Pro, Pro Max, Mini) without relying on internet network or wireless syncing. With File Explorer and Photos app preinstalled in Windows system, exporting videos from the iPhone 13 directly to any computer's folder has become a free simple task.
First, change the HEVC to a Windows compatible format. HEVC (High Efficiency Video Coding) does not work with some older Windows systems. Open Settings app, scroll down and tap Apps, then choose Photos. From there, scroll down to "Transfer to Mac or PC" section and select Automatic.
Then, connect iPhone and enable Trust permission. Use a USB-C to Lightning cable to plug iPhone 13 into the computer, and unlock the screen. A prompt will appear on your iPhone asking "Trust This Computer?". Tap Trust and enter your device passcode, allowing PC to access your iPhone media library and send the videos from iPhone to computer.
If you prefer a traditional way of manually moving videos from your iPhone 13 Camera Roll, Windows File Explorer gives direct access to iPhone's videos for a cable transfer without installing iTunes or extra video transfer software. This works for all Windows computers.
1. Open File Explorer on your PC (Windows Key + E).
2. Click This PC in the left sidebar, then double-click Apple iPhone.
3. Navigate through Internal Storage > DCIM. You will see date-based folders, or folders named 100APPLE or similar numbered folders.
4. Open these folders to locate your video files (.MOV or .MP4), and select the ones you wish to import to the computer.
5. Copy and paste, or drag and drop the selected videos into your desired PC folder (such as Videos or Pictures or whatever folder you created).
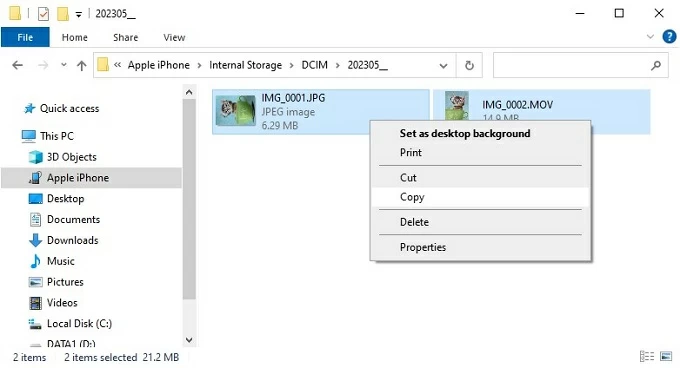
Tip: You can also right-click Apple iPhone, and choose Import pictures and videos > Import all new items now to transfer all new photos and videos from your iPhone 13 to computer.
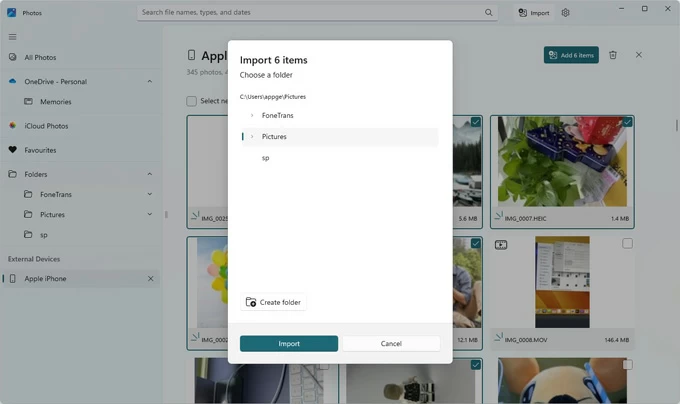
For Windows 10 and Windows 11 users, the built-in Photos app provides an organized import wizard allowing to quickly import Camera Roll videos from an iPhone 13 to a computer through a cable connection, while keeping the original resolution of the raw videos.
1. Open the native Photos app on Windows.
2. In the top-right corner, click the Import > From a connected device. Windows will scan your iPhone 13 for photos and videos that are stored in iOS Photos app.
3. Select the specific videos you wish to transfer.
4. Set your destination folder to save all your transferred video files.
5. Click Import button to initiate the manual copying. Simply wait for your computer to get your videos from your iPhone 13 storage, and afterwards, viewing offline.
Sometimes, the native video import tools may fail with loading and copying a large video library. If you're looking for a seamless iPhone video transfer strategy to get all or a selection of long videos from iPhone 13 to your computer—regardless of a PC or Mac, or vice versa, consider the cross-platform Appgeeker iPhone Data Transfer.
This beginner-friendly program lets you preview and manage all videos - 4K footage, screen recording, movies, TV shows, etc. in one place, making it straightforward to transfer thousands of videos to the computer from iPhone's Photos app or Videos app. In addition to videos, the tool can also handle the transfer of photos, music, contacts, messages and more between iOS device and computer quickly and effortlessly.
Here're detailed steps on how to transfer videos from iPhone 13 to computer without losing quality in simple clicks — using Appgeeker iPhone Data Transfer tool.
Step 1: Lauch the software on your PC or Mac. Then attach your iPhone 13 to the computer.
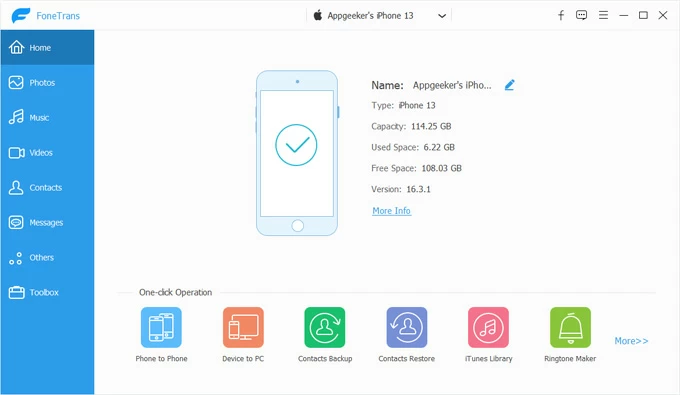
Step 2: To import iPhone 13 videos to the computer, click Videos option on the left sidebar.
The software does a scan quickly and displays all your video files on its interface and into different categories: Movies, Home Videos, TV Shows, Music Videos, etc.
If your videos you need to move onto PC or Mac are stayed in your iPhone 13's camera roll, click Photos option instead.
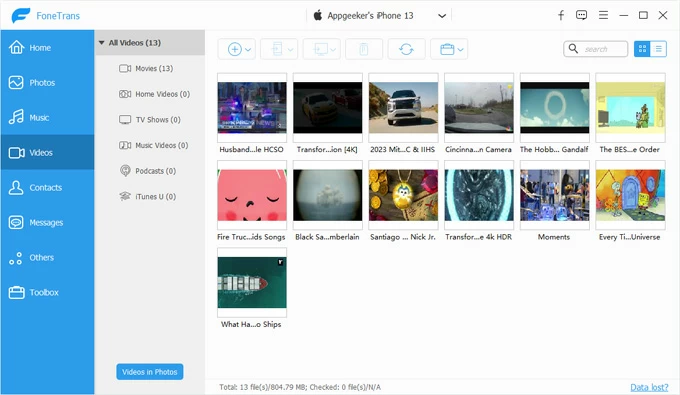
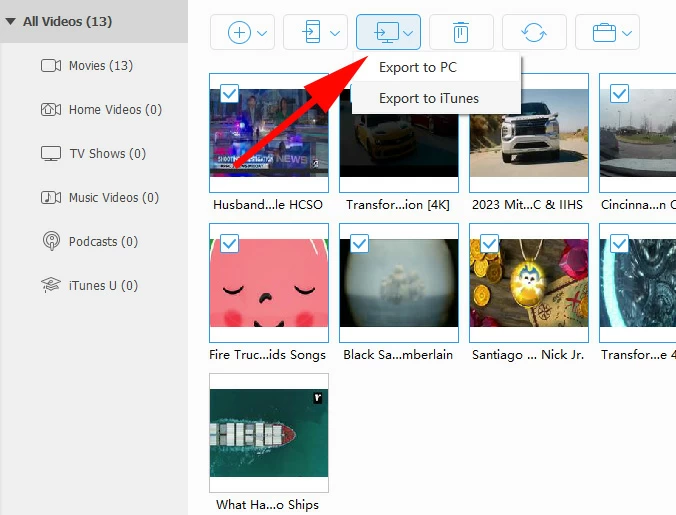
Step 3: Look through and check your desired videos or entire video library for exporting to PC.
Then hit the Computer icon > Export to PC, designate a local folder and the transfer begins.
Within a few minutes, your videos are copied over from your iPhone 13 to your computer's drive at their original resolution and ratio.
Also: How to transfer data from iPhone to PC
If you use a Mac, AirDrop is the absolute fastest wireless method to send smaller-sized videos from iPhone 13 to computer without needing a physical cable. It uses a combination of Wi-Fi and Bluetooth to transfer full-resolution video footages directly from iPhone 13 Photo Library without compression and put them into Mac's Download folder.
If you have hundreds of large 4K ProRes videos to move from iPhone to a Mac, AirDrop is not the best method; The wise option is to employ a USB transfer route like Photos or Image Capture.
Now when you want a quick sharing for a small number of short videos at once, here's how to use AirDrop to complete the iPhone 13 to computer video transfer process wirelessly.
1. First, enable AirDrop on your Mac.
2. Select videos on your iPhone 13 for the import.
3. A pop-up notification will appear on your Mac. Click Accept. The video file will automatically save to your Mac's Downloads folder.
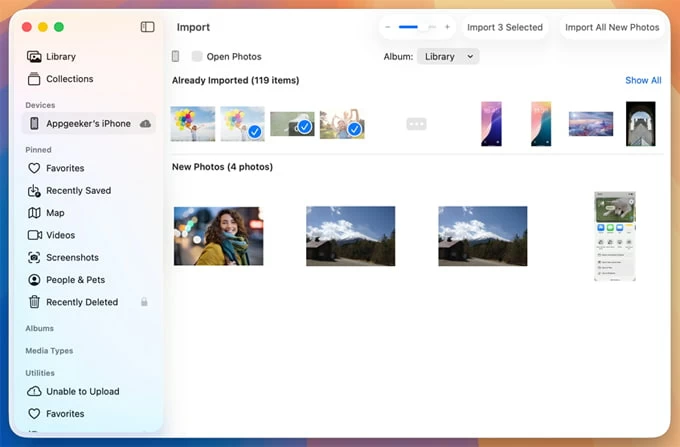
While AirDrop is convenient, a physical cable connection remains superior when transferring massive video files from your iPhone 13 to the Mac, such as 4K video clips over several gigabytes. The common apps for importing iPhone videos to the computer is macOS Photos app and Image Capture, bypassing the need to go through the compatibility issue.
You can either transfer entire media library or just the selected videos from your iPhone 13 to the Mac's Photos Library.
Don't miss: How to bypass iPhone Unavailable screen
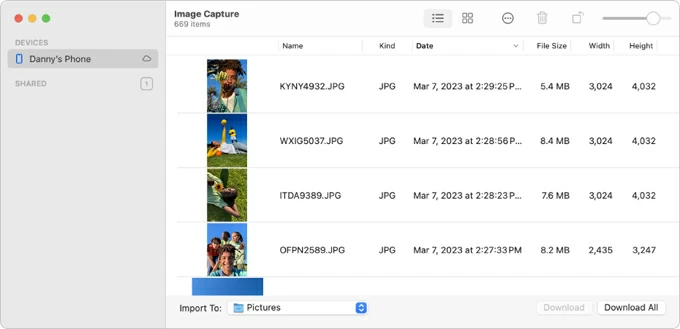
Image Capture is another wired method for Mac to copy the videos from iPhone 13 over to the computer's local drive or an external drive. Unlike macOS Photos app that can only save the imported video files into its Library, Image Capture allows users to transfer the raw videos to any folder.
To offload iPhone 13 videos to a computer that's running macOS via a cable, do the following:
Depending on the size and number of the video files you choose to import, the process could take for a while.
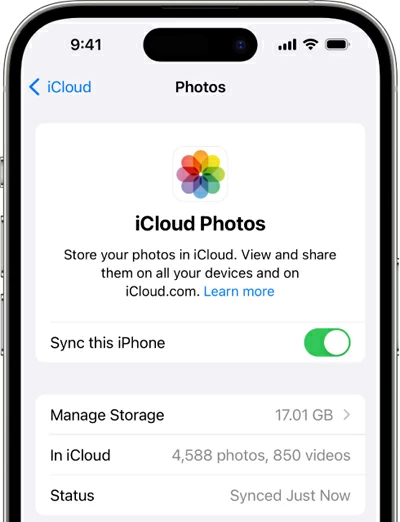
For hands-off, automated transfers, iCloud Photos keeps your entire media library synced across your iPhone, Mac, and Windows PC. This allows for a wireless transfer without a cable.
Note on Storage: iCloud provides 5GB of free cloud storage. Because 4K videos fill 5GB rapidly, you will likely need an iCloud+ subscription (50GB, 200GB, or 2TB tier) to use this cable-free method for transferring large video libraries from an iPhone 13 to a computer through Wi-Fi connection.
Once enabled, you can download your iPhone 13 videos to the computer wirelessly.
Syncing and accessing videos on a Mac
Once enabled, any video recorded on your iPhone 13, 13 Pro, 13 Pro Max or 13 Mini automatically syncs to the native Photos app on your Mac whenever connected to Wi-Fi.
Syncing and accessing videos on a Windows PC
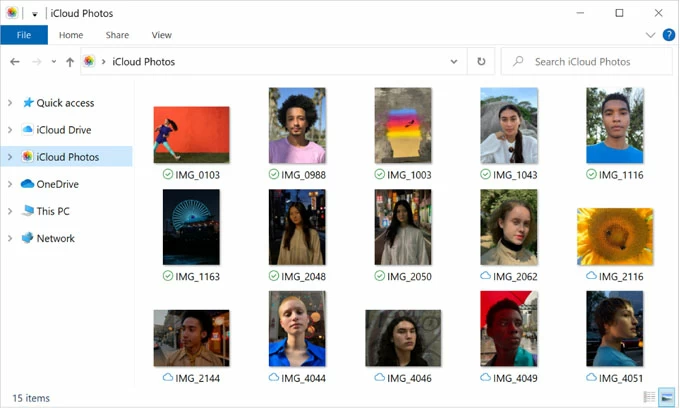
There are two ways you can wireless download videos from iPhone 13 to the computer on Windows system.
Way 1. Via the iCloud for Windows app
Way 2. Via iCloud.com web browser for manual downloading
If you prefer non-Apple cloud ecosystems or need to share videos from om an iPhone 13 to a computer without installing iCloud, third-party cloud services like Google Drive, Microsoft OneDrive, Dropbox, etc. provide an effective alternative. Ensure that there's enough cloud storage to upload your iPhone videos for downloading onto the computer locally.
After you've transferred your videos from your iPhone 13 to your computer (PC & Mac), you can drag and drop the files to an external drive for a secure backup.
Related: How to transfer photos from iPhone to USB drive
Transferring videos or movies from iPhone 13 to a computer does not require complicated software. For occasional transfers, built-in tools like Windows Photos, File Explorer, Mac Photos, Image Capture, AirDrop, and iCloud Photos are enough to have all your short or long videos moved to your computer.
However, if you regularly move large numbers of videos or need more control over file selection and management, a file transfer tool like Appgeeker iPhone Data Transfer can save time and simplify the video importing process.
Whether you use a Windows PC or a Mac, choosing the right transfer method (wired or wireless) helps you keep your valuable iPhone 13 videos safe, accessible, and ready for editing or backup.