
How to recover contacts on iPhone without backup

Do you need to access iPhone contacts on your iPad? There are several nifty tricks for Apple users to sync contacts from iPhone to iPad.

What to know
Transferring contacts from iPhone to your iPad to take backups of them.
Mobile phones offer a universal feature through which you can keep in touch with your family members and friends. But this only works when you know your friends' number. Thus, address book is something that can't be lost. Perhaps, keeping the contacts backed up on another device is a common method among iPhone owners allowing you to avoid hassles of contacts loss.
As an iPhone user who owns an iPad at the same time, you may want to sync all contacts from your iPhone to iPad to take backups. Then you are at the right place, the following are the most accessible ways to sync iPhone contacts to iPad. Which method you choose to start syncing your contacts is up to you.
Being Apple's official cloud storage service, iCloud allows you to sync your contacts from iPhone to iPad wirelessly as long as the two devices are logged into the same Apple ID. Other than that, a stable internet connection is also a must. iCloud has a free version and paid version. Remember that the free version only gives you 5 GB of iCloud storage. You will have to pay for upgrade if you want to get more iCloud storage.
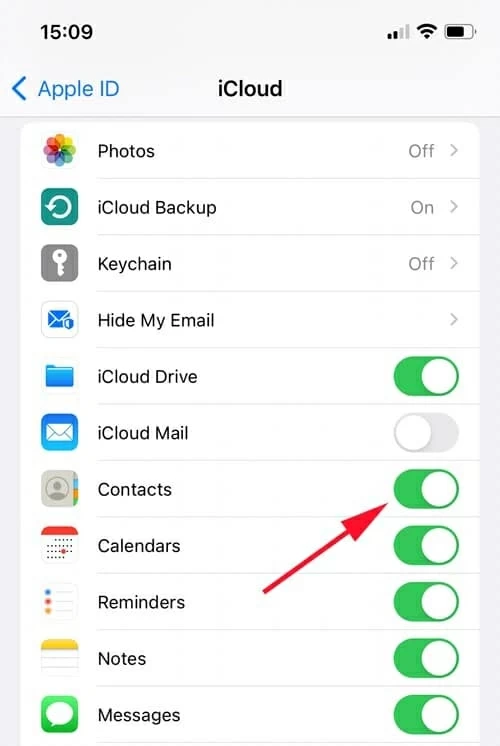
Firstly, navigate to the Settings app on your phone. Then merge your iPhone contacts: go to "your iPhone's name" > "iCloud" > "Contacts." Move the slider next to "Contacts" to the right. After that, there should be a window asking you what you would like to do with existing local contacts on your iPhone. Select "Merge." Then, your contacts will merge with the database within minutes.
Move to your iPad, make sure you're signed in on your iPad with the same Apple ID as your iPhone. Repeat the steps above to activate iCloud contact syncing on your iPad. Then your iPhone contacts will sync across iPad.
Also read: How to transfer contacts from iPhone to iPhone
Since 5 GB is not enough and you don't want to pay Apple to upgrade, you may be looking for an alternative. Appgeeker iPhone Data Transfer is a worthwhile option: with unlimited storage and an easy-to-use interface, it helps you transfer contacts from iPhone to iPad effortlessly.
There is no limitation on the number of contacts in iPhone Data Transfer, which means you can transfer as many contacts to your iPad as you want. Not only contacts, but also other data such as photos, videos, music and any other data can be transferred from iPhone to iPad, iPhone to Mac and vice versa. Its high success rate makes data transfer between devices less of an issue.
Step 1: Connect your devices
Click the green button above to download iPhone Data Transfer. No need to worry about the version of the computer, it is compatible with both Windows and mac OS.
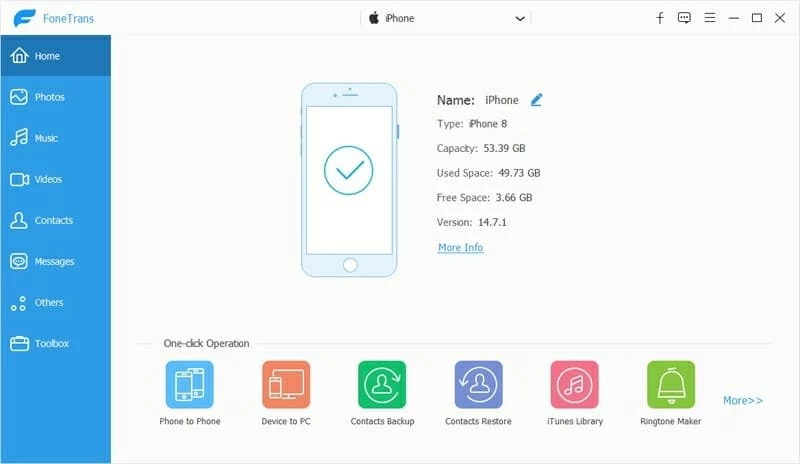
Launch iPhone Data Transfer, bump into its interface to begin with the syncing process. Once you come ahead to the interface, you'll be prompted to connect your device to manage your data. Connect your iPad and iPhone to your computer. You'll need to tap "Trust" on your iPhone and iPad to let the computer access your data.
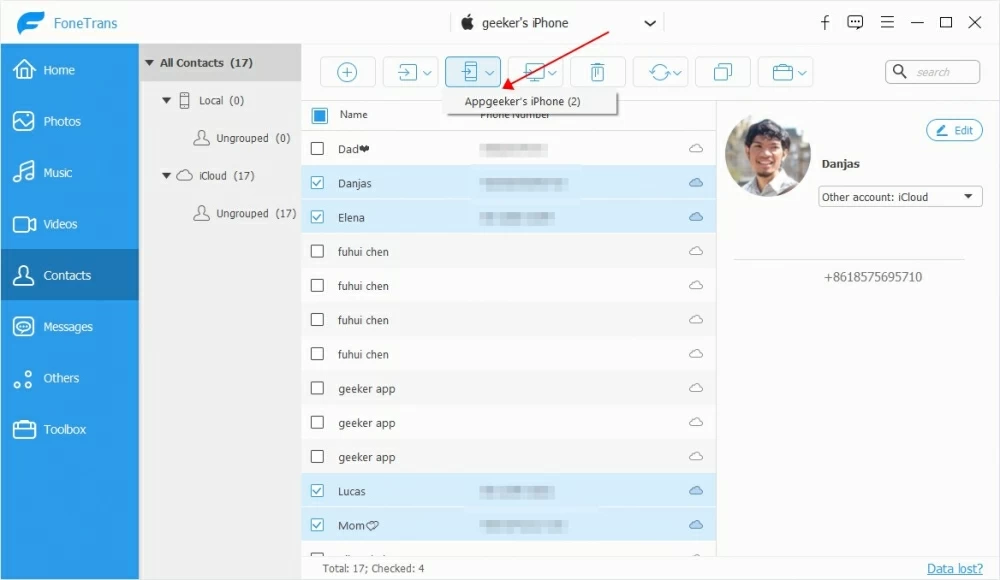
By default, when your devices are connected, iPhone Data Transfer will display the details of one of your devices. iPhone Data Transfer will show which device was connected to the PC first. You can switch to another iPhone by clicking user's name at the top of the screen.
Step 2: Click on "Contacts"
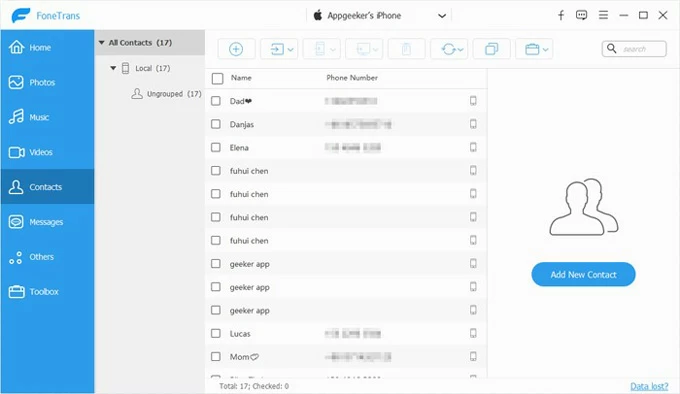
From the left navigation bar, click on the "Contacts" button. After that, you'll come ahead to the list of all the contacts on your iPhone.
Step 3: Sync contacts between iPhone and iPad
Select the contacts that you want to transfer, or if you're going to share all at once, tick the little box next to "Name."
It's time to share iPhone contacts to your iPad: Now, click on the device icon and click the "start" button. After the pop-up window showing that the transfer is in progress, syncing your iPhone contacts to your iPad will take a few seconds.
After that, you can view your contacts on your iPad.
This is also a wireless method. However, unlike the other wireless method, iCloud, Airdrop is a Bluetooth-dependent instant file transfer service. It is common for iPhone users to use airdrop to transfer photos between Apple devices in their lives. In fact, Airdrop can transfer more than just photos, which includes contacts.
Note:
Follow the steps listed below to sync your contacts to your iPad:
1. Open Contacts app on your iPhone.
2. Locate the contacts you want to share.
3. Tap on the "Share Contacts" button, then select "Airdrop."

4. From the recipient list, choose your iPad.
5. Move to your iPad, tap "Accept" to receive the shared contact.
Everyone wants a direct answer to their digital issues, and that's where we come in. This article has gone over the three most basic and quick ways to sync your iPhone contacts to your iPad. Apart from the iPhone, you can also use these ways to back up your iPhone contacts to other devices, like computer.


