
Copy music between Google Pixel and Sony

iPod are under gadget's "obsolete" category and you might want to transfer music on iPod to a computer. Knowing different methods can help you make an informed choice.

What to know

You may want to take backups of the precious tracks on your iPod.
It's true that iPods were once a trend and a technological symbol for listening to music. As a music lover, you may have collected a lot of songs on your iPod. At some point, you will need to transfer them from your iPod to computer to bring back old memories.
However, transferring music from iPod to your computer is not an easy task. But don't worry, we have got you covered! This article focuses on the best methods to transfer songs from iPod to computer. Each one has its pros, cons, complexity, and specific steps. Feel free to read on and pick one for yourself.
When dealing with Apple issues, iTunes is always the first method that pops into Apple users' mind. As Apple's official media data manager, iTunes can not only play the songs, but also build a bridge between Apple device and computer to allow you to transfer music from iPod to your computer. However, the limitation is that only purchased music can be transferred from iPod to computer under iTunes.
Download the latest version of iTunes on your computer if you haven't done so.
When you connect your device to iTunes, the music in your library automatically syncs with your device and overwrites the music on your iPod. Therefore, to copy music from iPod to computer, you will first need to prevent iTunes from automatically syncing with your device and erasing data from your device while the process is underway.
Prevent iTunes from syncing automatically: go to "Edit" > "Preferences" > "Devices." Tick the little box next to "Prevent iPods, iPhones, and iPads from syncing automatically."
1. Connect your iPod to the computer using USB and launch iTunes.
2. At the top of the window, select the "File" option and choose "Devices" from the list.
3. In the following window, Click on "Transfer Purchases from [your iPod's name]"
![]()
In a few moments, all the songs you've purchased on your device will be synced to your computer. You can find them in "Recently added" in the left menu of the iTunes window.
To download your purchased songs to your computer, simply select any songs you want and choose the "Download" option to save them to your computer for free.
Also read: How to transfer music from iTunes to computer
iTunes does help with transferring music from your iPod to computer. This is good, but you may soon find that it is not user-friendly and you also want to transfer non-purchased songs. No need to worry, the alternative to iTunes: Appgeeker iPhone Data Transfer will help you out.
With iPhone Data Transfer on your computer, you can easily manage all your data in one place. Beyond that, compatibility is no long an issue. In other words, iPhone Data Transfer can automatically convert media files to a format compatible with any of your devices. Other data types are also supported. You can use iPhone Data Transfer to transfer photos, videos and any other data from iDevice to iDevice, iDevice to computer and vice versa.
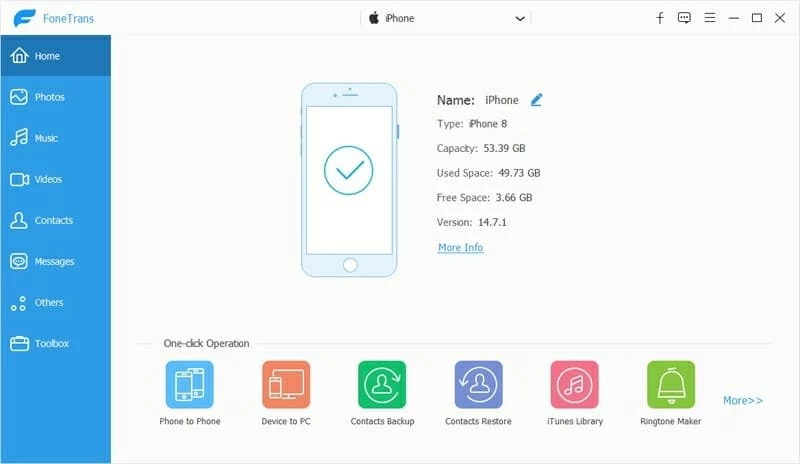
Step 1: Connect your device to computer
Simply click on the button above to download iPhone Data Transfer on your computer. After the installation, let it run on. Use a USB cable to connect your device to your computer. Once the tool has detected your device, it will show you the detailed info about the device on the screen like the following screenshot.
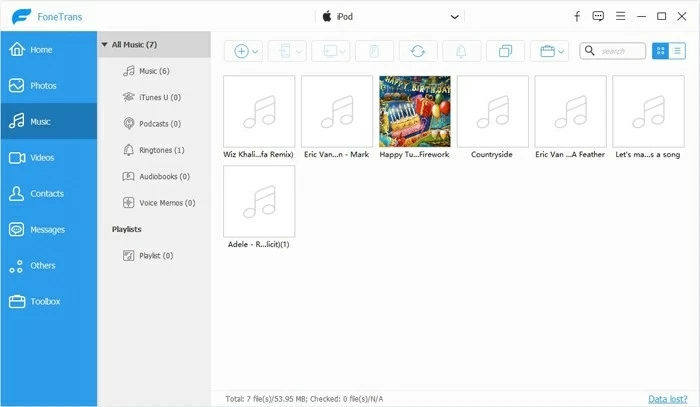
Step 2: Click on the "Music" button
From the left menu, click on the "Music" button. All the music files, including podcasts, ringtones, and other music files will be displayed.
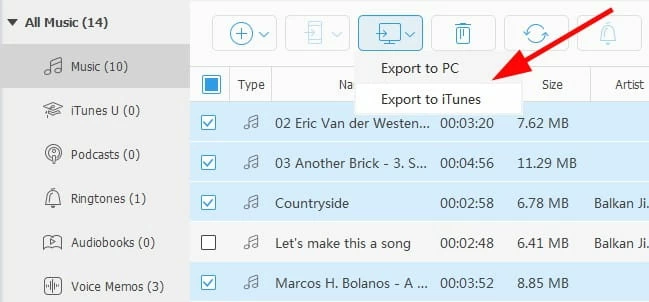
Step 3: Move music from iPod to computer
Tick the songs that you'd like to transfer. Then click on the computer icon at the top of the window. Choose "Export to PC." It won't take long for the selected items to be stored on your computer after you select the destination folder.
As discussed above, iPhone Data Transfer supports multiple music file types and provides powerful features to transfer kinds of data between devices. Other than that, it also provides a shortcut to move all the music on your iPod to computer.

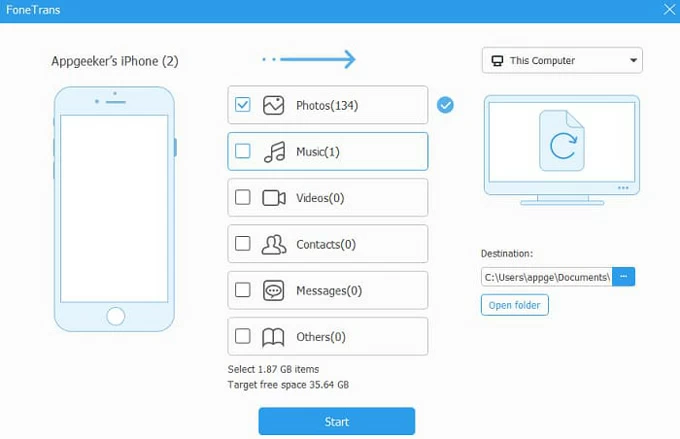
It won't take you long to finish the transfer process. You can also use this shortcut to safely move photos, videos and any other data from iDevice to computer.
It has now become easy and comfortable for you to transfer music from iPod to computer: you can use iTunes or iPhone Data Transfer to do that. If you want to compare the two, iTunes has a downside that cannot be ignored: it only helps with the purchased songs from your Apple music, while iPhone data transfer can handle all of other songs. Considering the benefits and make your decision to pick one method to copy music from iPod to computer with ease.


