
How to See Blocked Messages on iPhone

Struggling to move videos from iPhone to PC? Discover fast & easy way to transfer your video using USB or iCloud Photos without quality loss.

To quickly copy videos from an iPhone to a PC, Appgeeker iPhone Data Transfer is the way to go. With a USB connection, you can access your video library that's on iPhone or iCloud, and transfer large amounts of long videos to the PC without format compatibility issues.
You can use Windows utilities to transfer large video files from your iPhone to your computer for free and with ease.
Transferring iPhone videos to PC computers has become increasingly popular as it helps you free up space on your device, make a backup for your precious memories, edit these videos with more professional software and watch them on a larger screen.
Whether it's a MOV, MP4 or HEVC (H.265), it's actually quite straightforward once you know how to import videos from iPhone to PC. This guide shows you a few effective ways for iPhone video transfer to PC, covering both traditional, high-speed USB wired transfers and modern, convenient wireless solutions.
Let's dive in each method to get your video files to move from iPhone to your computer (Windows 11, 10, 8, 7, etc.) and retain the original quality.
Table of Contents
Before going through the whole process to transfer your video from iPhone to Windows PC with or without a cable, check the highlights of each method and decide which route is best for you.
Windows Photos app - Wired
Windows File Explorer - Wired
Appgeeker iPhone Data Transfer - Wired
iCloud Photos - Wireless
Keep reading and master the steps on how to transfer videos from iPhone to computer whether you prefer a wired or wireless option, helping you reclaim space and secure your memories.
If you're using Windows 11, 10 or 8, start with using the native Photos app for the iPhone to PC video transfer task. When you connect your iPhone via USB, Windows Photos app recognizes your Apple device and automatically opens, letting you seamlessly import your camera roll photos and videos to your PC's dedicated Pictures folder.
However, if iCloud Photos is enabled and set to Optimized iPhone Storage, Windows Photos won't be able to see the videos in iCloud. You need to switch to Download and Keep Originals option to download the full-solution videos to your iPhone before you import to your PC.
Tips and steps for how to copy videos from an iPhone to a PC using Windows Photos app:
1. Set compatibility setting to Automatic
To avoid HEVC/ H.265 compatibility issue, you need to set your iPhone to automatically convert modern format to Windows-compatible version when transferring video files to a PC.
Go to Settings, tap Apps > Photos, then under "Transfer to Mac or PC" heading, choose Automatic.
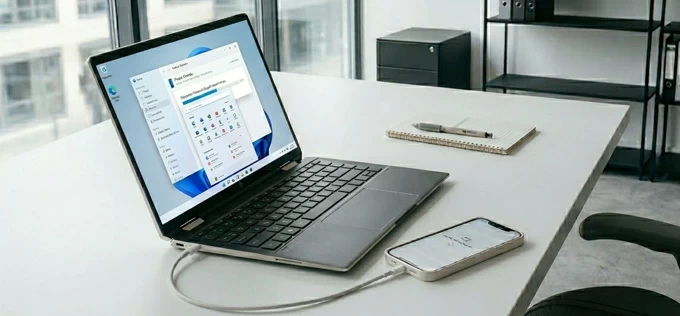
2. Connect your iPhone to your computer with a Lightning or USB-C cable.
Unlock your iPhone screen. If you see a prompt asking to "Trust This Computer," tap Trust and enter your passcode.
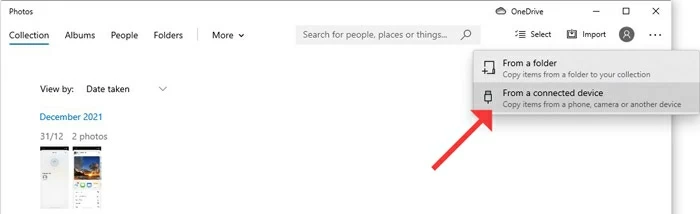
3. Open Windows Photos app from the Start menu.
4. Click the Import > From a connected device at the top right corner.
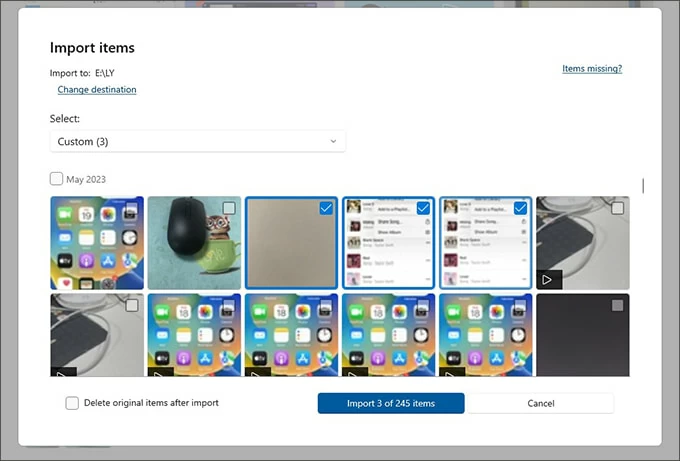
Photos app starts loading all your videos from Apple iPhone. The process may be slow if you have a large number of videos to move onto your PC.
5. Choose the videos and photos you'd like to import by checking each box.
6. (Optional) Click Change destination link at the top to switch the default Pictures folder to anywhere you want to save your imported videos.
7. Click Import at the bottom to get videos from iPhone on the computer. This may take a few minutes to transfer the long footages.
For those who want direct control without a dedicated app, File Explorer (or Windows Explorer in previous Windows 7, 8) is the manual transmission method. This is another USB-based option to enable you to access iPhone's DCIM folder and manage, copy the video clips to any PC's folder without internet connection.
The catch is that, instead of a user-friendly view that matches the album on your iPhone, the DCIM folder is filled with date-based or [number] APPLE subfolders. This requires a bit effort and time to go through endless folders to locate your videos files before copying to the computer. Also, videos optimized for iCloud are not displayed until they are fully downloaded.
If you stick with using File Explorer, follow these instructions on transferring the video from an iPhone to a PC manually.
1- Hook up your iPhone to your computer, and if prompted, tap "Trust" on your iPhone.
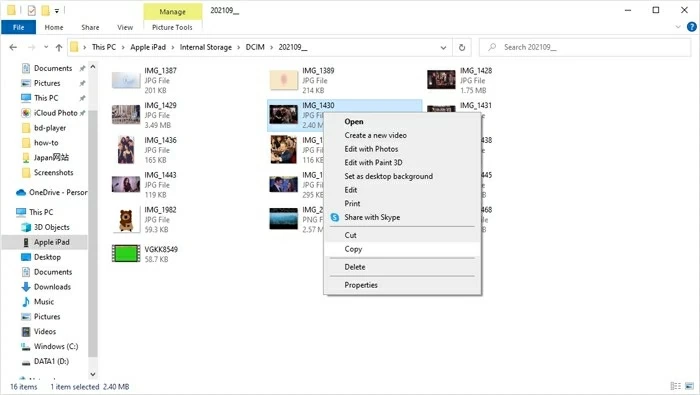
2- Open File Explorer on your PC
3- Navigate to "This PC", and double-click on Apple iPhone.
4- Go to Internal Storage > DCIM.
5- Browse through the folders until you find certain videos (.MOV, or .MP4).
6- Select the videos you want to keep locally. It would be better transfer small batches at a time.
7- Drag the video files from the File Explorer and drop them onto your desktop or into your desired folder to finalize the video transfers from iPhone to PC.
After your video clips are imported, you can delete them to save your iPhone's space.
Note that media library in modern iOS is too heavy for the old Windows system, making Explorer be freezing during the import. There's also a chance that "some files are not copied" error might occur when transferring large 4K videos or slow-motion videos, when your phone is locked, or when the cable connection is interrupted.
Also: iPhone Unavailable. How to Reset
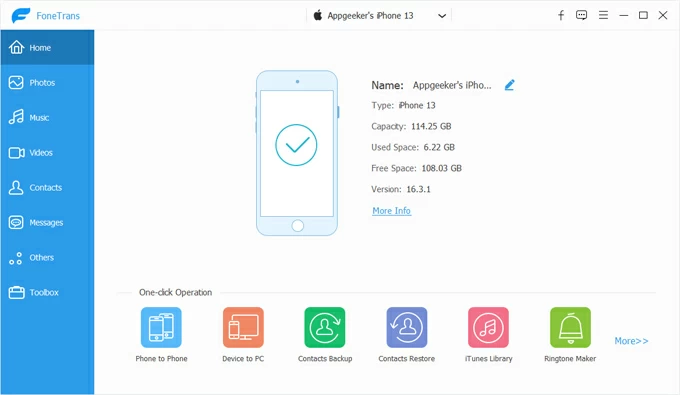
If you find the Windows built-in utilities slow, clunky, or prone to format issues, a dedicated utility like Appgeeker iPhone Data Transfer is your best bet for a professional, flexible, seamless experience especially when talking about how to transfer large video files from iPhone to PC effortlessly without losing quality.
The software is designed specifically to overcome the limitations of Windows-iPhone interaction, making it straightforward to get videos from iPhone to computer losslessly. It provides a clean, visual interface where you can browse your entire media library by type and album (Videos, Photos, Music, etc.) and perform lightning-fast, selective transfers. It automatically handles with HEVC video format conversion in the background.
One feature really stands out in the wired transfer routes of Windows Photos app and File Explorer is the ability to view and transfer the videos that exist on iCloud, bypassing the need to fully download the videos to the device.
Main features of Appgeeker iPhone Data Transfer tool:
To perform a video transfer from iPhone to computer running Windows 11, Windows 10, Window 8, Windows 7, do the following:
Step 1. On your PC, run the software after it's installed.
Step 2. Plug your iPhone into your computer through a functional USB cable. To ensure a smooth video import, keep your device unlocked.
Step 3. Access and preview your iPhone videos on your PC
Depending on where your video clips are stored on your iPhone, the software offers two approaches for you to quickly find your videos to transfer over to your computer.
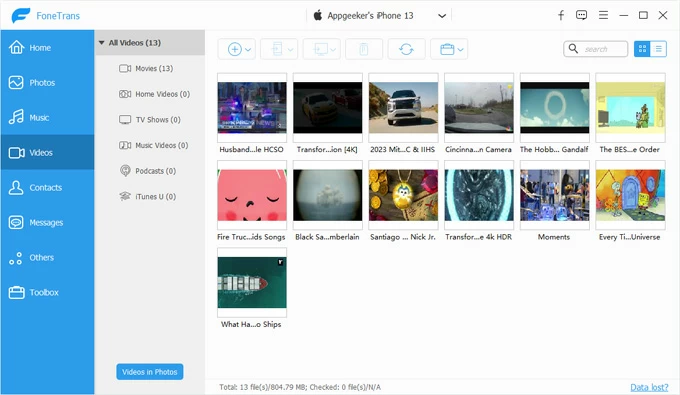
If your videos are saved in Photos app
Click Photos tab from the sidebar to access your Camera Roll, and then click Videos category. Now, you're able to see all your videos that are in your media library.
Tip: You can right-click on the Videos category and choose Export to PC option from the menu to get the entire iPhone video library to move onto your computer immediately without iCloud or iTunes.

If your videos are in Apple TV app
Click Videos from the left sidebar, then your movies, Home videos, TV shows, music videos will be displayed.
Step 4. Pick every video you want, and then click Export to PC icon at the top toolbar.
Step 5. If prompted, designate a specific folder and let your computer copy your iPhone videos over - no compression or quality loss.
Tip: You can also drag and drop a single video or multiple files directly onto any PC's folder.

See how to transfer videos from PC to iPhone if you'd like to make the video transfer journey in the opposite direction.
If you're looking for a wireless option to transfer your entire iPhone video library to your PC, then iCloud Photos is a good choice thanks to its automatic syncing feature. Once it's enabled, your iPhone uploads the photos and videos to cloud server, allowing you to download them on the Windows computer without a data cable.
All you need is a valid Apple ID with sufficient iCloud Storage space (free 5GB is rarely enough for videos, as well as a stable, high-speed Wi-Fi connection. Here's how to turn on iCloud Photos for syncing your library and put the iPhone videos onto the PC in their original resolution.
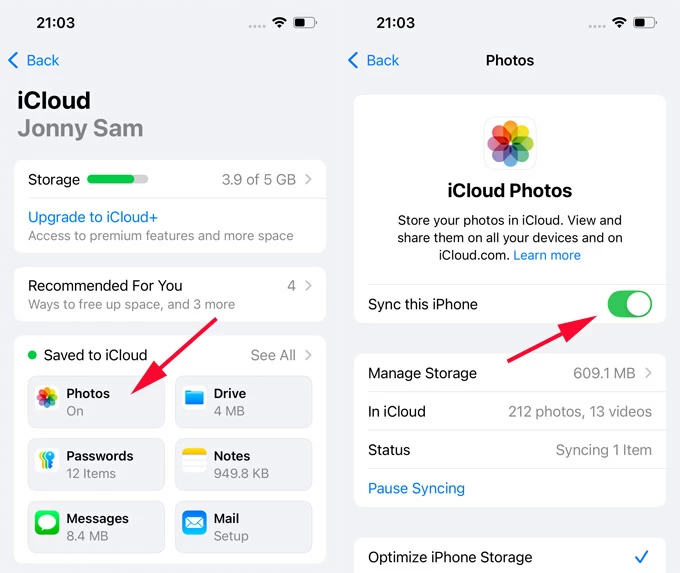
First, enable iCloud Photos on iPhone
iCloud Photos should trigger a seamless sync, making your entire library accessible across your Windows PC and all your Apple products sharing the same Apple Account.
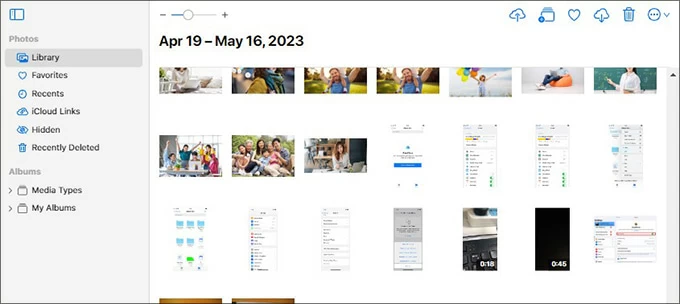
Then, download iPhone videos onto PC from iCloud
On your PC, you can install iCloud for Windows, set up iCloud Photos, and then download the synced video files from the cloud to your local hard drive. Here's how.
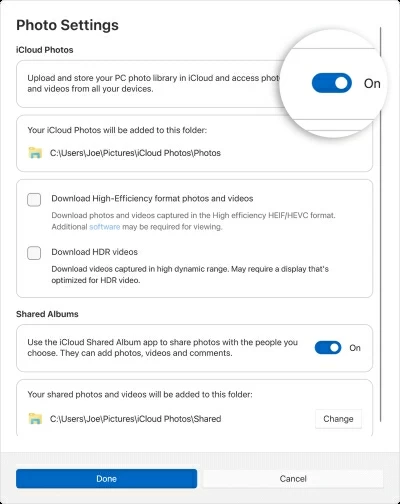
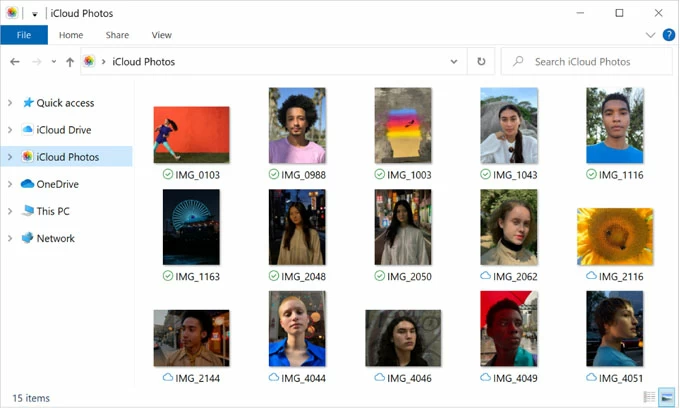
The green mark indicates that your media files are downloaded. You can also copy the iPhone videos to your PC's local folder from iCloud Photos folder directly.
Alternatively, navigate to icloud.com on a web browser to download and view your iPhone videos on your Windows PC offline. The steps are simple.
Note: If a photo or video gets deleted on your iPhone while iCloud Photos is enabled, it will be also deleted from iCloud for Windows until you download it before the deletion.
iCloud Photos is designed for a transfer of an entire photo & video library from iPhone to the Windows PC, but there's no support for selective transfer. For a few small clips instead of everything, Email might suffice — A cable-free solution to send your video file as an email attachment and then extract it to your computer.
Related: How to restore text messages from iCloud backup even deleted
You now know exactly how to import videos from an iPhone to a PC with or without a cable, and never struggle with cross-platform video transfers again. Wired transfer remains the undisputed king of speed and reliability, especially if you have gigabytes of 4K footage, while wireless transfer is ideal for small batches of videos or if you have a reliable, active Wi-Fi network.
Whether you prioritize speed, convenience, control, or cost, there is a path forward.
Don't wait until you get the "Storage Full" warning, or worse, lose your device. Back up those priceless cinematic memories to your PC now, reclaim your iPhone's space, and enjoy peace of mind knowing your videos are safe forever.
Why can't I import videos from iPhone to PC?
The common reasons of iPhone videos not transferring to a PC could include iOS device not trusted, USB connection issue, or HEVC format incompatibility.
After transfer HEVC videos from my iPhone to computer, it won't play. How to fix?
The best way to avoid HEVC incompatibility is to set the Transfer to Mac or PC setting to Automatic in iPhone Settings > Apps > Photos. This automatically converts the HEVC format to MP4/H.264 that is playable on the PC during transferring.
When HEVC videos are not playing on PC after import, you need to install HEVC Video Extensions from Microsoft Store for Windows Media Player and Movies & TV app, which may cost $0.99–$1.29. Or for an all-in-one solution, try Appgeeker iPhone Data Transfer tool to transfer iPhone videos in any formats to the computer, along with HEVC conversion occurring on the fly.
Do videos lose quality when transferred?
No—USB transfers maintain original video quality. However, some wireless options using cloud services may compress the video resolution.


