How to Record Internal Audio on Mac


Platforms
Developed for both Windows & Mac users

If you feel like recording lectures easily and quickly, the native tool QuickTime Player or the compact application Appgeeker Screen Recorder might be the way to go.

A proper screen recorder makes it easy for you to record lectures on your Mac.
Apple's Mac computers are great for productivity geeks. They provide excellent experience with the perfect blend of software and hardware. And in terms of recording lectures on Mac efficiently, you just need to have an appropriate recording software that collaborates with the system without any hassle.
Related: How to record a livestream on Mac
You can easily record online lectures on your Mac with various screen recorders. In this article, we'll focus on the most effective ones, QuickTime Player and the AppGeeker Screen Recorder. Below you will be shown about how to use them respectively to record lectures from a Mac. Without further ado, let's get started!
You might want to record an online lecture on your Mac for many reasons.
For example, if you are a student who need to have class online, you may want to record the class lecture for taking notes and listening back to check that you understood everything correctly.
The same applies if you are a teacher who wants to keep track of what students are saying in class online. You can listen back to the recorded lecture and see if they have any questions that need addressing, or check if you have made some mistakes.
Learn more: How to record a Facebook live video
You probably hear of the built-in tool QuickTime Player on Mac, which allows you to record lectures easily. However, the process can be a little different depending on the version of macOS you're using.
Note:
If your Mac is running macOS Mojave and later, you may record a lecture with the steps below:
1.Get the lecture ready and open QuickTime Player.
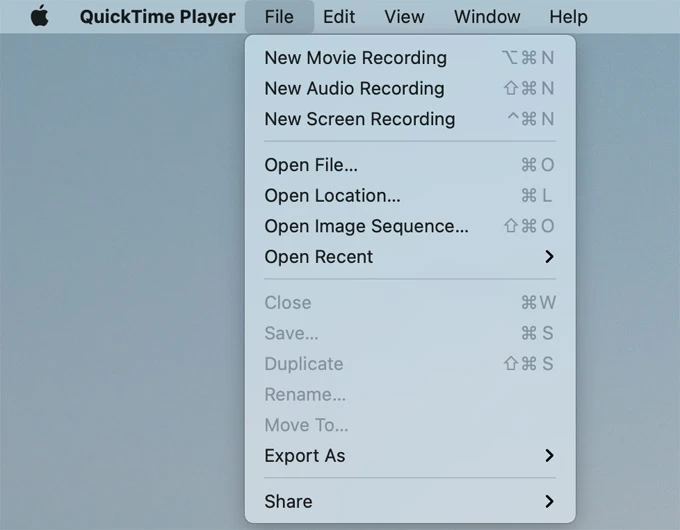
2. Click on File and select New Screen Recording.
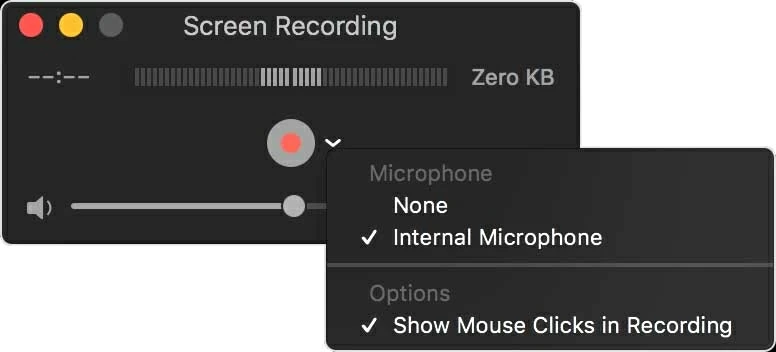
3. The Screenshot toolbar will show up next. You can choose to record the entire screen or record a selected area here.
Tip: You can also use the shortcuts Shift + Command + 5 to activate the toolbar.

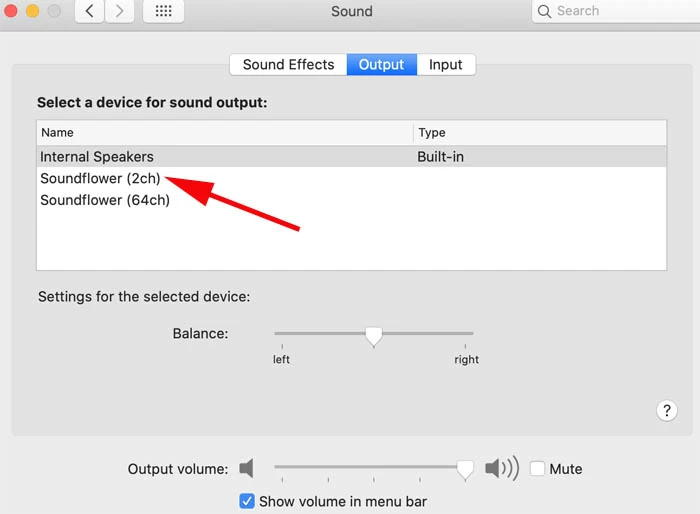
4. Hit Options and select Soundflower (2ch) as the audio output.
5. Click on Record and you can start recording the lecture as needed.
6. Once the recording is done, hit the Stop button on the top bar menu to end the recording. It will be automatically saved as a .mov file on the desktop and you can click on it to play back.
Suppose you have a Mac of macOS version older than macOS Mojave, you'll need to take these steps to get a lecture recorded:
If you are looking for a recording tool that is more convenient to use, you may have a try on this expert but intuitive software, AppGeeker Screen Recorder, which bridges the gap between professional recording and user friendliness. Loaded with tools that enables you to add annotations during the recording, it makes it simple for you to capture and edit a lecture with several clicks as well as convert it into a format you need.
Here's how you can use this software to record lectures on your Mac.
Step 1. Launch the AppGeeker Screen Recorder
Download and install the software on the computer. Also open the lecture window in advance. Select Video Recorder from the menu.

Step 2. Adjust the settings as needed
Choose the field for recording, full screen or a customized area. And with the switch of System sound and Microphone, you can turn them on or off to record corresponding audio based on your preference. It is also optional for you to record webcam on your Mac here by opening Camera or not.
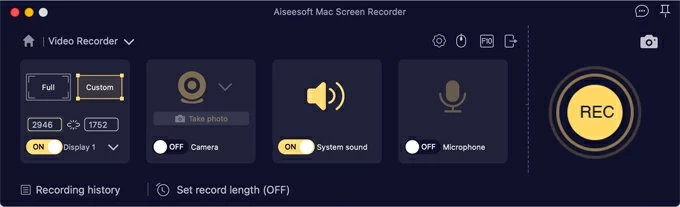
You can adjust the output settings by clicking the gear icon, too.
Step 3. Start recording the lecture
Hit the REC button to begin recording. A countdown will show up before it starts. When it's recording, there will be a floating bar, you are free to add notes during the capturing process.
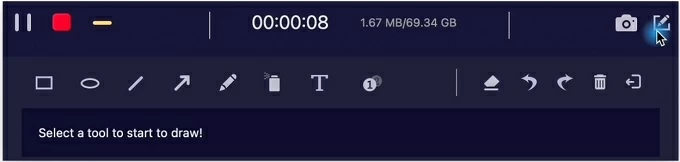
Step 4. Stop the recording
To stop screen recording the lecture on Mac, hit the red Stop button. It will be saved and you can preview it and make simple trimming if needed.
Step 5: Export the recorded video
After clipping, you may hit the Save button to export the recording.
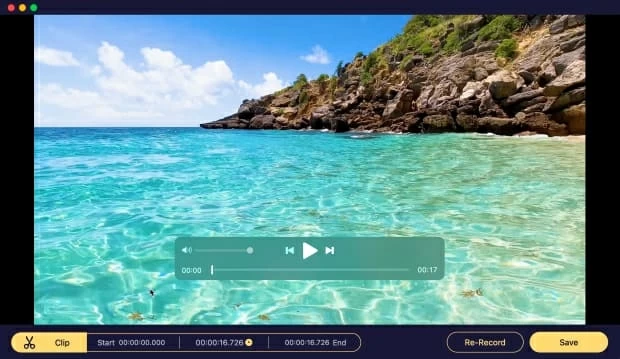
If you are not satisfied with it, you may select the Re-Record option to create a new recording; but noted that the original one will be deleted automatically then.
If you want to record a lecture on Mac in better quality, you should know a few things first:
The bottom line
The suggestions explored in this article are just a few of the many different ways you can record lectures on your Mac. The best way to determine which option is right for you is through trial and error. We hope this guide troubleshoot your recording problems well.

