How to Record Video on Windows 11

Wondering how to record a webinar on your computer or mobile? Here we've compiled a comprehensive list of methods to make it easy to record your webinar on any platform.

If you want to record a webinar with audio on PC or Mac, or record your own presentation during a webinar, AppGeeker Screen Recorder will be your indispensable helper!

Several methods allow you to record webinars on Mac, Windows, iPhone and Android phone.
With the popularity of using webinars for online meeting discussions and sharing, the demand for recording webinars is increasing dramatically. While there are webinar apps that allow you to capture webinar videos online, most require permission or payment. Then you may need to use other tools to record a webinar for free.
Don't worry, if you often attend a live webinar and want to record a webinar for offline viewing or review, this article shows you how to record a webinar. Whether you're using a Mac or Windows or mobile, you'll be able to choose the right webinar recording software.
Table of Contents
How to record a webinar on computer
How to record webinar with online webinar recorder
How to record a webinar on iPhone & Android
There are many ways to record a webinar on Windows or Mac, such as using the built-in tools or employing a third-party software.
When it comes to webinar recording, it can be difficult to keep the video and audio in sync. And as a full-featured and trusted webinar recording software, AppGeeker Screen Recorder is designed to provide a streamlined recording process that can capture a webinar on computer without any delays.
It enables you to record any live meeting, including recording a webinar presentation, screen, webcam, audio, and more. And not only does it give you the flexibility to add or mute computer sounds and microphones during the webinar, it also lets you add text annotations for important notes while capturing a webinar.
Here's a step-by-step guide on how to record webinars on computer:
Step 1. Go to or join the webinar you want to record. After downloading and installing AppGeeker Screen Recorder, launch it on your computer and select "Video Recorder" on the main panel.

Step 2. Select the area to be recorded. You can choose "Full" to record a full-screen webinar, or "Custom" to record a portion of the webinar. For partial screen recording, you should drag the cursor to highlight the specific part of the screen you want to record.

Step 3. Adjust the audio settings. To capture the webinar with audio, switch on the "System Sound"; to record your own speech in the webinar, turn on the "Microphone" as well.
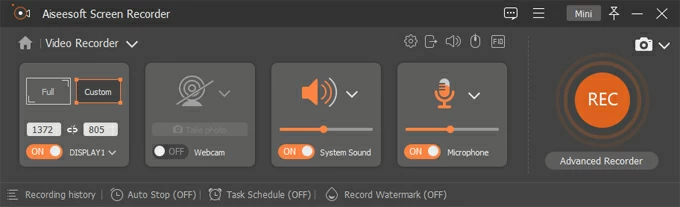
Step 4. When everything is ready, hit the "REC" button to begin recording.
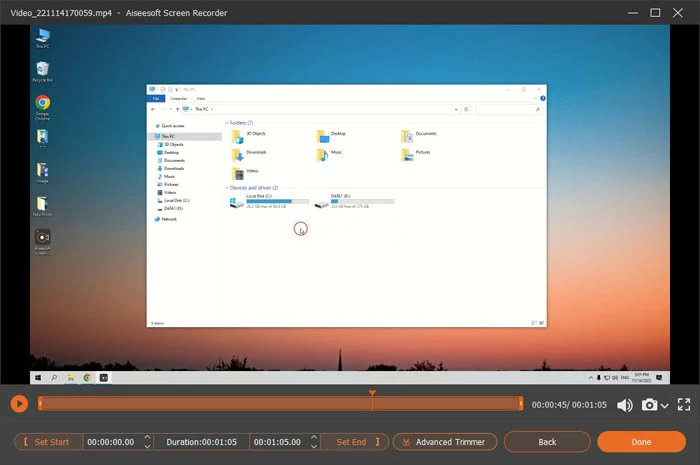
Step 5. Click the "Stop" button once the webinar is finished. You can play the recorded webinar in the preview window, and edit the content of the webinar you need.
For Windows 10 and Windows 11, Xbox Game Bar is their built-in screen recording tool, which is sufficient to record a webinar on your PC. Xbox Game Bar is primarily a game overlay, but it can also be applied to other programs, allowing you to easily record a webinar for free.
1. When the webinar begins, use "Windows logo key + G" to launch the Xbox Game Bar widget.
2. Press "Windows logo key + Alt + R" to start capturing the webinar.
3. To stop recording, click the "Stop Recording' button in the recording progress box.
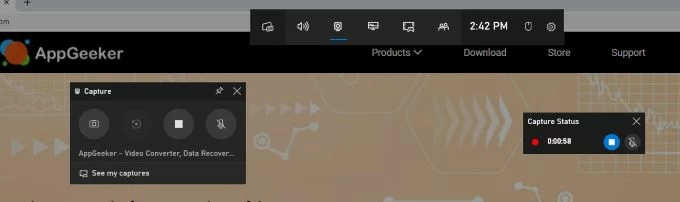
Use the Windows logo key + Alt + R shortcut on the keyboard to start and end recording.
You can click the pop-up "Game clip recorded" to view your recording. Alternatively, your recorded webinar video can be found in the Capture subdirectory of the Video folder.
Most macOS computers come with QuickTime Player pre-installed, a multimedia player that can be used to play videos, capture Mac's screen or audio, and record the webinar on Mac.
1. Join the webinar and open the QuickTime Player in the Applications on your Mac.
2. Select File > New Screen Recording in the taskbar at the top of your Mac screen.
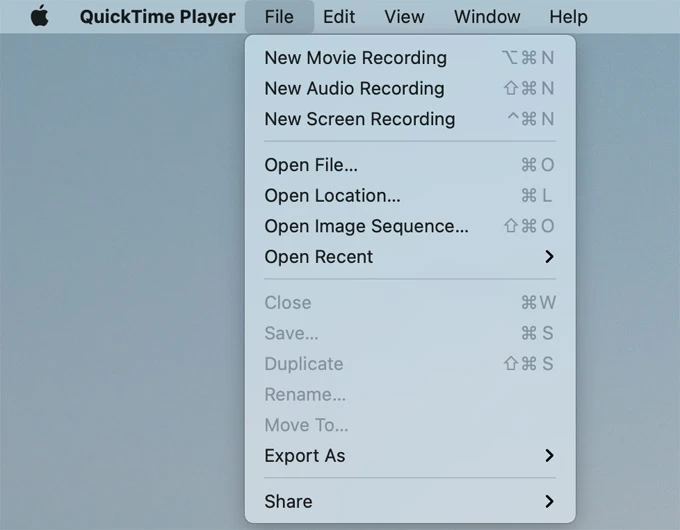
Run QuickTime Player on your Mac and locate File > New Screen Recording.
3. Click on the "down arrow" icon to adjust the audio facilities.
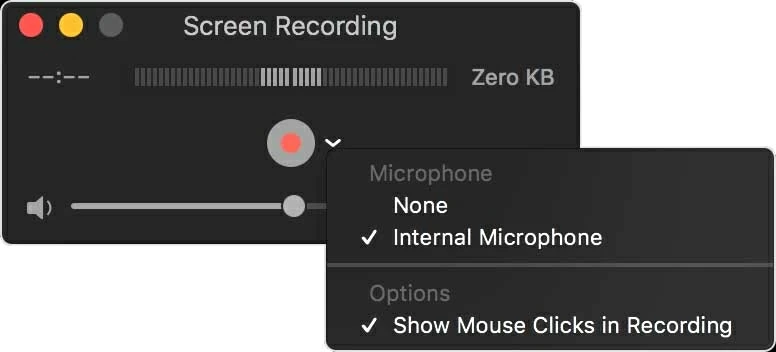
Click on the down arrow to select the audio source to be recorded.
4. To begin recording the webinar, click on the "red recording" button in the middle and select the range of areas to capture.
Note:
5. When the webinar is over, click the "Stop" button on the taskbar at the top of the screen.
If you don't like installing additional software to record a webinar on your Windows or Mac, whether you are a webinar host or participant, there are various online tools available for recording a webinar for free.
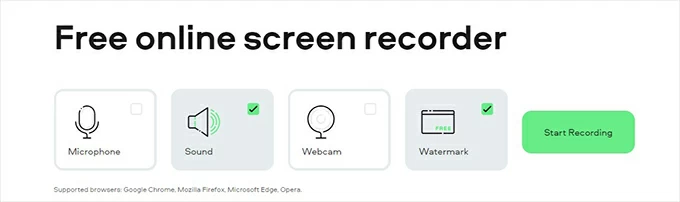
Movavi Screen Capture is a free online recording tool with an easy-to-use interface that lets you perform webinar recording without downloading any software. It supports high-definition webinar video recording in Google, Firefox, Microsoft Edge and other browsers. And you can use it to capture the webinar screen as well as your face.
However, this free online webinar capture software does have some limitations. In the free version, you cannot remove the watermark, and you can't select a region to record, you can only record the whole webinar screen.
1. If you have attended the online webinar, open Screen Capture in your browser.
2. Select the parameters for recording the webinar. You can select Microphone, Sound and Webcam to be recorded during the webinar. If you are hosting a webinar and need to speak, turn on the "Microphone." To record other participant's presentation, enable the "Sound" option.
3. Click "Start Recording" to record your webinar content. You need to select the tab or window where your webinar is located in the pop-up window and click "Share" begin recording.
4. Hit "Stop Recording" to end the webinar recording. And then you can click "Download" to save the recording on your computer.
Read more: How to record audio from browser
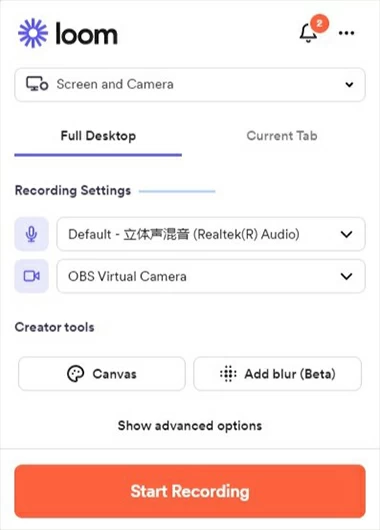
As a Chrome extension, Loom supports recording webinar videos online through Google Chrome. Without downloading any recording software, you can add the Loom Chrome extension directly to your browser for efficient online webinar capture, including screen, sound, microphone and webcam, which works well for both webinar hosts and participants.
If you don't want to enable the webcam in the webinar, you can choose Screen Only mode. However, it should be noted that the free version of Loom is limited to 5 minutes of recording time and only offers storage for 100 recordings. If you want to record a long webinar, then it is recommended to use the AppGeeker Screen Recorder.
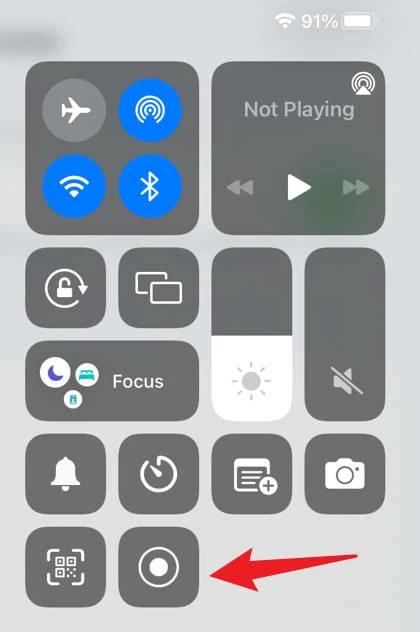
If you are using your phone to watch or attend a webinar, there are built-in recording tools available for both iPhone and Android phones to help you record a webinar. In short, the screen recorder that comes with iOS and Android devices makes recording a webinar a breeze!
For iPhone:
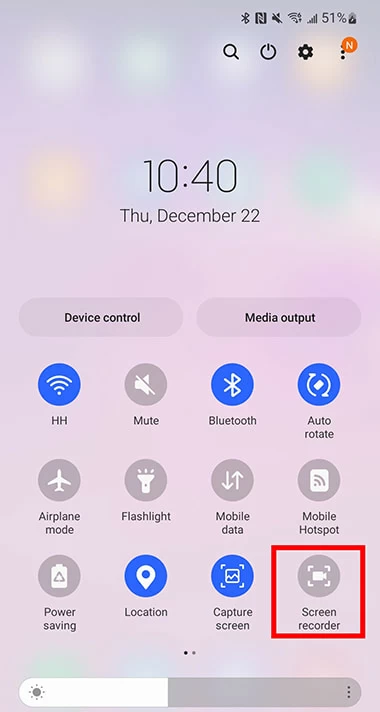
For Android phone:
Note:
1. How to record webinar on Zoom?
Zoom is an online meeting software where hosts who subscribe to a paid plan have the right to initiate a local recording of the online webinar. Participants will need to obtain permission from the webinar host to record.
2. Can I record a webinar as an attendee?
As a webinar participant, some webinar apps do prevent you from recording webinars. But using AppGeeker Screen Recorder allows you to record a webinar as a participant without permission.
3. How to record a webinar for free?
Using the screen recording software that comes with Mac and Windows allows you to capture webinars for free. Press "Win + Alt + G" on Windows for free webinar recording; on Mac, press "Shift + Command + 5" to launch Screenshot toolbar to record a webinar on Mac for free.