Home > Resources > Can I recover contacts from Galaxy S9

How to Recover Contacts on Samsung Galaxy S9/ S9 Plus

face
Elena Spencer Updated on Apr 15, 2022 4:08 PM

It's never fun losing the contacts on an Android phone. It's happened to Samsung Galaxy S9 or S9+ users at some point or another: someone accidentally deleted all contacts, or even worst, the contact list disappeared randomly from the phone. Don't fear, we're going to show you how you can recover contacts on Samsung Galaxy S9 (S9+). These can bail you out of a bad situation, but don't forget that a regular backup can keep you from data loss.

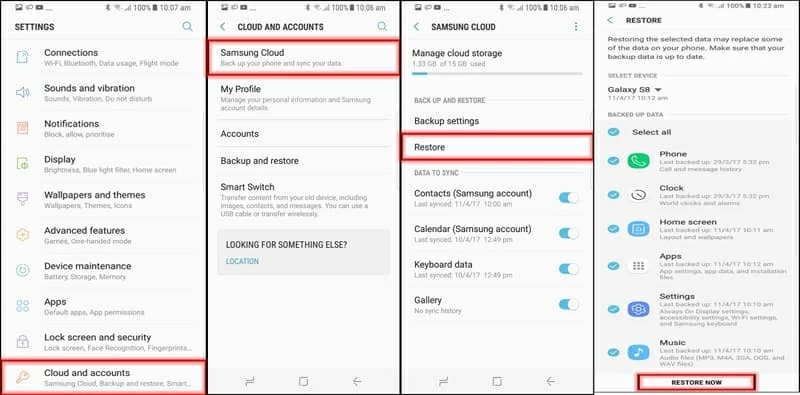
1. Recover Galaxy S9 Contacts from Samsung Cloud

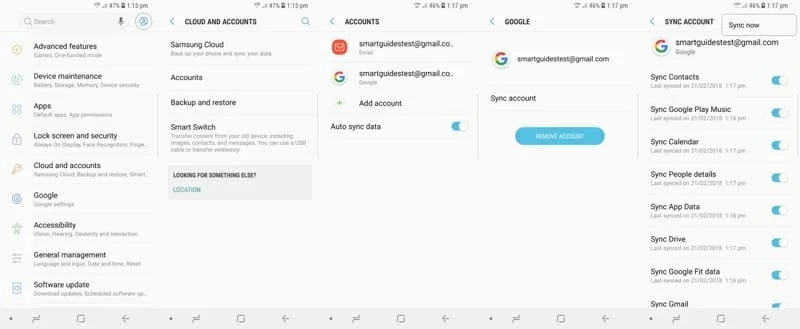
Assuming you've had the Contacts option enabled in Samsung Cloud, then all contacts should be backed up. To retrieve deleted contacts from Samsung S9 (Plus) Cloud backup, you just use the "Restore" feature. It's incredibly easy and free. Make sure to sign into your Samsung account.

  • Open Settings app in Samsung Galaxy S9.
  • Scroll down to tap Accounts and backup > Samsung Cloud.
  • Tap on Restore.
  • Select the Contacts you hope to restore, and the device you want to restore to.
  • Tap Restore Now to restore contacts from Samsung Cloud to Galaxy S9.

Restore Lost Contacts from Samsung Galaxy S9/S9+

S9 models: SM-G965U, SM-G960U, SM-G965F, etc.

2. Retrieve Deleted Contacts from Samsung Galaxy S9 (S9+) Memory

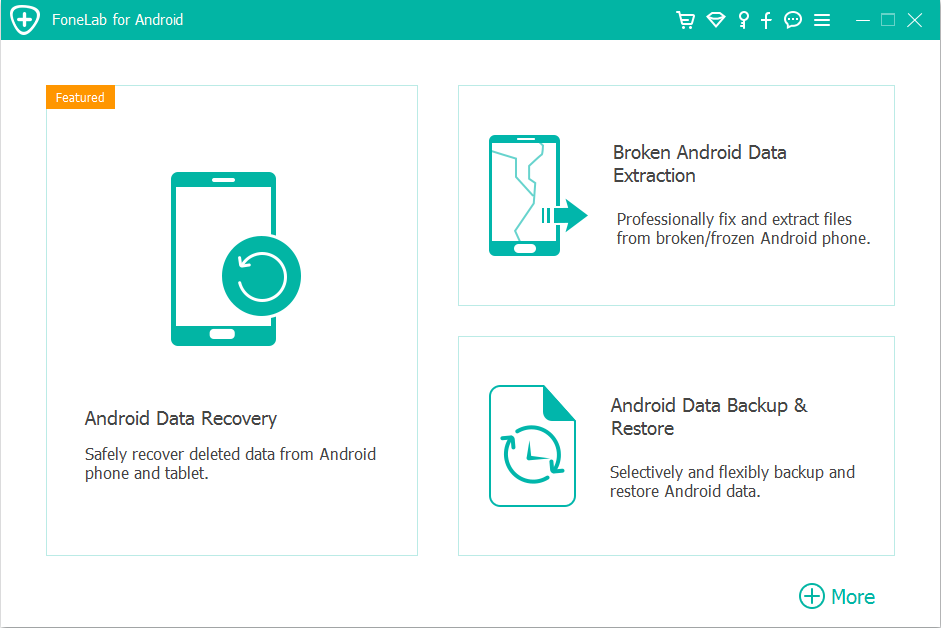
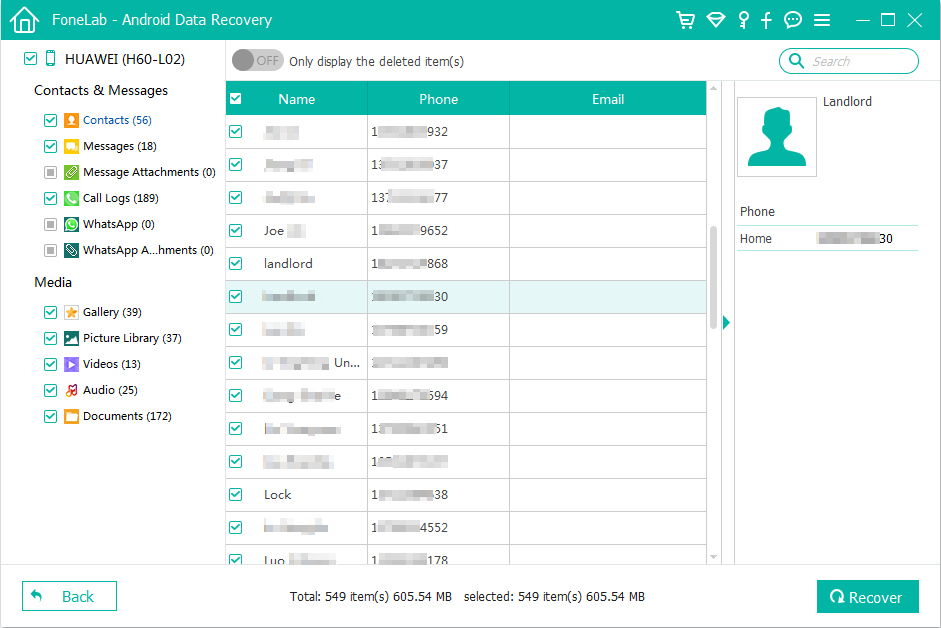
If you don't have Samsung Cloud backup or other backup file, like Google backup, then using a third-party software tool is a great idea. That's where Android Data Recovery truly shines.

This is an effective solution for Samsung Galaxy S9 contacts recovery, as long as the contacts you've mistakenly deleted has not been overwritten.

Download Now!

for MacOS | for Windows

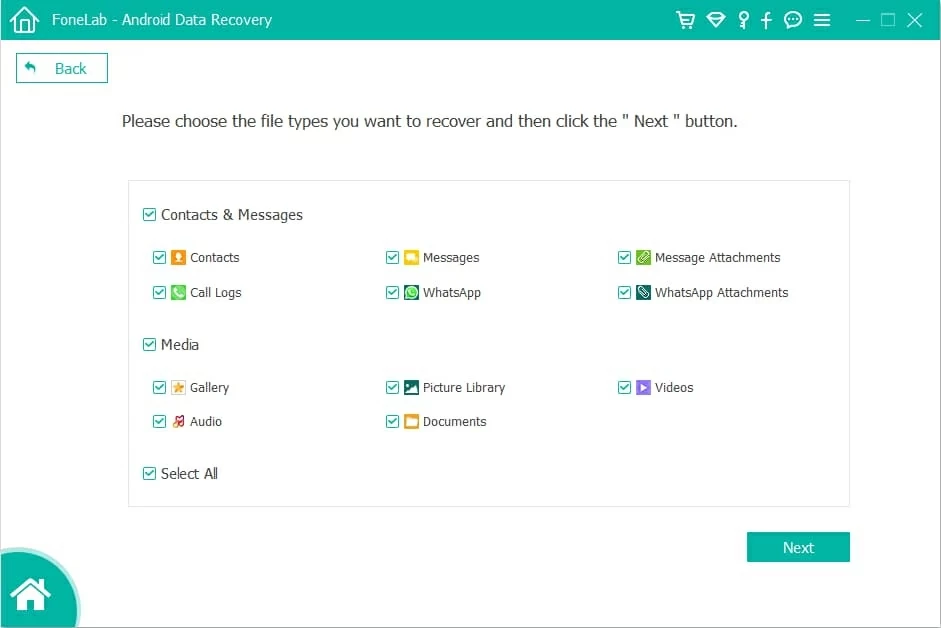
The cross-platform desktop program has been taken real strides in making itself a truly solid way of recovering deleted contacts on Samsung Galaxy S9 (Plus) phone, thanks to efforts like efficient scanning module, powerful file recovering ability, and high success rate. Once the contacts are scanned through your phone's internal memory, you can find contacts details (Name, Phone Number, E-mail) under certain category. That's very convenient.

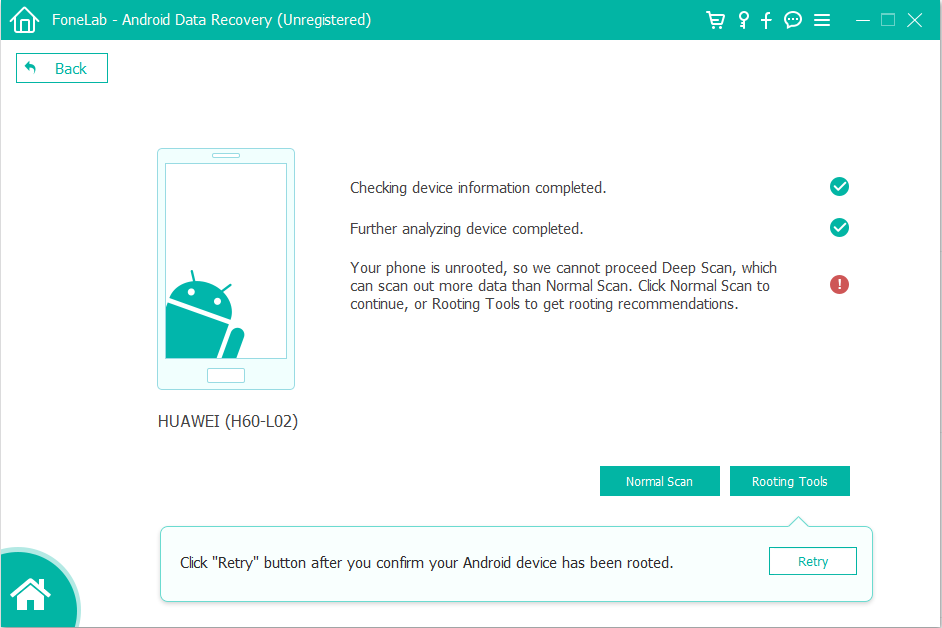
In the following section I'll take you through the step-by-step process of retrieving contacts from Samsung Galaxy S9 (S9+) internal storage. Make sure your mobile is functional.

  • Run the software after installation.
  • From the main screen, click Android Data Recovery mode.
  • Connect Galaxy S9 to computer with a USB cable.
  • Enable USB debugging mode under Settings in your phone. Refer to our guide: how to enable USB debugging mode on Android
  • On the next screen, choose "Contacts" and click Next button.
  • Samsung Galaxy S9 Contacts Restoration

  • When prompted, click Rooting Tools button to proceed.
  • You will now get into a site where you can use KingoRoot rooting your device so the software can gain full access to internal storage and search for the contacts you've lost. There's no harm of doing this. Refer to this guide: How to root an Android and remove root
  • Once that's done, the software will run a deep scan on your S9 device and display contacts it found on the screen.
  • Click the contacts according to the names or phone numbers that you wish to recover.
  • Click Recover button, then specify a saving location in your computer in pop-up window.
  • Hit Recover button again to begin the Samsung S9 contacts recovery process.

How Do I Recover Contacts from Samsung Galaxy S9 Phone

[Useful Resource: How to Back Up Samsung Phone to Laptop]

3. Restore Contacts from Google Account on Galaxy S9 (S9+)

Did you have your contacts list synced to your Google account prior to accidental deletion? If so, sign into Google account and restore contacts to Samsung S9 (S9+) Contacts app.

  • From Home screen, tap to open Settings.
  • Tap on Accounts and backup, then tap Accounts.
  • From the list, choose your Google account which you ever sync contacts to.
  • Tap Sync account.
  • Make sure the switch for Sync Contacts is toggled on.
  • On the top-right corner, tap Menu button (three dots) and then choose Sync now.
  • All contacts you've synced to Google should now be synced to Galaxy S9 address book.

Restoring Deleted Contacts on Galaxy S9

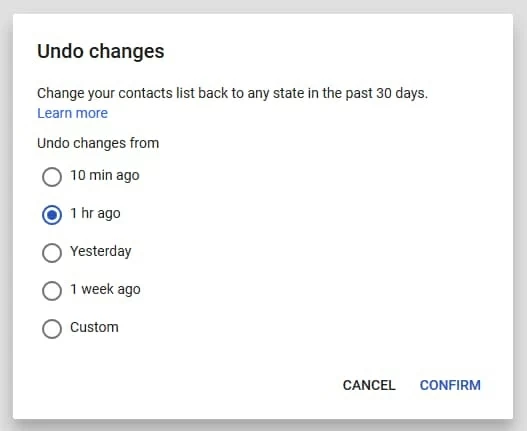
4. Recover Lost Contacts from Gmail (Google Contacts)

You can also quickly restore Google backup and get back contacts to Samsung Galaxy S9 from Gmail inbox.

  • Go to Gmail site, and sign into your account.
  • In the upper-right corner, click Google apps (the icon that looks like a grid of dots), then choose Contacts.
  • When you're in Google Contacts page, click Settings (a gear wheel icon) on the top right position.
  • On the menu, choose Undo changes.
  • From the pop-up dialog, choose a time frame to restore contacts from.
  • Hit CONFIRM and the process will accomplish in the background.

5. Restore Contacts from SD Card

Suppose you ever backed up contacts to a SD card for the sake of security, then when you lost contacts in Samsung S9 (+), you can use the "Import/Export contacts" function for restoration. Ensure that your SD card is inserted.

Here's how to copy contacts between SD card and Galaxy S9 to recover phone numbers:

  • On the Home screen, slide your finger upwards to open Apps tray.
  • Tap Contacts.
  • On the top-right corner, tap Menu > Manage contacts.
  • Select Import/Export contacts to move on.
  • Tap Import.
  • Select SD card as FROM location, then select Phone as TO location.
  • Press Import.
  • The contacts will be added to Samsung Galaxy S9.

Hopefully you will be able to recover Samsung S9 contacts. Anyone can use these methods even if they are not tech-savvy, and they're a lot better than manually typing in countless names and phone numbers in the Address book. With a little forward, you can prevent having to do this in the future by backing up contacts and other data from Samsung Galaxy S9 (Plus) to Samsung Cloud.

Highlight
By clicking "Agree" you allow cookies that improve your experience on our site, help us analyze site performance and usage. See Cookies policy.Agree