How to Recover Data Files on Huawei Phone


You've become a Samsung Galaxy S9 master! You are enjoying your phone everyday for storage, communication, and entertainment. However, the performance is slowed down for the cluttered photos, messages, call history, apps and many redundant files. You then do a spring-clean.
Then the worst thing that could possibly happen happens. Unexpectedly, you've deleted an important photo from Gallery or something valuable in other apps. But don't panic! There are a lot of services available to help you retrieve data files on Samsung S9 or S9+ right after an accidental deletion, software upgrade, factory reset, etc.
Method 1: Restore Data from Samsung Cloud to Galaxy S9 (Plus)
Samsung Cloud is a nice feature built in Samsung's smartphone, providing a convenient means of digitally backing up precious files and information for those worried about the possibility of loss: Contacts, Calendar, Phone (call and messages history), Apps, Music, Documents, Settings, Voice Recorder, Home screen, Messages, and Clock.
Restoring Samsung Cloud backup data is the first step in recovering deleted files in Samsung S9. Follow the below steps to perform the restoration successfully.
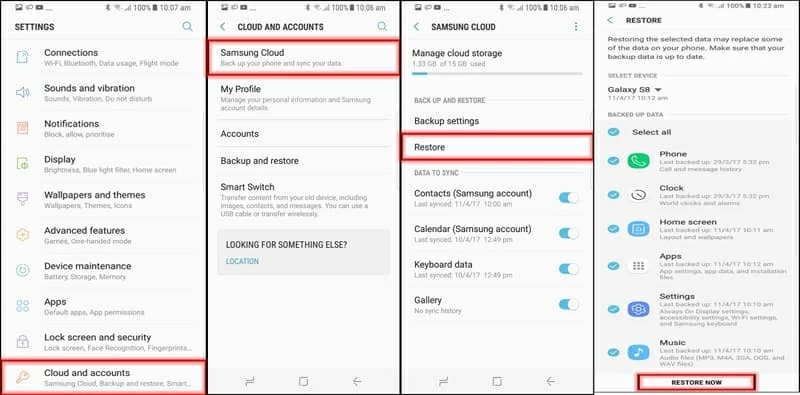
You could get lost photos and videos by restoring from Samsung Cloud Recycle Bin, if you've turned on Gallery Sync in Gallery application.
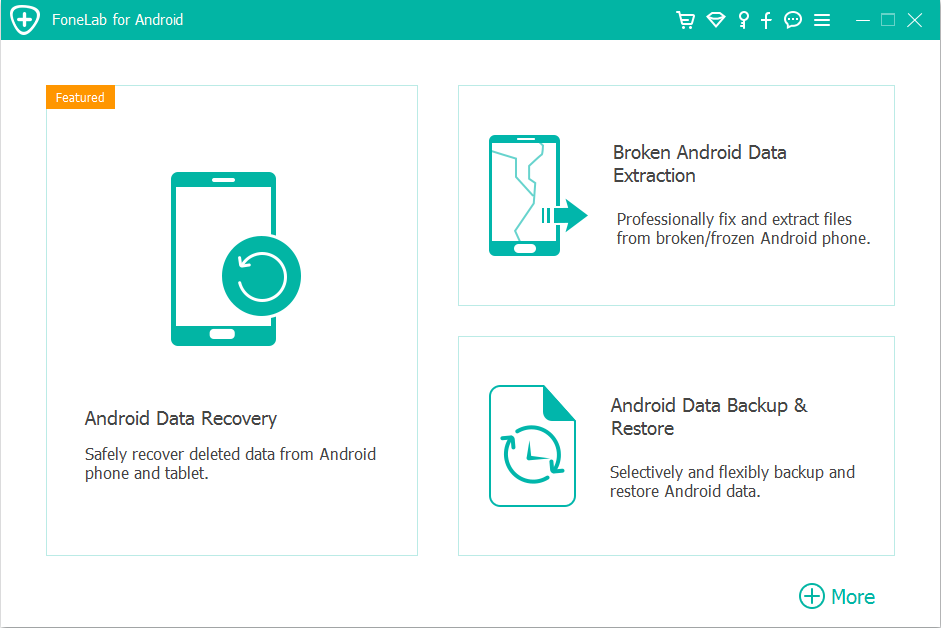
Method 2: Samsung S9 Data Recovery Software
Restoring from Samsung Cloud backup isn't the only option for retrieving data files on Samsung Galaxy S9 (Plus) phone, especially when you don't have backups. Android Data Recovery is the wonderful third-party software option in point, a safe offering that allows you to quickly recover all facets of Galaxy S9, from slew of personal data - contacts, messages & attachments, call history, WhatsApp messages & attachments and documents, to various media files - gallery, pictures library, videos and audio.
The streamlined software conducts a deep scan to find everything stored on the internal memory of Galaxy S9 (+), and allows user to browse the deleted stuff. This is where "Only display the deleted item(s)" comes handy.
Keep reading for instructions that can make the process of Samsung Galaxy S9 data recovery just a little easier for you.
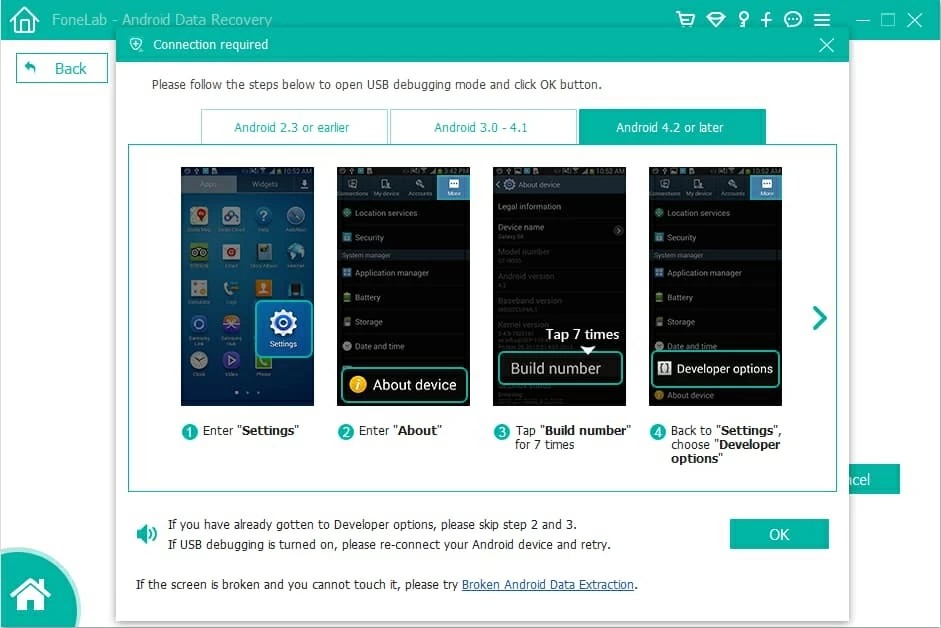
Step 1: Connect Samsung S9 (Plus) to computer
To begin, you must have the software downloaded, and then installed.
Open it, and choose "Android Data Recovery" mode.
Connect the Galaxy S9 device you want to restore lost files from using the supplied USB cable.
Afterward, enable USB debugging on Samsung S9 (+) under Developer Options. Follow on-screen instructions to do this.
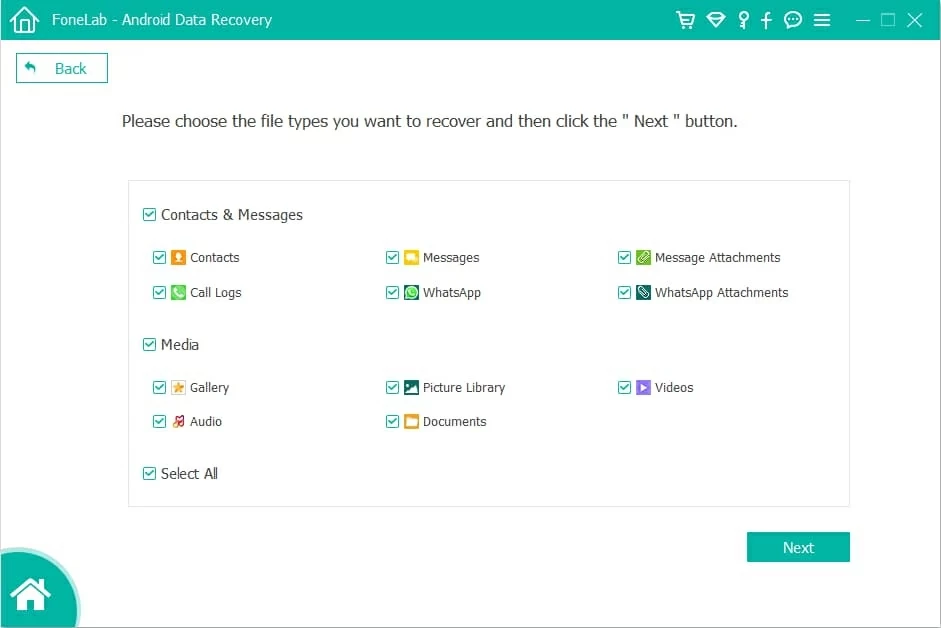
Step 2: Select types of data to scan for the deleted contents
Next, choose the types of files you wish to retrieve from Samsung Galaxy S9 (S9+) memory.
Click Next button to move on.
Step 3: Allow access to Samsung S9 for scanning data files
A window will open indicating you what the software is doing at this moment.
If prompted "Root failed...", press Rooting Tools button on the bottom right of the interface.
You will then get into a website where introduces a tool named KingoRoot. Download it to root your phone, so the tool can perform a deep scan for finding the deleted files. It's actually safe to do this.
Related guide: How to root and unroot an Android device
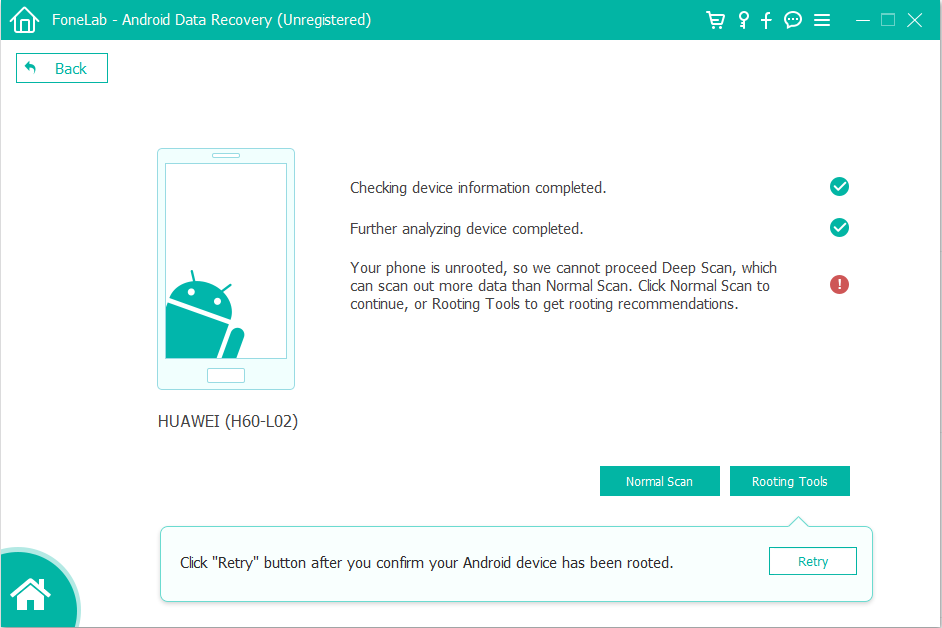
Once rooted successfully, the software begins scanning all data in your phone. Wait for it to scan.
Step 4: Retrieve Samsung S9 phone data and save onto computer
From the scan resulting menu, check the boxes pertaining to the files you want to get back, whether it be Contacts, Messages, Call Logs, WhatsApp, Gallery, Videos or something else.
Press Recover button once you're satisfied with your selection.
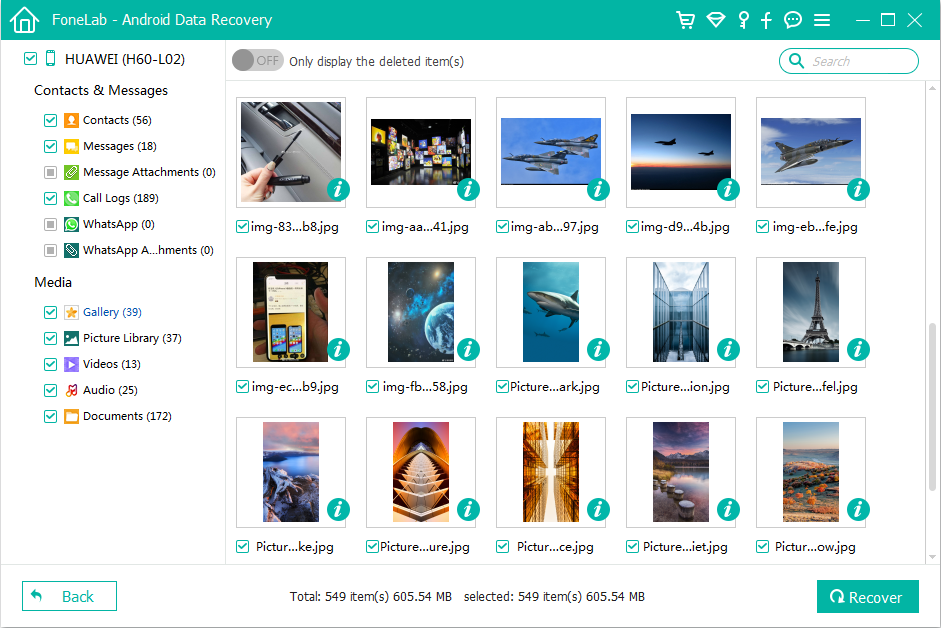
A pop-up window will prompt you to select the folder where you want the assorted files saved.
After that, click Recover button to retrieve lost data files on Samsung Galaxy S9 (S9+) and save everything locally.
A Warm Tip: Android Data Recovery software works well in almost situations, except the case when your phone is reset to factory settings or seriously damaged with no response.
Method 3: Samsung Galaxy S9/ S9+ Google Backup and Restore
If your Galaxy S9 (Plus) is set to backed up with Google server, you could try this to restore files:
Planning Ahead - Make a Backup Plan
Hopefully this article will be helpful for getting back Samsung Galaxy S9 data and saving the day. What's next? Backing up data on Samsung S9 (Plus) so anything won't be lost to the ether. You could stick with the native Samsung Cloud service to back up or sync files manually or automatically.
Check out the ultimate Samsung S9 backup guide for all the routes you have for doing this.
Retrieving Photos on Google Pixel
How to Restore Contacts on Samsung Galaxy Note9
How to Recover Photos from SD Card on Android
Supported S9 models: SM-G965U, SM-G960U, SM-G965F, etc.