Recover Disappeared Messages on LG


We wish recovering contacts list from Samsung Galaxy S25 (Plus, Ultra, Edge) was as simple as tapping an Undo button on the screen. It seems like the contacts stored in the phone memory or SIM card appeared to have been deleted or lost. Maybe it was an unfortunate result of accidentally deleting the whole contacts list, or a disastrous consequence of losing the phone.
It's a real pain in the ass when in the moments you need a phone number of the contact most, but you can recover it in more than one way. In this guide, we assemble a few methods that will really help to get contacts back on Samsung S25 Phone, and retrieve the important information tied up in each contact card like number, name, email address, work, note, etc. That depends on if you had backed contacts up using Google account, Samsung Cloud, Smart Switch, or only saved them on the phone in the first place.
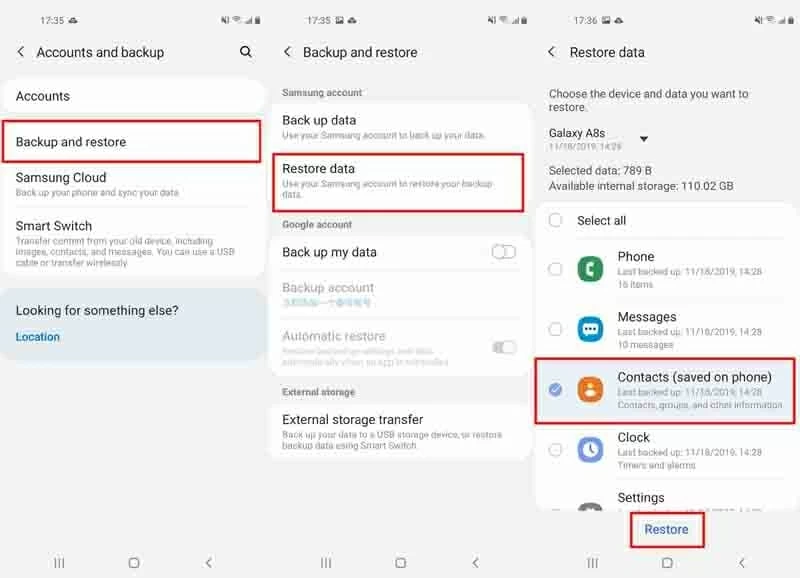
Solution 1: Via Samsung Cloud
If you're a Samsung S25 user, chances are high you've already connected to Samsung Cloud and backed up contacts to its server. Once the contacts lost, you could restore the backup of contacts onto S25's contact list.
After that's done, the contacts should be restored immediately to Contacts app.
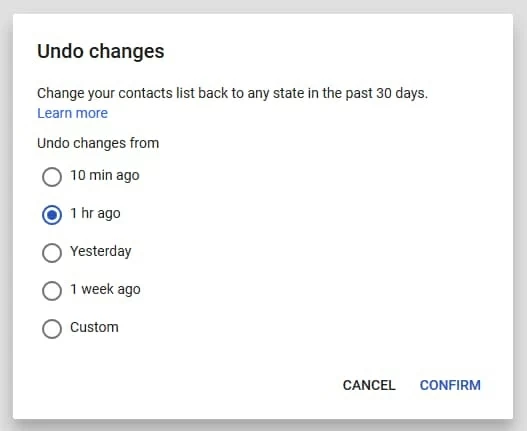
Solution 2: Via Google Account (or Google Contacts)
This is yet another backup-restore route. If you used a Google account attached to Galaxy S25 and the phone contacts were backed up, then you would retrieve deleted contacts from Google Contacts as far back as 30 days. Note that this won't restore contacts stored in SIM card.
By far you restored phone numbers to Samsung S25 from Google backup.
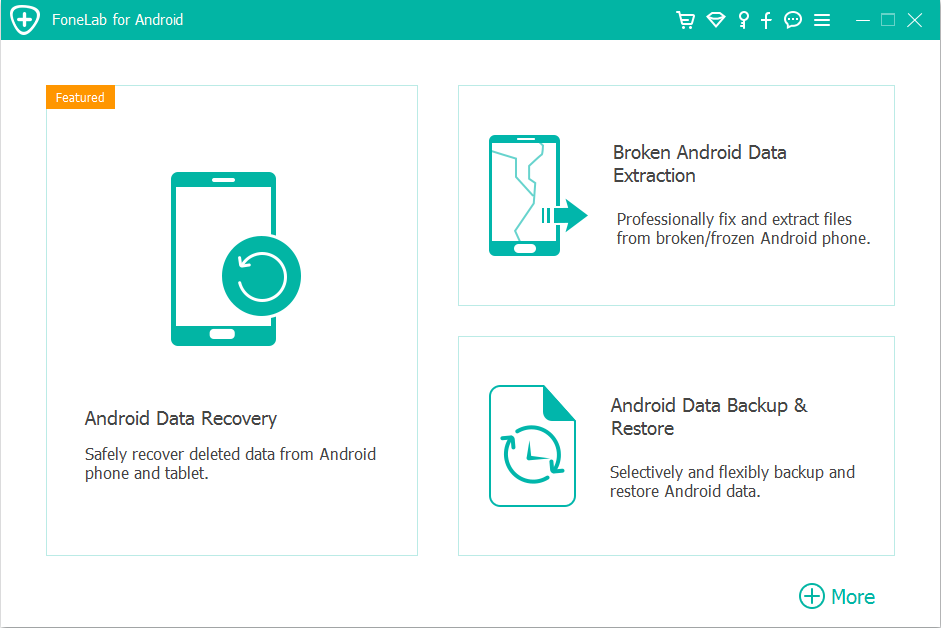
Solution 3: Through a 3rd-Party App - Retrieve a Deleted Contact
The problem is that you kept all the contacts in the device itself or the SIM card, as opposed to the Samsung Cloud or Google Account. Fortunately there's a simple workaround - Android Data Recovery, enabling users to recover contacts on Samsung Galaxy S25 phone.
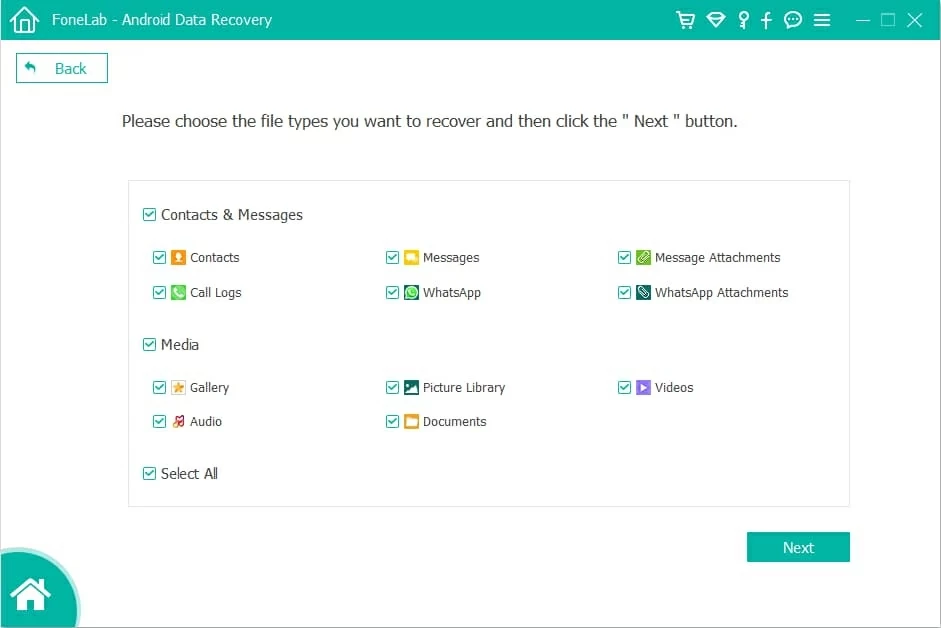
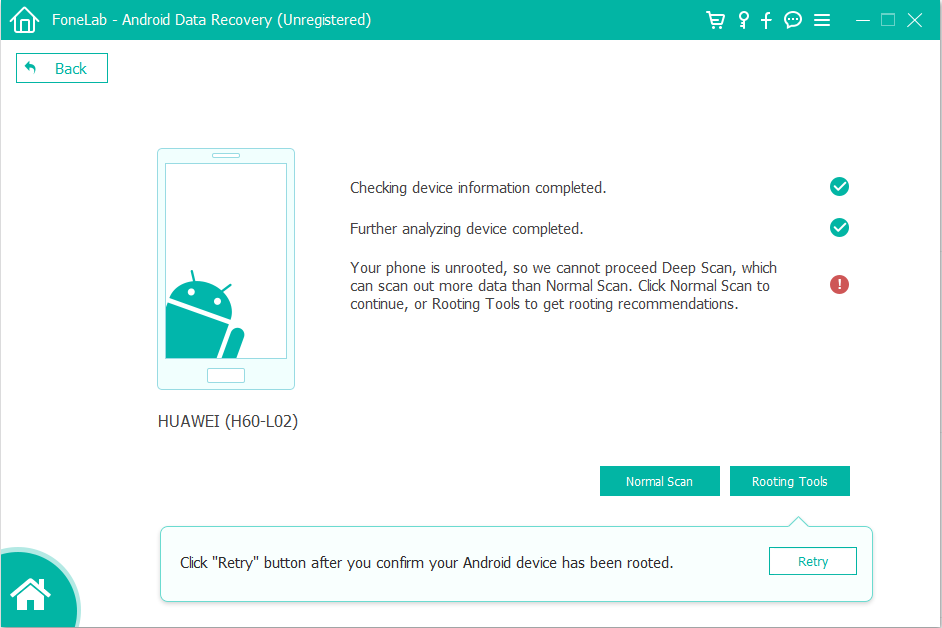
The software developed by FoneLab is designed to make everything work as it should: easily and quickly - thanks to its automatic file scanning & file recovering ability. Once it's launched, it automatically recognizes the connected Android phone, lets users to pick exactly which types of files need to be scanned for deleted items (contacts, photos, messages, call logs, etc.), then gets its hoops deeper into the internal storage and do the recovery.
Beyond simple data recovery, Android Data Recovery is used for backing up data to computer in case loss, and extracting files on a broken & frozen device.
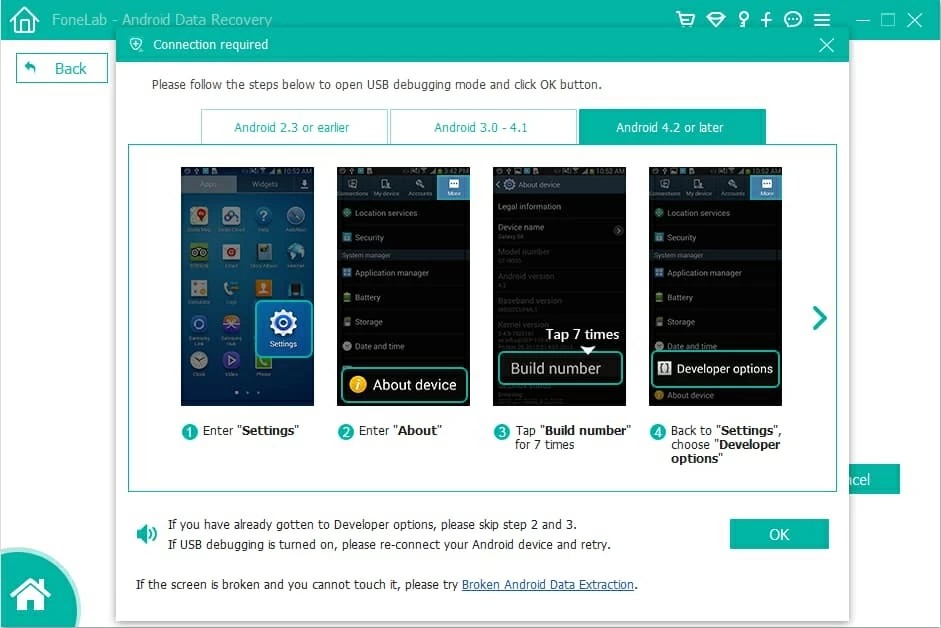
Here are instructions to get started using the program for the purpose of recovering contact numbers from S25 memory or SIM card. Whether you want to retrieve a phone numbers or all contacts, the tool will work.
Useful Guide: How to Root an Android Phone Safely
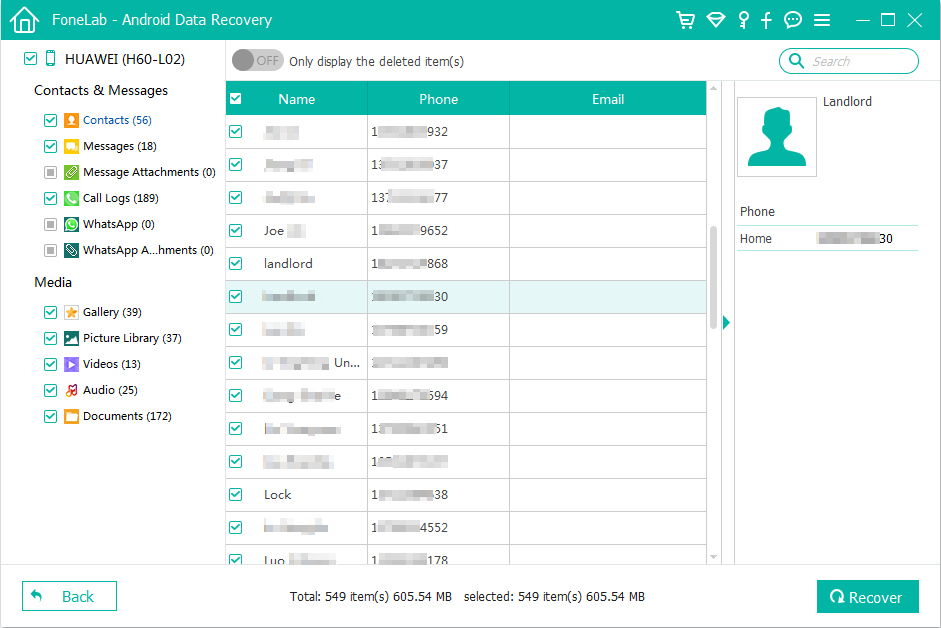
That's it. The lost contacts are recovered as many as you wish. Close the app.
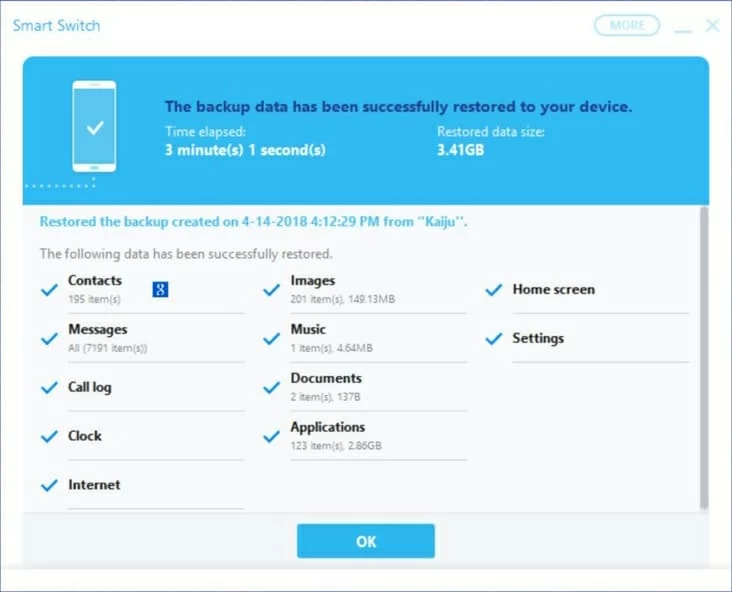
Solution 4: Via Smart Switch Backup
Take one last look around, and check to make sure you backed up Samsung s25 to computer using Smart Switch before contacts in the phone book are disappeared. If you never did the backup, this doesn't work for you.
When you're ready, open the Samsung Smart Switch on computer where you saved the backup to before, then restore the backup to get back lost contacts onto Galaxy s25 phone immediately. This is also useful when you need to transfer data to a new Samsung phone.
How to Get Back Call Logs on iPhone without Backup
Retrieving Deleted Data from Samsung Galaxy S25
How Can I Transfer Music from iPhone SE to Windows 10
Model Numbers for Samsung Galaxy S25 & S25+ & S25 Ultra & S25 Edge Model Numbers: SM-S931B, SM-S931B/DS, SM-S931U, SM-S931U1, SM-S931W, SM-S931N, SM-S9310, SM-S931E, SM-S931E/DS, SM-S936B, SM-S936B/DS, SM-S936U, SM-S936U1, SM-S936W, SM-S936N, SM-S9360, SM-S936E, SM-S936E/DS, SM-S938B, SM-S938B/DS, SM-S938U, SM-S938U1, SM-S938W, SM-S938N, SM-S9380, SM-S938E, SM-S938E/DS, SM-S937U, SM-S937U1, SM-S937B, SM-S937B/DS, SM-S9370, etc.