
How to Save iPad Songs to a Computer


If you've just got a new Windows 10 PC, there will be quite many things to set up, for instance, music library, and that often takes ages to rebuild it from scratch. Rather than that, you may prefer to transfer songs on iPhone SE to the Windows 10 computer to enjoy the music more efficiently.
Unlike Android users who can directly migrate the music collection to Windows 10 desktop via USB cable, for iPhone users however, it turns out to be a hard task. Fortunately, several workarounds are available in this easy guide to save you from the pain of transferring music files from iPhone SE to Windows 10. These methods work perfectly regardless of whether the music is purchased from iTunes store, extracted from CD or imported from other sources.
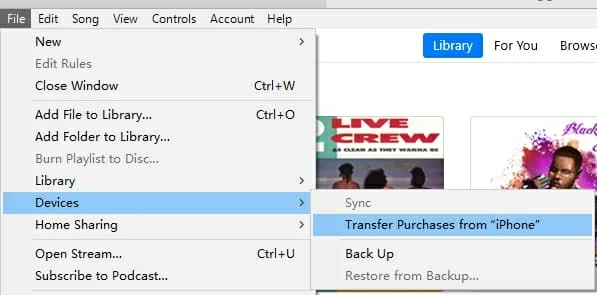
1. iTunes - Transfer purchased music to Windows 10
When it refers to copying music over from iPhone SE to Windows 10 PC or laptop, the Apple way is to use iTunes. It has a built-in music transfer function in an attempt to migrate iTunes purchased music into the computer that gets authorization. Below is an easy instruction:
Tips: A lack of function to transfer music you got outside of iTunes to the Windows 10 desktop & laptop is the main limitation by using iTunes. With that in mind, a dedicated third-party application which goes much further than what iTunes offers is required.
2. iTransfer - Get songs off iPhone SE into Windows 10
If you are wondering where to begin moving iPhone SE music to Windows 10 computer, consider using iPhone Data Transfer. It's a comprehensive data transfer program that packs with lots of smart features.
Long considered as a solid file transfer tool, iTransfer has a slick interface and offers a full-scale data syncing (songs, playlists, photos, videos, emails, contacts, TV shows, etc.). What makes itself unique from others is that it grants users to copy a single song or multiple tracks at a time. Plus in the process of migrating songs from iPhones SE right onto Windows 10, you're allowed to preview the tunes with all details before initiating the transfer process: name of the song, size, album, how long should a song be and more.
Beyond that, its functionalities are extended to phone to phone transfer, rebuild iTunes library, transfer iTunes media to device, backup data and more. Overall, iTransfer is a must try.
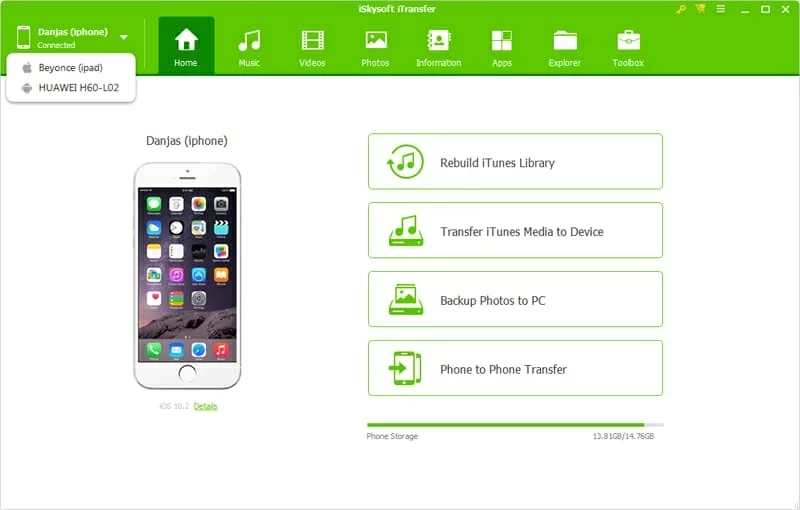
Step 1: Connect iPhone SE to the Win 10
Firstly, run the program, and attach your device with the Windows 10 machine.
When the phone is recognized, it will show up on the window of the program.
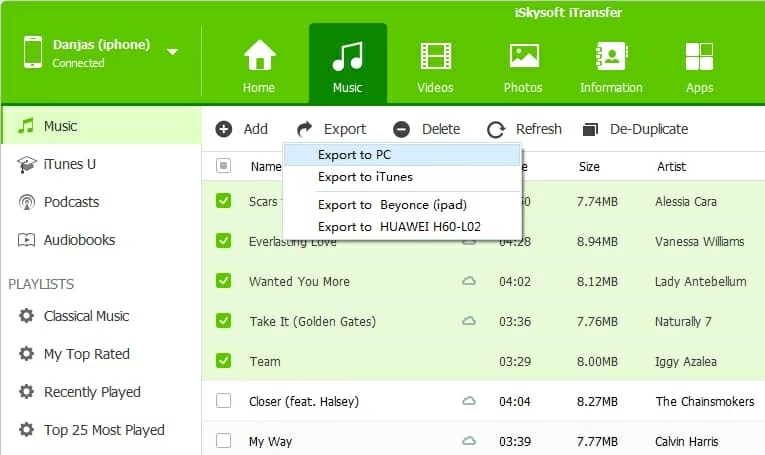
Step 2: Select music files you wish to transfer
Next, press Music on the top navigation bar.
Then click Music options on the left pane, and select the song(s) you'd like to move over to Windows 10 computer by checking the tiny box next to the music's name.
Alternatively, if you're going to get all iPhone SE tunes to Windows 10, tick the tiny box next to the "Name" part at the upper menu bar.

Tips: If it's hard to find the music you need to send from iPhone SE onto the Windows 10 through the long list, click search frame on the upper right corner and type into any keywords of the music name, album, artist or genre to locate the tunes in need quickly.
Step 3: Get music off iPhone SE and transfer to Windows 10
With the songs selected, click Export > Export to PC on the top of the window. This will bring up a pop-up dialog prompts you to choose the destination where you want to save the tracks on the Windows 10 computer.
Simply select the path and click on Save button to begin the music migration procedure.
Now the iPhone SE music files are kept to on the Windows 10 PC in the location you just chose. Enjoy and have a good time!
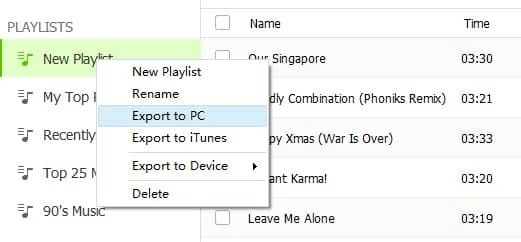
If you need to put a playlist of tracks from iPhone SE onto the Windows 10 desktop or laptop, just right click the music playlist from the left pane and on its drop-down menu, pick Export to PC.
[Also Read: How to Save iPhone Photos to Windows 8 Computer]
Wrapping it up
We hope this guide has helped you walk through the process of copying songs from iPhone SE to the (new) Windows 10 laptop & desktop. Take it easy and enjoy the beautiful songs - the iTunes purchases and the non-purchased music tracks are ready to play on the computer. BTW, if you want to save photos, videos, contacts, messages, apps from iPhone SE to Windows 10 for archive, iTransfer always gets ready to do you a favor. More details please check out here: How to transfer iPhone data to the computer.