
Extracting Notes from iCloud Backup for iPhone


If you are an enthusiast for taking photos with your Samsung Galaxy S24 (Plus, Ultra, FE) and save tons of pictures on the device, then it makes sense to de-clutter the photo gallery by deleting the stale images, especially when you often find yourself stuck at insufficient storage situation.
Unfortunately, sometimes you might accidentally delete important photos that you want to keep. Losing photos on your Galaxy S24 phone is a serious situation, but not necessarily a disastrous one. You can still recover them. There are a few ways to do this.
Option 1: Restore photos on Samsung S24 from Google Photos
Unlike iPhone, there is not a recycle in Samsung Galaxy S24 from where you can restore recently deleted pictures to gallery. But if you've enable "Backup & sync" option on Google Photo app, the deleted photos should be backed up there for up to 60 days, and you can get those photos back to Galaxy S24 gallery.
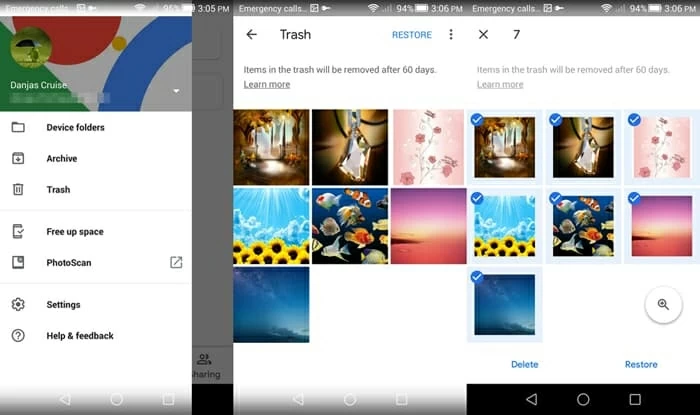
This way, your deleted photos will restore and reappear in Galaxy S24) Gallery app.
S24 Models: SM-S921B, SM-S921B/DS, SM-S921U, SM-S921U1, SM-S921W, SM-S921N, SM-S9210, SM-S921E, SM-S921E/DS, SM-S926B, SM-S926B/DS, SM-S926U, SM-S926U1, SM-S926W, SM-S926N, SM-S9260, SM-S926E, SM-S926E/DS, SM-S928B, SM-S928B/DS, SM-S928U, SM-S928U1, SM-S928W, SM-S928N, SM-S9280, SM-S928E, SM-S928E/DS, SM-S721B, SM-S721B/DS, SM-S721U1, SM-S721U, SM-S721W, SM-S7210, SM-S721N, etc.
Option 2: Retrieve deleted pictures from Samsung Galaxy S24 memory
If you can't find deleted photos on Galaxy S24 from Trash folder in Google Photos, don't panic. There are a lot of third-party file data recovery applications can help you. We tested Android Data Recovery and found it a reliable means of recovering photos on Samsung Galaxy S24.
It is a computer-based recovery utility that features user-friendly GUI. It can scan the device's internal storage deeply and retrieve the photos and other data files such as contacts, sms, call logs, audios, videos. The full process is quite simple: run the program, select what to be scan, root the device and you're done. It also includes a tool to back up your Android to make sure that any kind of data loss could be avoided in the future.
Here's the full instructions on how to recover pictures on Samsung Galaxy S24, S24 Plus, S24 Ultra, S24 FE.
Step 1: Launch the software on computer and connect S24
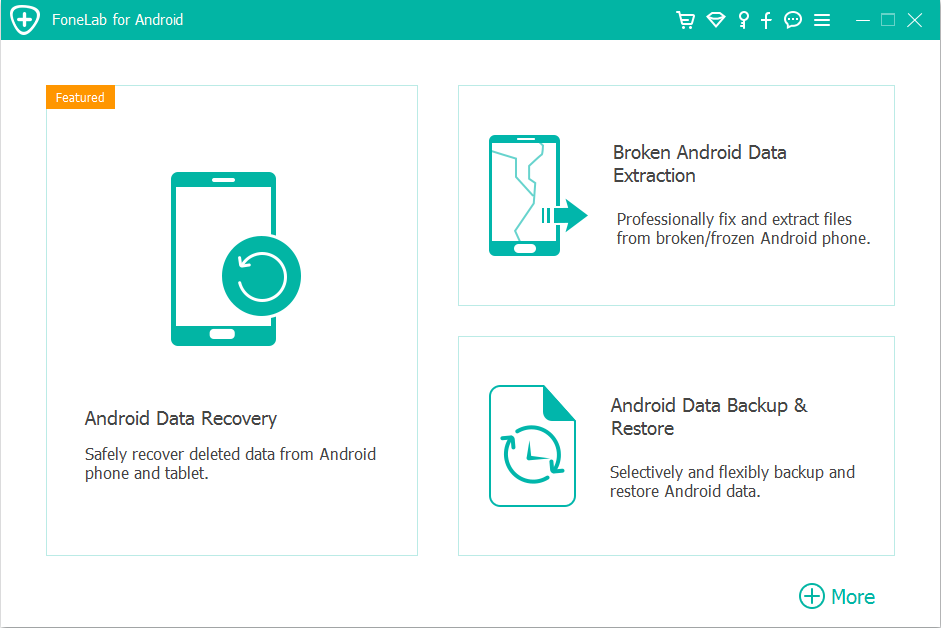
Run the application on your computer, you'll see its main interface as below. There are three options you can choose from to accomplish different tasks.
For the purpose of getting back photos from Samsung S24 memory, here we select "Android Data Recovery" option to continue.
Next, use a USB cable to hook up your phone with the computer.
Step 2: Allow USB Debugging mode
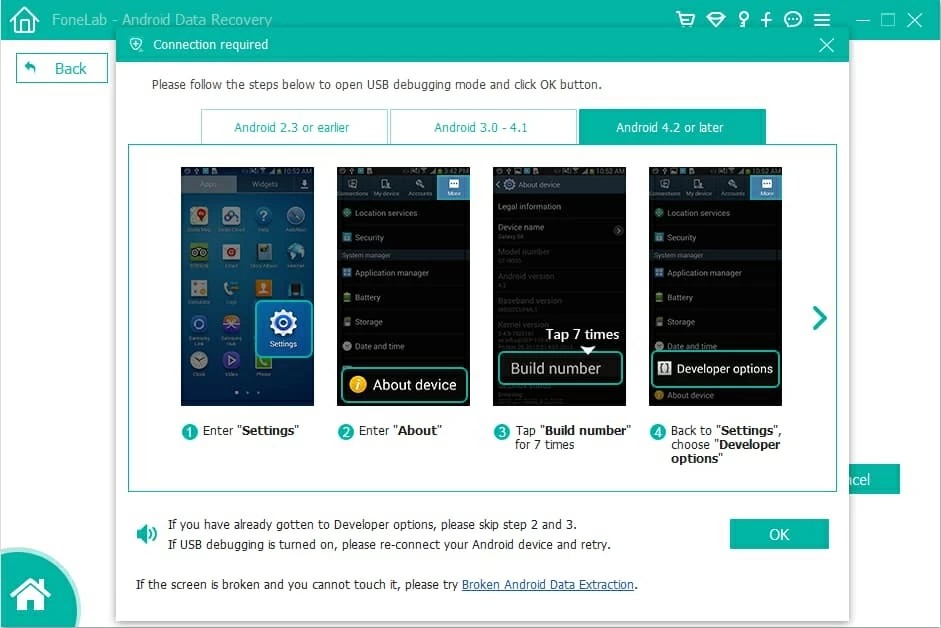
You then will be asked to enable USB Debugging mode on the device. It's really easy to operate. The on-screen instructions will guide you through every step. You can also click here to get more information: how to enable USB Debugging mode on Android.
Step 3: Select photos to be scanned
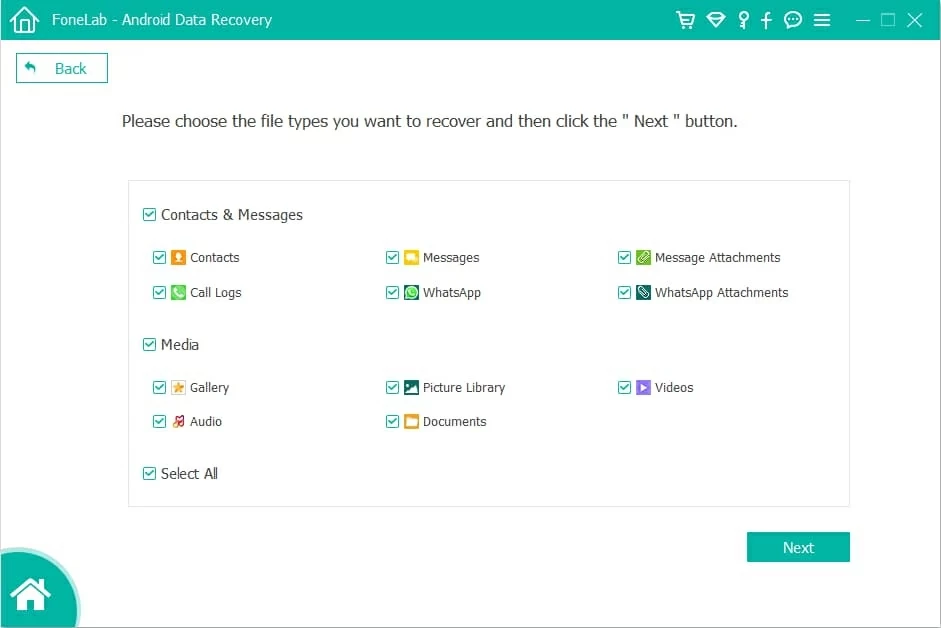
Once USB Debugging mode is on, the program will automatically detect your S24 phone and display a window as follows.
You are free to select any file types to scanned for deleted files. In your case, check "Gallery" and "Photo Library" category and press the Next button.
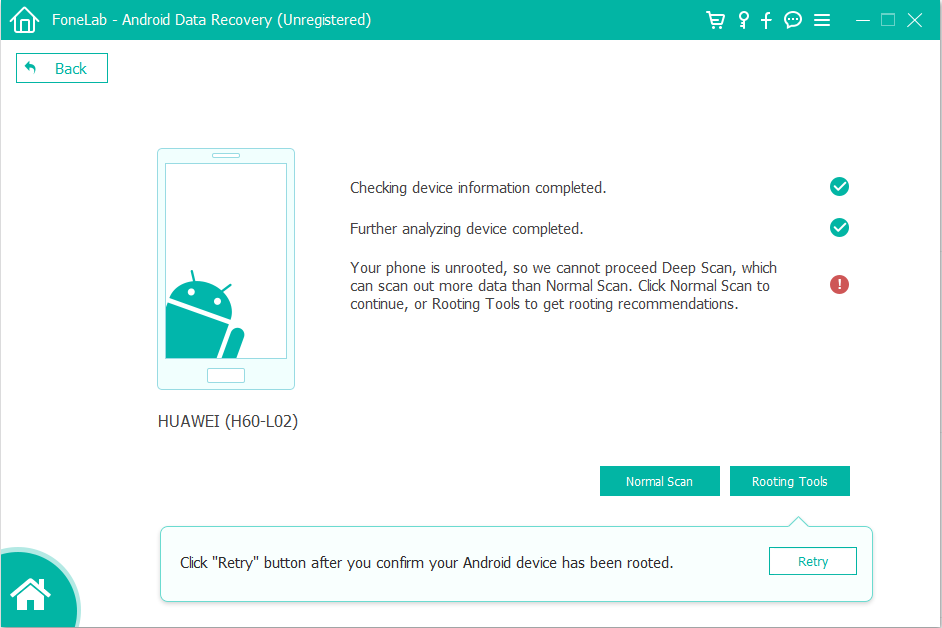
To let the program scan the Samsung Galaxy S24 deeply, you have to root the device to gain more control. To do this, press the Rooting Tools button at the lower right corner and you will be send to a site where you can install a tool KingoRoot on the computer for the rooting business.
About rooting, also visit how to safely root and unroot an Android device.
Once rooted, it will begin scanning your device completely to find photos. The entire process will last for 15-20 minutes approximately.
Step 4: Recover photos on Samsung Galaxy S24
After that, it will show you a list of photos it has found on the window. You then can click on any of the photo on the left sidebar to have a preview of it.
Next, click the "Gallery" (and/ or "Photo Library") category on the sidebar and mark the desired images in the checkboxes.
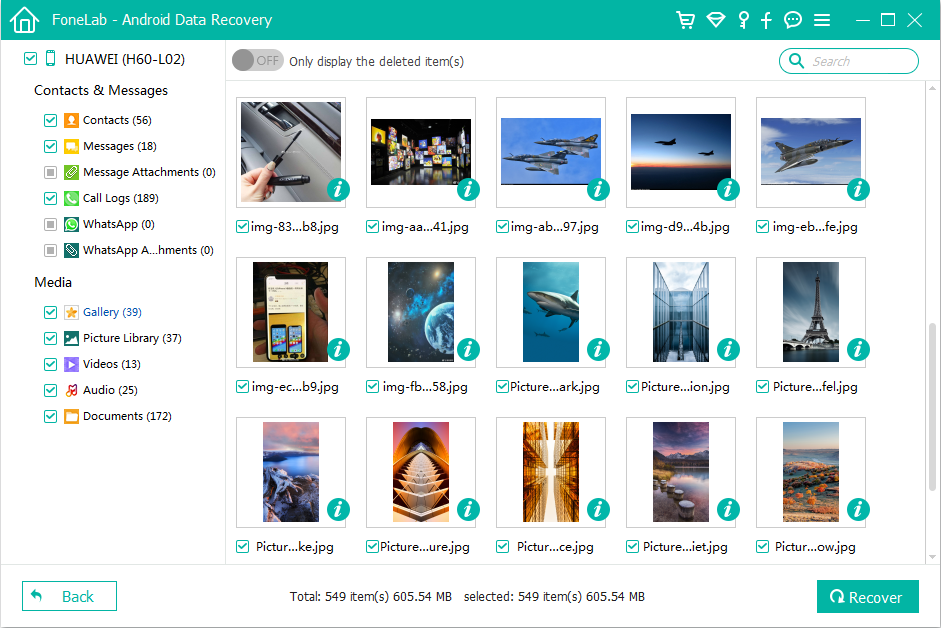
When you're ready, click the Recover button at the lower right position. In the pop-up dialog box, choose an output folder for the restored photos.
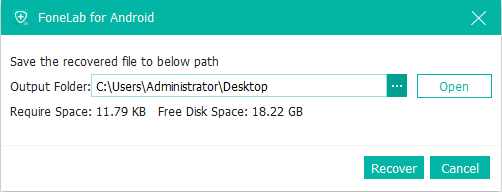
After that, click the Recover button one more time to fire up the Samsung S24 photo recovery process.
That's it!