How to Move Music from an iPad to Windows Computer


I've got a USB flash drive with mass storage space and I'd like to move my entire music library that are currently stored on my iPhone onto it in case I make some kinds of mistakes or something goes wrong on my iPhone. Any suggestions on how I can fix this?
Actually, we've already covered how to back up iPhone music to local computer's hard drive for safekeeping, but as you repeat the process for years, the accumulated backup files will end up clogging up the internal space on your Mac or PC machine, which results in sluggish performance. Thus, if you have massive quantities of music collections on your computer, you may consider to change the location to a USB flash drive, that is, transferring songs from the iPhone to a USB flash drive directly.
If you know much about iOS, you likely know that Apple's iTunes is a decent application for managing your iPhone, but it just isn't for you in the occasions when you tend to copy the music tracks to USB drive from iPhone. Fortunately, there are a wide range of alternatives available that has been well created, one of which is iPhone Data Transfer — a slick iOS management program that makes data transfer between device and computer, including saving iPhone tracks on USB memory stick, a virtually effortless task.
The software is very greatly appreciated since it enables users to easily and quickly transfer music files from iPhone to the USB thumb drive or in reverse, at will. This is also applicable for other data files, including photos, playlists, videos, contacts, messages, audiobooks, podcasts, TV shows, etc. Apart from the transfer feature, it offers more flexibility to manage and organize the files on your connected iPhone, for example, you can create a new playlist and move the songs to it, de-duplicate the song, fix the music ID3 tags, all are finished in the program.
It works well for all kinds of iOS (iPhone, iPad, iPod) devices.
How to Back up iPhone Songs onto USB Drive
Step 1: Attach your iPhone with computer
First, click the big green Download button above to complete the download and installation of iTransfer on your computer.
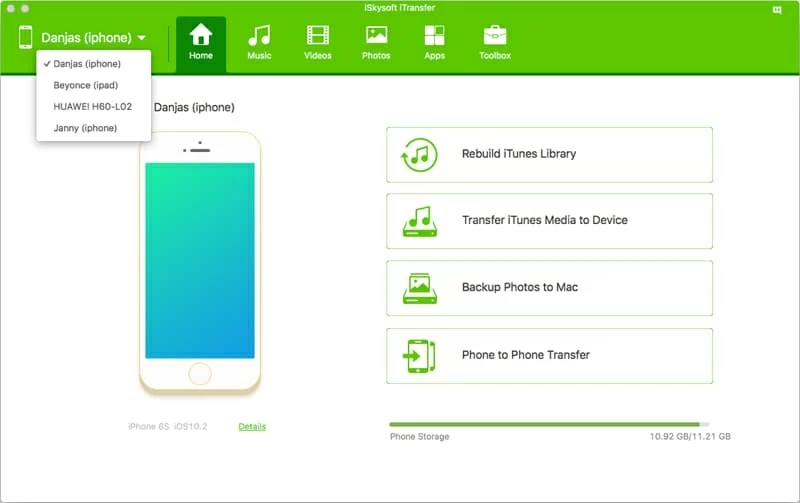
Plug your iPhone and USB memory stick into the USB slots on your computer, and boot up the software. Then from the upper left corner of its startup interface, click the drop-down arrow to change to your iPhone for getting iPhone tunes onto USB drive.
Step 2: Select iPhone tracks
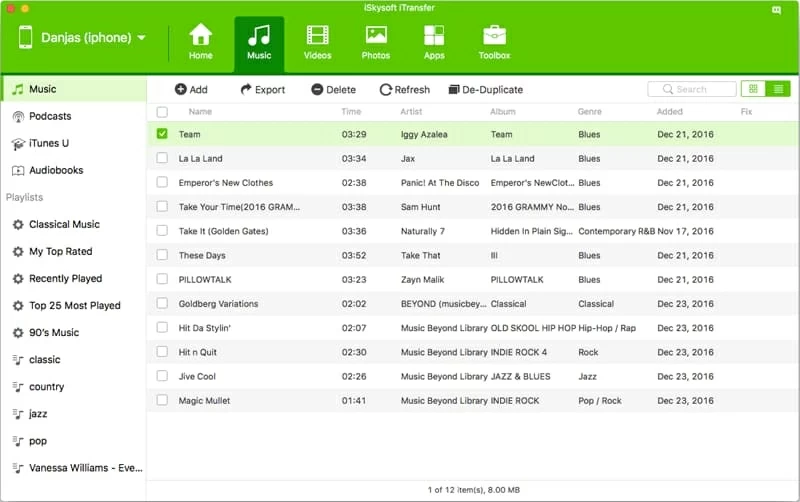
Head to Music tab on the top navigation bar, press it and you'll see your iPhone music files broken into groups on the left side of the screen, which make locating your songs incredibly easy.
Go ahead and click Music option from the left pane and the program will display all the tunes that are stored on your iPhone.
Next, selectively highlight the songs you wish to import to your USB flash drive by checking the boxes in front of the song name.
Step 3: Start transferring iPhone songs onto USB memory stick
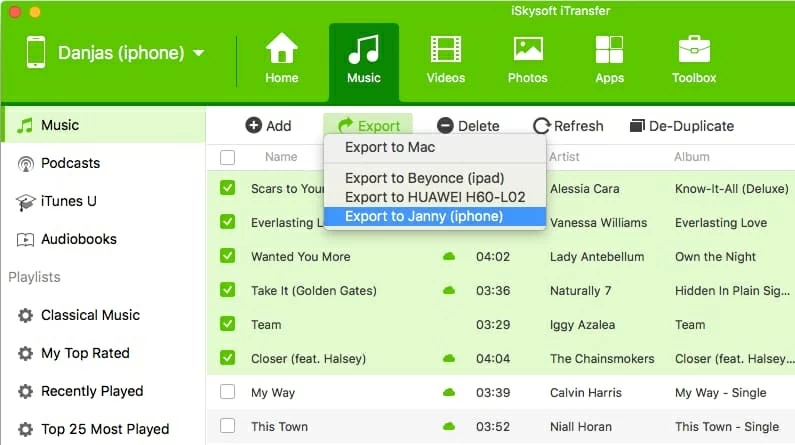
With the music files are checked, click the Export button below the navigation bar and choose Export to Mac (this should be Export to PC if you're using a PC) option from its pull-down menu.
At this point, a dialog box will comes out, asking that you designate a directory on your USB storage drive. After that, click Save button to move selected music files into USB drive directly.
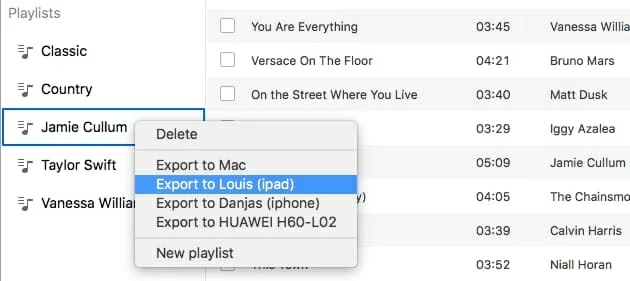
For those who want to copy cross the songs in the organized playlist, you can do so as well. Simply move your mouse cursor to a playlist you want to import and keep on the left sidebar, right click it and choose Export to Mac option from the menu. This will also take you to specify a output folder on your USB drive.
When the program is in process, you'd better not operate either your iPhone or computer. Just wait for the program to finishing backing up the music to the removable USB flash drive from iPhone.
Once the process is done, go to the folder on your USB drive and you should see your copied iPhone songs. If desired, go to your iPhone and delete some songs to free memory.
Other Options for iPhone Music to USB Drive Transfer
In addition to iTransfer, you also have plenty of software options to choose from for getting the songs of your iPhone and onto the USB flash drive. Here will involve two of them to make the transfer.
Option 1: iRip
iRip is a cross-platform utility for moving just the iBooks, podcasts, videos, TV shows as well as music on iPhone to USB drive, but strangely take lower speed and more bugs in transfer compared to its previous version. Here's the tutorial:

This way, your music on your iPhone will be safely kept on the USB memory drive and you can take it anywhere.
Option 2: TuneJack
If iRip isn't your deal, you can use TuneJack instead, a commercial application especially for Windows users. It allows unidirectional transfers only — copy songs off iPhone to a USB flash drive or any folder on a PC and optionally add them to iTunes. It's strongly integrated with iTunes and thus it's a little quirky.
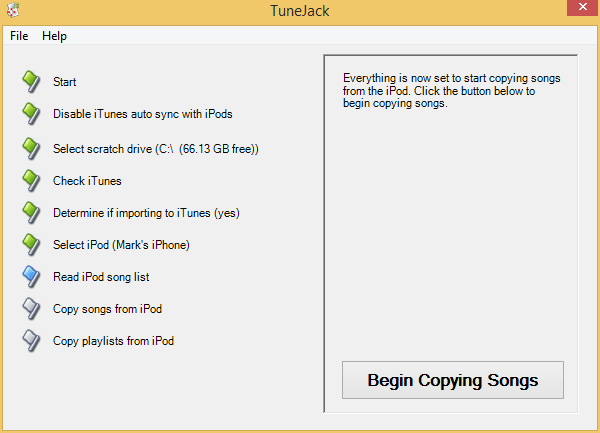
Here's how to pull songs from iPhone and get them onto USB drive using TuneJack:
Step 1: Disable iPhone Auto-sync in iTunes
Step 2: Enable "Manually manage music" option
Step 3: Begin iPhone tracks to USB drive transfer with TuneJack
Now you have all your music files safely transferred onto USB from iPhone with TuneJack. Note that the program provides no way to export just the selected tunes.
Conclusion
While all the options outlined above work for backing iPhone music up onto USB memory drive, keep an open eye and judge for yourself which program is most suitable for you so that you can better manage the resources of your computer.
Supported iPhone Models: iPhone 5, iPhone 5c, iPhone SE, iPhone 6 (Plus), iPhone 6s (Plus), iPhone 7 (Plus), iPhone 8 (Plus), iPhone X, etc.
How to Transfer Music from iPad to Computer