How to Add MP3 to Apple Music on iPhone

Have an important video stored on PC and want to transfer it to iPad? This post provides you with the simplest options to transfer your videos from PC to iPad.

There are several methods for you to make an easy video transfer from your PC to your iPad.
Whether you're transferring a movie for offline watching, a work-related clip, or personal videos you want to enjoy on the go, transferring videos from a PC to an iPad isn't always as straightforward as it seems. Fortunately, this guide will bridge the ecosystem of Windows PC and iPad, providing you with efficient methods on how to transfer videos from PC to iPad.
Here covers video transfer methods ranging from wired to wireless. Each method comes with its own strengths, so you can pick the one that fits your needs best. It's worth mentioning that if you want to quickly and stably transfer large video files from Windows PC to an iPad while preserving quality, Appgeeker iPhone Data Transfer won't let you down.
Table of Contents
As a software commonly used by Windows users to manage iPad and iPhone data, iTunes offers two methods to transfer your videos from a PC to an iPad: File Sharing and File Synchronization. This method of transferring videos through USB cable also offers a certain level of stability, making it a preferred choice for many users familiar with iTunes.
Using iTunes' syncing feature, you can directly integrate PC videos into the iPad's native apps, which is ideal for handling bulk video transfers. However, note that syncing iTunes' video library with your iPad will replace the existing video library on your device.
Step 1. Use a Lightning or USB-C cable to connect the iPad to the Windows PC. Ensure that you trust the computer if prompted on your iPad.
Step 2. Launch iTunes on your PC and click on the device icon located in the top-left corner to access your iPad's settings.
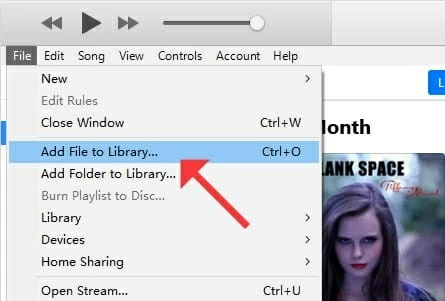
Step 3. From the iTunes menu, go to File and choose either Add File to Library or Add Folder to Library. Browse and select the needed videos or folder, and click Open to add them to your iTunes library.
Step 4. Once added, click on the Movies from the sidebar.
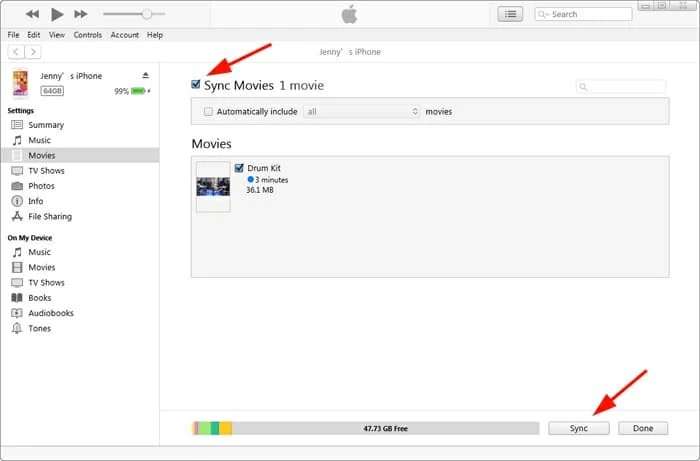
Step 5. Check the box next to Sync Movies to enable video synchronization with your iPad. Then select the specific video files you'd like to transfer to iPad from the Movies list.
Step 6. Click on the Sync / Apply button in the bottom-right corner, iTunes will start transferring the selected videos from your PC to your iPad.
Offering a flexible alternative within the iTunes ecosystem, the File Sharing feature allows users to transfer videos from PC to specific iPad apps without format restrictions. But the premise of this method is that your iPad must have apps that support File Sharing, such as iMovie, VLC, etc., to receive videos from the PC.
1. Plug your iPad to your PC using a suitable USB cable.
2. Open iTunes and wait for it to detect your iPad. Once connected, you should see the device icon appear in the upper-left corner of the iTunes window.
3. Click on the device icon and then head to File Sharing in the left sidebar of the iTunes window.
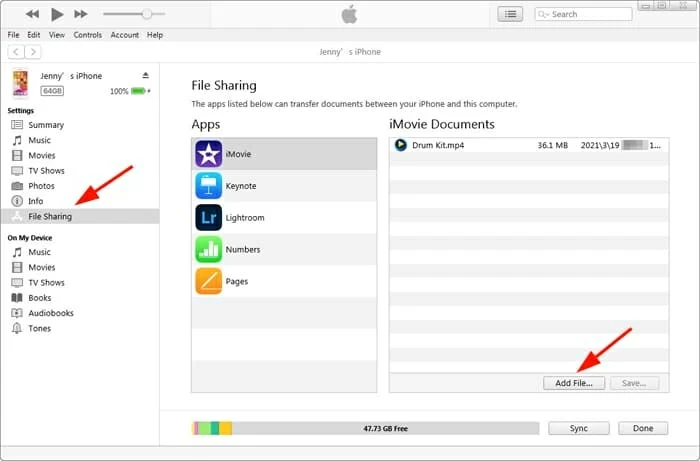
4. Select a compatible iPad app from the list of apps supporting file sharing.
5. Click on the Add File button within the selected app's file sharing section. A file browser window will open on your PC. Navigate to the location where the video is saved on your PC, select it, and click Open to start transferring the video to your iPad.
Wait for the transfer to complete, and then you can access the video within the chosen app on iPad. Remember to safely disconnect your iPad from your PC once the transfer is finished.
Related: How to unlock iPad if it says 'iPad is disabled connect to iTunes'
Obviously, transferring videos from a PC to iPad using iTunes always has some limitations, such as incompatible video formats that cannot be transferred or current video files being erased. Therefore, to get more control and flexibility in video transfer from PC to iPad, you can take the help of Appgeeker iPhone Data Transfer.
This software allows you to batch transfer video files from a PC to an iPad without compressing the quality. And it supports moving multiple video file formats, including .mp4, .avi, .mov, .wmv, and more.
For users who want to seamlessly transfer multimedia files between Windows PC and iPad / iPad Pro / iPad Air / iPad mini, including videos, movies, music, photos, etc., iPhone Data Transfer, with its high-speed transfer and intuitive interface, is undoubtedly a reliable assistant.
Here's how to transfer video clips from Windows PC to iPadOS device without iTunes:
1. Download and run iPhone Data Transfer on your computer. And then build the connection between your PC and iPad with a USB cable.
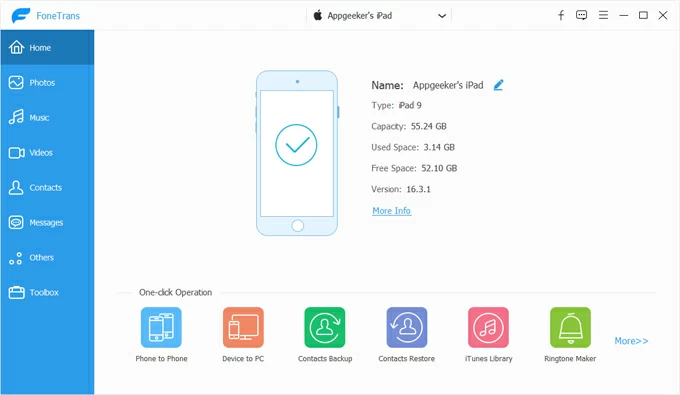
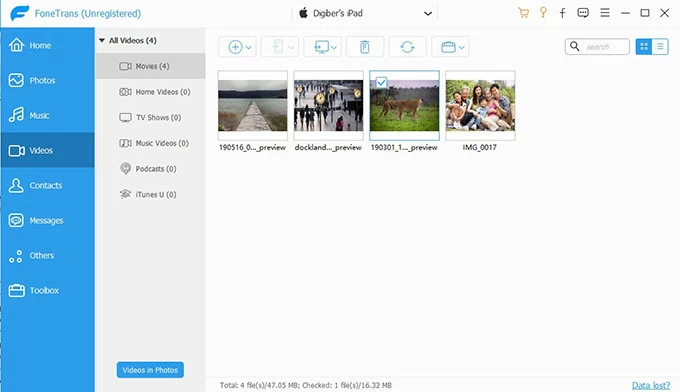
2. Navigate to the Videos tab on the left taskbar, and you can see all the videos from your iPad, like movies, TV shows, music videos, home videos, podcasts, etc.
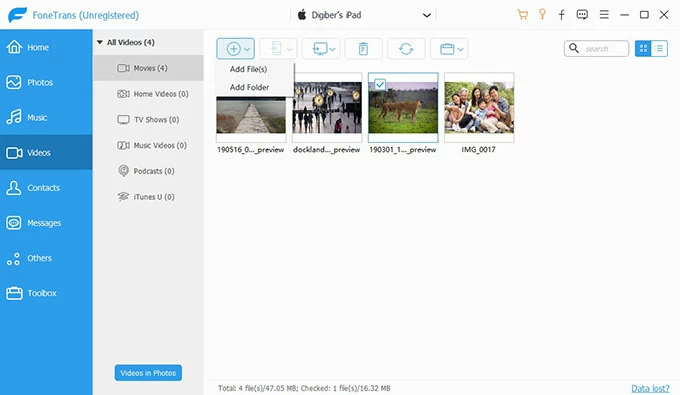
3. Add videos from PC to iPad. Click the plus icon at the top and select Add File or Add Folder to find the videos you want to transfer. After selecting them, click Open to transfer the videos to the iPad.
Apple has introduced the lighter and faster-performing Apple Devices app as a modern successor to iTunes. If your PC has the Apple Devices app installed instead of iTunes, you can use it to transfer videos to your iPad from the PC, especially on computers running Windows 11.
1. Download Apple Devices app from the Microsoft Store and install it.
2. Launch the app and connect your iPad through a USB cable.
3. Once the device appears, click on it to open management options.
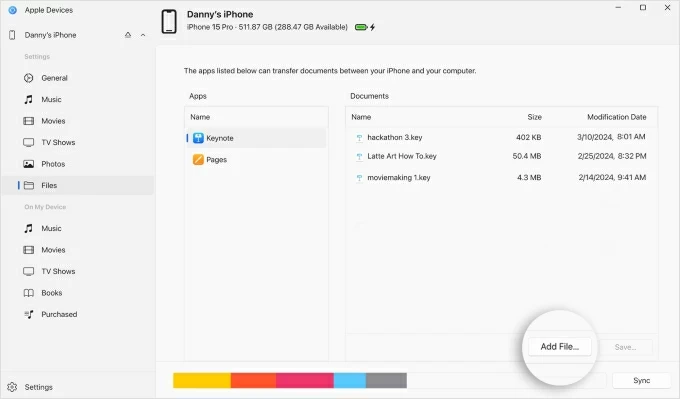
4. Select the Files tab.
5. From the list of installed apps, choose one that supports video playback.
6. Click Add File or drag and drop your video files into the Documents section.
7. On your iPad, open the corresponding app to watch the transferred videos.
If you prefer a wireless transfer solution or don't have access to a usable computer, there are also methods to transfer videos from a PC to your iPad wirelessly.
Also see: How to factory reset iPad without password or computer
For users seeking a seamless Apple-integrated solution, iCloud Drive offers a cloud-based approach to transfer your videos from Windows PC to iPad without a physical connection. This method fully leverages Apple's ecosystem, letting you upload videos from your PC to iCloud storage and access them across devices as long as you're using the same Apple account.
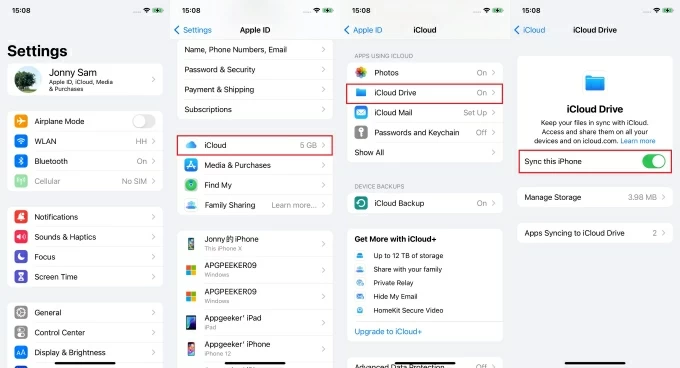
1. Ensure that iCloud Drive is enabled on your iPad. Open the Settings app on your iPad, tap [Your Name] > iCloud, then in the Saved to iCloud or Apps Using iCloud section, select iCloud Drive and turn on the Sync this iPad option.
2. On your PC, go to iCloud.com and sign in using your Apple ID credentials. This Apple ID should be the same as the one used on your iPad.
3. Choose Drive on the pane to access your iCloud Drive storage.
4. Click the Upload icon at the top of the page, browse your computer's local folders, and select the desired video files to upload. Alternatively, you can drag and drop the videos directly into a specific folder in iCloud Drive.
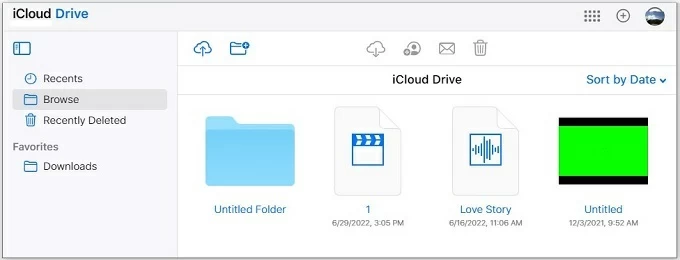
5. Wait for the video upload to complete. On your iPad, open the Files app, then go to Browse > iCloud Drive and check your uploaded videos. Tap to stream, or long-press and choose Download for offline viewing.
Note:
Also read: How to restore photos from iCloud backup
If you use Google services for data management on your iPad, you can also copy videos from your PC to Google Drive first and then download them to your iPad. Luckily, Google provides 15 GB of free space for you to use, which is more than the free memory offered by iCloud.
Step 1. Open a web browser on your Windows computer and visit drive.google.com. And then sign in with your Google account.
Step 2. Click the + New button in the upper left corner, then choose File upload or Folder upload from the drop-down menu.
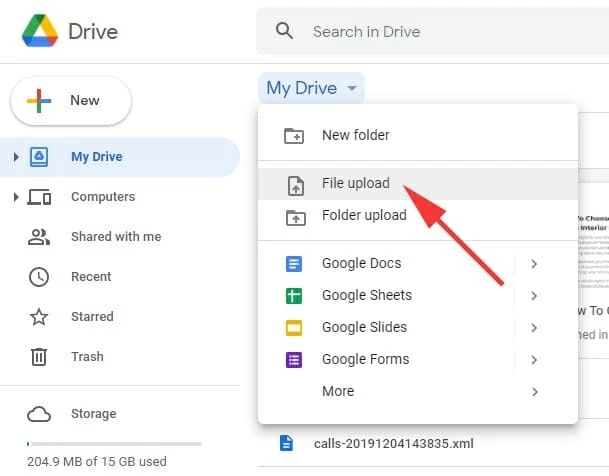
Step 3. In the pop-up file explorer window, pick the target videos you wish to transfer to iPad.
Step 4. After selection, hit Open to initiate the upload process from your PC to Google Drive.
Step 5. On your iPad, open the Google Drive app and sign in with the same Google account used on your PC. Now, you'll be able to view the transferred videos from PC on your iPad within the Google Drive app.
Conclusion
Transferring your videos from a Windows PC to an iPad is achievable through diverse methods, including iCloud, Google Drive, iTunes, iPhone Data Transfer tool, and the Apple Devices app. Select the method that aligns with your needs—cloud for flexibility, wired for speed, or third-party tools for customization—to seamlessly integrate your video library into the iPad.