
How to bypass Screen Time without passcode on iPhone

If your iPhone 14 is running out of space, you can move your collection of videos and pictures to your computer. Here's how to use different options to download videos locally.

Skip the pain: random disconnections, painfully slow speeds, or formats that refuse to play on your PC or Mac, and use Appgeeker iPhone Data Transfer to transfer your iPhone 14 videos to computer with absolute freedom. It offers a fast, reliable experience that easily handles massive 4K or Cinematic video files (and images) over USB cable, and preserves all original metadata. It essentially gives you total, flexibility control over your media.
There are several ways of importing videos from an iPhone 14 to a PC or Mac computer.
If you shoot a lot of video on your iPhone 14, your storage is likely on life support. Between Cinematic mode, 4K ProRes files, and 60fps action clips, a single vacation or weekend project can easily trigger the dreaded "Storage Almost Full" warning.
Moving those massive video files on iPhone 14 to your computer is the obvious solution, but the path forward isn't always clear. Apple's walled garden makes transferring data to a Mac incredibly seamless, but if you're trying to move those same videos over to a Windows PC, you might run into compatibility walls, slow transfer speeds, or broken connections.
Thankfully, you don't need to delete your favorite memories or pay for more local phone storage. Depending on whether you use a Mac or a PC, and whether you prefer wires or the cloud, here are the absolute best ways to move your iPhone 14 videos to your computer.
Related: How to unlock iPhone if I forgot passcode
For transferring a large library of video files (say > 1000), a wireless connection like AirDrop or cloud syncing is highly likely to freeze, crash, or take hours to complete. Instead, the most reliable, fastest, and safest method for a bulk transfer of this size is a direct wired USB connection to a Windows PC or Mac.
Here's how to transfer videos from iPhone 14 to computer smoothly.
There is one essential setting you need to adjust before plugging in your cable. iPhones 14 typically compress large HD or 4K videos during the transfer process itself. This real-time compression frequently triggers a "device is unreachable" error, causing large batch transfers to fail halfway through.
1. Open Settings on your iPhone 14.
2. Scroll down and tap Photos.
3. Scroll to the very bottom to the "Transfer to Mac or PC" section.
4. Change the setting from "Automatic" to "Keep Originals." This prevents the phone from converting files mid-transfer, saving battery and CPU power.
If you're looking for a simple way and, at the same time, get full control over the media files, you can resort to a few reliable third-party file transfer utilities to import your iPhone 14 videos into a computer.
Appgeeker iPhone Data Transfer is our favorite. It's a reputable tool that specifically designed for both Windows and Mac users to handle file transfer between computer and mobile device. It handles iPhones as external cameras, allowing to pull media files (including photos, videos, music) directly from the iPhone's storage smoothly. It even enables you to drag-n-drop files back to your phone, making it ideal for those who prefer bidirectional transfers.
In addition to media transfer, it lets you export individual SMS, iMessage, and WhatsApp chats, along with call logs, notes, and contacts, directly to print or PDF. It's the perfect solution if you only want to back up a few critical conversations without enduring a massive, multi-gigabyte full iPhone backup.
To transfer videos from your iPhone 14 to your computer using Appgeeker iPhone Data Transfer, first of all, plug your device into the machine, either a PC or Mac is OK.
1. Launch the software on your computer. If prompted on your phone screen, tap "Trust" and enter your passcode.

2. Select "Videos" icon from the left sidebar of the software window to load your phone's video library.
After the media loads, you can click the specific album on the center pane under "All Videos" category to preview your video clip one by one.
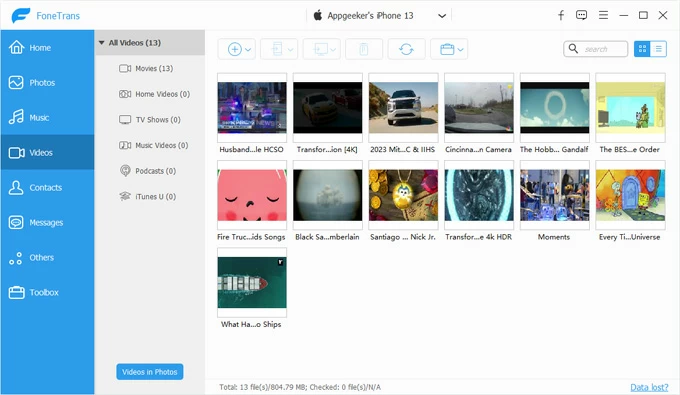
3. To grab videos to computer, tick the small boxes on the upper left corner of specific videos you want to copy to highlight them.
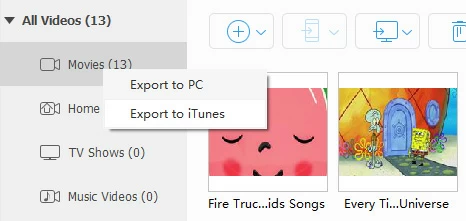
Next, click the "Export to PC" button at the top menu bar. A file browser window will appear. Choose the folder on your computer where you want to save the videos (like your Desktop or Videos folder) and click OK to start the transfer.

If you just want to import all videos from a specific album, just right-click on that album, then click "Export to PC" from the context menu.
Transferring photos from an iPhone to your computer should follow a similar procedure:

If your computer struggles with massive transfer of hundreds of videos at once, open File Explorer, and then navigate to your iPhone 14 as you do for an external hard drive, drag-and-drop them in smaller groups of 100 to 200 videos at a time to complete the transfer.
Here's how to use File Explorer to move iPhone 14 videos to PC.
1. Plug your iPhone 14 into the computer.
2. Open File Explorer.
3. Head to This PC > Apple iPhone > Internal Storage > DCIM.
4. Open the sub-folders, sort the files by Type so your videos (usually .MOV or .MP4) are grouped together.
5. Open a second File Explorer window to the folder on your PC where you want to save the videos (e.g., your Videos or Desktop folder).

6. Select the videos you want, then drag and drop (or copy and paste) them from the iPhone folder into your PC folder.
Instead of copying and pasting through Windows File Explorer—which can crash when handling a large number of video items—use the built-in Windows Photos app to index and transfer the iPhone 14 videos to PC safely.
1. Use a high-quality USB-to-Lightning cable to connect your iPhone 14 to the PC.
2. Unlock your phone screen and tap "Trust This Computer" when asked.
3. Open the Windows Photos app.
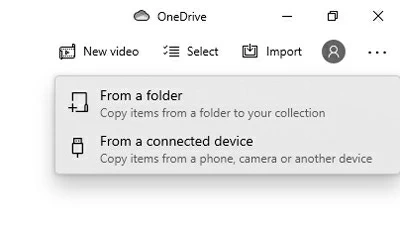
4. Click the "Import" button at the top right of the window and select "From a connected device."
5. The app will take a few minutes to look through your media library that contains your videos and pictures. Once loaded, click "Change Destination" to create a dedicated empty folder
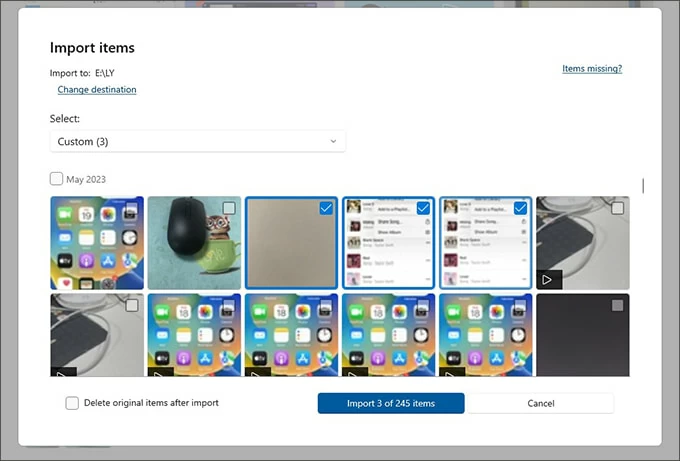
6. Select "All Items" (or filter by date) and click "Import." You can also manually check the boxes on the videos you want, and then click "Import [Numbers] of [Total Numbers]" items button at the bottom.
Keep your phone unlocked and connected until the progress bar reaches 100%.
Related: Photos disappeared from iPad
The native Photos app on Mac might import your videos from iPhone 14 library. To just get the raw video files from iPhone 14 onto your Mac's hard drive, use Image Capture.
1. Plug your iPhone 14 into your computer that's running macOS.
2. Press Cmd + Space, type Image Capture, and open the built-in utility.
3. When Image Capture opens, select your iPhone under the Devices list on the left. After a brief moment, a grid or list of every photo and video on your phone will populate.
4. At the bottom of the screen, change the "Import To" dropdown menu to a specific folder on your Mac or an external hard drive.
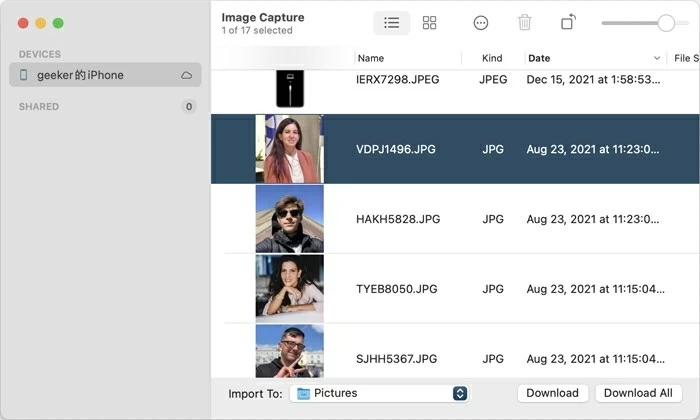
5. To import all your iPhone 14 videos into Mac, click the "Download All" button in the bottom right corner. A progress bar will track the video queue. You can also highlight the specific videos you want, then click the "Download" button instead.
Note: Image Capture can only see videos physically stored on your iPhone 14. If you use iCloud's "Optimize iPhone Storage" setting, your largest or oldest videos might just be tiny preview thumbnails. If a video is missing from Image Capture, open it on your iPhone while connected to Wi-Fi to force it to redownload to your device first.
For copying a small group of video clips from an iPhone 14 to a computer that's running macOS operating system, Apple comes with its very handy wireless option.
To send iPhone 14 videos to Mac wirelessly, AirDrop is arguably the least painful way. It doesn't rely on your home internet speed—even if your Wi-Fi router is acting up, AirDrop transfers video files directly from chip to chip.
However, because AirDrop relies on local wireless radios, keeping your phone and Mac within a few feet of each other is essential to maintain maximum speed.
Here's how to send videos from your iPhone 14 to Mac computer:
Prepare your Mac for AirDrop
1. Open a Finder window on your Mac.
2. Click AirDrop in the left-hand sidebar.
3. At the bottom of the window, look for the text that says "Allow me to be discovered by."

4. Click the dropdown menu and select "Everyone" (or "Contacts Only" if your Mac is already tied to your Apple ID).
Transfer iPhone 14 videos
Once your Mac is visible, grab your iPhone 14 and follow these steps:
1. Open the Photos app and locate the videos you want to move.
2. Tap "Select" in the top-right corner, then tap on each video clip you wish to transfer.
3. Tap the "Share" button (the square icon with an upward arrow) in the bottom-left corner.
4. Tap the "AirDrop" icon from the share sheet.
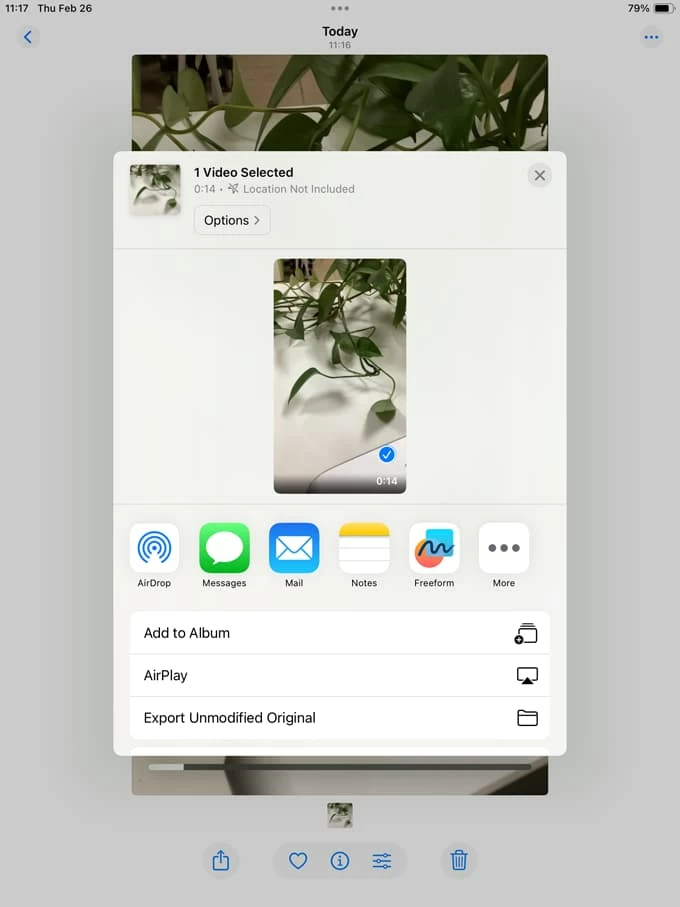
5. You should see your Mac's name or avatar appear in the list of nearby devices. Tap it to start the transfer.
6. A pop-up will appear on your Mac asking if you want to accept the files. Click "Accept."
7. Choose whether to save them to your Downloads folder or directly into your Mac's Photos app.
Related: How to transfer WhatsApp chats from Android to iPhone
If you prefer an automated solution that can transfer your videos to computer from iPhone 14 without plugging in cable, cloud service is your best bet.
Apple's iCloud (Mac & PC)
Apple's iCloud works beautifully across both Mac and Windows platforms, provided you have enough cloud storage space to house your video library.
When you save a video footage on iPhone 14, iCloud automatically pushes it to the cloud in the background, allowing you to access it via a web browser or native desktop app on your Mac or Windows computer.
How to enable iCloud Photos on your iPhone 14
1. Open the Settings app on your iPhone.
2. Tap your Apple ID name at the very top of the menu.
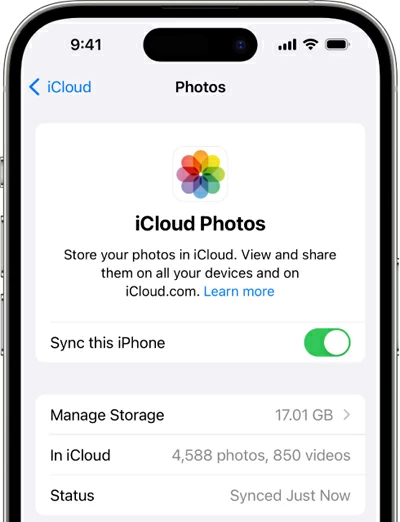
3. Select iCloud, then tap on Photos.
4. Toggle the switch next to Sync this iPhone to the ON position.
Access videos on Mac
On a Mac, accessing your synced iCloud videos requires almost zero setup.
1. Open the native Photos app on your macOS device.
2. Ensure you are signed into the exact same Apple ID as your phone.
3. Click on the Media Types tab in the sidebar and select Videos. Your iPhone 14 clips will stream directly into this dashboard, where you can drag and drop them straight to your desktop.
Access videos on PC
Windows users have two distinct ways to grab their videos from iCloud: through a web browser or via the official iCloud desktop application.
Using iCloud.com:
1. Open any web browser on your PC and navigate to iCloud.com website.
2. Sign in with your Apple ID credentials and complete any two-factor authentication prompts.
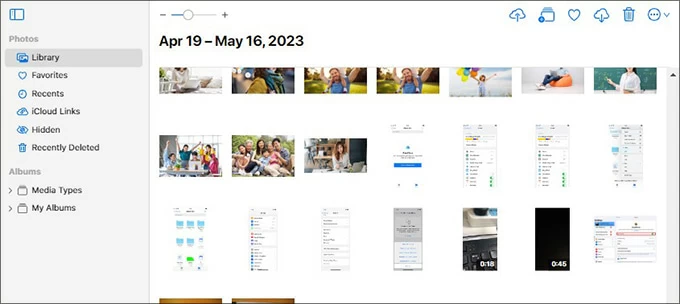
3. Click on the Photos icon.
4. Browse to your video folder, click to select the clips you want, and click the Download icon (the cloud with a down arrow) at the top of the browser screen.
Using iCloud for Windows client:
1. Download and install iCloud for Windows from the Microsoft Store.
2. Open the app and log in with your Apple ID.
3. Check the box next to Photos, then click Options to confirm that iCloud Photo Library is enabled.
4. Open Windows File Explorer, click iCloud Photos in the navigation pane.
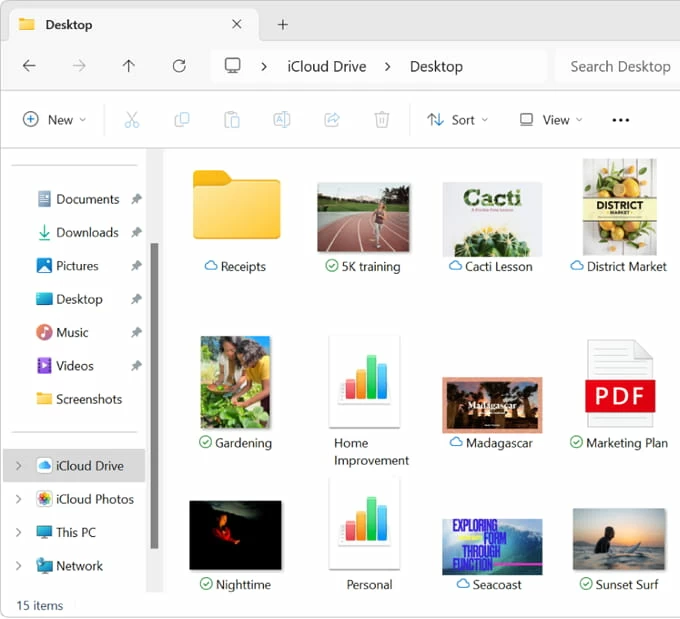
5. Download your iPhone 14 video files directly to your local PC hard drive.


