How to Record Screen with Audio on Mac


Platforms
Developed for both Windows & Mac users

This guide provides a comprehensive overview of native screen capturers for any device as well as excellent video recorder to meet the user's needs for onscreen video capturing.


Making on-screen video captures with the default capture tool is easier than you think.
Capturing onscreen video continues to be a crucial aspect in various situations, such as recording presentations, tutorials, or gaming moments.
Fortunately, both Windows 10, Windows 11, Mac, iPhone, and Android have built-in screen recording tools that provide basic functionality for capturing videos on the screen. However, these built-in tools have their limitations and may not meet everyone's needs for high-quality onscreen video recording.
Read more: How to screen record on Windows 10
To overcome these limitations, using a professional screen-capture application, such as Appgeeker Screen Recorder, can greatly enhance your onscreen video capture experience and provide better results. This guide will walk you through how to capture an on-screen video on any device, including Windows PC, Mac, iPhone and Android. Now let's get started.
Table of Contents
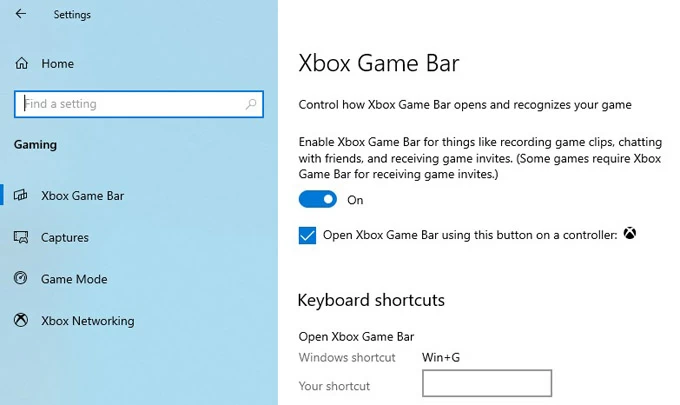
Windows 10 and Windows 11 have a pre-installed native tool for capturing on-screen video clips on computer called the Xbox Game Bar. This tool is not only designed for recording video games, but it also provides the capability to capture other types of onscreen content.
The Xbox Game Bar can be easily accessed by pressing the Windows key + G on your keyboard while using any app or program on your computer. The captured onscreen video is saved in MP4 format, which is widely supported and can be easily shared or edited.
In Windows 10:
In Windows 11:
Note:
It's important to make sure that the Xbox Game Bar is activated before using it to capture video of your onscreen activity from Windows 10 and Windows 11 PCs. Keep in mind that the Xbox Game Bar can only record one app at a time, and it cannot take a video capture from the Windows desktop screen or File Explorer.
1. Open the app or program you want to capture.
2. Press the Windows key + Alt + R to capture your onscreen activity. A recording progress bar will be displayed at the top right of the screen, which you can use to control your recording and audio. Or you can hit Windows Key + G on your keyboard and click on the Start Recording option on Capture widget to get your onscreen video captured.

3. To stop the recording, click the Stop Recording button or press Windows Key + Alt + R again.
4. Click on the pop-up "Game clip recorded" alert to preview your video. The onscreen captured video will be saved in the MP4 format and can be found in the Videos/Captures folder in your Windows Users folder by default.

Xbox Game Bar allows you to customize the capture parameters of on-screen video to suit your preferences. Navigate to Settings > Gaming > Captures and here are some of the features you can change:
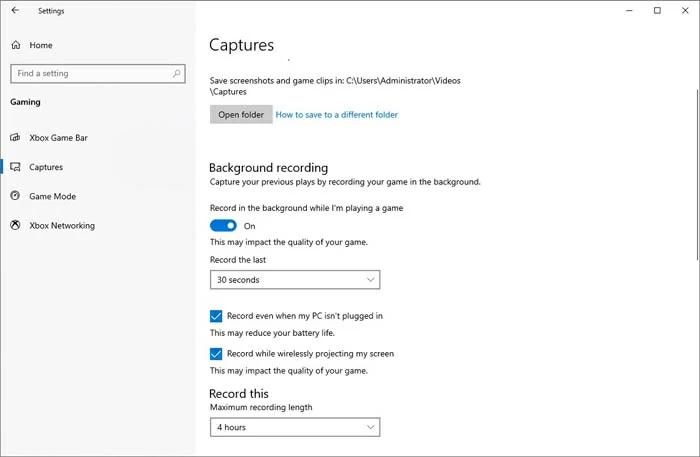
By adjusting these settings, you can create customized and high-quality onscreen video captures with the Xbox Game Bar.
Mac also has its own built-in tool for capturing video onscreen. The tool provides an easy and convenient way to grab video on your Mac's screen without the need for additional software.
You can access the screen-capture tool by using the shortcut keys or by triggering the recording app that comes with the Mac operating system.
To make an onscreen video capture on a macOS using the Screenshot Toolbar, you can follow these steps:
1. Press Shift + Command + 5 to launch the Screenshot Toolbar. The Screenshot Toolbar will appear at the bottom of the screen, giving you several options to capture different types of screenshots or recordings.

2. Click on the Record Entire Screen or Record Selected Portion option to choose which part of the screen you want to capture.
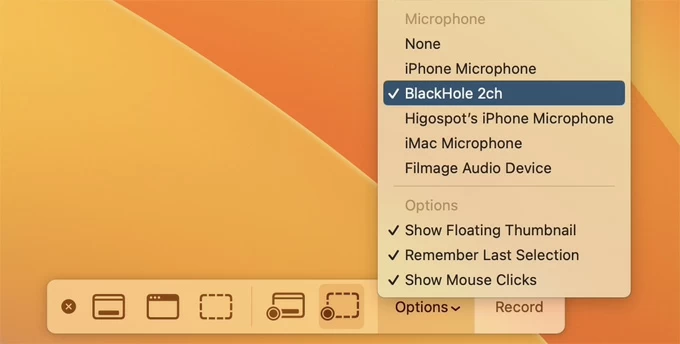
3. To add audio on your video recording, click Options to select your microphone.
4. Once you have made your selection, click on the Record button to start the recording.
5. To stop recording, hit the Stop button in the taskbar at the top of the screen. Or you can press Command + Control + Esc on your keyboard.
6. The captured video will be saved to your Mac's Videos folder.
Also read: How to record computer screen from Mac
QuickTime Player is a versatile media player that is built into the Mac operating system. In addition to playing various audio and video formats, QuickTime Player can also be used to do a video onscreen capturing.
1. Launch QuickTime Player on the screen.
2. Go to File > New Screen Recording.
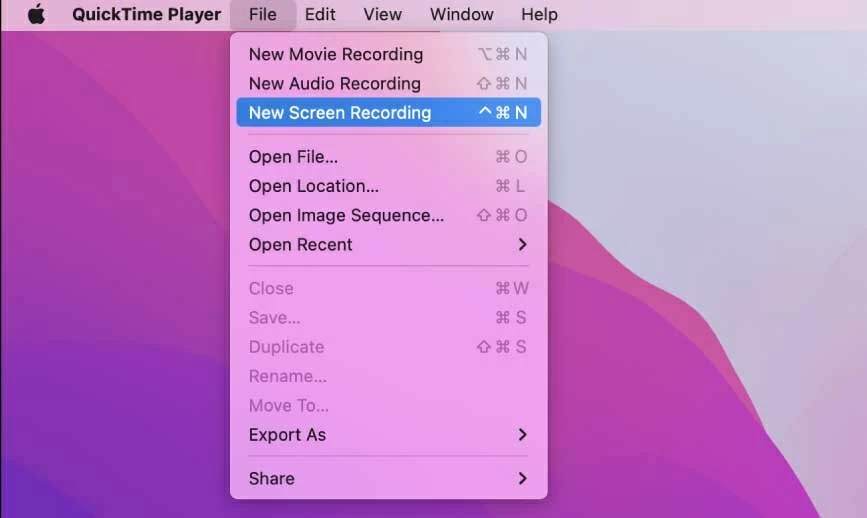
3. Select the recording area. You can choose to record the entire screen, a selected portion of the screen, or a specific window from the taskbar.
4. Click the Record button to start the recording.
5. Hit the Stop button in the menu bar to end recording.
Note:
Although the native recorders are simple and convenient, they all have some limitations, such as the Windows Game Bar can't capture multiple on-screen videos at the same time, while the Mac's built-in tools can't capture onscreen video with internal audio. But by utilizing professional recording software to make computer on-screen video captures, things will work out fine.
AppGeeker Screen Recorder is a powerful and advanced on-screen capturer designed for professional use. It offers a comprehensive set of recording and editing features that make it ideal for capturing high-quality videos of onscreen activities, games, seminars, and more.
With the AppGeeker Screen Recorder, you can simultaneously capture video and audio, and it also supports a wide range of recording formats and video quality to ensure that you get the best results possible.
Step 1. Run Screen Recorder and pick Video Recorder from the menu.

Step 2. Select which recording type you want. In order to capture the whole desktop, you must choose the Full as the capture region. Or you can choose Custom to drag the scissors to select the recording area.

Step 3. Enable or disable the Microphone and System Sound as needed. To add audio to the captured screen video, you can turn on the System Sound to record the sound from computer.
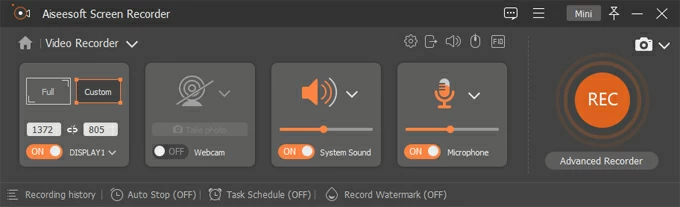
Step 4. Press the REC button to begin capturing your screen activities.
Step 5. When you are finished with your task, use the Stop button to end the recording.
![]()
OBS (Open Broadcasting Software) is a sophisticated yet user-friendly tool for video recording and live streaming. It enables users to effortlessly capture and record onscreen video with a high degree of accuracy and precision.
The versatility and efficiency of the OBS, coupled with its ability to capture on-screen video on a laptop or desktop, make it an indispensable tool for those looking to create engaging and professional-quality video content.
Step 1. Download and install OBS. Go to the OBS website, download and run the software on your computer.
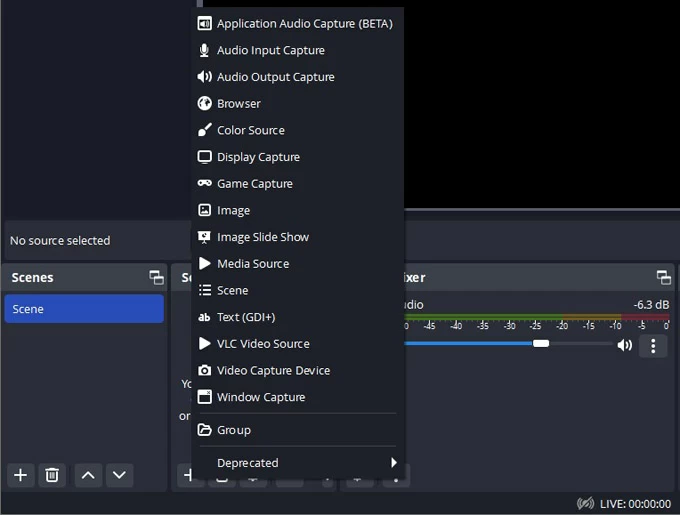
Step 2. Add a display capture source. Click the "+" button under the Sources box, choose Display Capture, and select the screen you want to record.
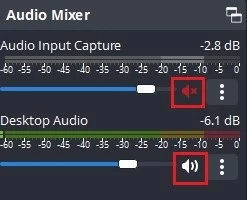
Step 3. Adjust the audio source. OBS will capture audio from any input device on your computer by default, but you can activate/mute desktop or microphone audio and adjust the volume level in the Audio Mixer panel.
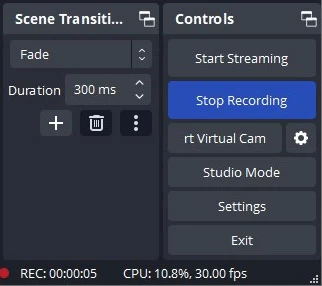
Step 4. Start recording. Click Start Recording in the lower right corner of the Controls panel to begin capturing your onscreen video and audio.
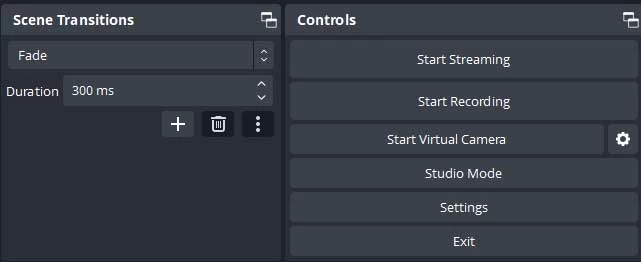
Step 5. Stop recording and save the file. Hit the Stop Recording button when it is finished. And the onscreen video is captured and saved to your designated location.
Like Windows and Mac, iPhones and Android phones have their own default recording tools to perform on-screen video capture without downloading third-party software.
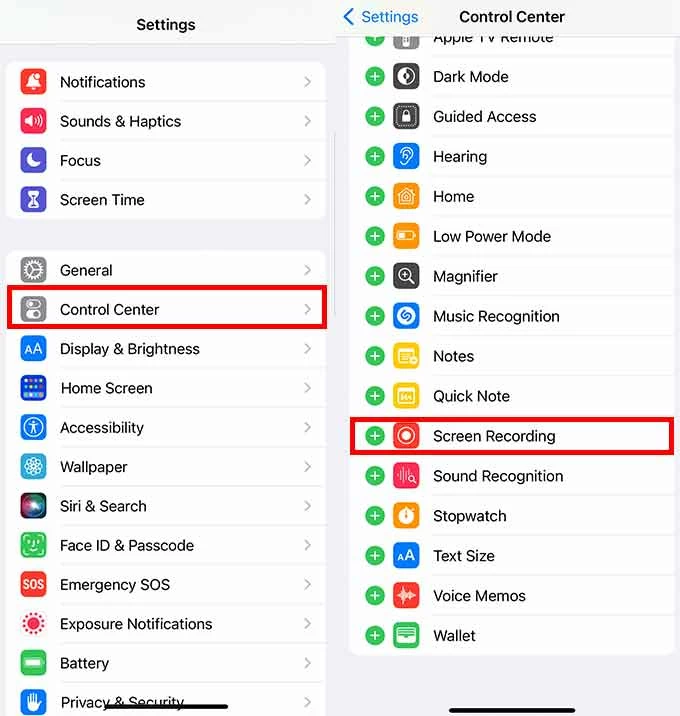
1. Go to Settings > Control Center > Customize Controls
2. Find and tap the "+" icon next to Screen Recording.
3. Swipe down the screen to access the Control Center and tap the screen recording icon.
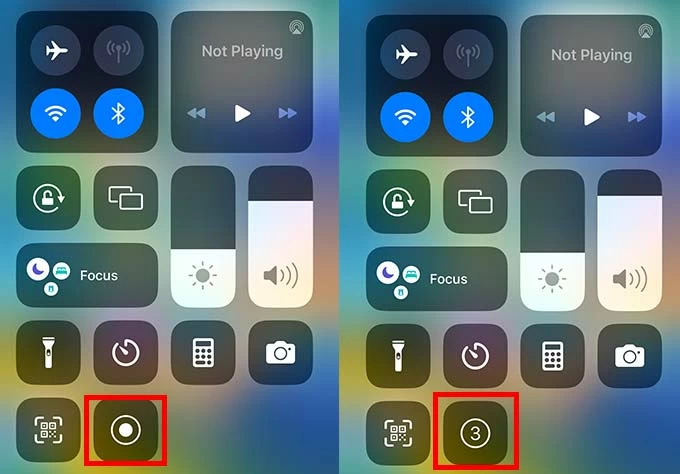
4. Wait for the countdown and start recording.
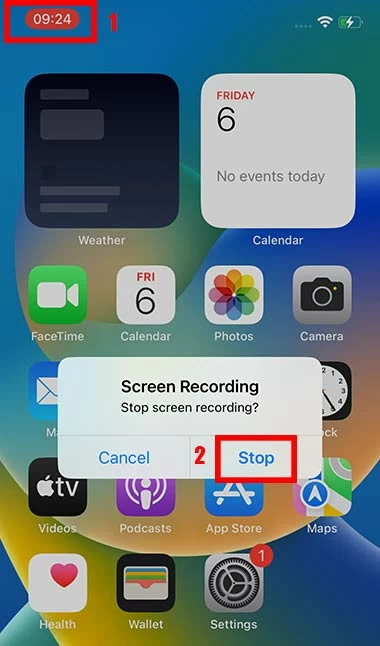
5. Tap the red status bar to stop recording.
6. Find and view your recording in the Photos app.