
How to Record Videos from YouTube

The built-in Xbox Game Bar can record screen of the game and app on computer, and there are many of other tools available. Here's how to make Windows screen record.

Summary: You can screen record Windows 10 with built-in Xbox Game Bar for gameplay or other applications. To begin your screen recording, you'll want to use Windows Key + Alt + R shortcuts, or press Windows + G to launch Game Bar and then record your Windows 10 screen.
If you're aiming for professional recordings with more flexibility, you may want to use a third-party app like Screen Recorder. It does a reliable job and is fairly easy to use.

You're able to do screen recording on Windows 10 machine using built-in Game Bar or third-party apps.
While taking a screenshot on a modern computer or phone is pretty simple and easy, there will come a time when you'll want to know how to screen record in Windows 10 computer—whether you're sharing fantastic gameplay on the social media, or you want to making an application tutorial for your YouTube channel.
The Windows 10 has always made it easy to perform screen recording tasks. It comes with a free built-in Windows 10 screen recorder—a part of the Xbox Game Bar—that allows screen recording game clips, screenshots as well as capturing non-gaming app activity in Windows 10 PC.
Unfortunately, the fact remains that its Windows 10 screen recording capability is yet somewhat rudimentary. The Game Bar can't record activity in File Explorer or the Windows desktop screen, and it's limited to support screen recording of one Windows application at a time.
This post will cover how to use the Xbox Game bar recording feature to screen record on Windows 10 while you're playing a game or running a desktop app.
Table of Contents
On Windows laptop or desktop, you're allowed to screen record Windows game activity with the Game Bar tool that comes installed by default on Windows 10 and 11, and get video in MP4 format saved in Gallery folder (or Videos / Captures folder). Don't let the name fool you, the Xbox Game Bar tool can also capture screen recording on Windows 10, including the activities from regular apps, not just the games you're playing.
However, Windows Xbox screen recording utility only capture a single application each time and it cannot record the Windows desktop or File Explorer. If you want more flexibility to screen record on your Windows 10 PC, try to use the Windows 10 screen recorders outlined later in this article.
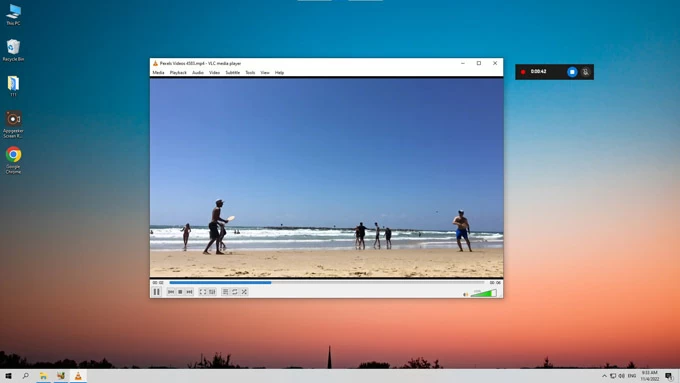
1. Open the app or window you're going to record screen from.
Note: Switching to another window or app will stop Xbox Game Bar from recording the current screen, so you may need to have the target window open in advance.
2. Press the keyboard shortcut Windows Key + Alt + R to begin screen recording. Or, click the Windows + G on keyboard to display Game Bar controllers, and select Capture tab > Start Recording button to start Windows 10 screen recording process.
3. Perform whatever screen actions you want to record. A tiny black floating bar should appear on the screen, indicating how long you've been recording, and allowing to click the microphone icon on it to screen record with audio from your mic or disable it.
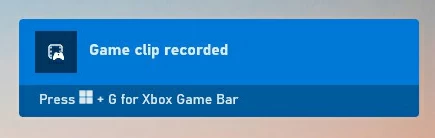
The Game Bar controller floats on the screen to signal that you're now recording.
5. When you've finished recording, press the Windows + Alt + R again. You can also go to the floating bar and click the Record button (blue circle with a white square in) to stop.
Once screen recording ends, a notification tells that the game clip is recorded. By default, your screen recordings will be saved to Gallery widget of the Xbox Game Bar as MP4 files. To view all your Windows 10 screen recordings, click on the notification for preview. You will also access and play those the captured screen videos from C:\Users\[username]\Videos\Captures on your PC.
If you want further tweaking of how the tool operates when you're screen recording in Windows 10, head to Start menu > Settings > Gaming > Capture, you'll be given various settings to control how you want to record your Windows 10 screen, whether capturing a gameplay or a desktop app.
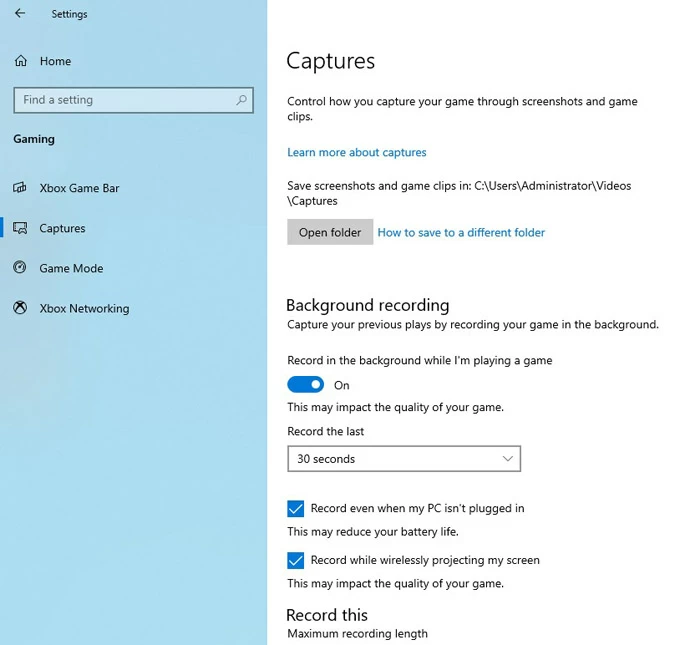
Before recording a game clip or app, you have abundant options to configure the Xbox Game Bar.
How to save to a different folder: Choose where your screen recordings will be stored to.
Record in the background while I'm playing a game: Choose whether to make a background recording of a game, allowing to monitor the gameplay that runs on the computer and automatically record the last 30 seconds of the game.
Maximum recording length: The maximum length of screen recording on Windows 10 is 4 hours.
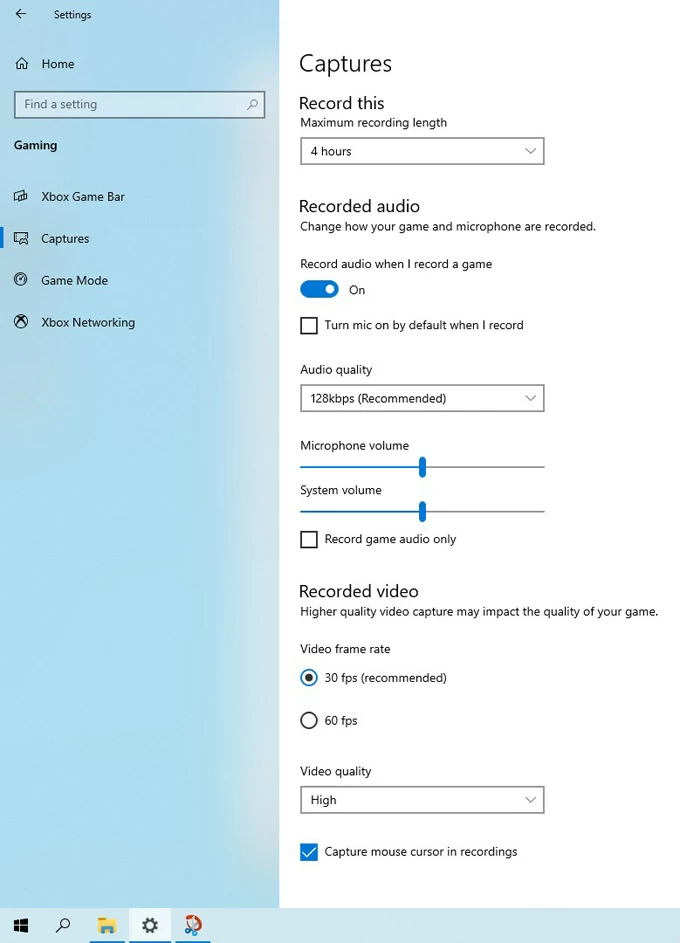
The Recorded Audio and Recorded Video fields let you control the screen recording outputs.
Recorded audio:
Recorded Video:
If you're looking for a full-featured Windows 10 screen recorder for capturing anything from computer, including the multiple app activities, Windows desktop as well as File Explorer that Windows Xbox Game Bar can't record, don't miss AppGeeker Screen Recorder.
The program has a great reputation as a solid recording tool which can do everything, from the most popular video and audio recording to screen recording of webcam, screenshot and phone. It features a truly pleasing interface that can record screen from Windows 10 within clicks.
As you might expect, this screen recorder for Windows 10 offers a wealth of options to enhance your recording experience — you can record a full screen or just a part the window in high quality; capture computer screen with webcam, system sound as well as microphone voice; export screen recording in different formats; edit and convert the recorded videos, and more. It's also able to record your screen on Windows 10, Windows 11, and even macOS:
Step 1: Launch Windows Screen Recorder

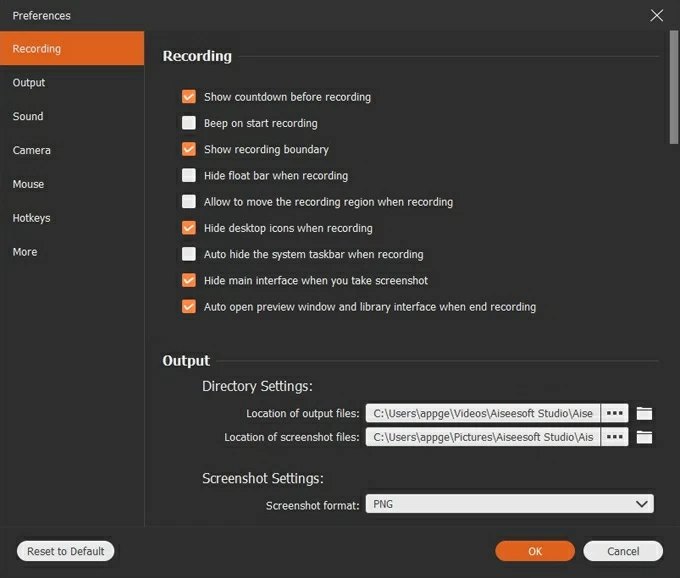
Step 2: Configure screen recording settings

Step 3: Record your screen in Windows 10
![]()
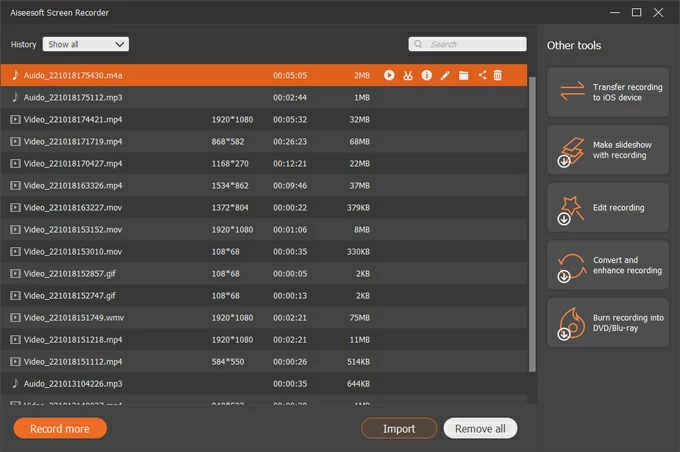
Step 4: Save the recorded video
And that's it! If you're new to screen recording on Windows, Appgeeker Screen Recorder is good place to start thanks to its easy interface with all necessary features. No matter you're a gamer, Youtuber, vlogger, or streamer, for work or business, you can record anything that's happening on your computer screen. Check out the video tutorial for your ease:
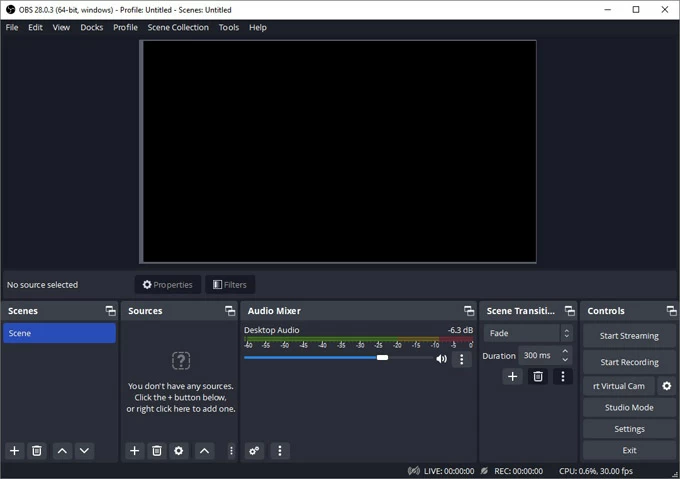
OBS (Open Broadcaster Software) is a completely free and open-source program for video recording and live streaming. If you're looking for an Xbox Gama Bar alternative to record screen from Windows 10 with audio, capture File Explorer, and multiple windows for your running apps, OBS is an option to go. This free Windows recording software can also be used to screen record on Windows 11 if you upgrade your computer in the future.
1. Run OBS on Windows PC after download and installation. If asked, select Optimize just for recording, I will not be streaming and go to next step.
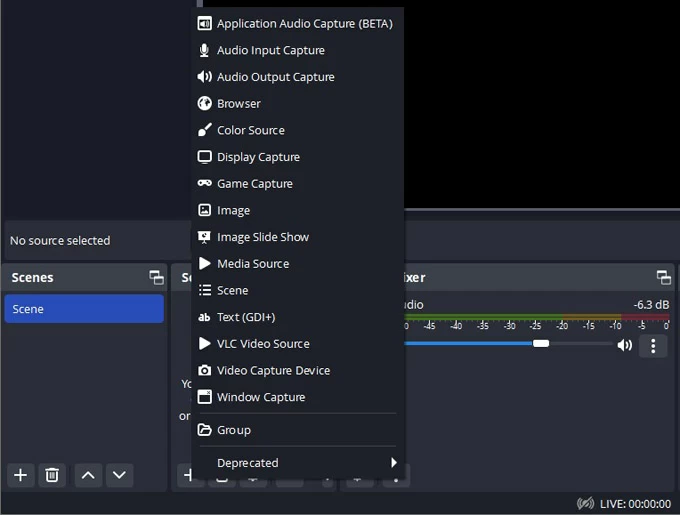
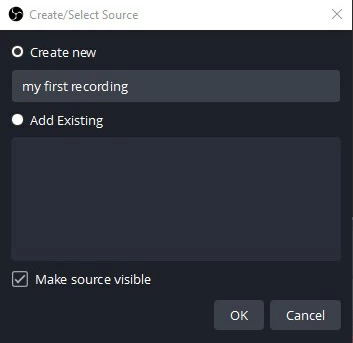
2. Under Source section at the bottom, click + icon > Display Capture to create or select a source display you want to record. There are also Game Capture and Window Capture for different purpose.
3. Rename the file name and click OK to go on.
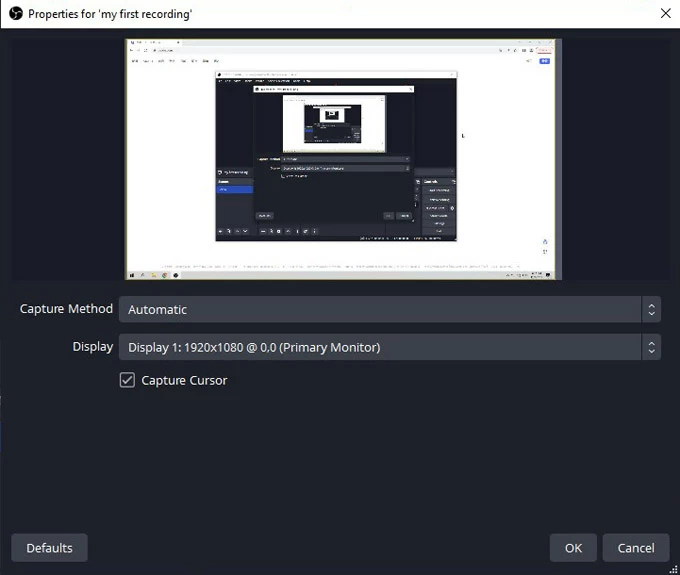
4. Select your display if you have more than one monitor, followed by OK.
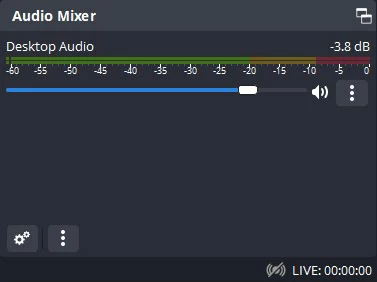
5. From the Audio Mixer, change the sound volume for your recording. You can also mute it if you just want a separate video recording.
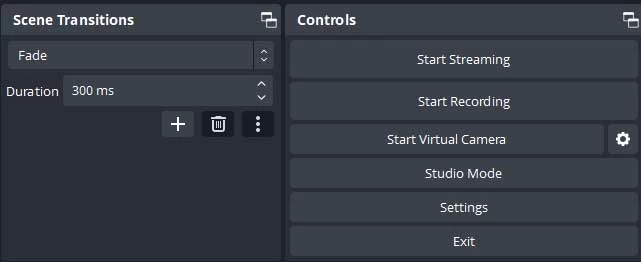
6. Once everything ready, click Start Recording button from Controls to begin, and hit Stop Recording to exit screen recording.
That's how you do Windows 10 screen recording for free using OBS Studio. You'll want to check where the OSB recordings are saved on your computer. By default, they will be stored in the Video folder, but you can still change the location.
Does Windows 10 come with a free screen recorder?
Yes. The Xbox Game Bar comes pre-installed and is free to use for screen recording on Windows 10 and Windows 11 machines. With Game Bar, you can capture your screen activity while playing a PC game or running other apps.
Where can I find the Windows 10 screen recorder?
You can access the default Windows 10 screen recorder — Xbox Game Bar — by using Windows key + G, then opening Capture widget from the Game Bar controller to start a screen recording; or directly start your recording using Windows key + Alt + R shortcut.
Can Windows 10 record screen and audio at the same time?
To record computer screen and audio simultaneously, try the free screen recording feature in Xbox Game Bar that comes preinstalled in Windows 10 and Windows 11. With it, you can create screen recordings with audio of up to 4 hours at a time, including sound from your microphone.
Where does Xbox Game Bar save screen recordings in Windows 10?
Screen activities recorded with the built-in Game Bar are stored by default to the This PC > Videos > Captures folder. You can also go into the Gallery widget of Xbox app to find your recorded files.


