
How to Recover iTunes Library after Hard Drive Crashed


I am considering downloading download music from my iPad mini to my new iPhone but can't find any information from Apple Support. Is it possible to do this? If so, how can I make the transfer?
Most modern tablets based on Android or iOS mobile operating system come with music app preinstalled that lets you to listen to music at home or on the go. If you're an iPad user, no matter what the model is, Mini, Air or Pro, you probably have a large collection of music on the device.
Yet, despite enjoying music is as simple as tapping it on your screen, how easy is it to share songs between two devices — say, between the iPad and the iPhone? As all iOS users might know, Apple doesn't allow transferring songs from iPad to iPhone and vice versa, except for purchased items from iTunes Store. What do you do then? Well, there's a way out. So keep reading to see how you can get music off of their iPad to move to iPhone.
iPad Music Transfer Software
Apple makes it difficult for those who have legitimate reasons to save their iPad songs to iPhone, but that doesn't mean you don't have any means of finding the solution. In this article, we will introduce a application named iPhone Data Transfer. For beginning users who just want to move music to your iPhone from iPad, it's a solid option.
What's iTransfer
iTransfer is an all-in-one management tool designed for iOS users without the need of iTunes, allowing you to move music, photos, videos, audiobooks to and from iPhone, iPad, iPod. This app also lets you export music and dropped onto the iTunes interface to restore your library. If you have just got a new phone, you even use it to move all the data from the old one in one-click.
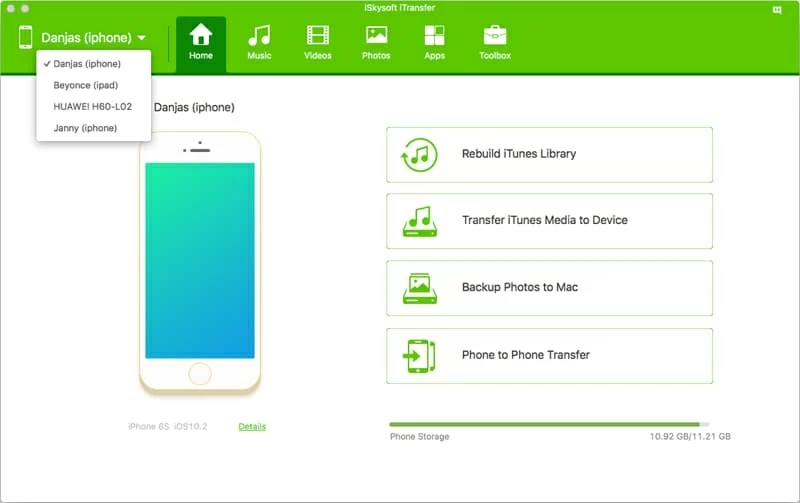
Step 1: Connect both devices to computer
Plug your iPad and iPhone to the computer. Open iTransfer and make sure your both devices shows up in the upper left corner of the program's window. If this is the first time you plug-in please tap "Trust" on the device's home screen when a notification pops up.
Since we're going to moving songs from iPad over iPhone, select your iPad from the upper left corner as the sending source.
Step 2: Choose iPad songs
Click the Music button on the top menu bar, and you'll get a list of tracks this app detects on your iPad. This app sorts those tracks automatically by music, podcasts, iTunes U and audiobooks categories, along with playlists you've created.
Next, click the Music category on the left sidebar to display all songs.
Go ahead and select what tune you want to move. You can do this by marking the songs you want to move individually. Alternatively, if you want to transfer all of the iPad music to the iPhone in one go, just tick the box on the top of list, next to Name column.
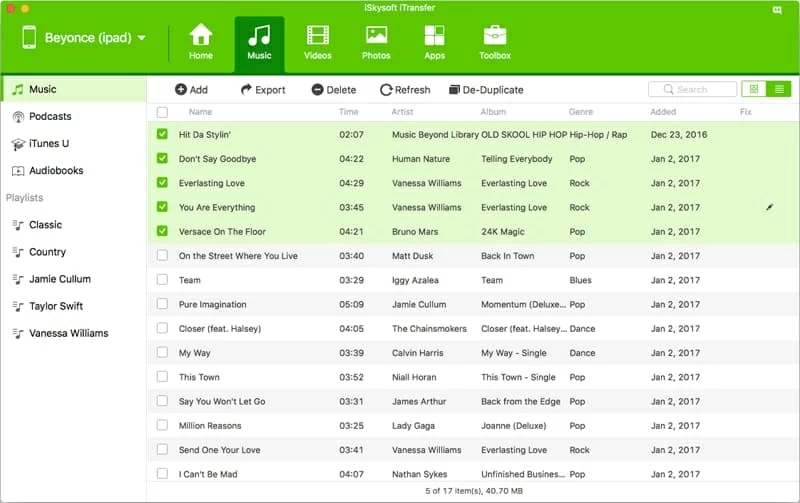
Tip: If you have a long list of songs, you can find the track you're looking for faster using the search function located in the upper right corner..
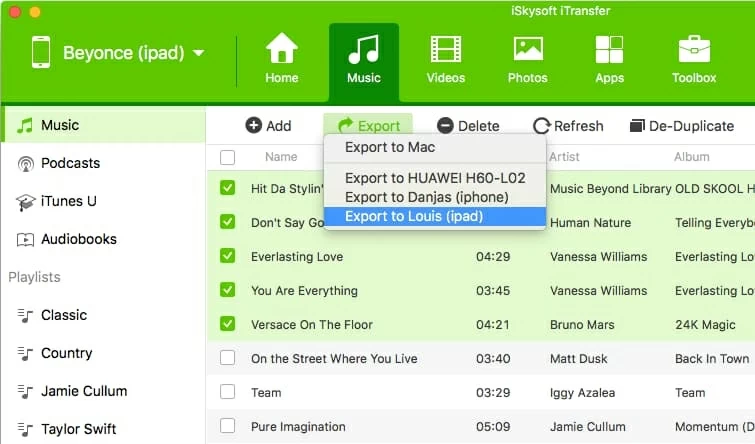
Step 3: Transfer to iPhone
After you've selected the songs, click the Export button in the toolbar of the window (or use the right-click context menu) and then select Export to [Your iPhone's name] option from the drop-down list.
The process begins. Wait while iTransfer copies songs from the iPad and save to iPhone internal memory.
Be mindful that you can also use the right-click context menu to transfer merely songs of a specific playlist on the iPad to your iPhone, as image demonstrated below.
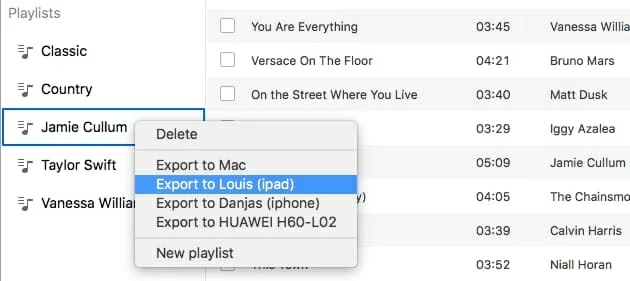
That's it. With just a few mouse clicks your iPad tracks are got onto iPhone. In brief, iTransfer is a remarkably simple utility that takes no time at all to use. Want to copy videos and photos to and from your iPhone? No problem. You can finish these kind of tasks by choosing corresponding options on the top menu bar.


