How to Back Up iPhone Songs to USB Drive


Have some tracks on your iPad, and you need to get it onto your Mac? Put simply, transferring music from iPad to an iMac & MacBook isn't difficult with right tool. In fact, it can be just as simple as copying photos from iPhone to computer).
Apple, true to form, is in the business of making things as easy as possible. Being a music fan, you can easily sync your favorite tracks from Mac with your iPad and then keep them updated across all your iOS devices via iCloud service. So you always have access wherever you want it.
Unfortunately, in the other direction—getting your music off your iPad and backing up on your Mac, Apple provides no way to help you deal with it. You might think that there should be an application on Mac to help you transfer iPad songs back to local folder of Mac just like the way you pull photos and videos off the device with Photos app, but the truth is, except the tracks your purchased from the iTunes Store, you're not in luck.
So what can you do if your music is stuck on your iPad? Thankfully, the web still has some third-party tools to go. In this article, we're going to cover a quick guide to help you copy music tracks from iPad onto your Mac and reorganize your iPad library if needed, with the help of iPhone Data Transfer.
Before we jump into the actual process, let's take a brief look at how to transfer iPad songs purchased in iTunes Store to a Mac.
Steps to transfer iPad music you've purchased or downloaded elsewhere to Mac
iTransfer is a device management tool that works on both Windows and Mac. It allows you to manage and move files (photos, videos, music, contacts, messages, podcasts, etc.) amongst iOS, iTunes, and computer without any hassles. It gives you ability to access the library on your device and re-organize all the contents. Some other useful features are also included such as making GIF file from videos & photos, automatic detection of duplicate files, and more.
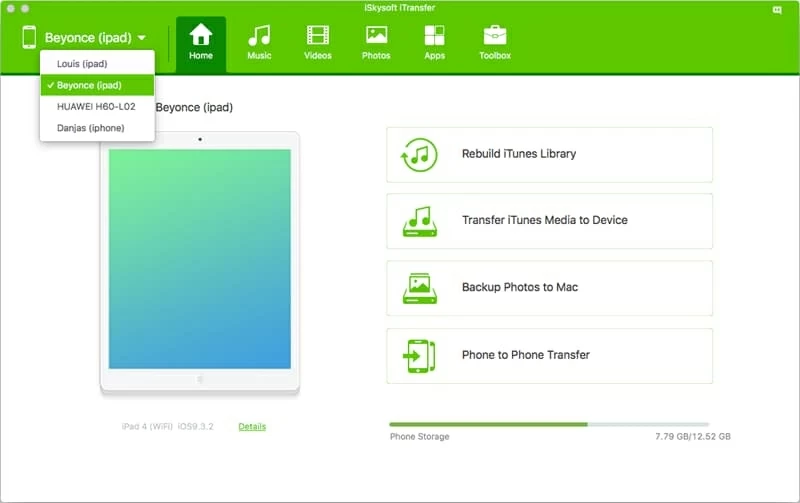
Step 1: Connect to your iPad
You first step to set this up is open up iTransfer and hook up your iPad with the supplied cable to your Mac. The software should detect it and scan the whole hard disk immediately and display a big iPad icon on the main interface.
The software's interface is sleek and intuitive, most functions can be accessed from the top menu of window. Another Four shortcuts on the main area are available for quickly accomplish some tasks.
Step 2: Select the songs you want to copy to Mac from the list under Music window
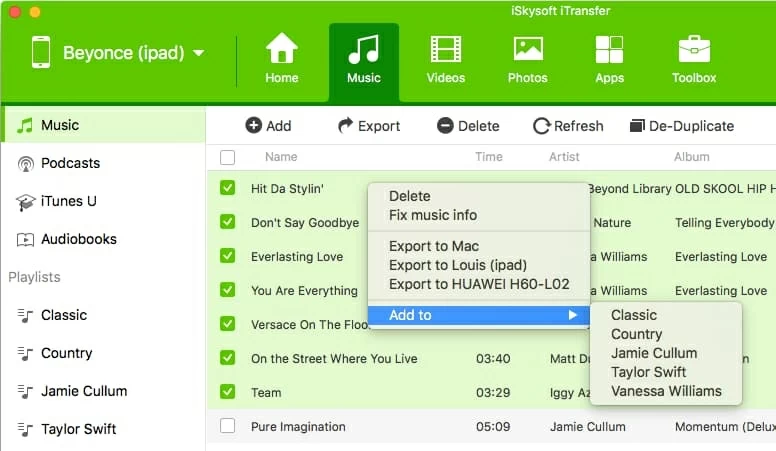
Click on the Music button on the top menu, it should bring up a window where you can see a summary of your iPad tracks, as well as a listing of your music playlists on the left pane. Clicking on any of items will show its content on the right pane.
To transfer all of iPad songs to your Mac, tick the checkbox next to Name (under Add button). To transfer individual songs, tick the checkbox next to each track.
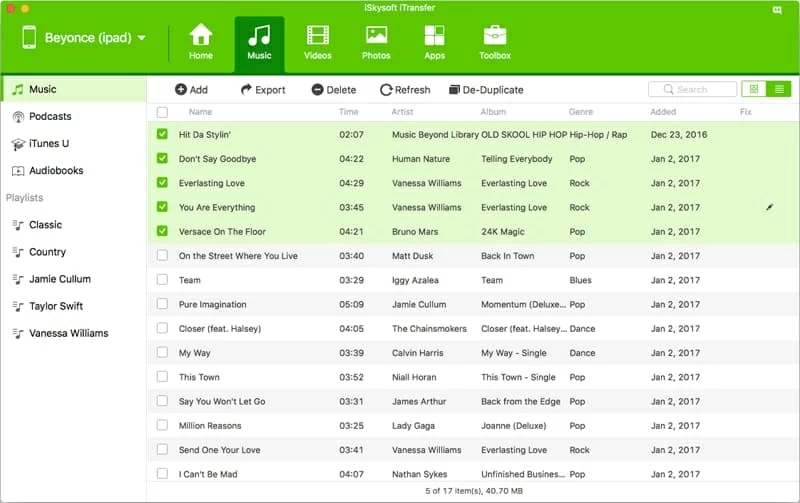
Tip: the tool features a built-in playing option that allows you to play the song before you decide to move it to your Mac. You just double click on that track, it then invokes QuickTime app to play it.
Related: how to play .mkv movie files on Mac OS X
Step 3: Export to your Mac machine
When you're satisfy with your selection of music, hit the Export button on the top row (under Music button). A drop-down menu with several choices should appear. In our cases, select Export to Mac. You can also move your iPad music to another iPad, if you have another iPad device connected
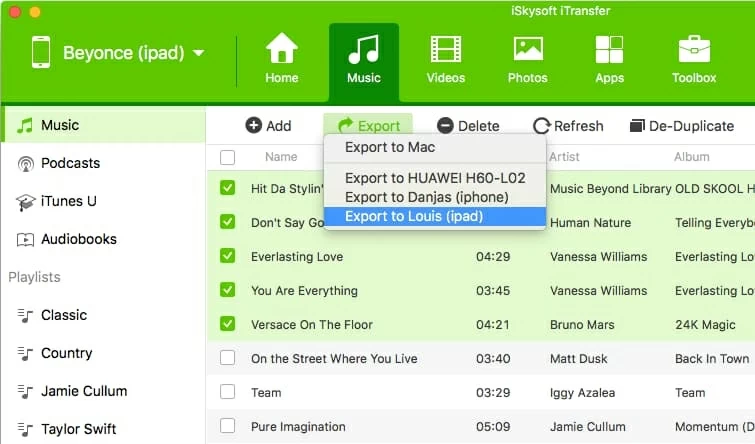
Then, a dialog will come up and ask you to choose a location where you want to save your iPad tunes on Mac. Once you have selected a folder, click Save.
The process of moving music from your iPad to Mac starts. The time varies, depending on how many of songs you're transferring.
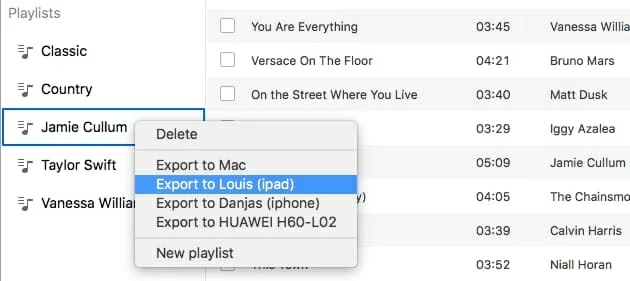
Note that if you want to export a specific playlist of songs to your Mac from iPad, you can select that playlist by clicking on its name, from right-click context menu, select Export to Mac option, done!
That's it! You're done!
Reorganize media library on iPad
After you have transferred tunes to save on Mac, you can do further work about your iPad library. The program includes some nice options for you to manage your entire iPad library.
Add songs
Remove & create playlist(s)
Right click on a specific playlist in the navigation panel on the left side, from its right-click menu, select the Delete or New Playlist option
Delete unwanted iPhone song(s)
Select songs you want to delete from the list, click on the Delete button on the top row.

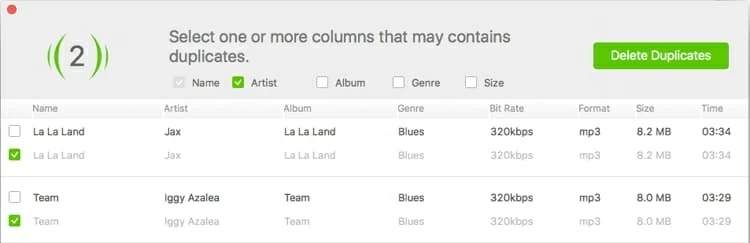
Remove duplicate music files
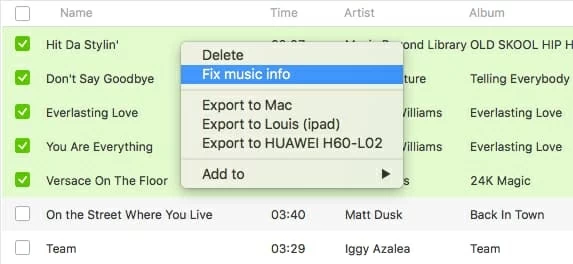
Fix music ID3 tags (Name, Artist, Album, Genre, Year, Track No.)
That is it!
Conclusion
iTransfer might not a fully-featured iTunes alternative, but it can copy your iPad music back to Mac machine, and certainly accomplish more than a few jobs that you've expected: moving data between iOS, PC and Mac, rebuilding your iTunes library, fixing music tags, adding any type of video & music files to your iOS device, and more. Though you can find the similar utility in the web, it won't be nearly as easy-to-use and universal as it is.
iPad: iPad Pro, iPad Air 2, iPad Air, iPad Mini 4, iPad Mini 3, iPad Mini 2, iPad 3/ 2/ 1, iPad Mini, etc.
Mac: iMac, MacBook, MacBook Air, MacBook Pro, Mac Pro, Mac mini
How to Transfer Data to an iPhone from Your Old ZTE Using Phone Transfer